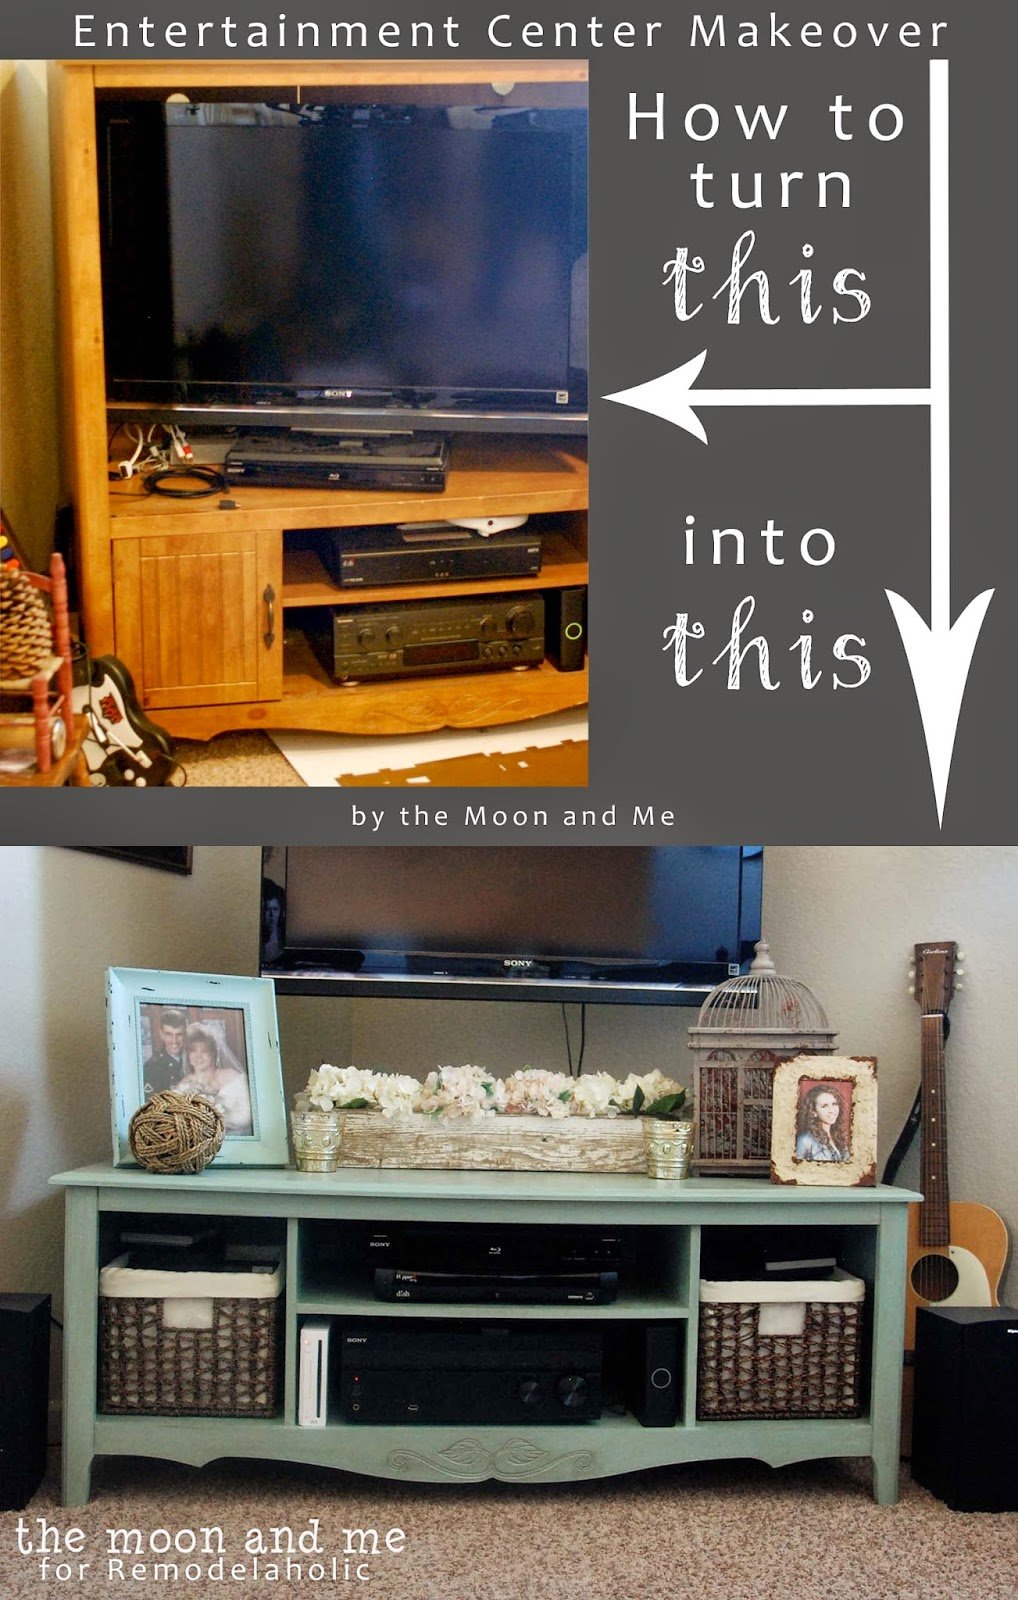
Furniture styles are always changing, but one big style that has changed in the last ten or so years is entertainment centers. With the invention of the thinner flat screen TVs, those deep entertainment centers aren’t necessary anymore — something much thinner will work, or you can even hang your TV on the wall (and frame it like we did ;).
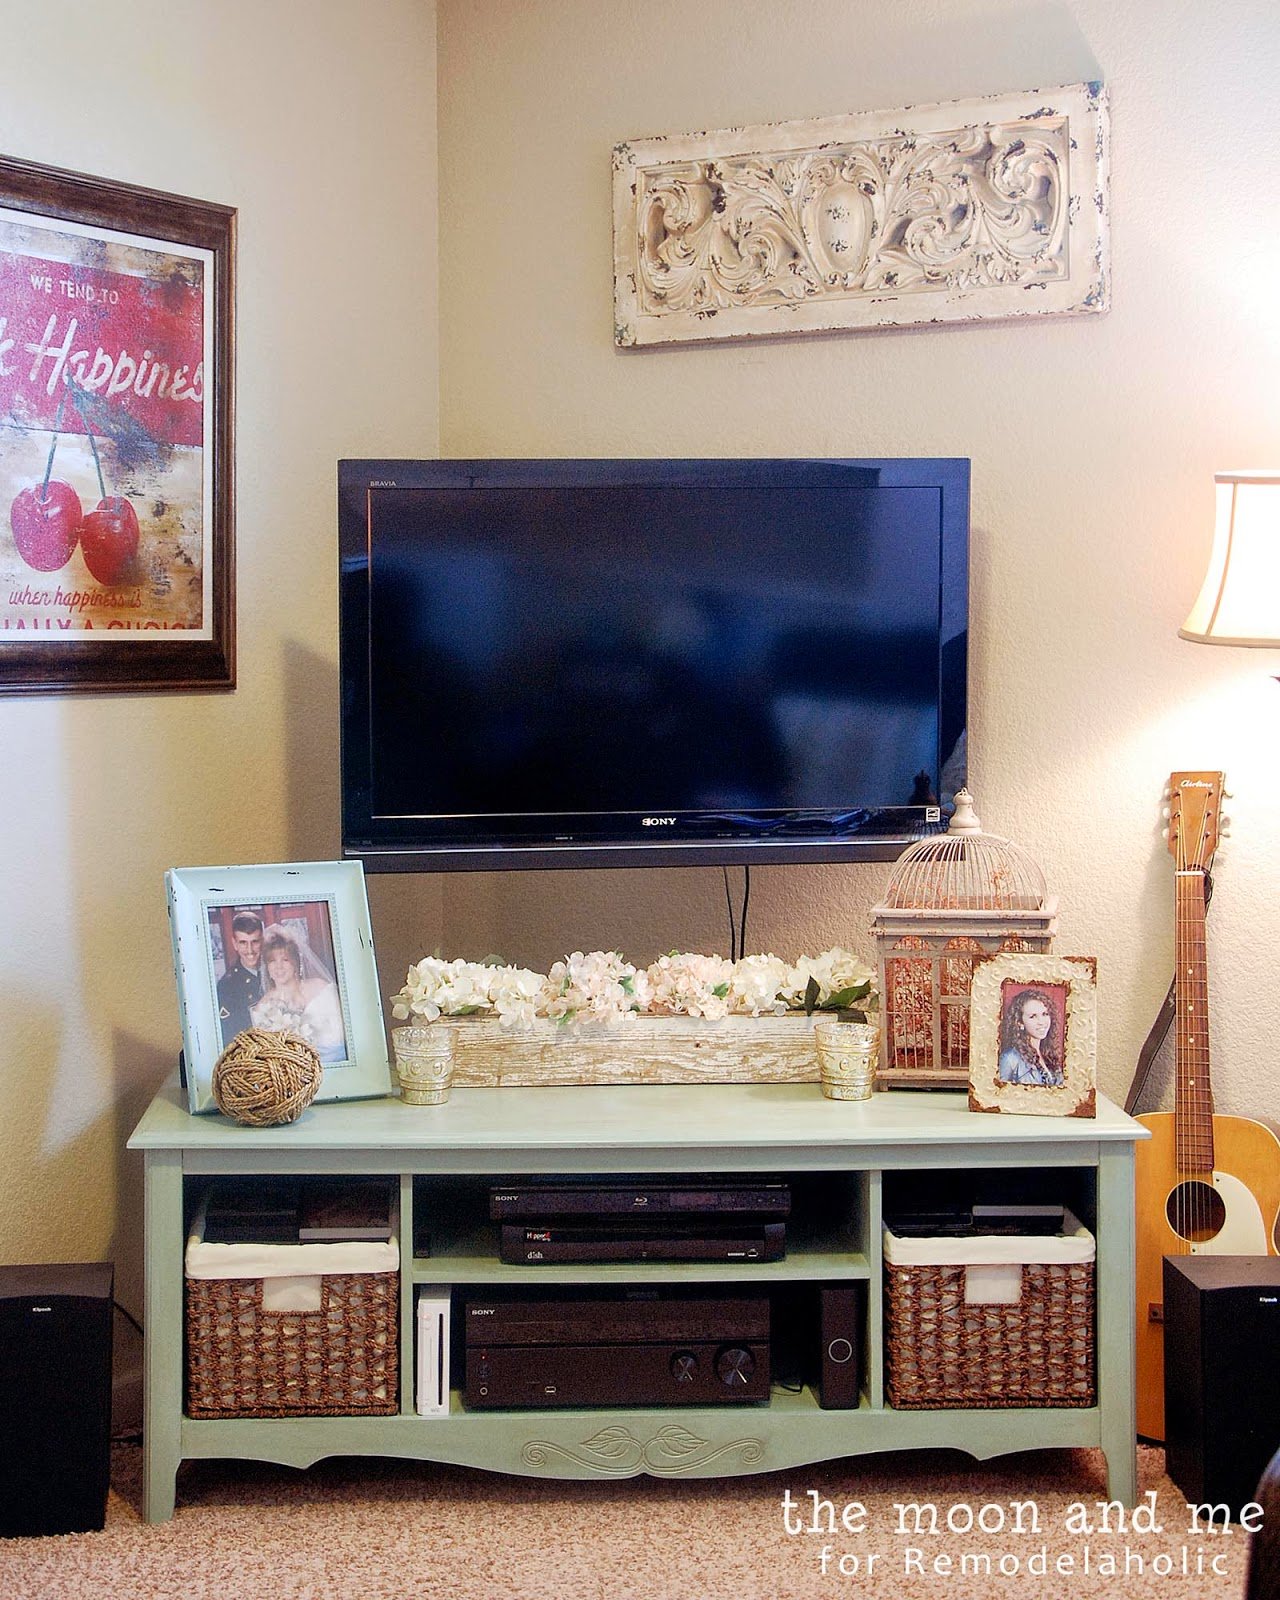
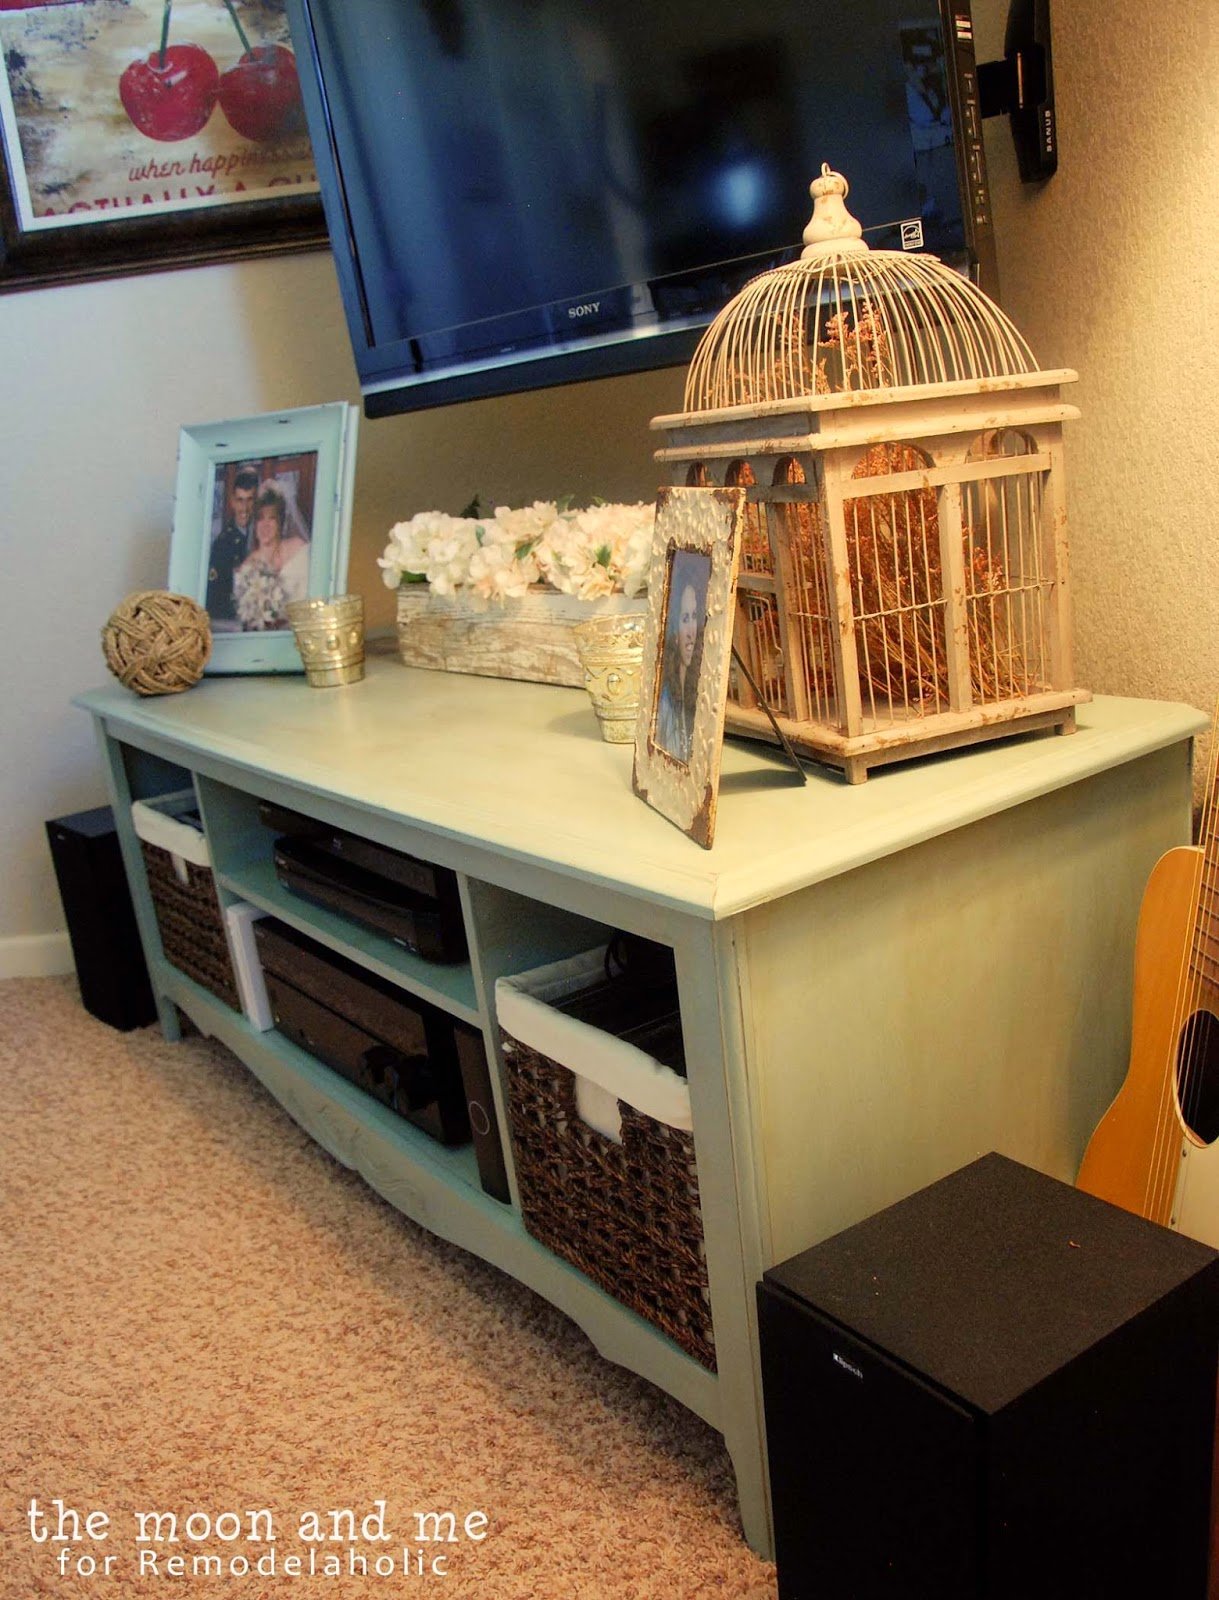
Sooo… that leaves lots of older style entertainment centers sitting around on curbs and in thrift stores. Which makes them the perfect DIY revamp candidates, of course. And our guest today made quick work of hers by removing the top and chopping it down to make it into a TV console table, perfect for holding your electronics beneath your wall-mounted TV:
When you’re revamping furniture, it’s important to use what you have wisely and make the existing features work for you. For example, a dresser made a great base for this awesome tall mudroom bench (featured here)
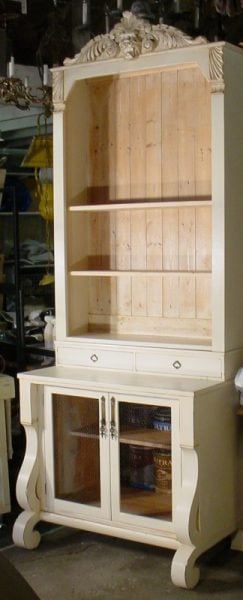
Or a taller dresser is a great candidate for a new bookshelf (featured here).
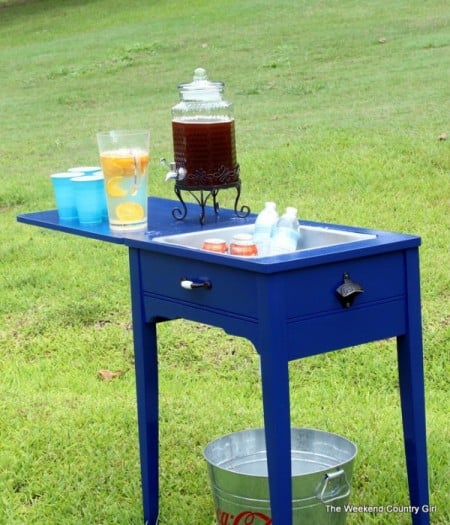
An old sewing table is a perfect fit for a drink cooler — perfect for entertaining! (featured here)
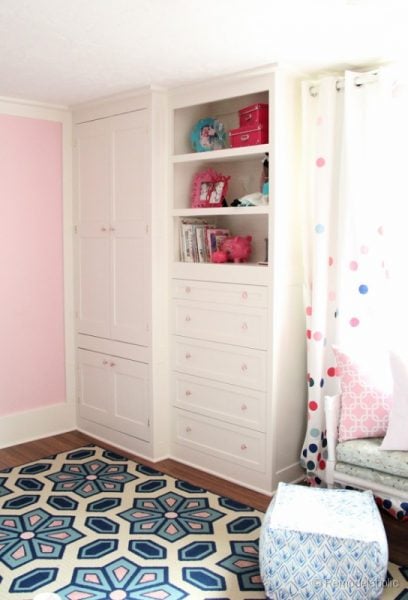
Or, my favorite is our built-in closet made from odds and ends of furniture:
But my favorite part about today’s project is just how EASY it is, and that it will work with pretty much any older style entertainment center. Here’s Kelly with all the details!
Today I’m showing you how we came to have this fabulous entertainment console…
it looked almost nothing like this when we got started.
Stick around…we’re gonna have some fun!
Once upon a time…
There was a man who wanted to mount a flat screen TV to the wall.
The question that came about was:
What in the world do we do with this old entertainment center?
Hmmm…that was a good question.
There was talk of some open shelves with baskets…
kinda like something somebody somewhere saw on Pinterest.
There was even some nonchalant perusing of brand
new console tables for under the TV.
Ugh. Ugly and/or expensive.
Then one of us (you know it was me…) said:
Hey, why don’t we just make over what we’ve already got?
Genius, I tell ya.
It actually used to have a partition on the upper left side with a glass door…
we took that off a couple years ago so we could fit the flat screen in there.
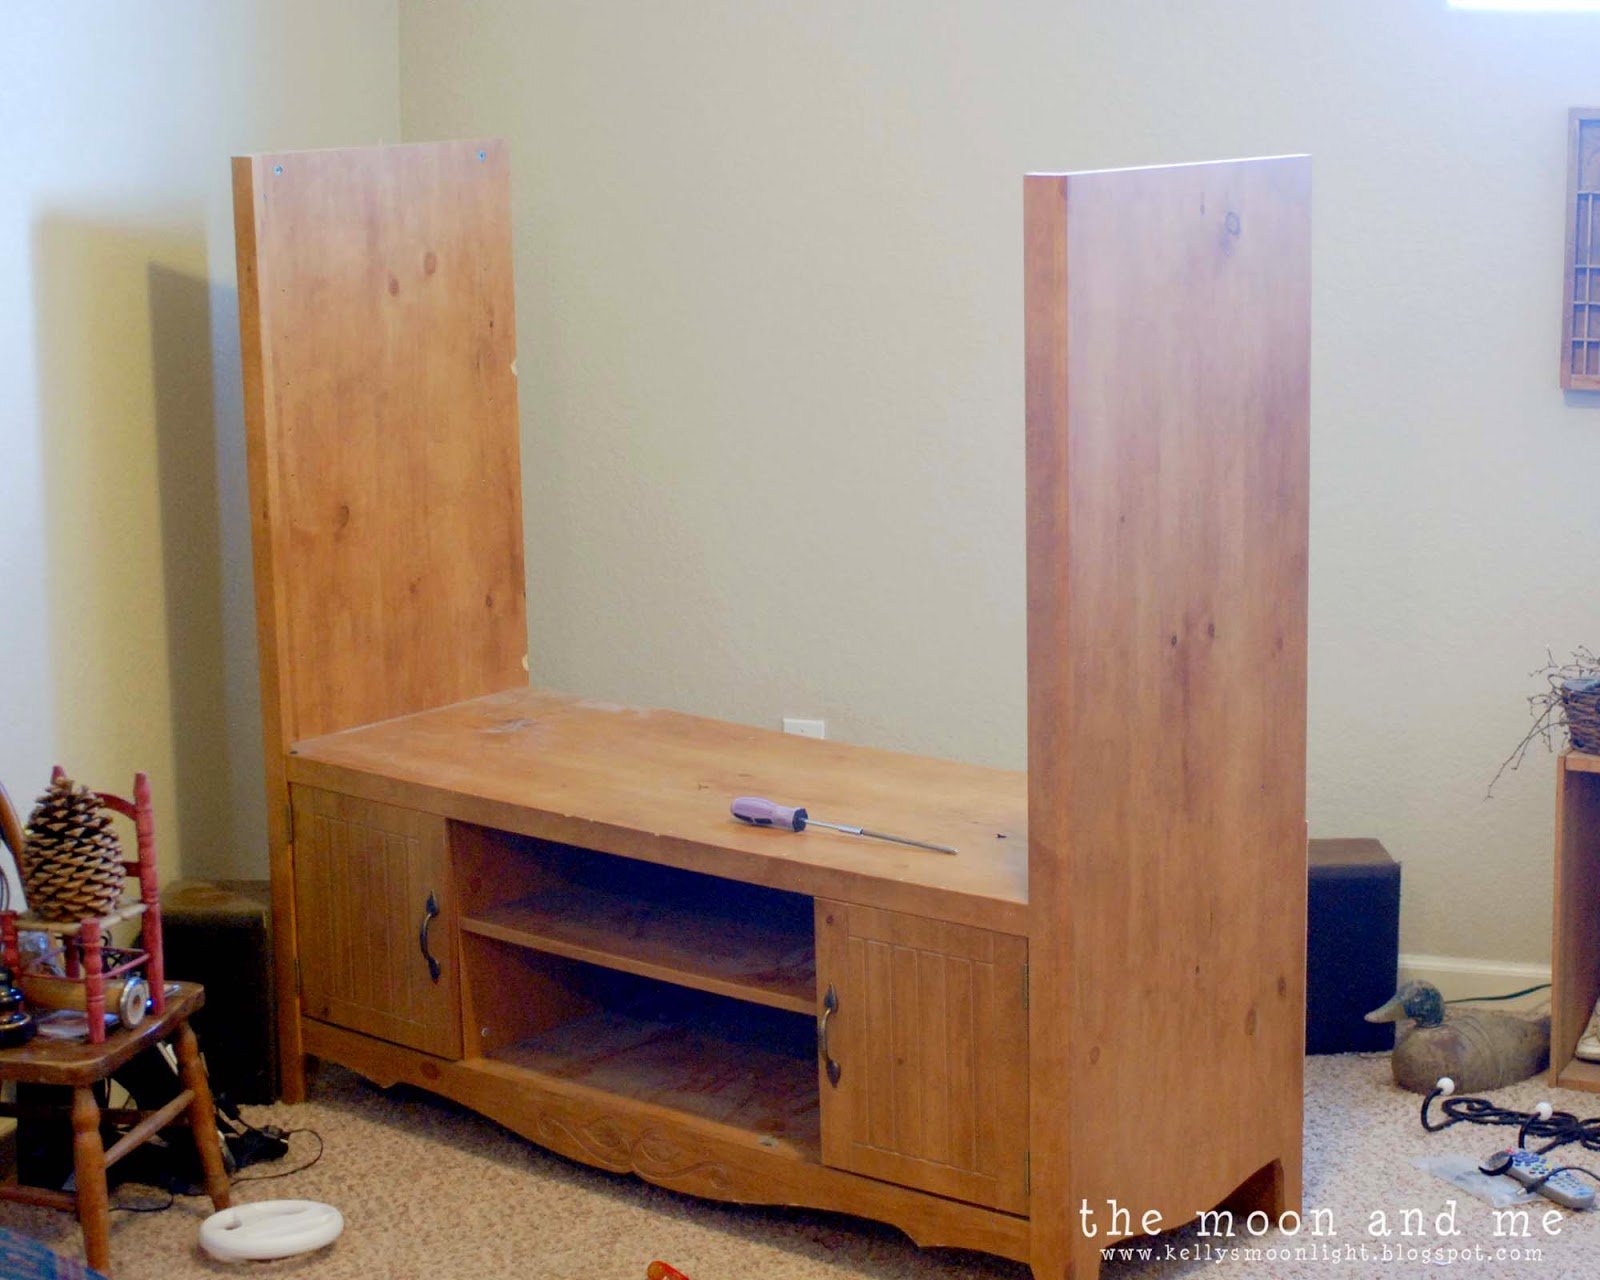
First we removed the top…we knew we wanted to keep
that part since the edges were finished.
We used a hand saw to cut off the vertical sides all the way down to the bottom.
Rather easy, and it doesn’t have to be pretty…just even.
See why pretty doesn’t matter?
We’re attaching the top piece the bottom section and it will cover any saw marks.
Unless you got really carried away and went all Texas Chainsaw on it or something.
Then I can’t help you.
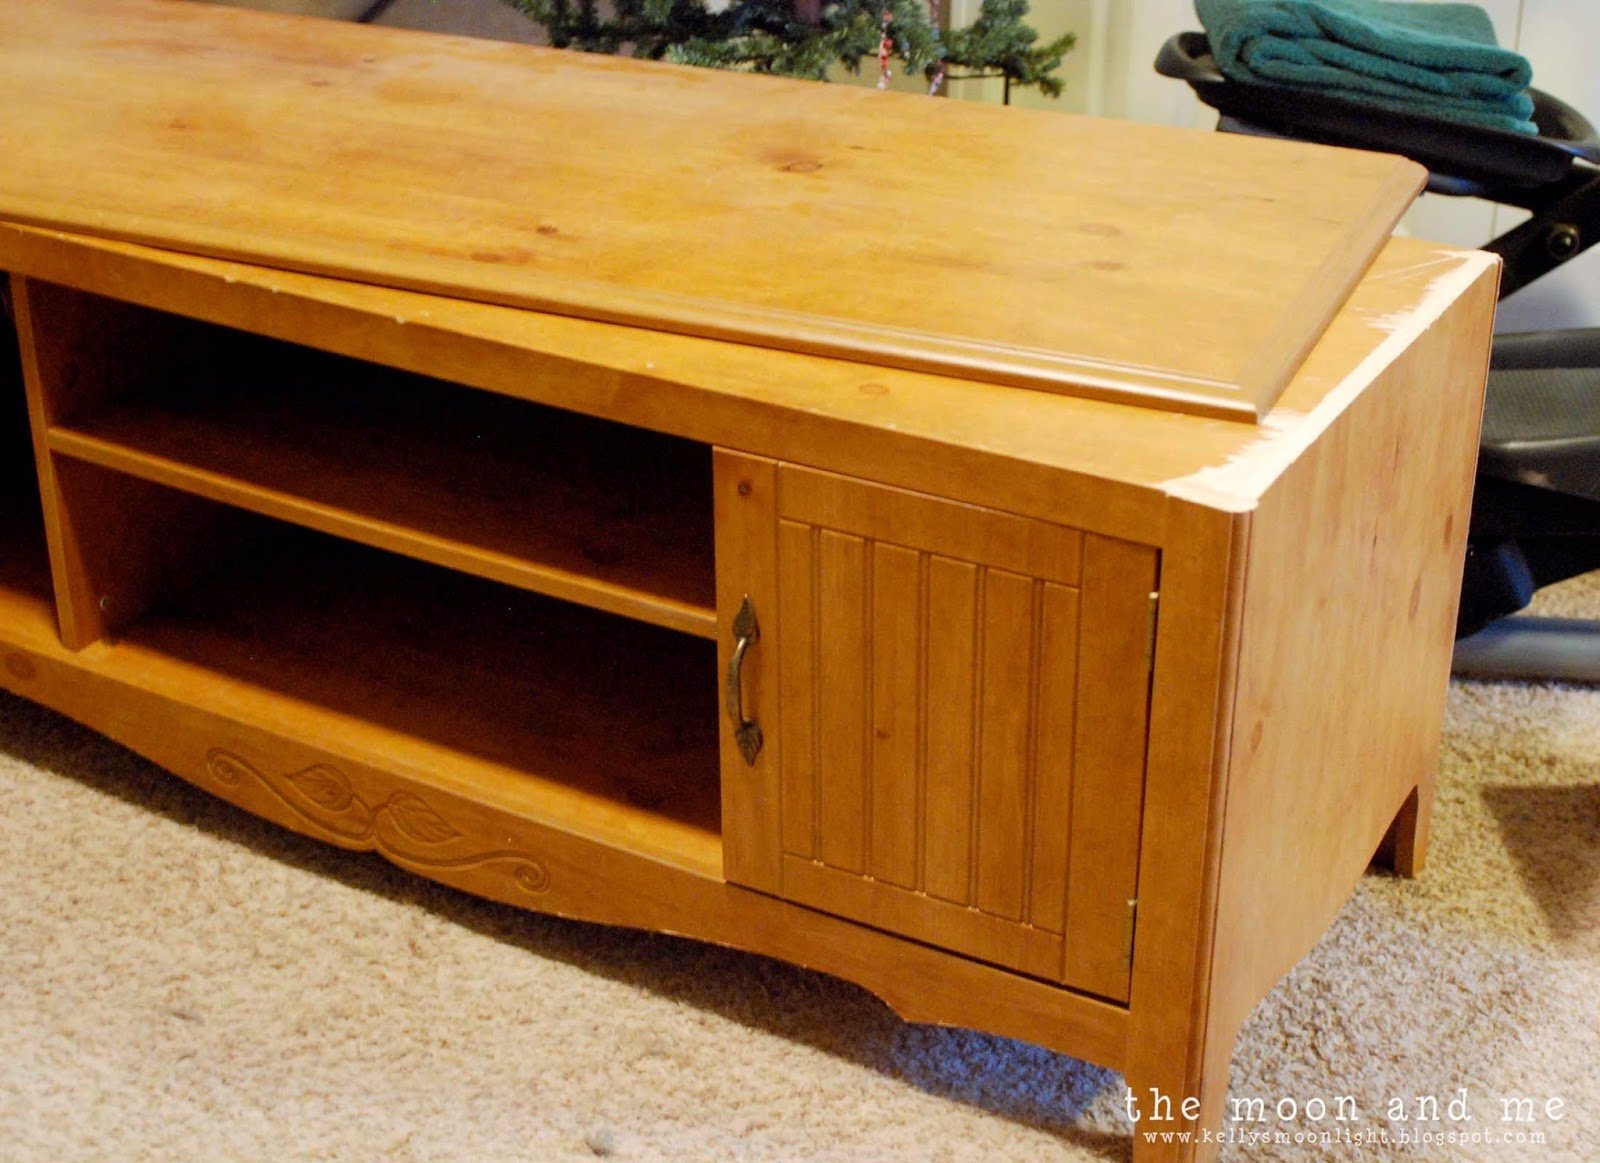
We removed the doors, filled the screw holes with DAP spackle and sanded.
We measured to make sure we had the top centered on the bottom piece,
then we used Gorilla wood glue in generous amounts, added a few clamps,and set some heavy things on the top while it dried for a couple days.
Obviously not these things…they’re not very heavy.
Once it was ready…I used some home mixed chalk paint…
because, really…I didn’t want to primer.It is laminate, so if you don’t use a chalk type paint, you will need to primer.
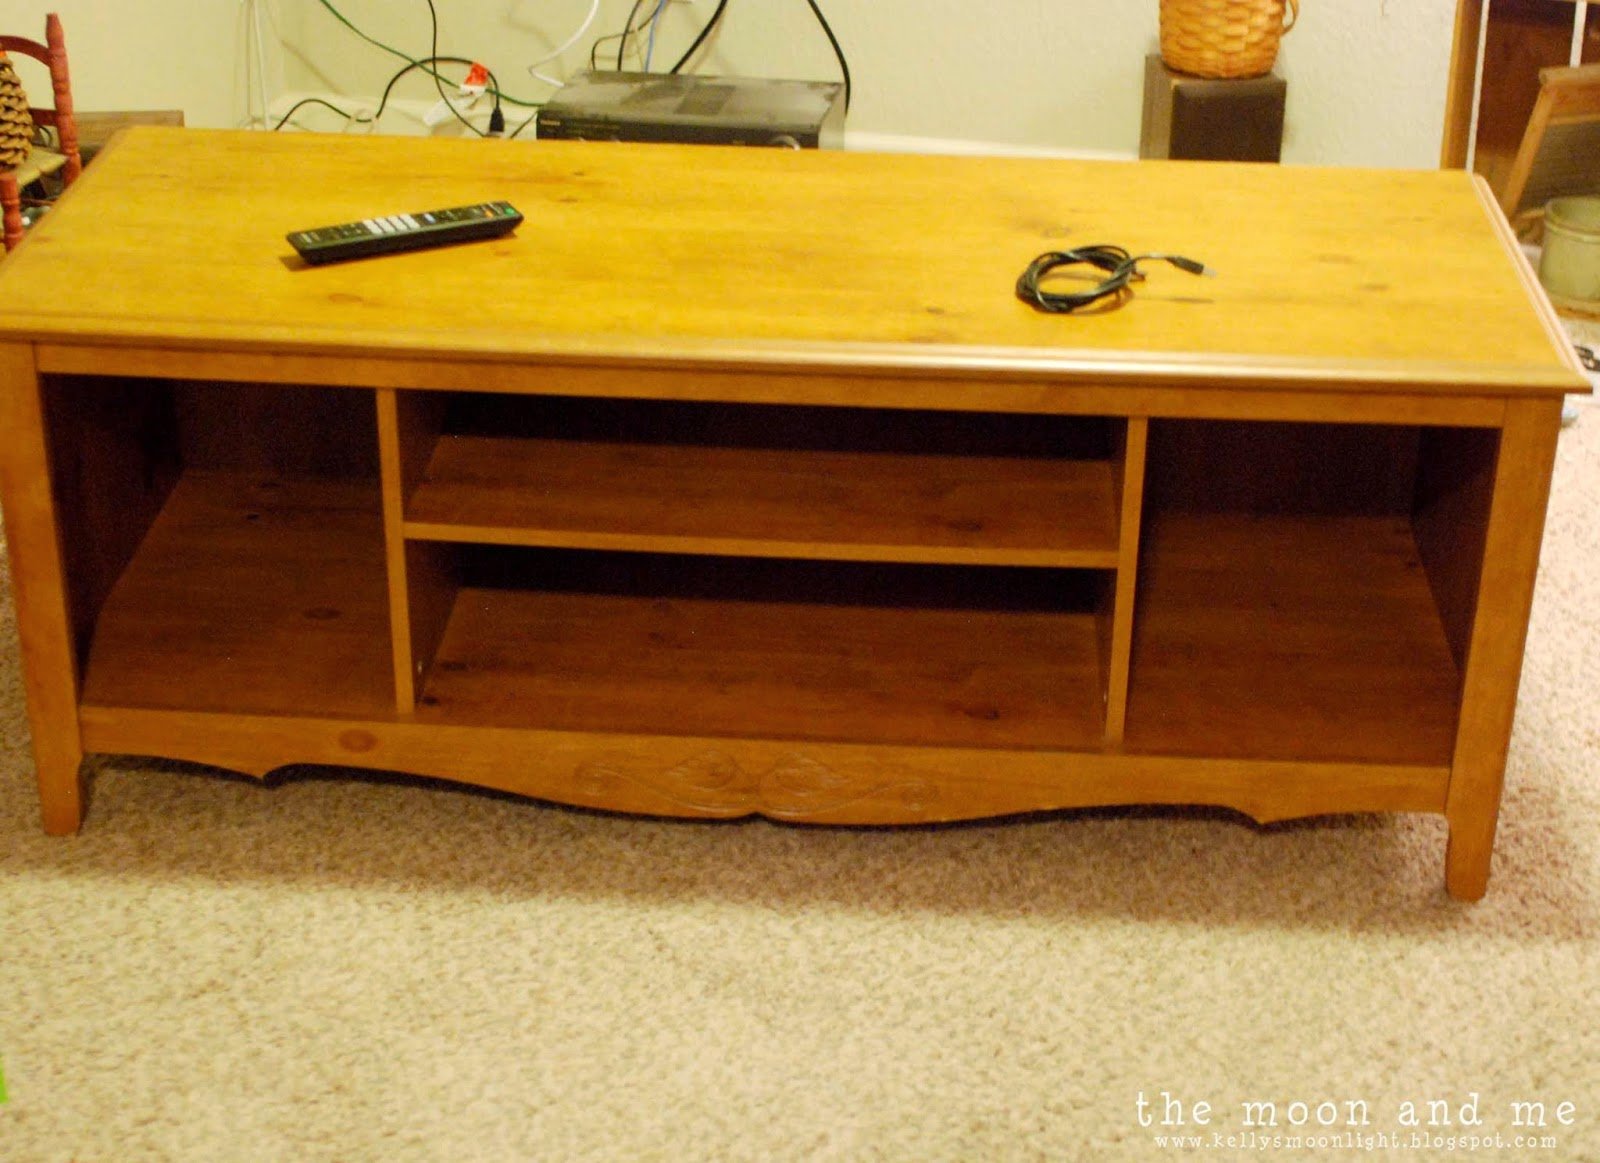
Two coats later…and it looks like it was always one
short piece of furniture and never anything else.
This was Martha Stewart’s Tidewater…mixed at Home Depot with Glidden paint.
It’s a little more green than aqua, but I made it work in the room.
Minwax clear furniture wax all over, a little Annie Sloan dark wax for drama…
and you have an amazing transformation!
I found these practically perfect baskets at World Market.
I sewed the liners and we won’t talk about how they
didn’t fit quite right and I had to cut a slit in the back.
Grrr.
Hey, at least they’re pretty from the front!
Not only did they unify the look, but they kept the CDs and DVDs
from leaning to and fro on the uneven seagrass weave.
And there you have it…
We actually made over the whole room…
all because of one man’s desire to wall-mount the television.
In the end…it was a good decision. 🙂
Thanks, love.
I spent about $40 for paint, baskets, and fabric…
(I already had the spackle, glue, wax, and plaster of paris for the chalk paint.)
which is a bargain when you consider most of the new consoleswe saw started at around $300…that’s a $260 or more savings!
I can’t say exactly how long it took, but all in all only a few hours.The biggest time chunks were waiting for the glue and paint to dry.Definitely a quick weekend project.
It took me longer to find baskets that fit!
I can’t think of anything I would have done differently…well, except maybe have someone else apply wax and buff it off.Whew, my arm was tired!
How about you, would you have ever guessed how this piece began its life?
Got an old entertainment center that needs a makeover?
We think ours is pretty awesome and couldn’t be happier with it now.
Thank you to the amazing team at Remodelaholic for
inviting me to come and play today.
I had so much fun!
~Kelly~
——————————————
Thanks so much for visiting and sharing, Kelly! I’ll never pass up an outdated entertainment center again 🙂
Lorene has been behind the scenes here at Remodelaholic for more than a decade! She believes that planning projects and actually completing them are two different hobbies, but that doesn't stop her from planning at least a dozen projects at any given time. She spends her free time creating memories with her husband and 5 kids, traveling as far as she can afford, and partaking of books in any form available.
There are numerous recipes online. I just use the one I find first.
Generally it’s plaster of paris, water, and latex paint…but some use calcium carbonate or unsanded grout.
I think the ratio is the same…about 2 tbsp of the “chalk” mix in with some warm water, about 1 tbsp – to one cup paint.
Hi, love this idea! Was wondering if your entertainment center was solid wood or particle board? I want to do this to ours, but my husband says it won’t work since it’s particle board so I figured I would ask about yours!
totally particle board. There’s not an ounce of solid wood on that thing. That’s the beauty of chalk paint…or paint in general…covers a multitude of sins. 🙂
I simply LOVE all your projects! I’m new to chalk paint can you tell me why you mixed Martha’s and Glidden? I’m about to start some projects myself and would like to know. Also you used light wax and then dark wax? Thanks very much and look forward to viewing many more of your beautiful ideas! Thanks!
Thank you for the inspiration. I finally turned my old entertainment center in my sons game room into a tv console to hold his new 50″ tv we bought him for his Birthday
This is EXACTLY what I want to do to my Entertainment Center. I knew that I didn’t have an original idea, so I searched and found your project. It’s almost the same entertainment center. 😉
Thanks for the inspiration and confirmation that I am on the right track!


 I can’t think of anything I would have done differently…well, except maybe have someone else apply wax and buff it off.Whew, my arm was tired!


Totally love this idea! Can you tell me how you make your own chalk paint?
There are numerous recipes online. I just use the one I find first.
Generally it’s plaster of paris, water, and latex paint…but some use calcium carbonate or unsanded grout.
I think the ratio is the same…about 2 tbsp of the “chalk” mix in with some warm water, about 1 tbsp – to one cup paint.
Hi, love this idea! Was wondering if your entertainment center was solid wood or particle board? I want to do this to ours, but my husband says it won’t work since it’s particle board so I figured I would ask about yours!
totally particle board. There’s not an ounce of solid wood on that thing. That’s the beauty of chalk paint…or paint in general…covers a multitude of sins. 🙂
I simply LOVE all your projects! I’m new to chalk paint can you tell me why you mixed Martha’s and Glidden? I’m about to start some projects myself and would like to know. Also you used light wax and then dark wax? Thanks very much and look forward to viewing many more of your beautiful ideas! Thanks!
Thank you for the inspiration. I finally turned my old entertainment center in my sons game room into a tv console to hold his new 50″ tv we bought him for his Birthday
Kelly
This is EXACTLY what I want to do to my Entertainment Center. I knew that I didn’t have an original idea, so I searched and found your project. It’s almost the same entertainment center. 😉
Thanks for the inspiration and confirmation that I am on the right track!