Make a Sewing Table Into a Drink Station
Vintage sewing tables are great candidates for repurposing — since they generally don’t fit modern sewing machines, you can find a sturdy, all-wood sewing table at many antique stores and thrift stores. Our guest today gave this sewing table a revamp by turning it into a drink cooler (with a drain!) for entertaining:

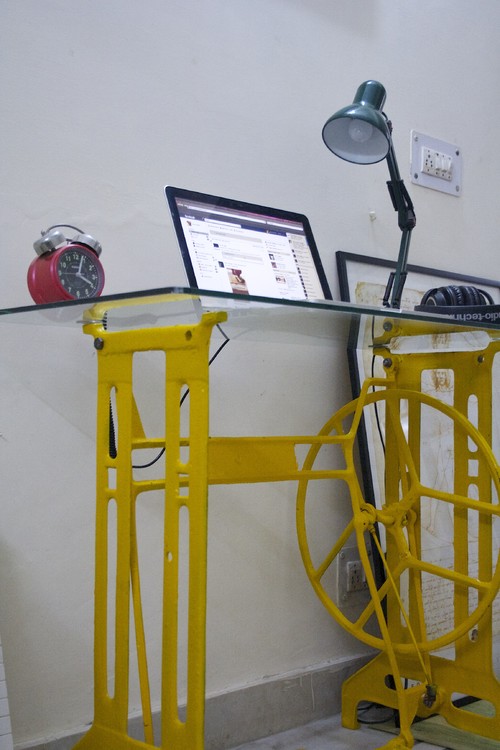
Sewing tables have also been making the rounds as every type of furniture imaginable…
…desks…
…bathroom vanities… via Design Sponge
…entry tables, consoles, buffets… Bravo Henry
…and even dining tables! tutorial from Apartment Therapy
So keep your eyes peeled for a great castoff sewing table because now you have plenty of inspiration to revamp it into something fabulous! See how Karen turned an old sewing cabinet into a drink station (and you might recognize her from her dresser to mudroom bench featured here awhile back!)
Turning a Sewing Cabinet Into a Drink Station
by Karen of The Weekend Country Girl
Hello from Texas! My name is Karen. I am a wife, mother, full time public school educator. My husband and I enjoy taking old, broken, or neglected furniture and turning it something unique, fun, and functional again.
I love, love, love Pinterest. I started seeing sewing machine cabinets being repurposed on Pinterest in a variety of ways, but the use that got my imagination going was to use it as a drink station. We live in southeast Texas and spend a lot of time entertaining out of doors. I wanted something that I could keep under our covered back porch year round that would serve as a buffet of sorts and not take up much room when not in use.
I found an empty sewing cabinet at Value Village for $12.12 while visiting my daughter in Charlotte, North Carolina. My long suffering husband is used to dragging things home from trips. It was a basic sewing cabinet that had no machine inside. Probably a 1960′s version that did not have a door on the front.
My original plan was to follow what I had seen on Pinterest and look for a container that would fit inside the hole where the sewing machine had been. It looked simple enough. Put something into the hole that the sewing machine once lived in and voila!
As I shared my idea with Hubby, I could see the wheels moving in his head. That is where the not easy part started. He decided that a sink would be the best thing to put in the station. A sink would drain when the ice melted without having to tip it over. He decided to put in a sink drain stopper too to hold the ice water in when we wanted to keep everything icy cold. A drain pipe in the bottom would allow us to put a container under to catch all the water if it was on the porch so there wouldn’t be a mess at clean up time.
I am embarrassed to tell you this, but we just so happened to have a stainless steel double sink behind our shop in what I call “the hoard”. You know those sinks that everyone is tearing out of their kitchen right now to put in under-mount sinks? That is what we had…well we actually had two we had been given by people redoing their kitchens.

Hubby got out his grinder and cut the sinks into two separate sinks instead of a double. After he finished cutting the sink, he cut out a rough opening for the sink in the cabinet with a skill saw. The original hole where the sewing machine had been was not quite large enough.

As you see from this picture I also filled in the holes where the cabinet hardware was. I found one I liked a lot more at our local Restore for fifty cents. It will match the house better. Of course I am saving what came on it for another project.
I liked the idea he had about dropping in a sink but the sink on top of the wood was going to keep the cabinet from closing flat. Hubby routed out a groove on the top edge of the cabinet hole the width of the sink lip so that the sink would be recessed.

I knew that this piece would be outside in the weather and it had some particle board parts inside so the first thing I did was coat every surface inside and out with a coat of exterior primer then Behr paint with primer in Sailboat Blue. To make it a little more weather resistant, I used Kona floor poly in a satin finish on the entire cabinet.


I also had a bottle opener in my hardware collection. It is attached to the end of the cabinet.

We also added a weight to the inside of the cabinet attached to the exterior wall after our first couple of uses because I was afraid that the piece could tip over if the sink was empty and the flip out counter was full. Here it is all finished. 


I do love my beverage station and will be getting a lot of use out of it, especially since it will be as easy as emptying a bucket under it to get rid of the melted ice. Enjoy the finished product.

————————————————
Thanks for sharing with us, Karen! You and your husband have great ideas and skills for revamping old furniture!
Pay Karen a visit over at The Weekend Country Girl and check out all of her upcycled projects, like this media center turned home office.
See more Remodelaholic upcycling projects here.
Lorene has been behind the scenes here at Remodelaholic for more than a decade! She believes that planning projects and actually completing them are two different hobbies, but that doesn't stop her from planning at least a dozen projects at any given time. She spends her free time creating memories with her husband and 5 kids, traveling as far as she can afford, and partaking of books in any form available.


oh my gosh, that is SUCH a great idea!
The drink station is a great idea. I especially love that it can drain. Genius!
Thanks so much for showing our work on the beverage station! I am just about to start my third one of these beverage stations.
Such a great idea! I am so sad I got rid of my old sewing table!
So cute!! Love the blue color. Thanks for the inspiration 🙂
We made a similar table, as some of the pictures https://life.kuchers.com/2012/10/stol-iz-shvejnoj-mashinki/
Good job guys!
love this idea I have one of those cabinet in the shed might do the same thing.
Just love it and all your work
Karen is amazing, and we love her work, too! If you do this, be sure to send us a picture: https://www.remodelaholic.com/share-brag-post/ — we LOVE to see projects!
How to you weight it so it does not tip over. Iam making a drink station/bar out of mine. Put a small shelf under the ice bucket and put a wine rack there. But when I open up the top – if set something heavy on it – tips over. How to I weight it without showing?