How to Make a Super Simple Woven Rope Wreath for Any Season


Transform your front door on a budget with a versatile woven rope wreath. Learn how to make one in just an hour with our easy tutorial. Perfect for beginners and seasoned crafters alike! Customize with whichever faux flowers you love best.
For more rope home decor ideas, try this easy rope chandelier DIY, hanging rope shelves, and 20 more simple rope DIY projects.

When it comes to home decor, wreaths have long been a classic choice for adding a touch of warmth and style to your living space. However, not all wreaths are created equal, and if you’re looking for a unique and versatile decor craft, then a woven rope wreath might just be your perfect choice.
Nautical rope wreaths and braided rope wreaths are great for a beach house decor, but this easy woven rope wreath looks like a wicker or rattan wreath so you can use it anywhere, any season. This just might be your new favorite wreath!

In this step-by-step tutorial, we’ll show you how to create a stunning woven rope wreath that can be customized for any season, using cheap materials from the dollar store. Whether you’re a seasoned DIY enthusiast or a beginner looking to explore the world of crafting, this project is sure to delight you.

Why This is a Great Decor Craft
There are several compelling reasons why crafting a woven rope wreath is an excellent idea:
- Affordability: One of the best things about this craft is that it’s incredibly budget-friendly. Most of the supplies can be found at your local Dollar Tree or Walmart, or maybe even already in your craft room, making it accessible to anyone looking to spruce up their home decor without breaking the bank.
- Versatility: The beauty of a woven rope wreath lies in its adaptability. You can customize it your own way to suit any season or occasion. Whether you want a vibrant and floral wreath for spring or a rustic and cozy one for fall, the possibilities are endless. With the wicker wreath style, you can even make a Christmas wreath with holly and berries and mistletoe.
- Easy to Make: This simple wreath doesn’t require a lot of creative energy and is a great craft for a craft night with friends or for while you binge watch your favorite show or a classic movie. Rainy day craft? You bet!
Dollar Tree is a great place to get seasonal decor and inexpensive craft supplies. Check out all of these great DIY dollar store wreath ideas, for any season.


This post contains affiliate links. Learn more and read our full disclosure policy here.
How to Make a Super Simple Woven Rope Wreath
Supplies

- 14-inch or 18-inch wire wreath form (Dollar Tree)
- 100 feet of cotton clothesline (1-2 packs of rope from Walmart or a hardware store like Harbor Freight)
- Hot glue gun and glue sticks
- Wire cutters or scissors
- Large flowers: yellow-orange poppies (Dollar Tree)
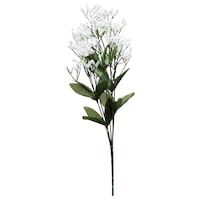
- Faux baby’s breath flowers (Walmart, Michaels, or Dollar Tree)
*You’ll need enough flowers to cover the 6-8 inch section of wreath that isn’t covered by the rope *or* a bit more rope to cover the entire wreath.
*You can see part of the form on my wreath, so you can spray paint the wreath form to match the rope before wrapping the wreath if you’d like to cover that little piece of the form better.


Choosing Flowers for the Rope Wreath
You can choose any flowers you’d like for this rope wreath! For a look like mine, you’ll want 2 types of flowers:
- an outer layer of smaller flowers or greenery such as baby’s breath, lavender, decorative grasses, lambs ear, etc.
- a center section of larger flowers such as poppies, sunflowers, dahlias, mums, etc.
Instructions
Step 1: Weave the Rope into the Wreath Form
Start by taking the end of the clothesline and weaving it through the metal rings of the wreath form, to the outside edge of the form. You may want to wrap the end of the wrap with gift wrapping tape or clear tape to prevent it unraveling as you weave.

Go under and over, then loop around on the inner circle or the outside diameter and back through. Continue a second layer of this process all the way around the wreath until you’ve used the entire clothesline. Keep the next layer of rope together tightly so you don’t see the wire.

I left the gap because that is the section I will cover with flowers. If you’d prefer to have the entire wreath form covered with woven rope, you’ll just need more rope. You can center the flowers at the bottom of the wreath like I did, or you can position the flowers to the side like this Dollar Tree sunflower wreath or fall farmhouse mum wreath.
Step 2: Glue the Rope Ends
Secure both the end of the rope on both sides to the back of the wreath using a hot glue gun. Apply some dabs of glue to ensure they are firmly attached and won’t show.

Step 3: Add the Outer Layer of Flowers
For the second part of the wreath, take several branches of the baby’s breath flowers (or greenery of your choice), bunch them together, and place them on the open space of the wreath.
Using the hot glue gun, glue the stems to the wire section. You can add two bunches of baby’s breath on either side for a balanced look.

Step 4: Add the Center Flowers
Pop the flowers off their stems and apply some hot glue to the bottom of each flower, around where the stem would be.

Ensure that the glued section attaches securely to the wire section. You can use around 5 poppy flowers for a vibrant centerpiece.

Be sure to cover the wire wreath form and the stems from the outer flowers. You can see the black wreath form a little bit, so you could spray paint the frame to match before wrapping with wire if you’d like.

Variations for the Craft
While the basic woven rope wreath is lovely, you can get creative and try different variations to suit your style and the season:
- Make it Nautical: After you’ve wrapped the wreath base with rope, add an anchor, seashells, or beachy wood shapes to the top of the wreath for the perfect beachy color addition to a coastal style for a beach house.
- Seasonal Swaps: Swap out the types of flowers and colors to match the season. Use bright, pastel flowers for spring, warm and rustic tones for fall, or even add some ornaments for a festive winter wreath.
- Natural Elements: Incorporate natural embellishments like pinecones, twigs, or dried leaves to give your wreath a rustic, outdoorsy feel. You can even wrap some twine or ribbon around it for an extra touch.
- Monogram or Initials: Add a personal touch by incorporating your family’s initials or a monogram in the middle of the rope wreath. You can craft the letters from cardboard, paint them, and attach them securely. Or make your own farmhouse sign for the wreath!

Common Questions about the Rope Wreath Craft
Can I use a different type of rope for this wreath?
Yes! While cotton clothesline works well for its flexibility, low price, and ease of use, you can experiment with other types of rope like jute or sisal rope for a different texture and look. To fit the spacing of the wire forms, look for rope that is 1/5 or 1/4 inch thick (4 or 5 mm).

If you’d like to make a colorful rope wreath (to match school colors for team spirit, or to match a season) paracord, cotton macrame cord, and polypropylene rope come in many different colors. Many of these are sold in large spools which makes it very inexpensive per foot and gives you lots of leftover rope for other projects!
How long does it take to complete this project?
This rope wreath project can typically be completed in about an hour, depending on your crafting experience and the level of detail you want to add. And how distracted you get by the movie you’re watching 😉

Can I hang this wreath outdoors?
While this wreath is primarily designed for indoor use, you can certainly hang it outdoors in a covered area. However, to ensure its longevity, it’s best to protect it from direct exposure to the elements. The rope will endure the elements just fine, but if you’d like to hang it where it will get direct sunlight or rain/snow, spend a bit more to get UV-resistant faux flowers that are meant for outdoor use.
Dollar Tree is a great place to get seasonal decor and inexpensive craft supplies. Check out all of these great DIY dollar store wreath ideas, for any season.


Pin this to save and share!

How to Make a Super Simple Woven Rope Wreath

Ingredients
- 14-inch wire wreath form from Dollar Tree
- Cotton clothesline from Walmart, Big Lots, supermarket, etc
- Hot glue gun
- Wire cutters and scissors
- Yellow-orange poppy flowers from Dollar Tree
- Faux baby’s breath flowers from Dollar Tree, Walmart, Michaels, etc
Instructions
- Start by taking the end of the clothesline and weaving it through the metal rings of the wreath form. Go under and over, then loop around on the inside or the outside and back through. Continue this process all the way around the wreath until you’ve used the entire clothesline.
- Secure both ends of the clothesline to the underside of the wreath using a hot glue gun. Apply some dabs of glue to ensure they are firmly attached and won’t show.
- Take several branches of the baby’s breath flowers, bunch them together, and place them on the open space of the wreath. Using the hot glue gun, glue the stems to the wire section. You can add two bunches of baby’s breath on either side for a balanced look.
- Pop the flowers off their stems and apply some hot glue to the bottom of each flower, around where the stem would be. Ensure that the glued section attaches securely to the wire section. You can use around 5 poppy flowers for a vibrant centerpiece.
Notes
Material Notes
You’ll need enough flowers to cover the 6-8 inch section of wreath that isn’t covered by the rope *or* a bit more rope to cover the entire wreath. For a look like mine, you’ll want 2 types of flowers:-
- an outer layer of smaller flowers or greenery such as baby’s breath, lavender, decorative grasses, lambs ear, etc.
- a center section of larger flowers such as poppies, sunflowers, dahlias, mums, etc.
Variations for the Craft
While the basic woven rope wreath is lovely, you can get creative and try different variations to suit your style and the season: Seasonal Swaps: Swap out the types of flowers and colors to match the season. Use bright, pastel flowers for spring, warm and rustic tones for fall, or even add some ornaments for a festive winter wreath. Natural Elements: Incorporate natural elements like pinecones, twigs, or dried leaves to give your wreath a rustic, outdoorsy feel. You can even wrap some twine or ribbon around it for an extra touch. Monogram or Initials: Add a personal touch by incorporating your family’s initials or a monogram in the center of the wreath. You can craft the letters from cardboard, paint them, and attach them securely.Lorene has been behind the scenes here at Remodelaholic for more than a decade! She believes that planning projects and actually completing them are two different hobbies, but that doesn't stop her from planning at least a dozen projects at any given time. She spends her free time creating memories with her husband and 5 kids, traveling as far as she can afford, and partaking of books in any form available.