I knew this undertaking would be a big project, and I psyched myself up for a week and a half of solid painting.
If you’ve been following this project, you already know it took twice as long.
But the results are so worth it!
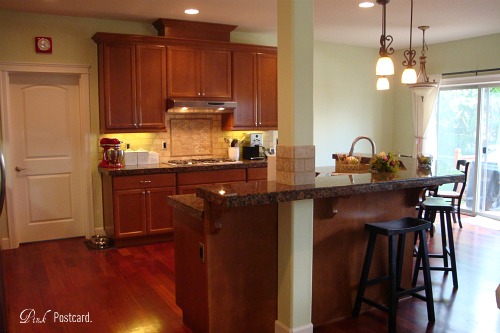
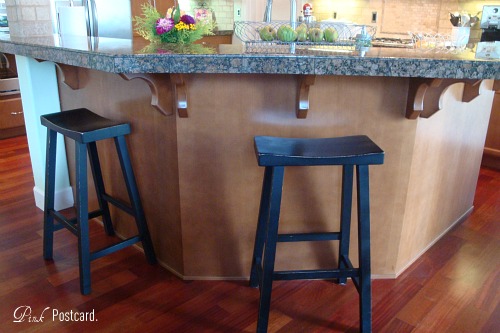
We started out with a very monochromatic wood tone kitchen:
August 2010
Everything was new and nice; so initially I felt guilty about wanting white. But after seeing and reading up on so many great kitchen redo’s, and living with what you love, I decided this summer was the time to tackle it.
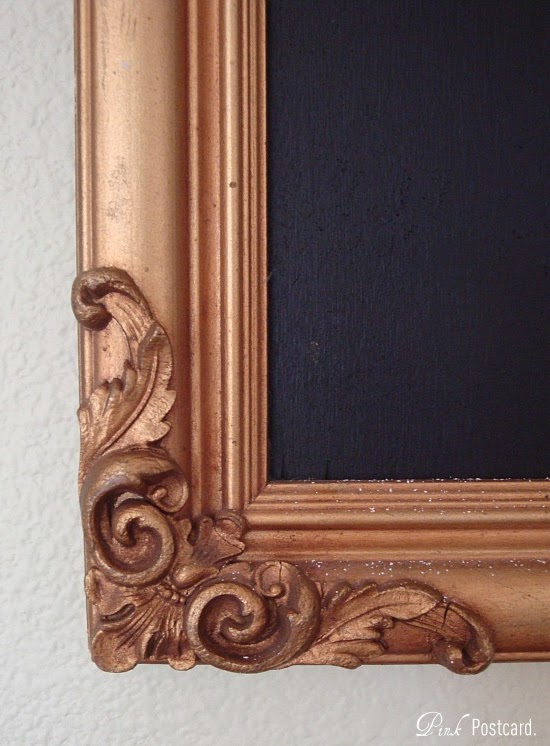
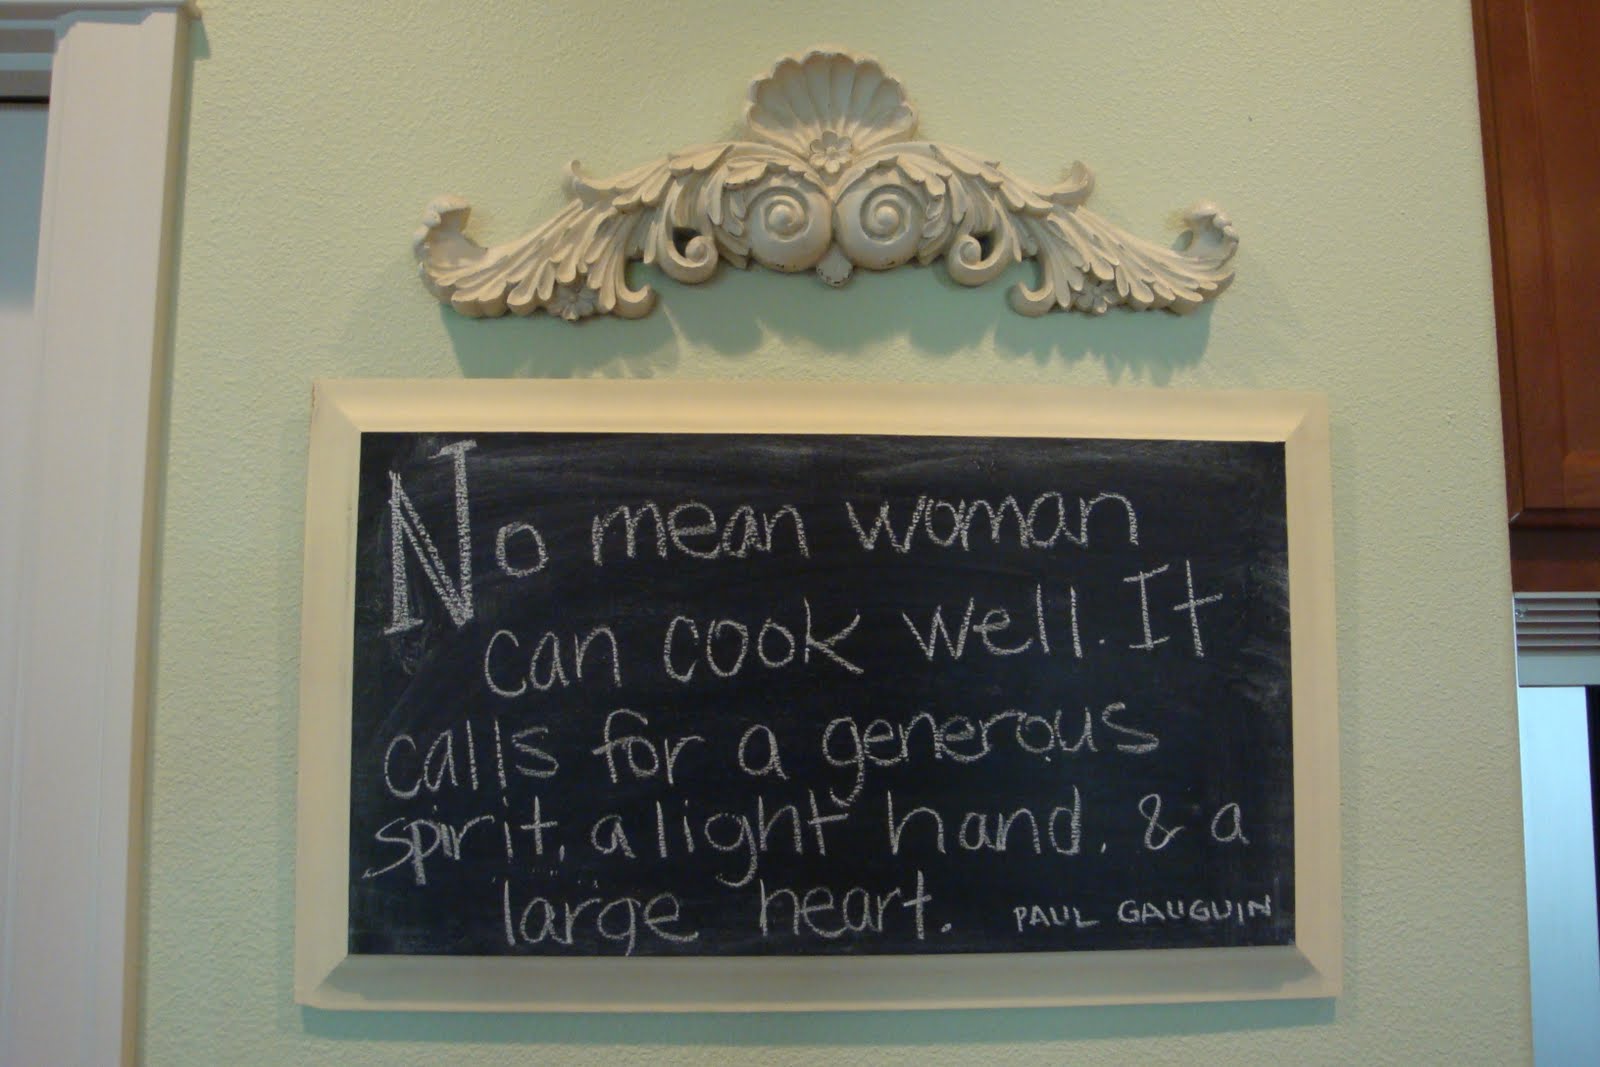
One fun element I changed was our chalkboard. The previous one was functional but way too plain Jane. I picked up this beautiful frame at Goodwill and added in a thin sheet of poplar and painted it with blackboard paint. So much prettier!
Aren’t the corner details yummy?
Here it was previously:
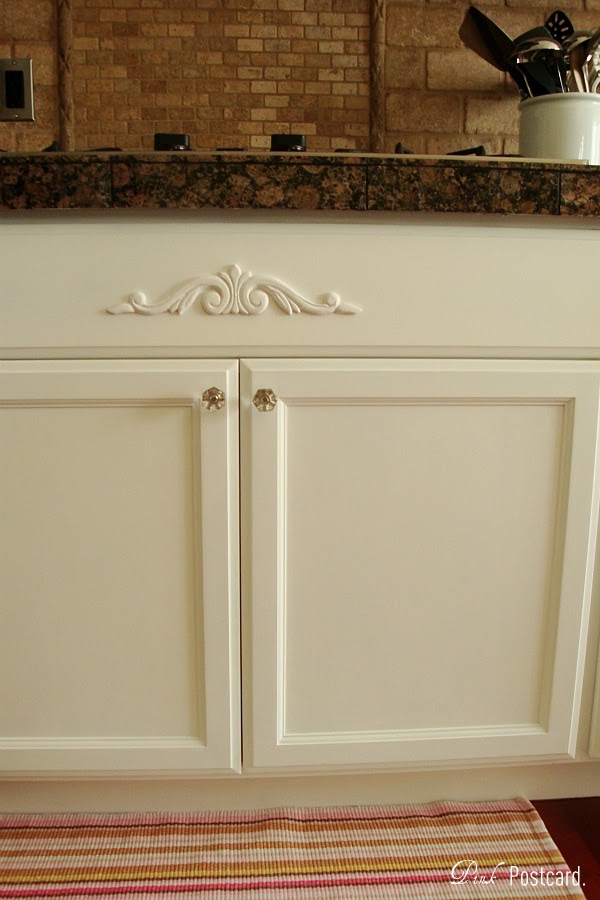
The plain front on the stove got a little embellishment- I love the little flair it adds.
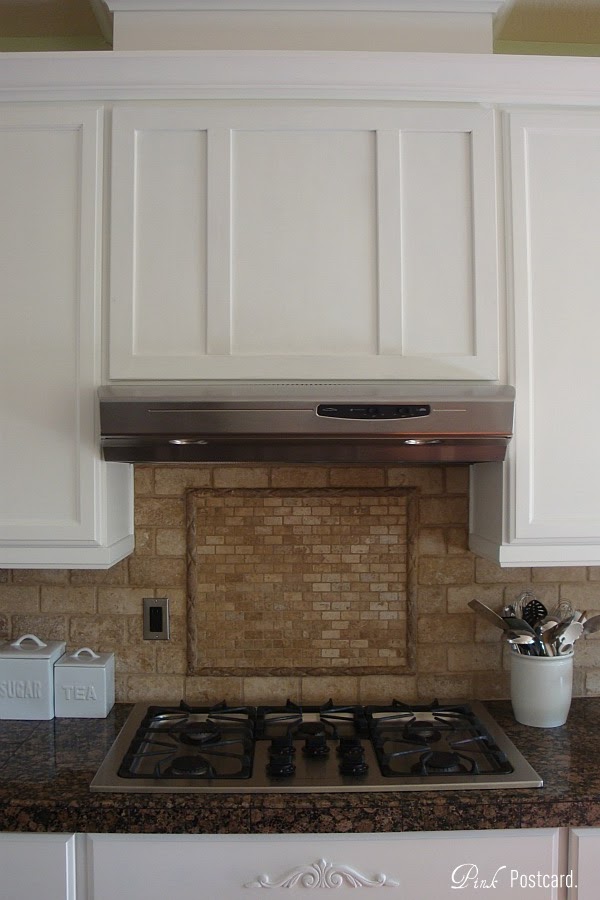
We also built a new front above the hood. Previously, there were two cabinet doors here. It was always a head scratcher why the builder did this since there is zero storage! We used a 3/4 piece of MDF, and trimmed it out- it now has the same look as our fireplace mantel that we did in the same way.
My plan is to put something decorative on the front of it, but I haven’t had time to do it yet.
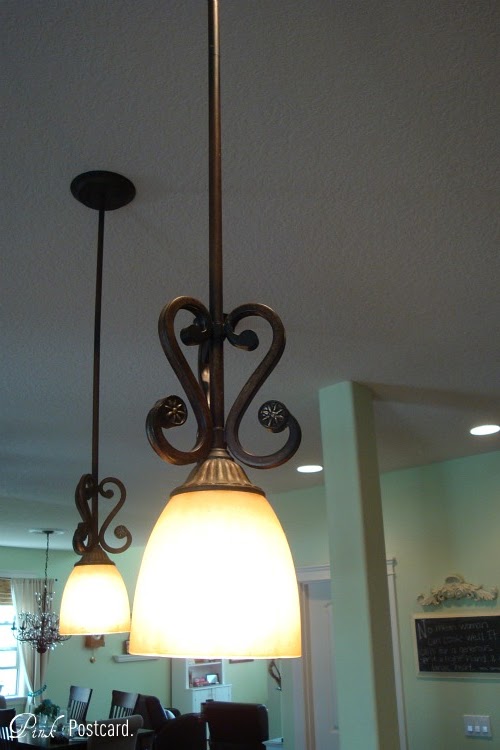
We also replaced our island pendants with these:
before
They are much more our style! More farmhouse than frill. I didn’t care for the golden-y glow the other ones put off. We really tried to make it happen with the schoolhouse pendants, but they were way out of our budget, and it just wasn’t going to work. I really like what we chose though, and they flow with the rest of the fixtures that we have going on.
You can also see all the trim work we added to the island here. New base trim, and some thin moulding really enhance it. Here’s was what it looked like before:
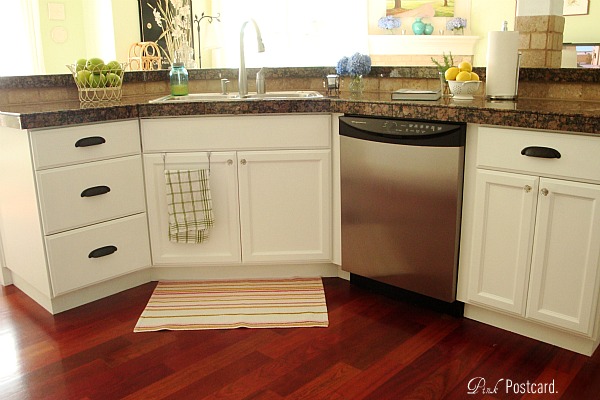
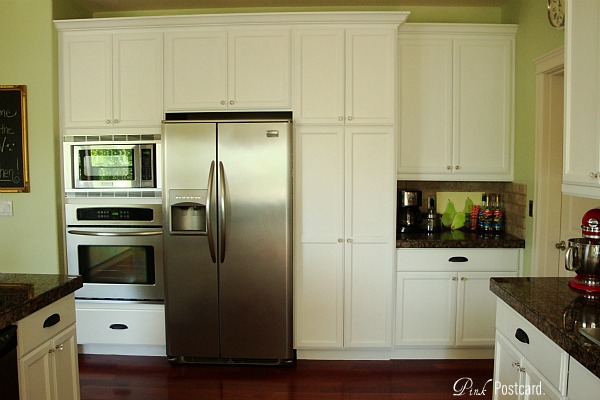
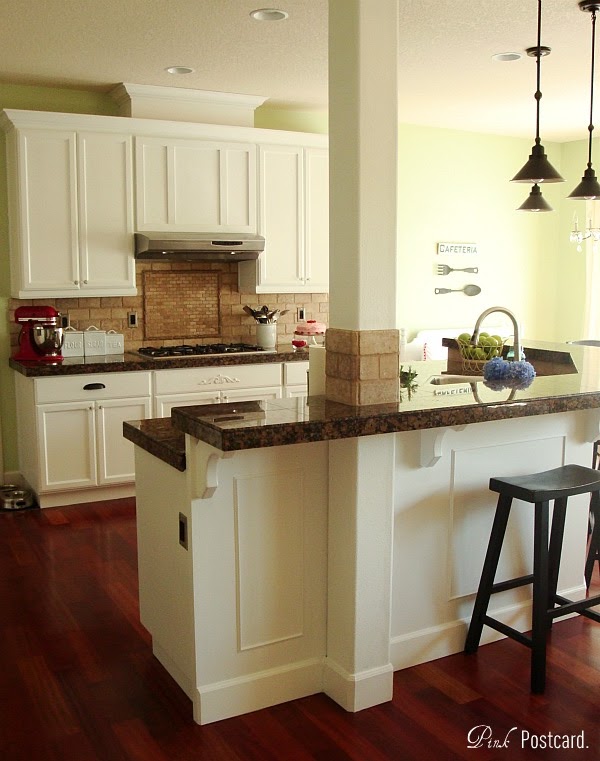
Everything is so much brighter now. I love the contrast of the floors with the white.
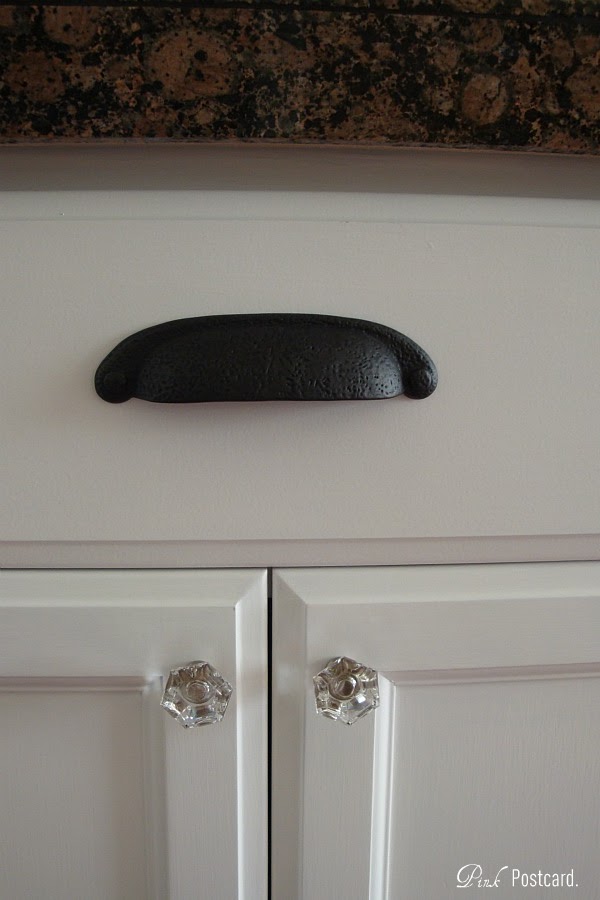
I have always loved the combo of bronzed pulls and glass knobs, and I finally have them!
This was one of the biggest expenses of the makeover, but it really adds so much.
I had a bit of a time finding the pulls I wanted that matched the previous size. These fit perfectly without me having to re drill any holes.
We are so happy with the end results! My husband gave me the best compliment. Half way through the project and after a long day of painting, he snuggled me and said, “I’m really proud of you honey.”
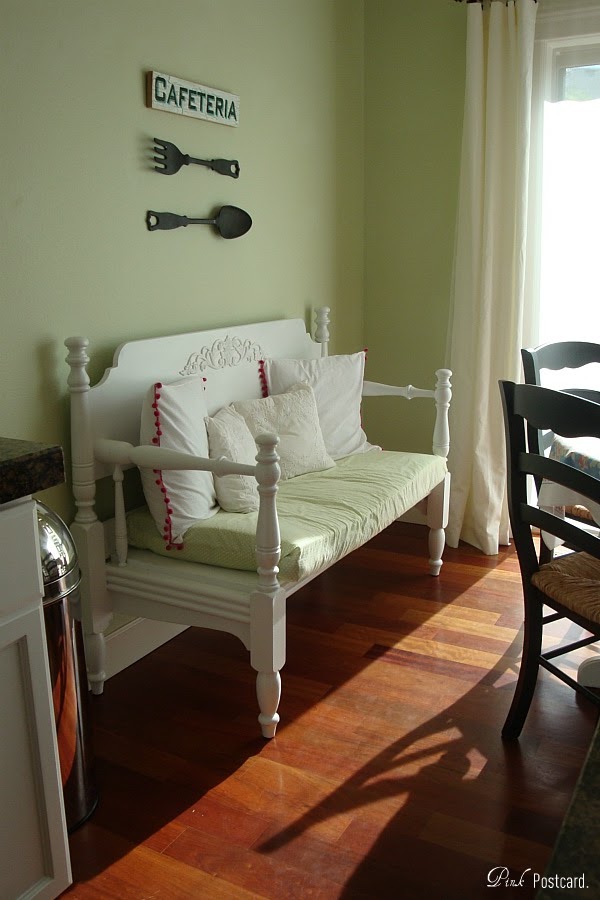
Now that this is done, I’ve set my sights on our nook. I want to finally complete this area!!!
I’m going to take a much needed break after this, but this area is going to be much more functional. The huge semi-empty wall will have a new look, and I think the bench will be finding a new home.
What I learned from this project and some tips:
*This wasn’t a hard project, just very time consuming. Plan to stick with it for awhile, and not make any huge plans while you’re doing it. I would rate this at an intermediate paint level.
*Use the best materials you can afford for the job. Even something as small as a sanding sponge can make a big difference! I bought a no name brand initially, and needed another one half way through. I bought a 3M brand the second time around, and wished I’d been using it all the way through the project.
* Floetrol. I’d read up on several other projects that used this paint product, and honestly, I really couldn’t tell if it made a big difference. It was my first time using it, and it would be a toss up if I used it again. It’s supposed to eliminate brush strokes- roller, brush, and for use in sprayers- but I still had ’em. Some of you painters who have used this more often than me can give me your opinions on it!
*I loved Frog Tape!! Also my first time using the green over the blue- which I’ve always used- but I prefer Frog tape now.
*All of our hinges on our doors were internal. I didn’t remove them, I just painted around them. If a little paint got on the hinge, it was very easy to take the sanding sponge to it once the paint was dry. So much easier! If you have visible hinges that are exterior mounted, you definitely need to remove them for painting.
*I used Zinsser 1-2-3 primer and Behr’s Ultra in Decorator White satin finish. Loved both! One gallon of paint completed the project. I will be getting a quart of it just to finish up something for the nook, and for future touch ups.
* The most thorough how to that I referenced on painting kitchen cabinets was Young House Love’s tutorial. You can find it here.
Would I do it again? Yes!! But not for awhile. 🙂 I’m so pooped, I just want to enjoy.
Want more lovely kitchen makeovers? Check these out:
Cassity Kmetzsch started Remodelaholic after graduating from Utah State University with a degree in Interior Design. Remodelaholic is the place to share her love for knocking out walls, and building everything back up again to not only add function but beauty to her home. Together with her husband Justin, they have remodeled 6 homes and are working on a seventh. She is a mother of four amazing girls. Making a house a home is her favorite hobby.
Wow- thank you for this. It is EXACTLY what I want to do. Currently I have wood, stainless steel appliances, and even the Baltic Brown granite (but mine is bull nose) and I googled the look and found a few pictures. This post has all the pictures I could have hoped for!
Absolutely gorgeous! I would have been so fearful to change the existing cabinets since they were brand new…I am very impressed! I am dying to do mine white soon.
This is great! We are almost done with our involuntary whole-house remodel (lightning strike and fire), which included remodeling our kitchen. The previous owners installed very nice cherry cabinets in 2007 or 2008, but they weren’t my absolute favorite. So as part of the remodel we had them refinished white, and I LOVE them.
Your kitchen looked great before and looks amazing after! We bought our house 2 years ago, can tell the cabs were once white and were refaced with maple, but not a good refacing job- some of the white still shows between doors and underneath the upper cabs. I would have preferred white, kinda’ wish they hadn’t “upgraded.”
I LOVE this kitchen! We have the baltic brown granite and I am getting ready to paint our cabinets white. I am also trying to decide what color walls I want to do. I have been looking for a pretty green, but hadn’t found the right shade yet. But, I love the green you have on your walls!! Do you have any idea what the color and brand are? Thanks!
We are redoing our kitchen, I love your aesthetic. Where did you buy your pendant lights for over your island? They are just my style and I’m having a hard time finding some I like.


Wow- thank you for this. It is EXACTLY what I want to do. Currently I have wood, stainless steel appliances, and even the Baltic Brown granite (but mine is bull nose) and I googled the look and found a few pictures. This post has all the pictures I could have hoped for!
You did a beautiful job!
Absolutely gorgeous! I love everything about it!
Absolutely gorgeous! I would have been so fearful to change the existing cabinets since they were brand new…I am very impressed! I am dying to do mine white soon.
I love love love this look! We are definately on the same page! I will keep this for future projects!
Thanks so much for sharing!
Blessings to you and yours.
GOR-JUS!!!
This is great! We are almost done with our involuntary whole-house remodel (lightning strike and fire), which included remodeling our kitchen. The previous owners installed very nice cherry cabinets in 2007 or 2008, but they weren’t my absolute favorite. So as part of the remodel we had them refinished white, and I LOVE them.
Frog tape – yes! Love it too. Blue tape doesn’t stick. Frog does… 🙂
oh – and I love the white cabinets!
What a beautiful remodel and I love the chalkboard!
Your kitchen looked great before and looks amazing after! We bought our house 2 years ago, can tell the cabs were once white and were refaced with maple, but not a good refacing job- some of the white still shows between doors and underneath the upper cabs. I would have preferred white, kinda’ wish they hadn’t “upgraded.”
I love white kitchen cabinets. I wish I could paint ours but we are not allowed to do so. Awesome transformation!!! Good Job!
Love it!
i’ll trade you kitchens!!!
Where did you find the bronze handles? I can’t seem to find any with the hammered detail like yours! Love them!
I LOVE this kitchen! We have the baltic brown granite and I am getting ready to paint our cabinets white. I am also trying to decide what color walls I want to do. I have been looking for a pretty green, but hadn’t found the right shade yet. But, I love the green you have on your walls!! Do you have any idea what the color and brand are? Thanks!
Hi-love,love,love your cabinets!! How many coats of primer & paint did you end up doing? What did you seal them with?
Thanks:)
Mandy
We are redoing our kitchen, I love your aesthetic. Where did you buy your pendant lights for over your island? They are just my style and I’m having a hard time finding some I like.
What is the color white and brand you used?