Kitchen Makeover; Painted Cabinets and a Pop of Color!
Submitted By Pretend Fancy

Let’s remind ourselves of where we came from to get this post started off right.
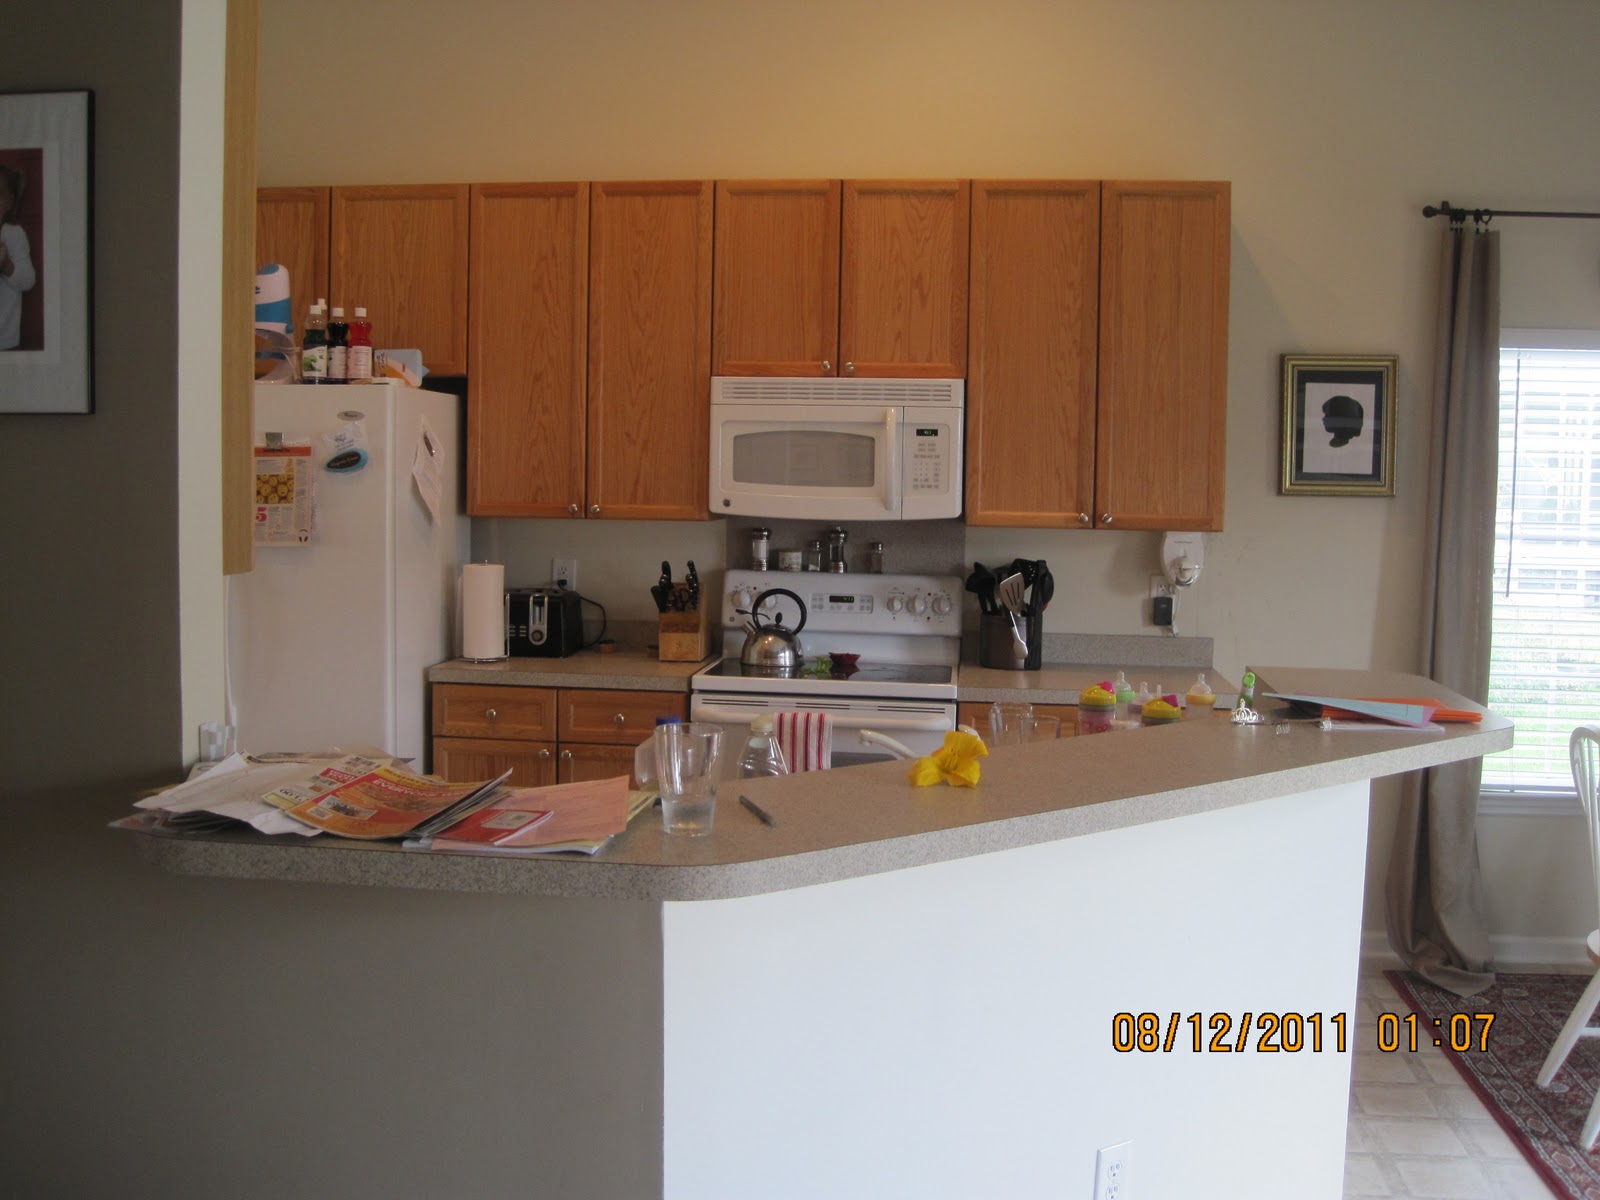

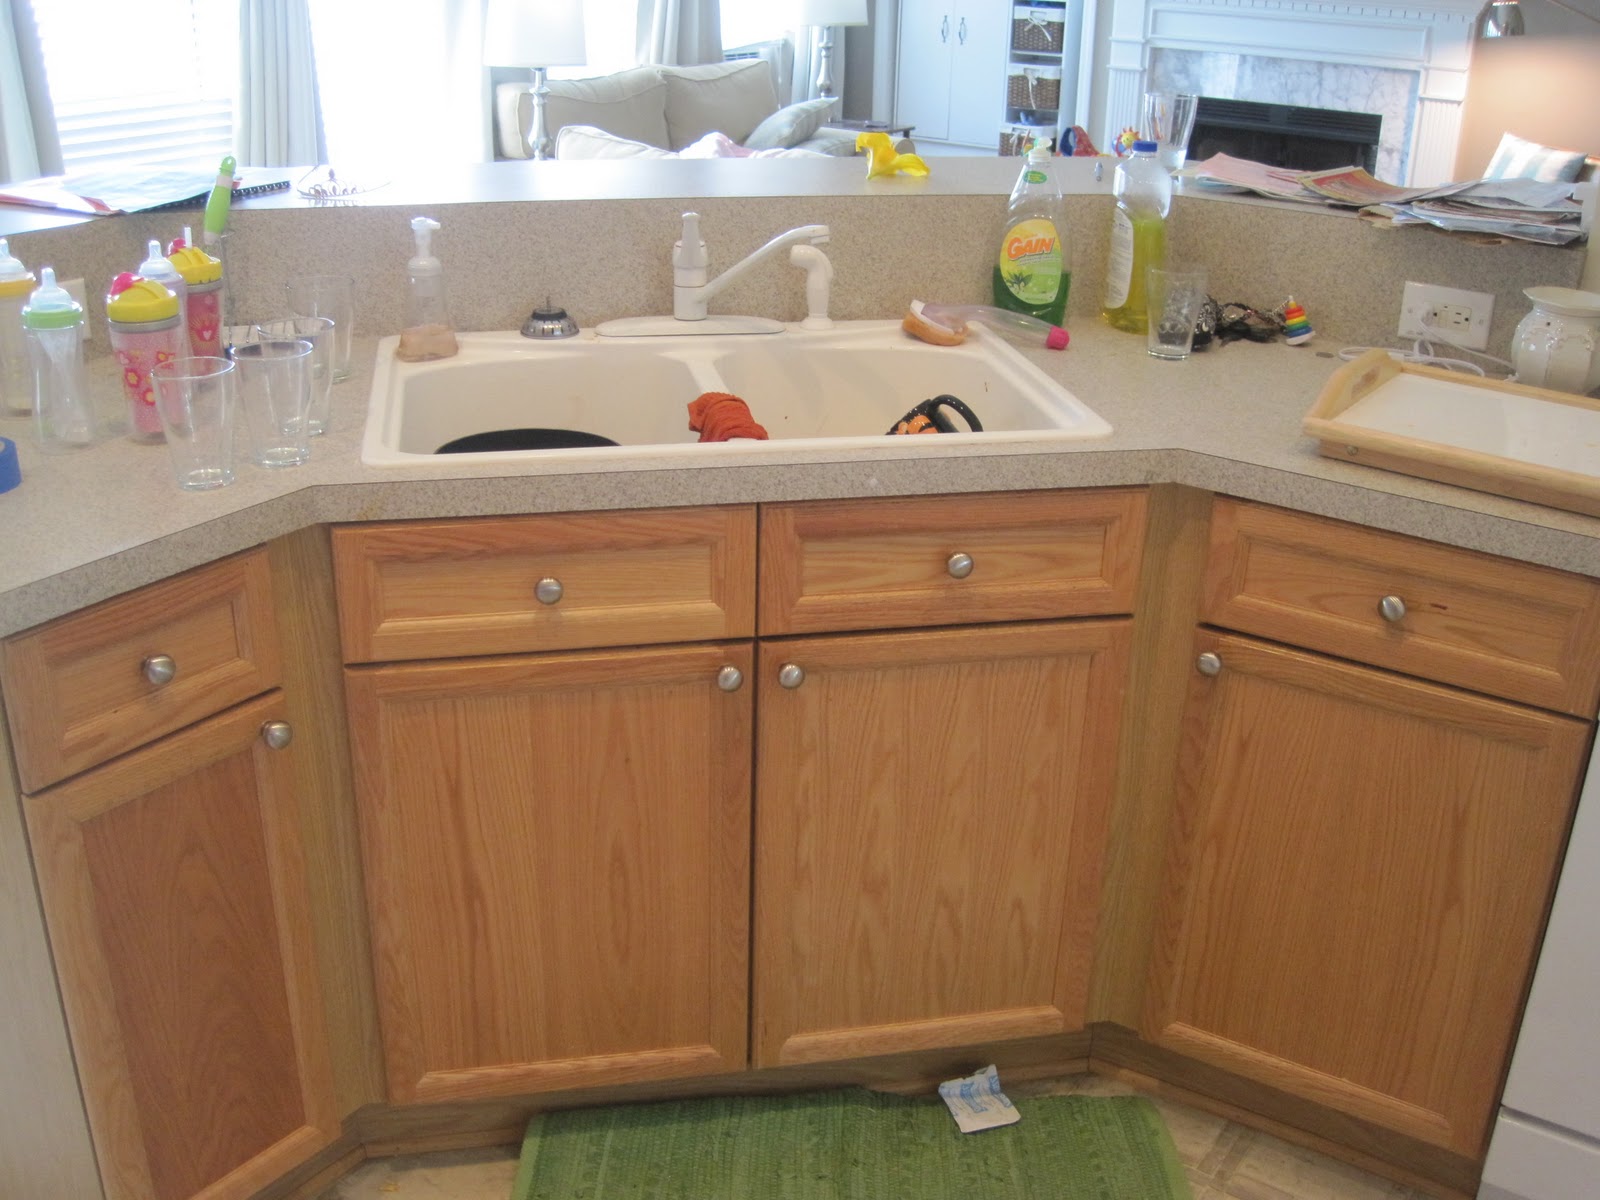
 |
||
 |
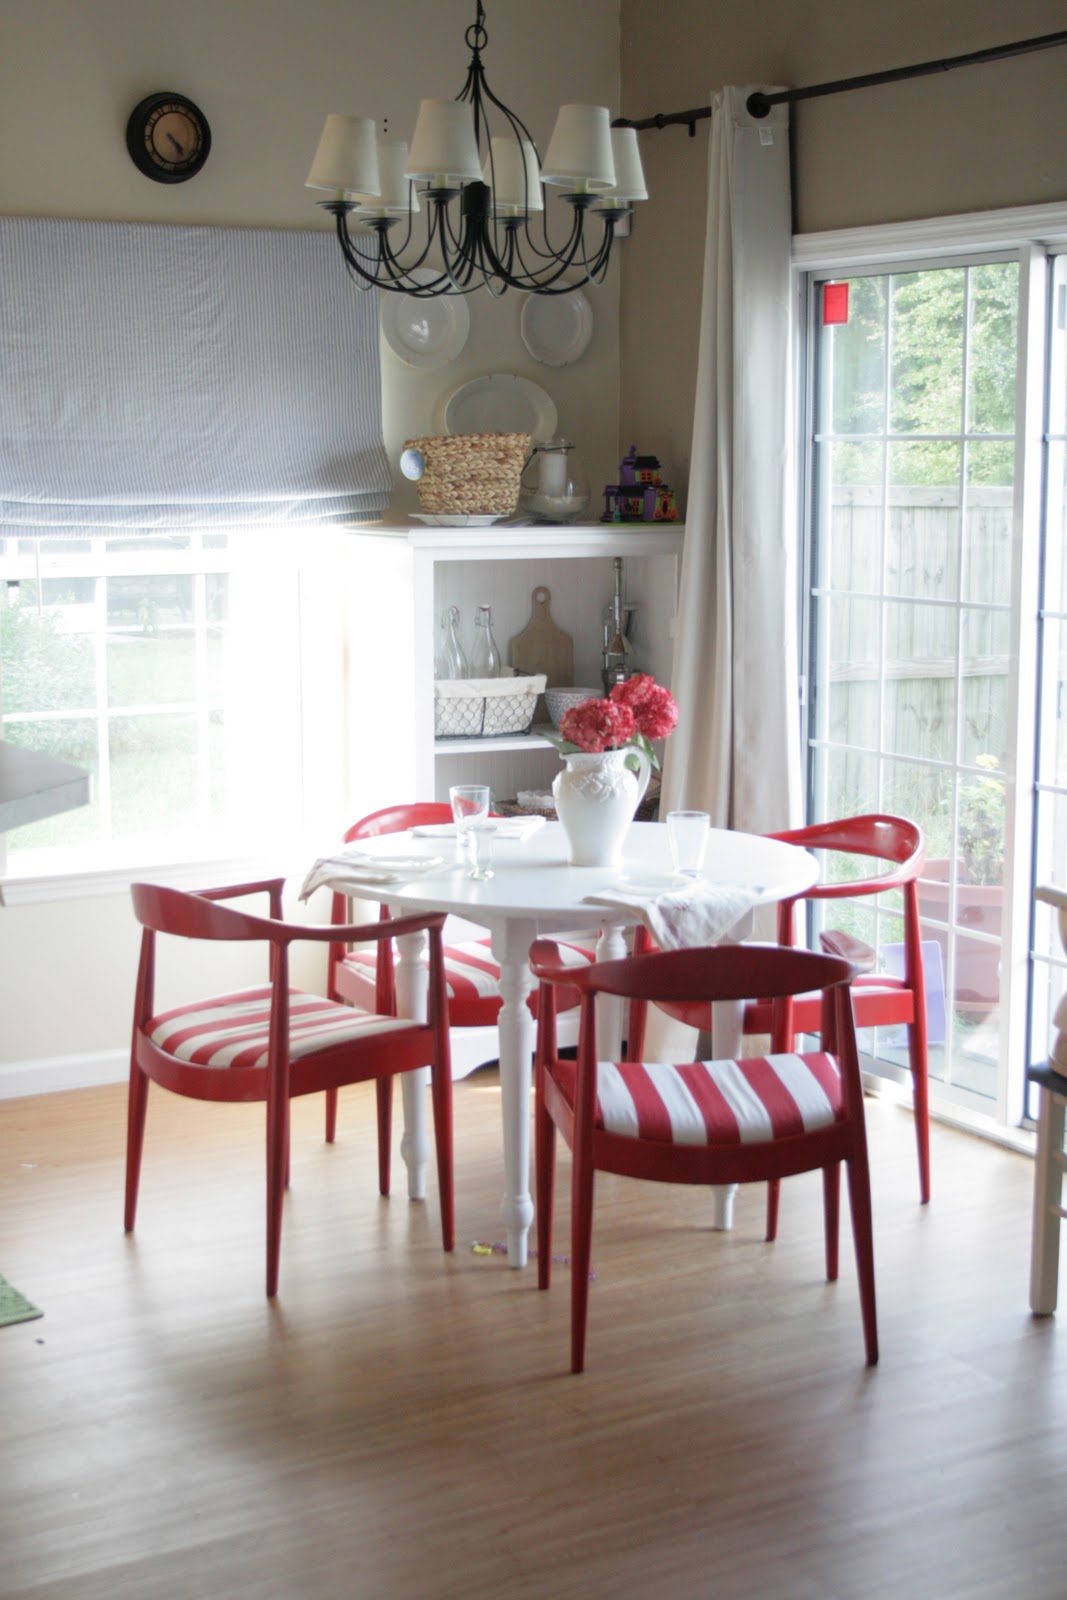
ahhh, breath of fresh air. This picture was taken on another day and the lighting was better than most of the others, but oh well.
I used the same paint from the cabinets on the table. It is holding up great.
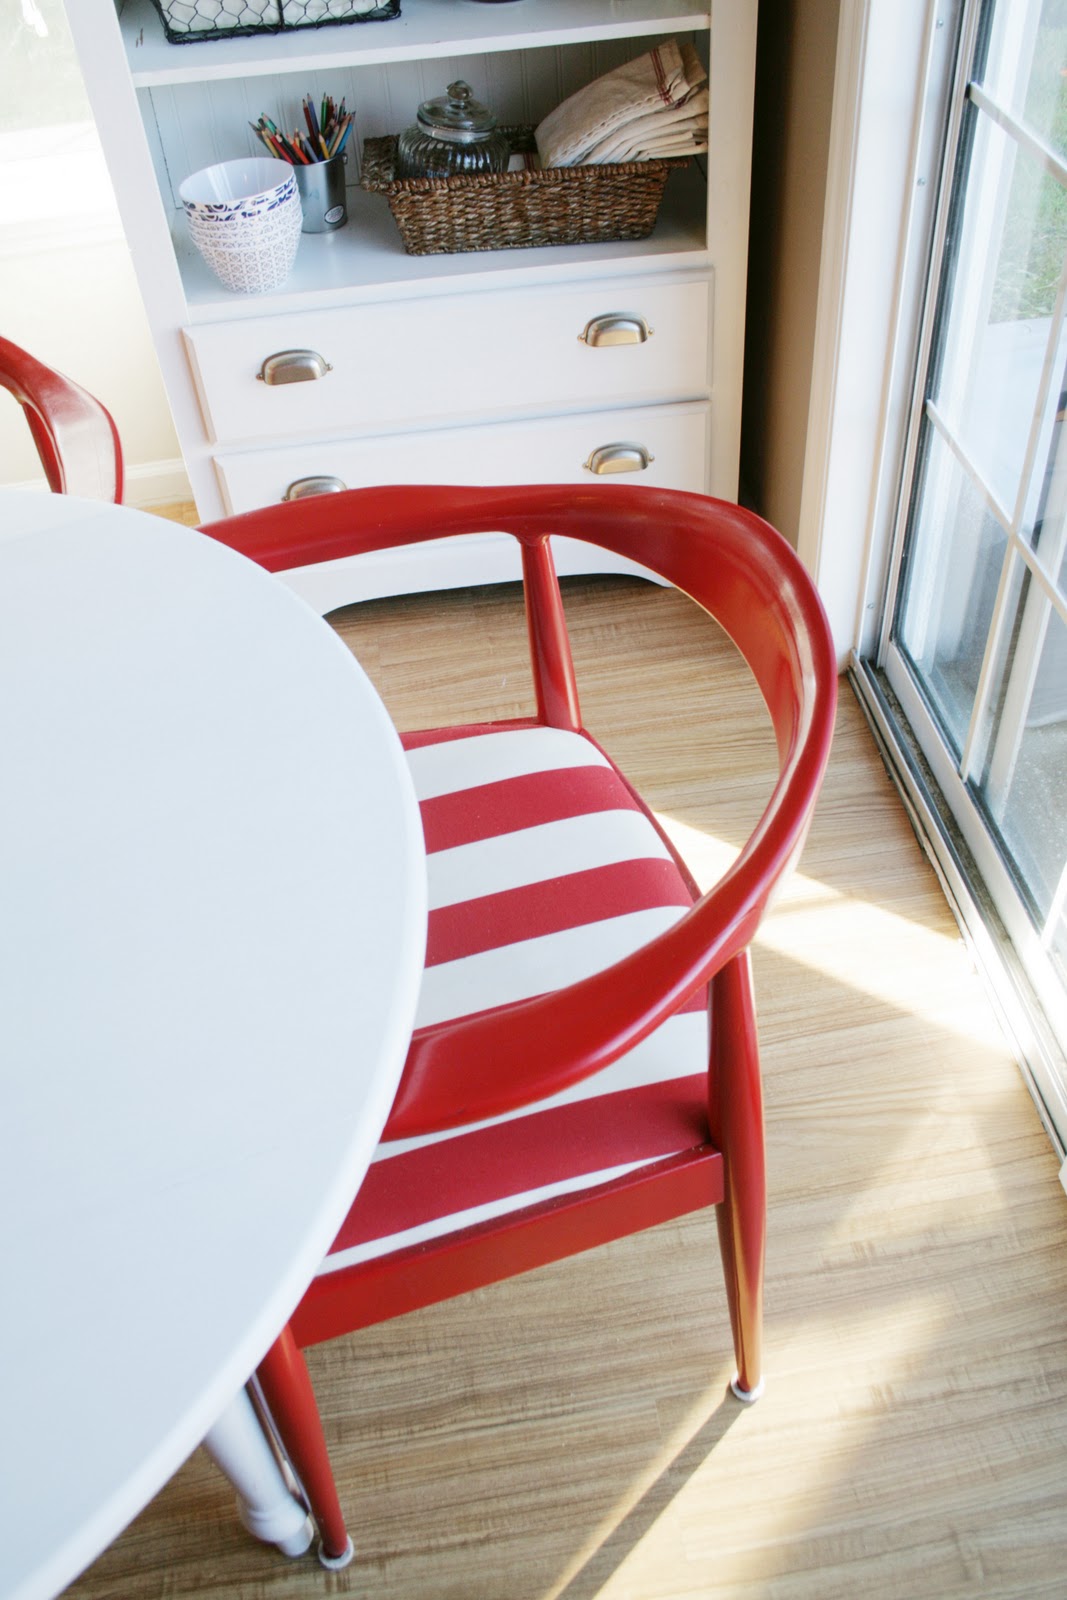
The rest were taken today. I am still loving my red chairs that I made over. You can read about that here.

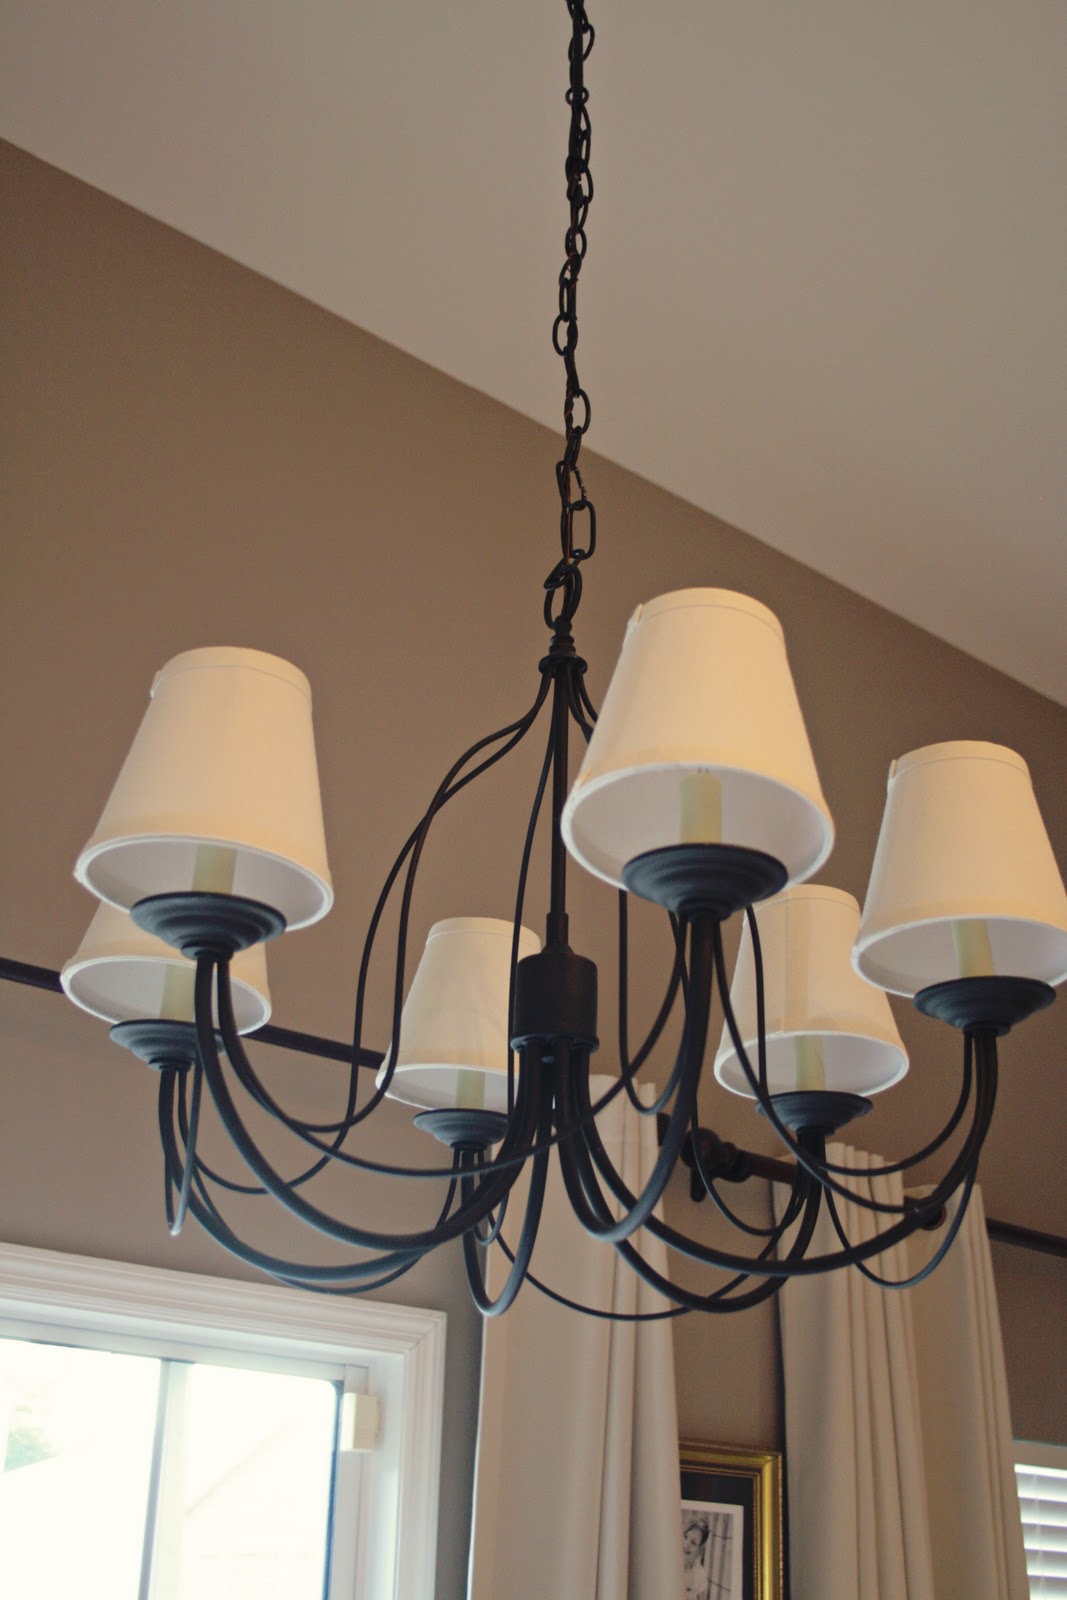
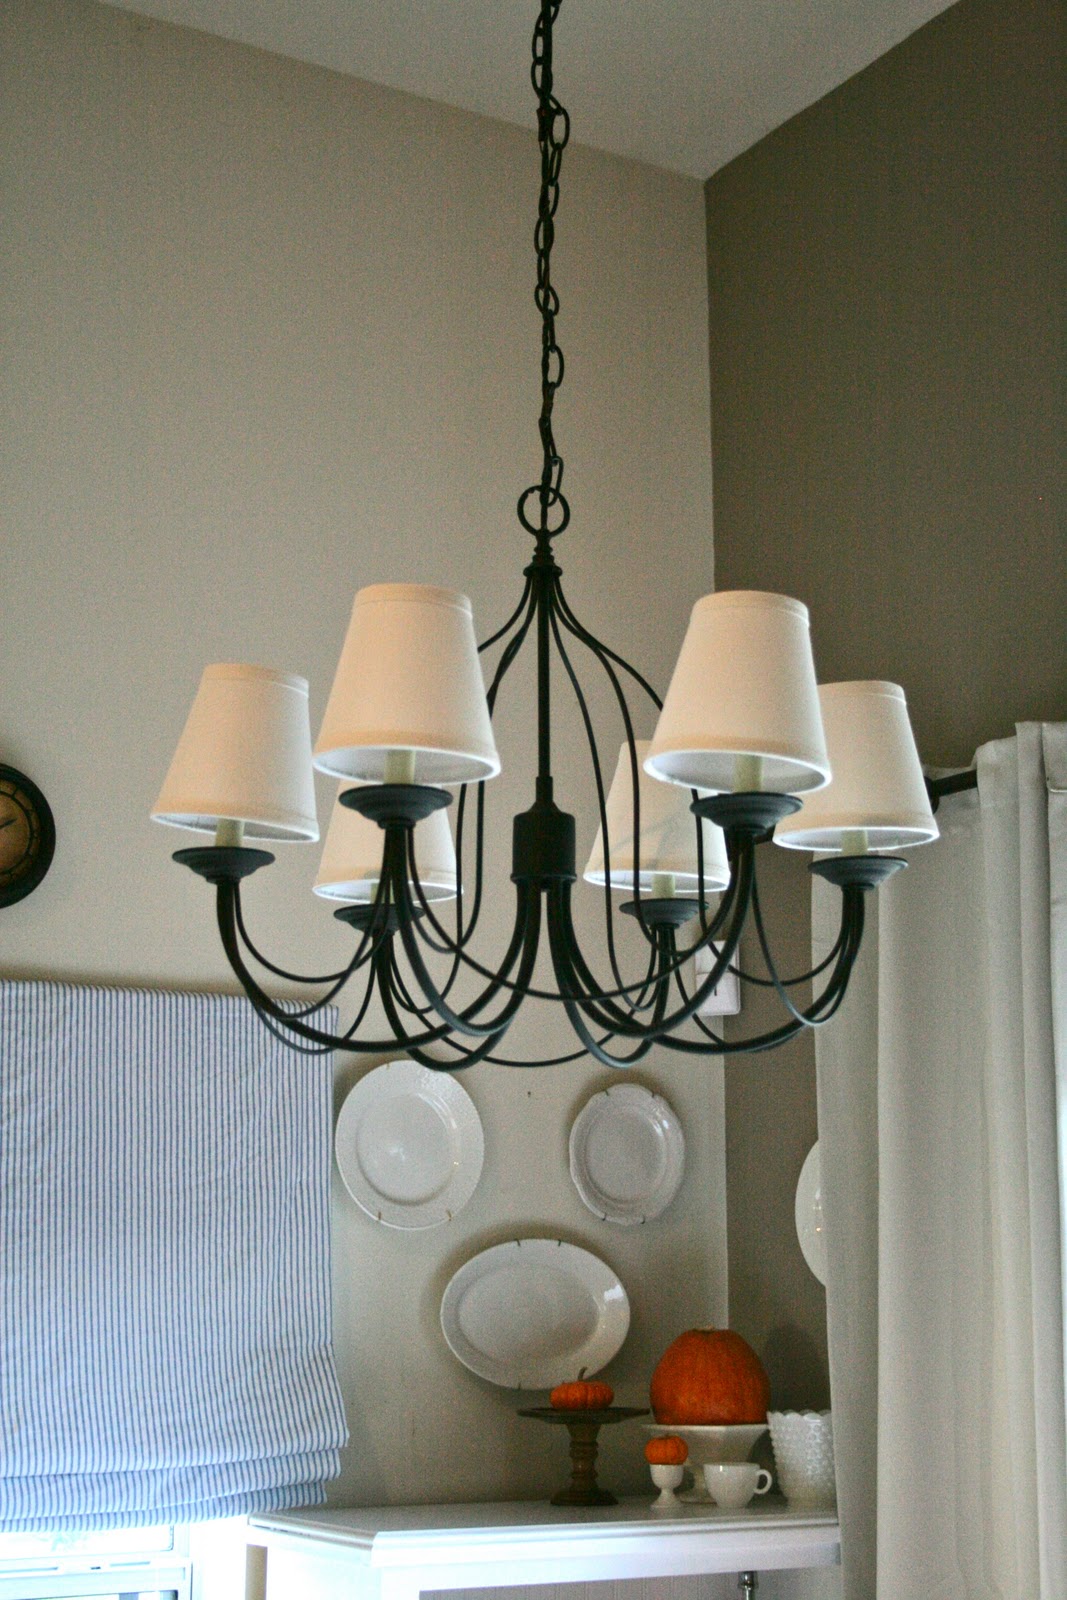
Are you in love with my light fixture? Because I am. Big time. That was my twenty dollar score at Habitat for Humanity.

I was super impressed that John figured out to hang it. That is one area that I refuse to DIM (Do It Myself). Electricity is scary. My hair is big enough without any accidental help.
Ah, my dumpter dive dresser that I turned into an armoire. More about that transformation here.
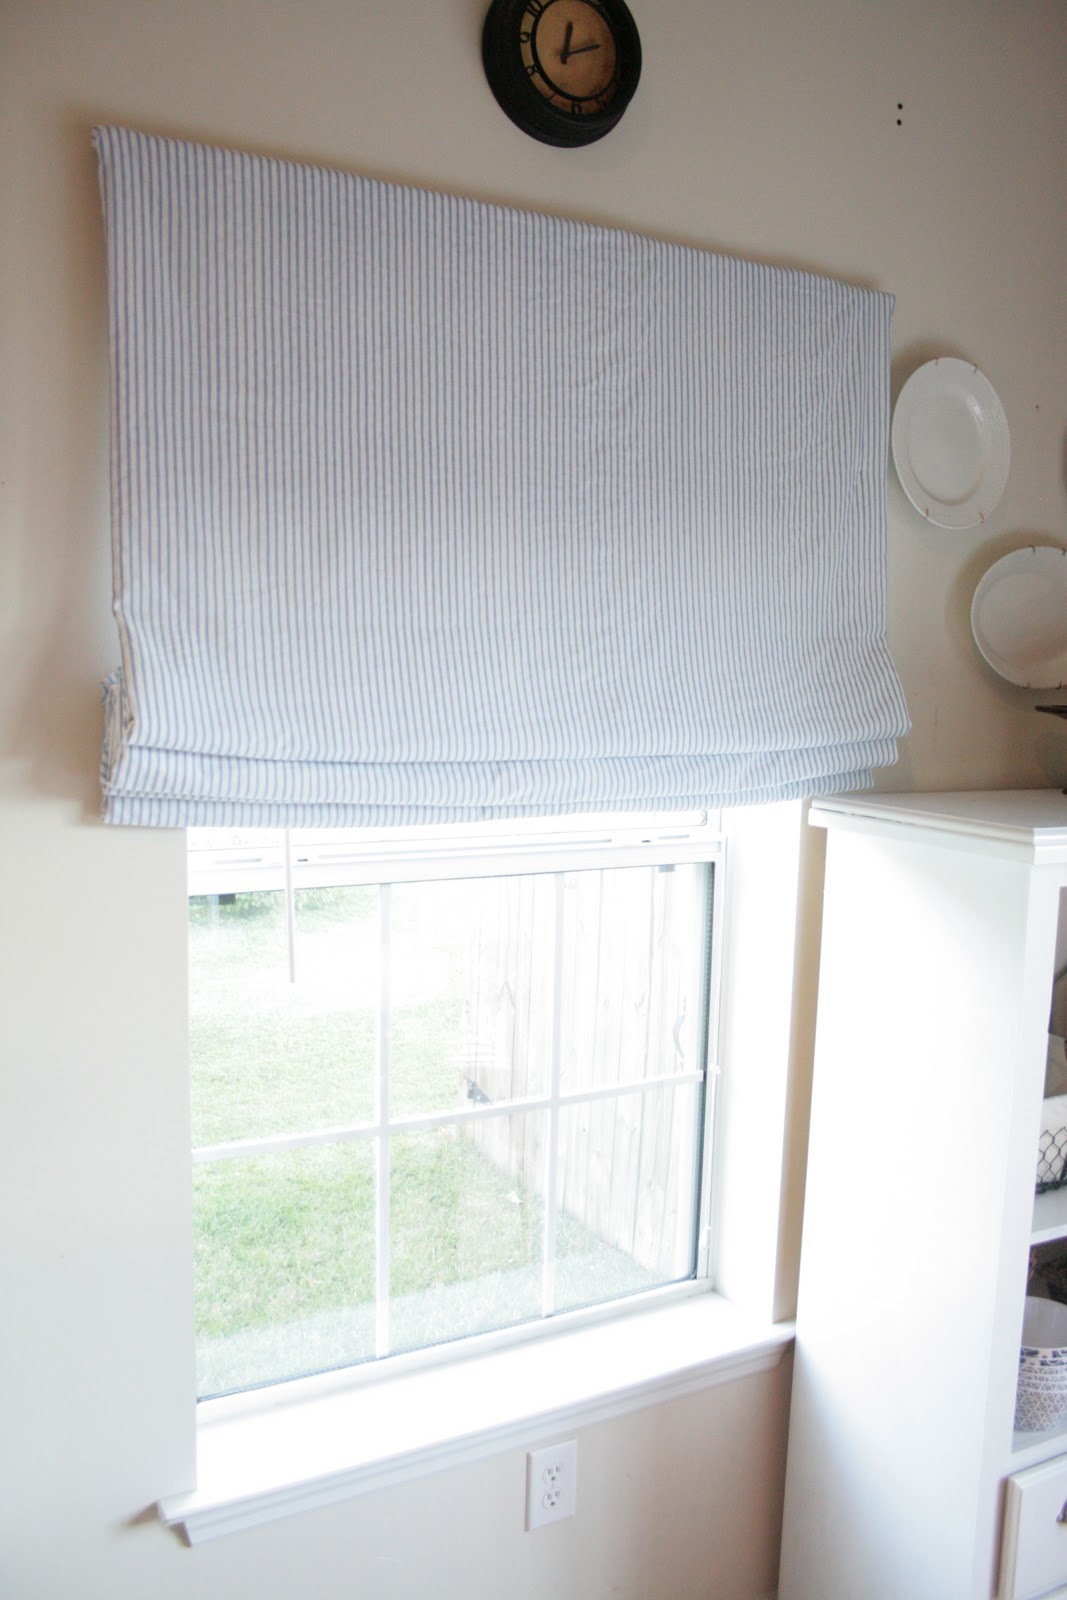
I had curtains here at first, but they were just not sitting right with me. So I took the roman shade from Maddy’s room and decided to jimmy rig a cover and use it in the kitchen. You’ll laugh, but that fabric is from the back of an Ikea duvet cover that I had sitting in my closet. ha! You might ask how I put it on the shade?
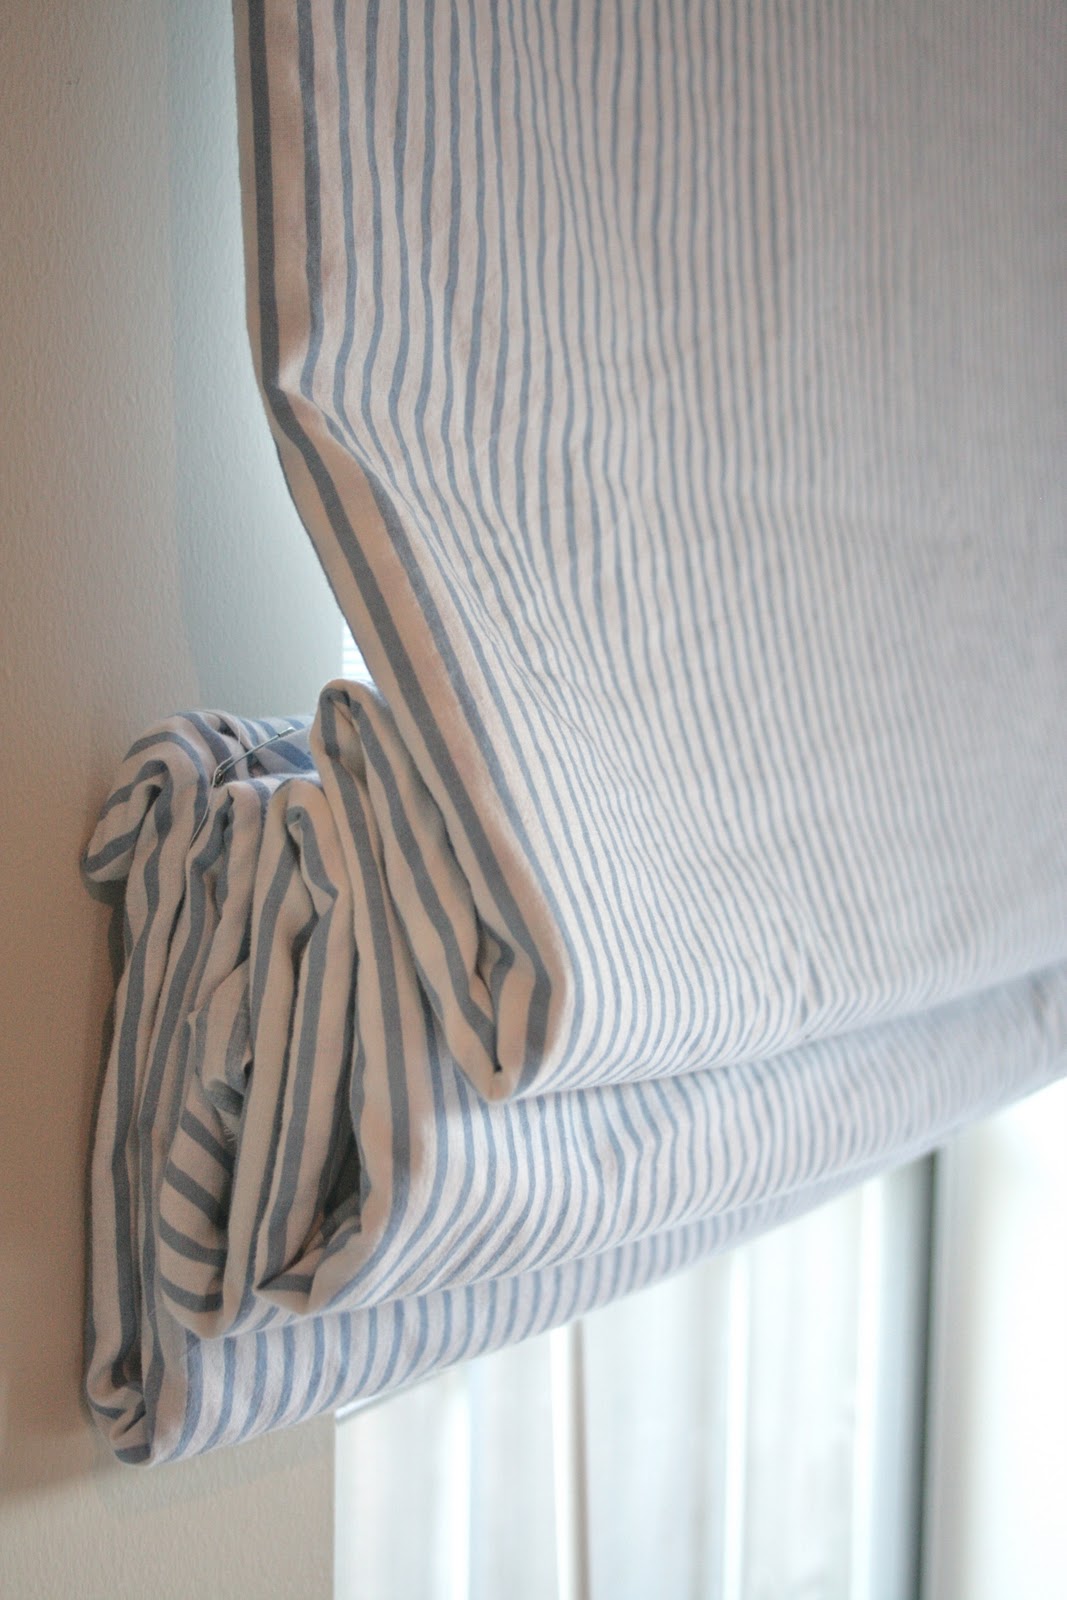
If you look really closely you’ll see the answer to that question…safety pins! No I am not joking. Not only am I the cheapest person alive, but I am also possibly the most likely to short cut something.

But I really love how it turned out.
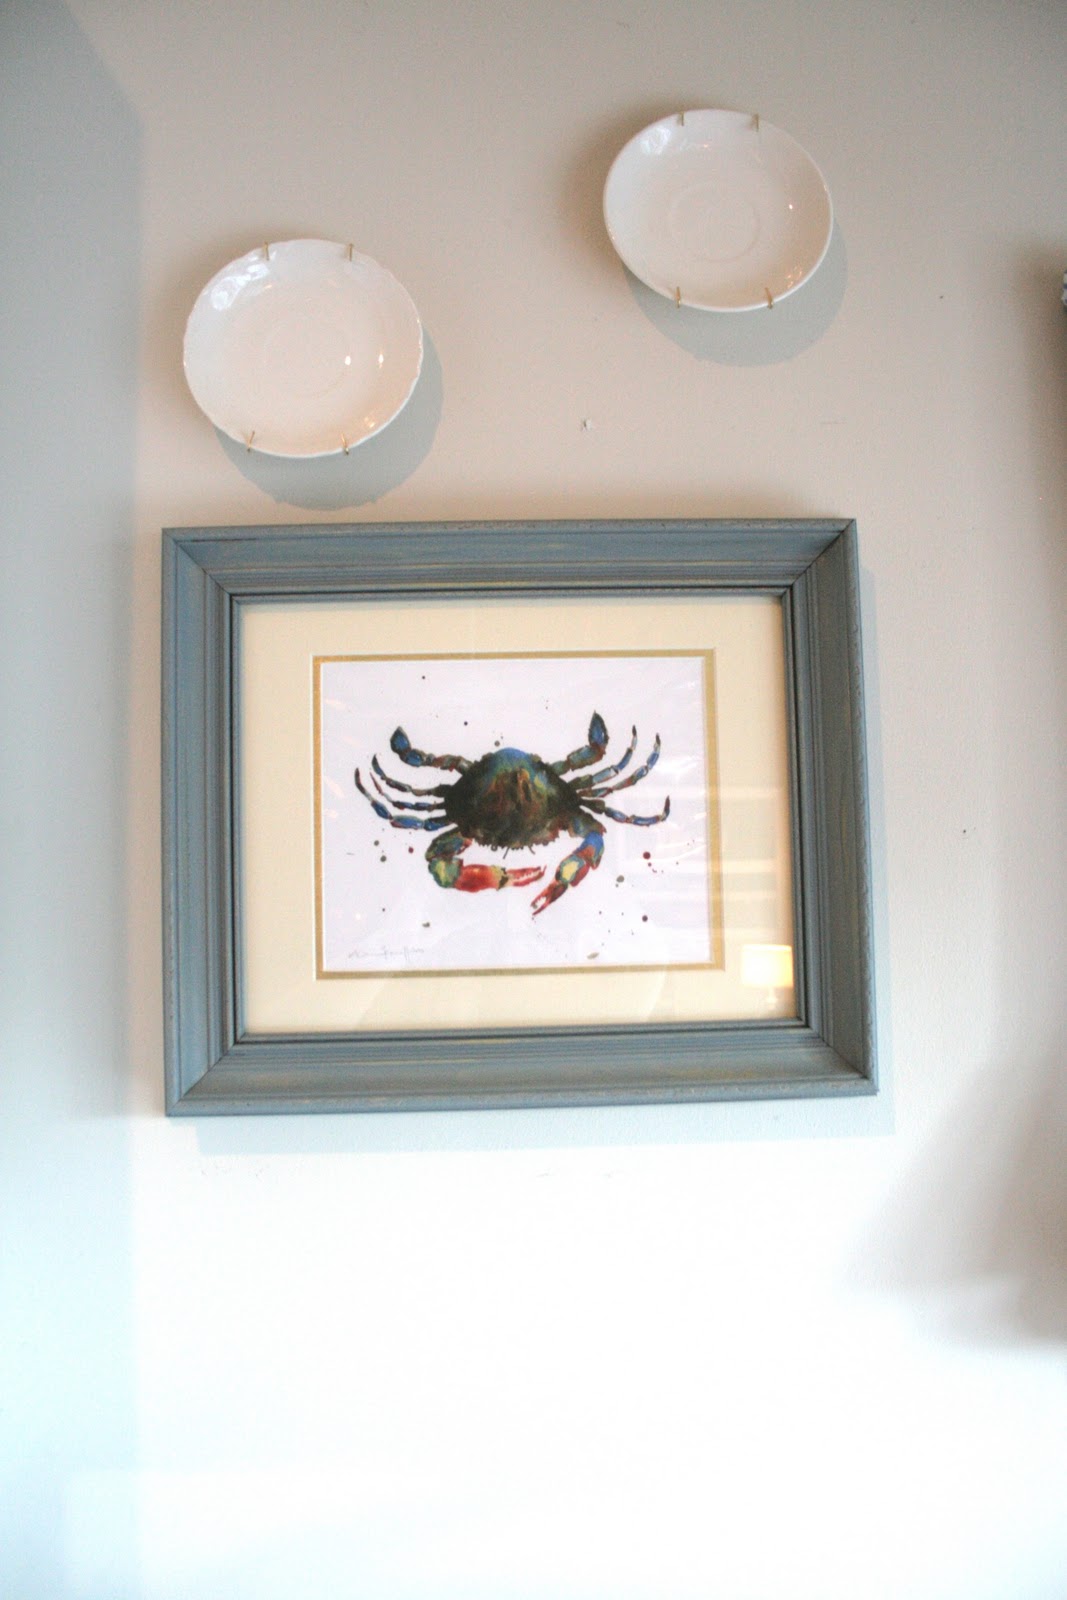
Then I bought a crab on etsy and that kinda made me happy. I dry-brushed a gold frame with the same paint I used on the bottom cabinets.
Woo hoo, I picture of the done cabinets!
I added beadboard to the back of the cabinets to add some interest, and to make my life more difficult. You know how much I love to complicate my life.
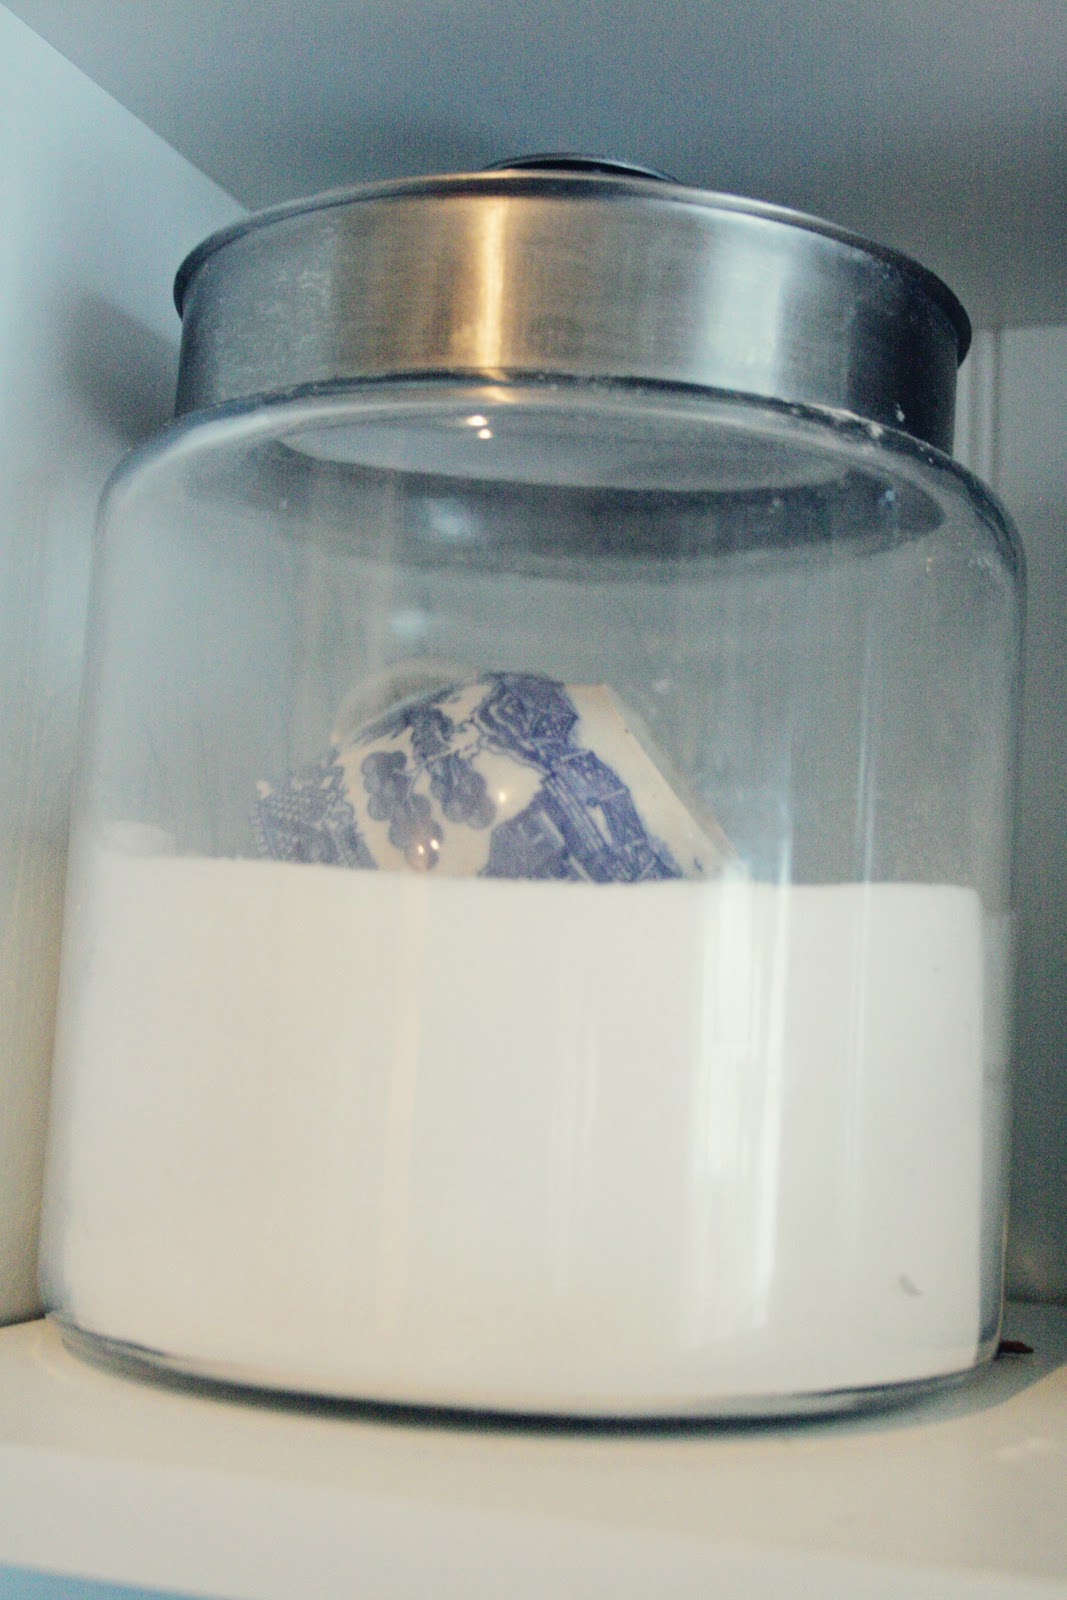
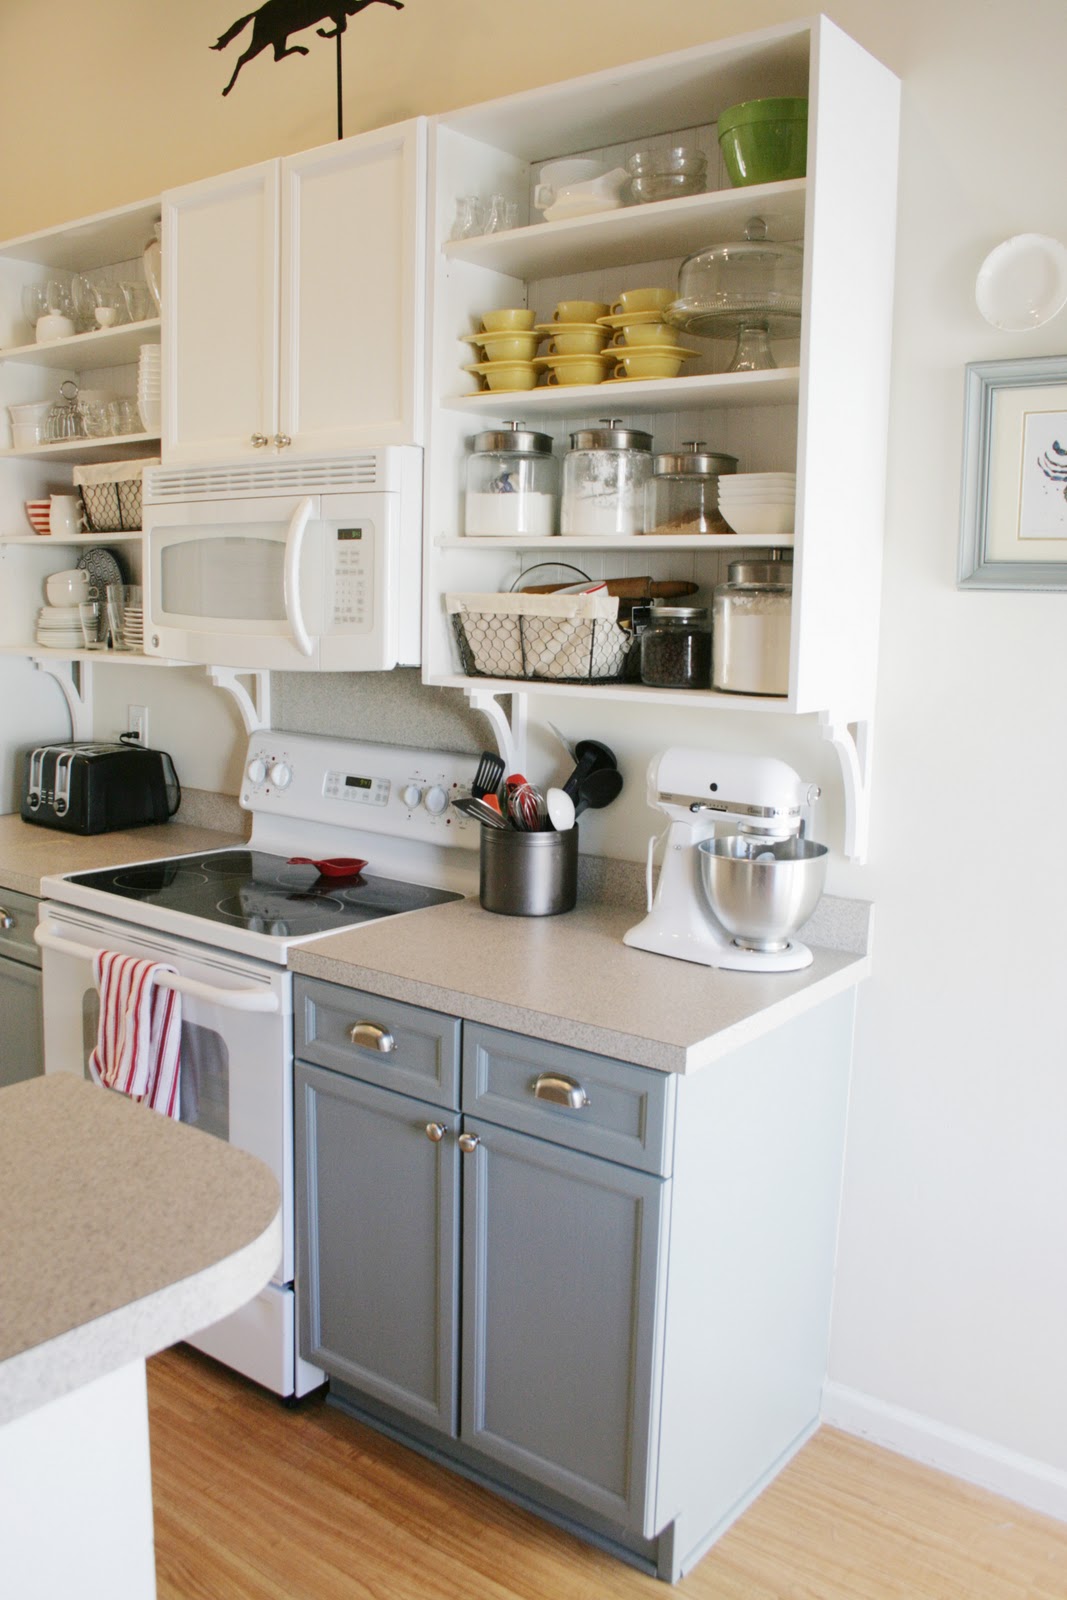
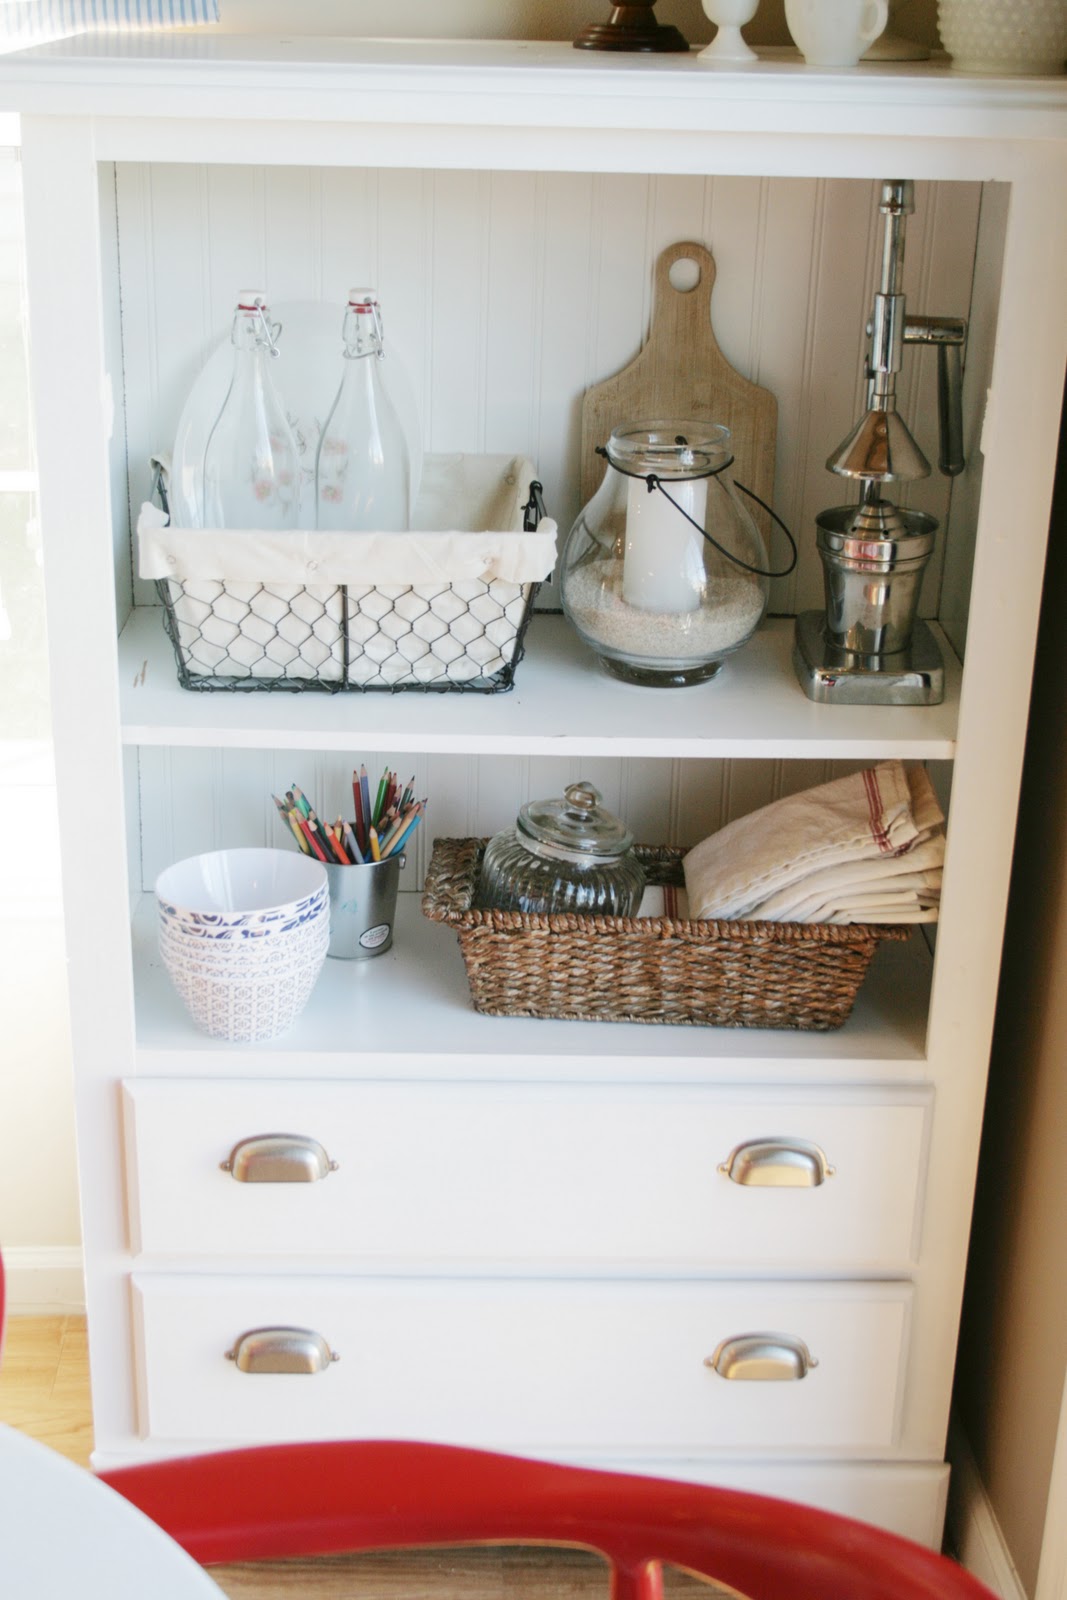
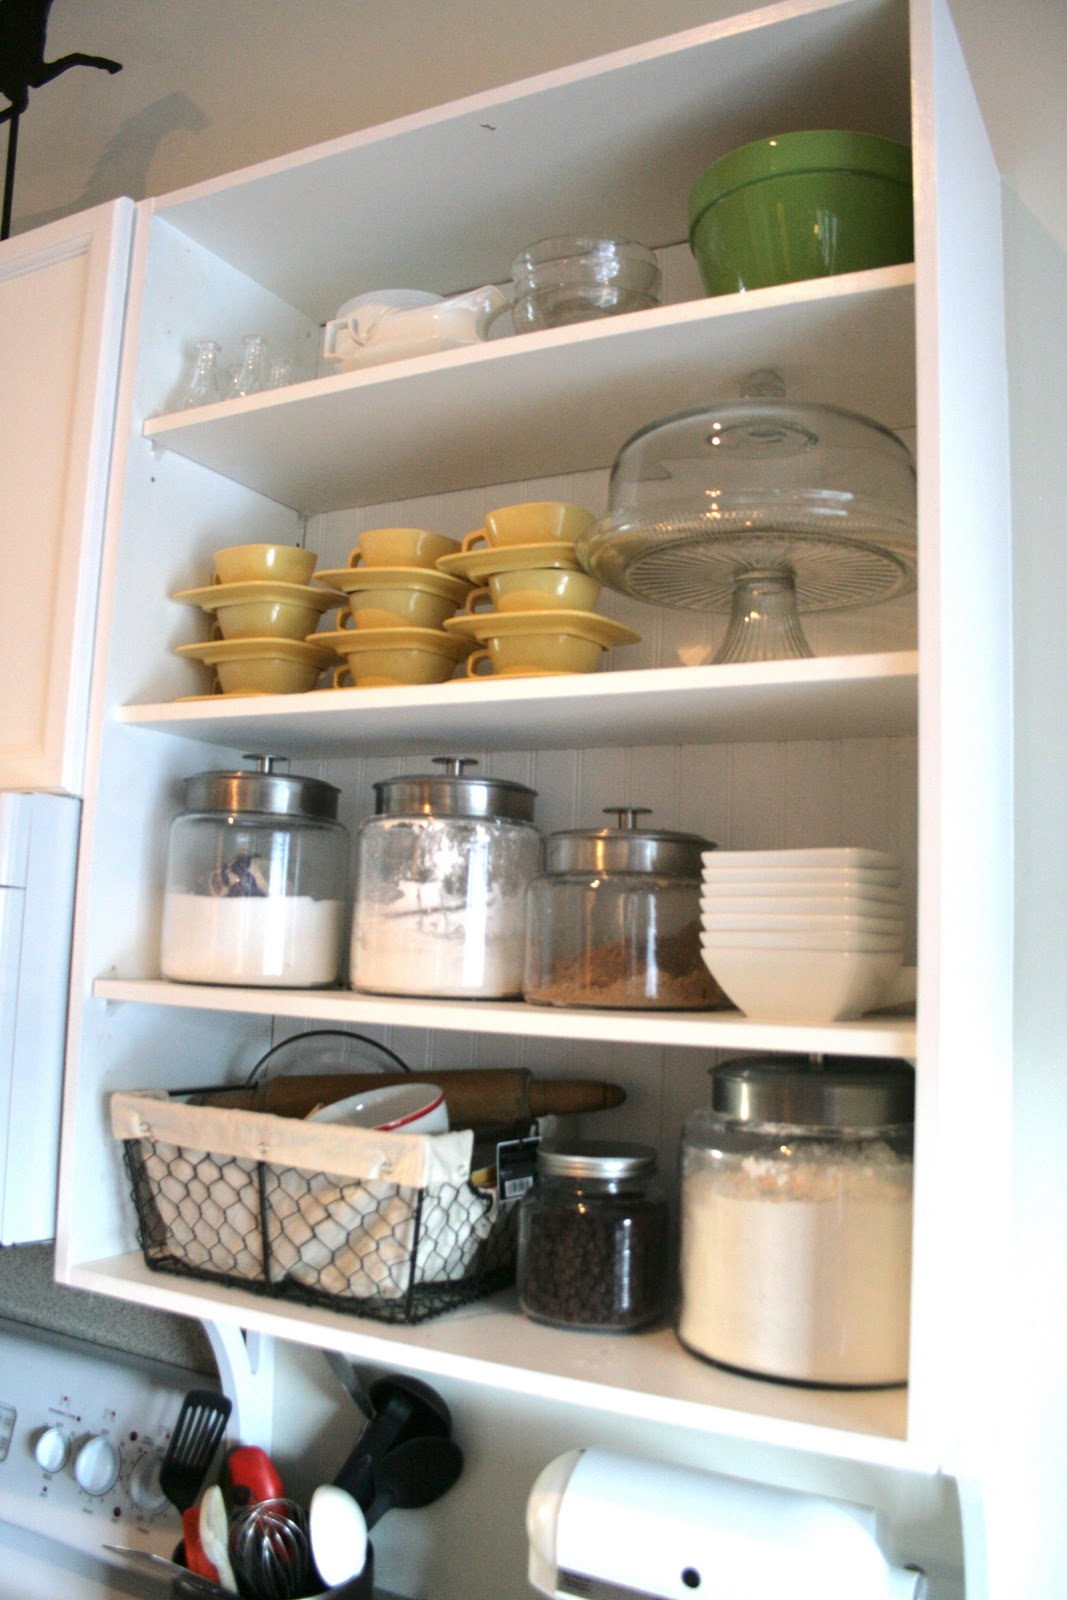
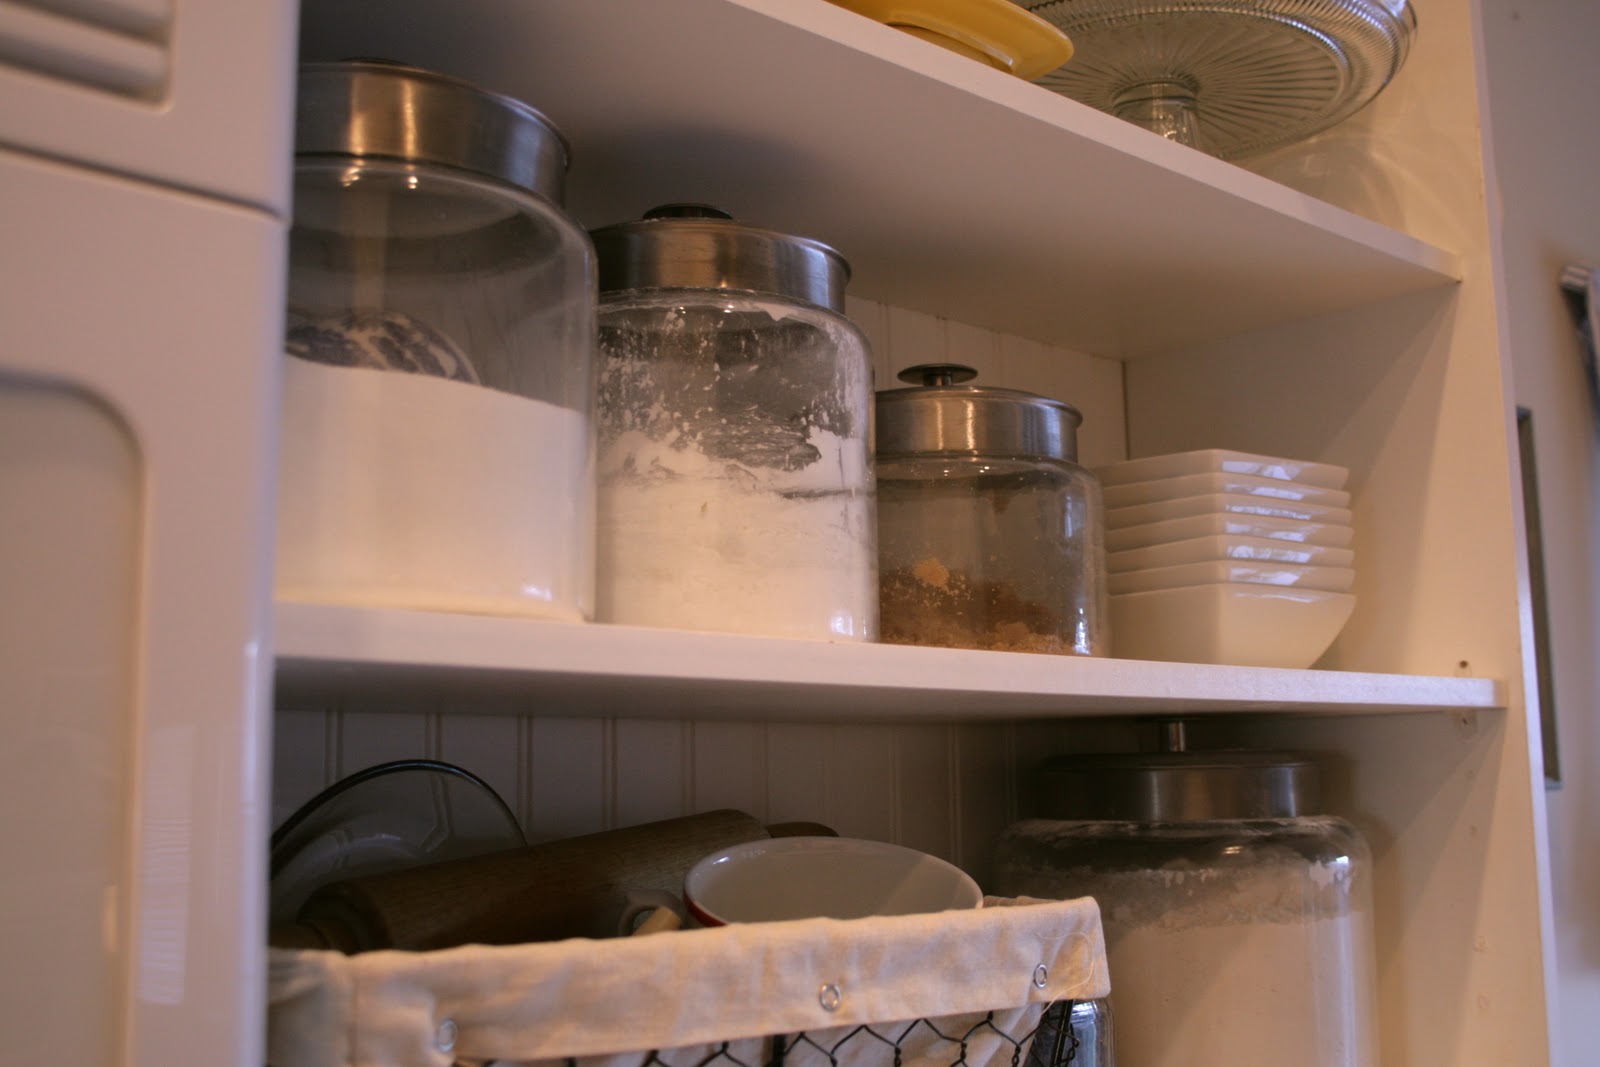
It took me a long time to get everything to my liking on those shelves. I texted pictures to my Mom and sister several times. This is what we ended up with. I love it. And maybe you don’t believe me, but we use everything that you see (although granted the yellow teacups are used less frequently than other things.) 🙂
 |
Oh, and there’s my homemade horse weathervane on top. It is made of foam core board and a dowel. I got the inspiration from this blog, which copied the idea from Ballard designs (although I made mine with a different type of base than she did). I wanted a statement piece over the cabinets that could stand alone, since I’m not a fan of tchotkes on top of cabinets. (no offense to any of you that might have stuff up there, I just can never get it to look right).
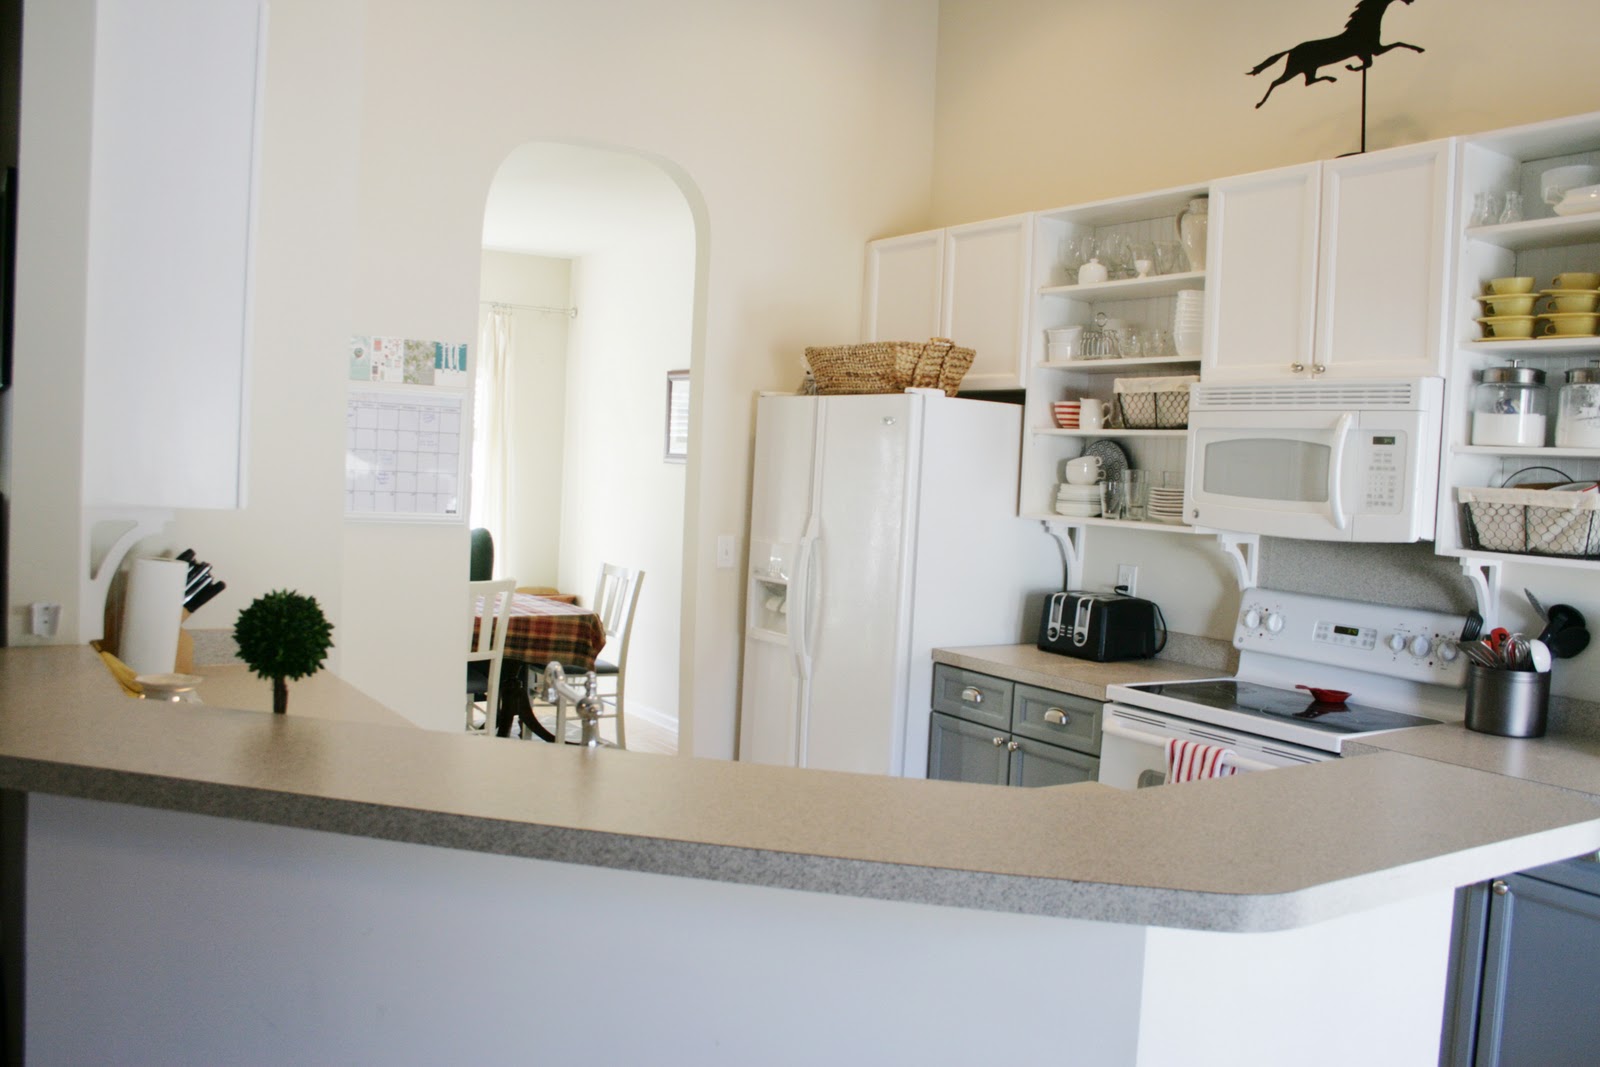
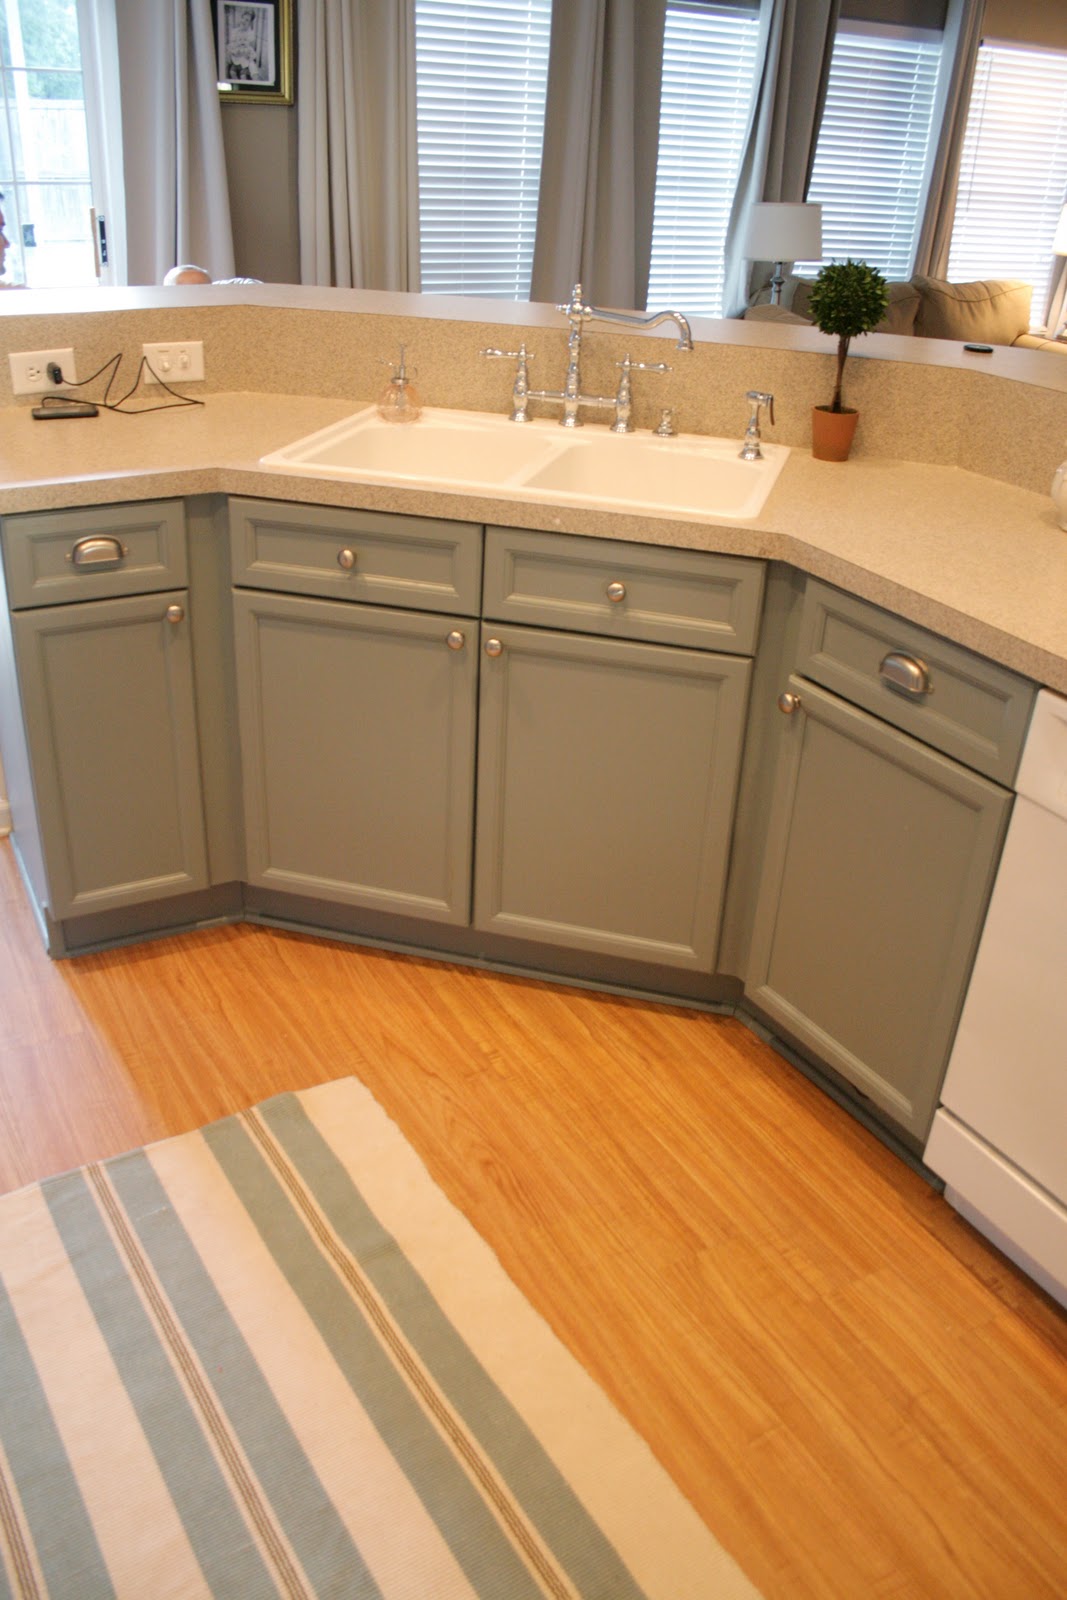
Another view of the kitchen. Don’t you love how my floors look next to the blue of the cabinets?? I also added corbels underneath. They are smallish, but I wanted them that way so that they wouldn’t eat into the useable counter space underneath.
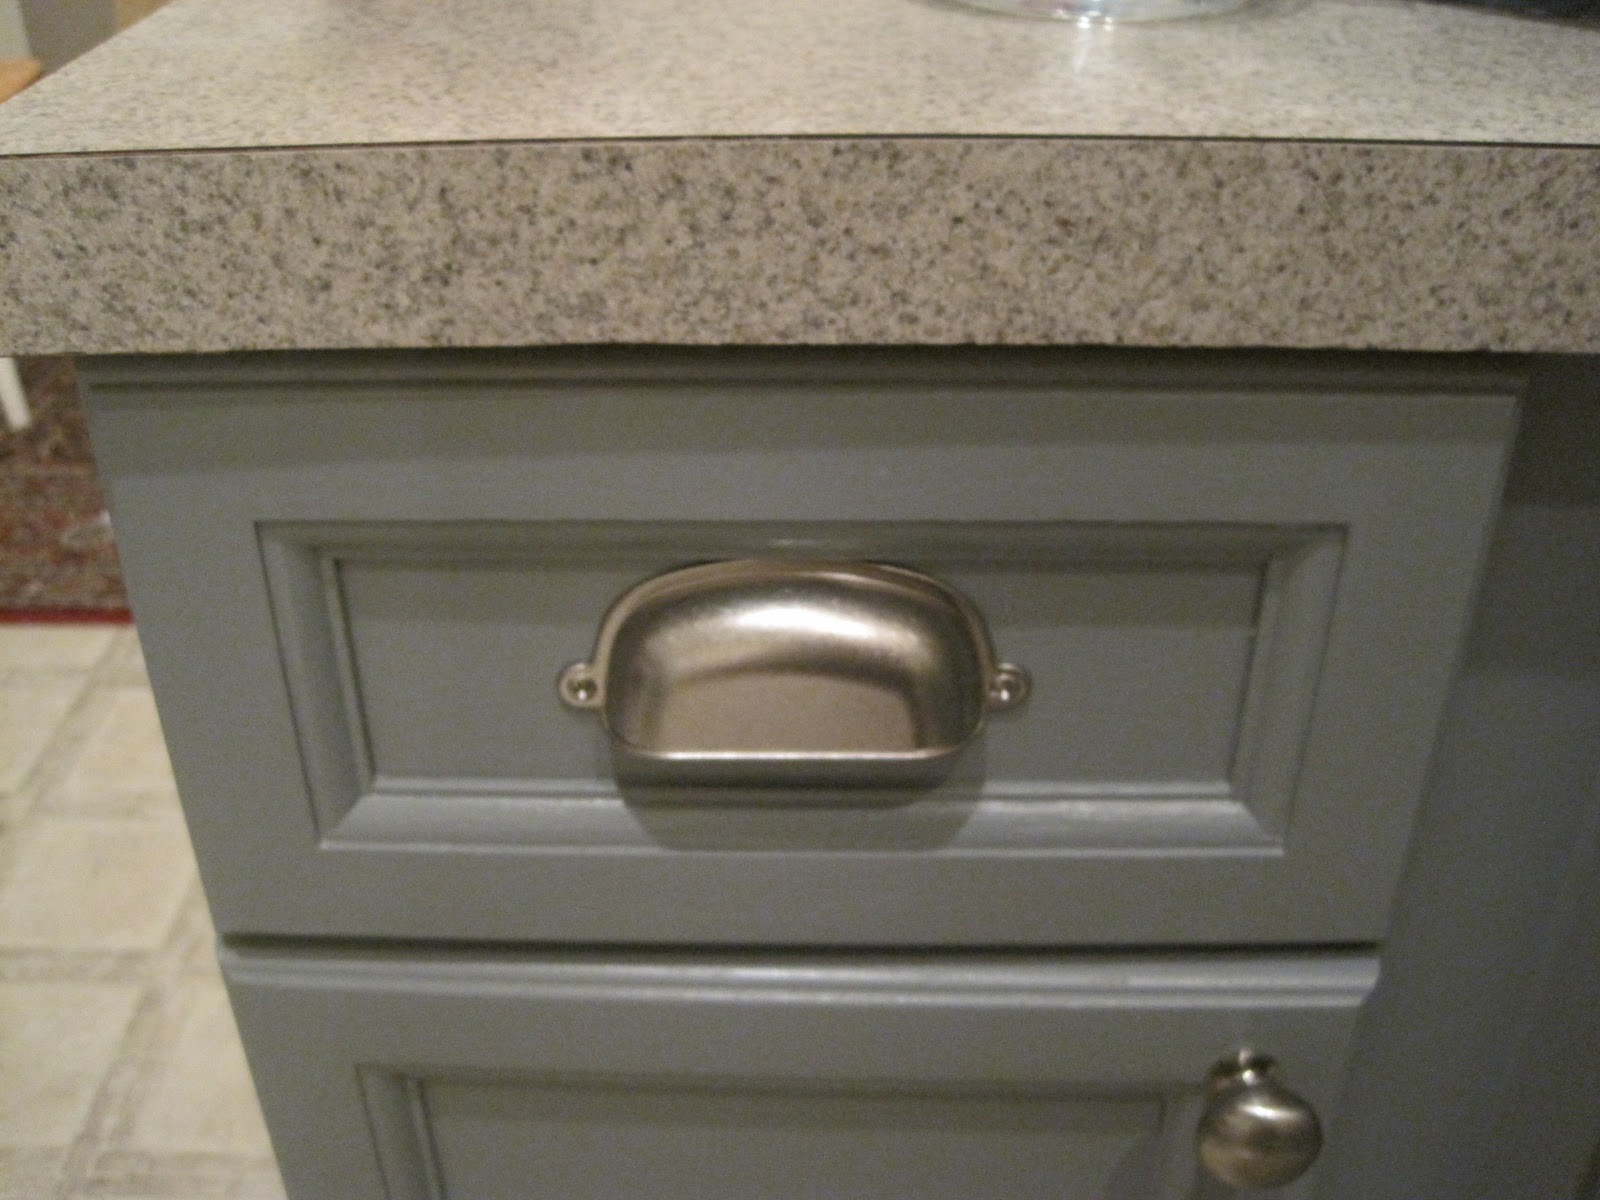
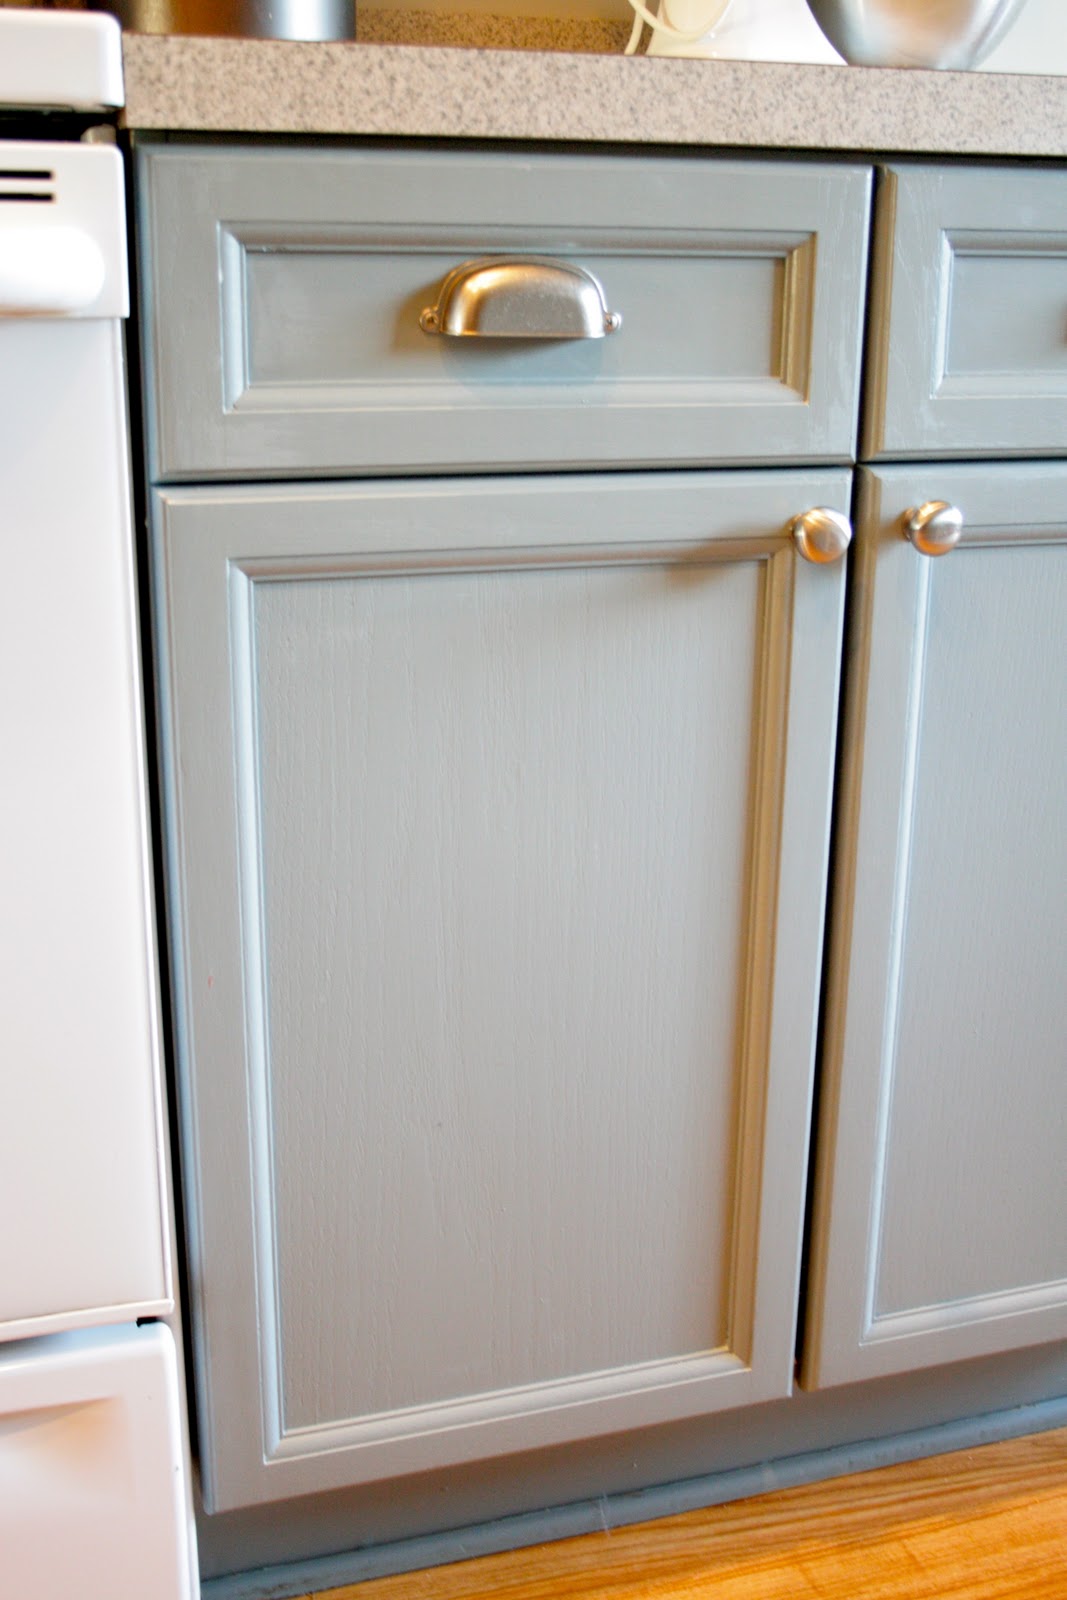
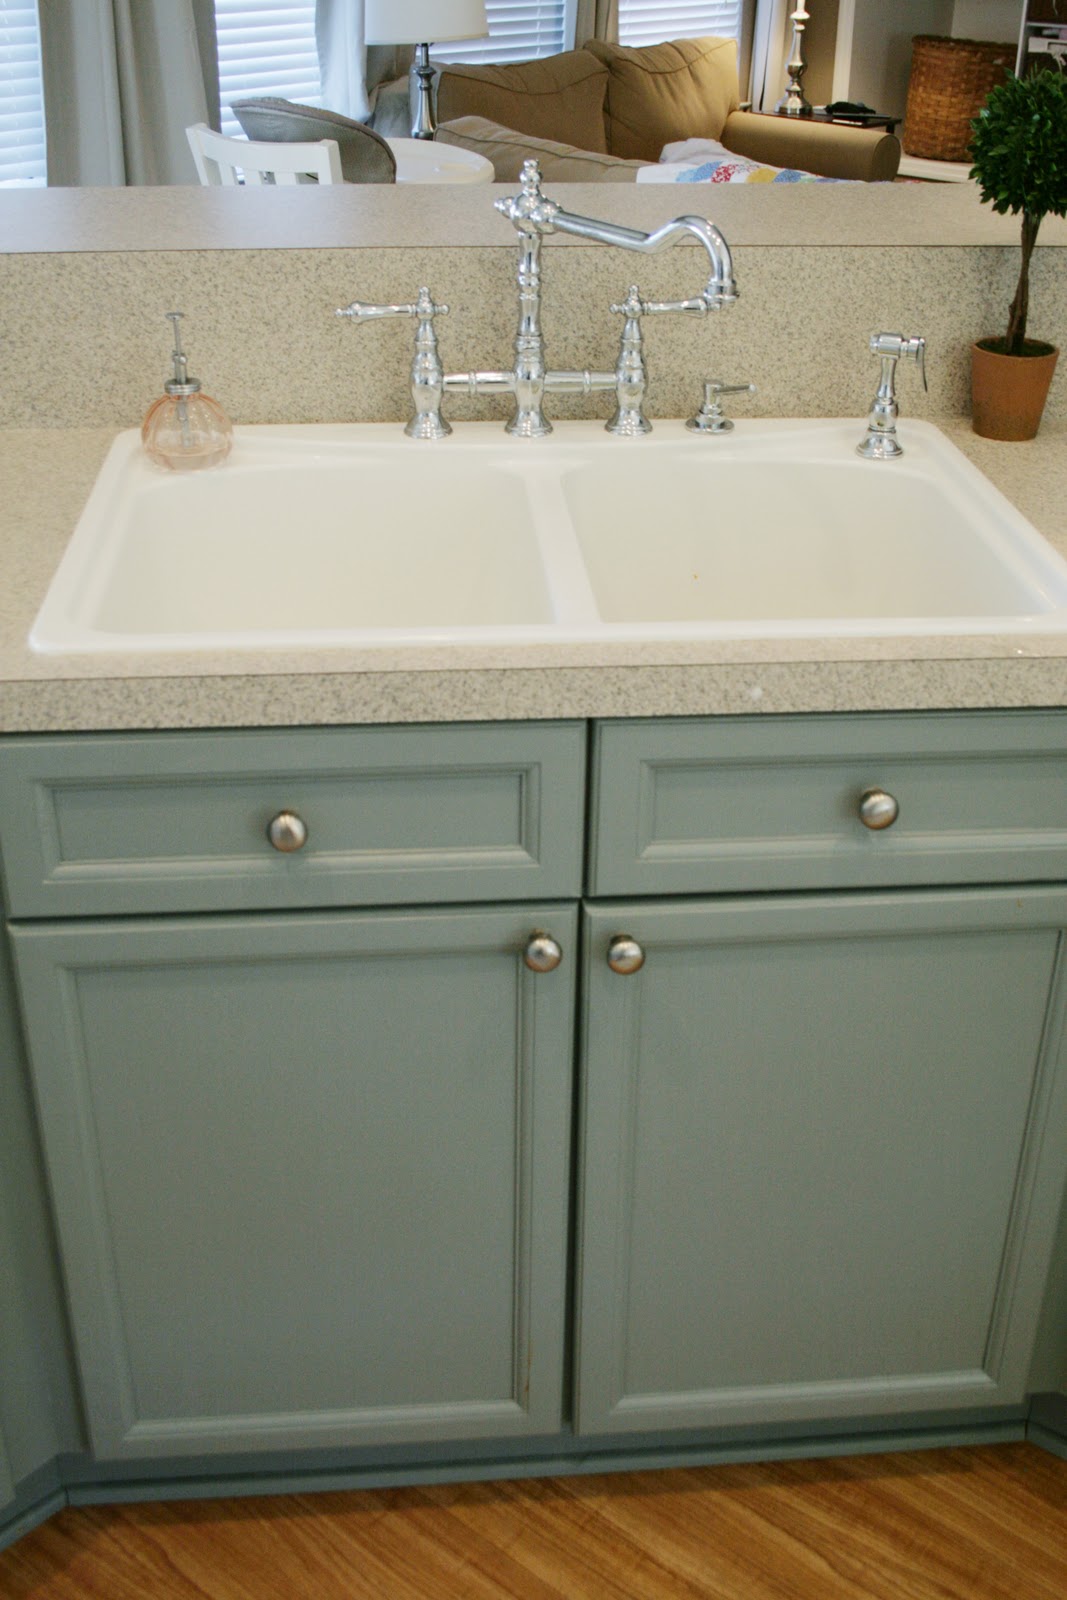
I also took out the old hardware and added these pulls from Home Depot’s Martha Stewart line. They were actually quite cheap for bin pulls and I LOVE how they look.
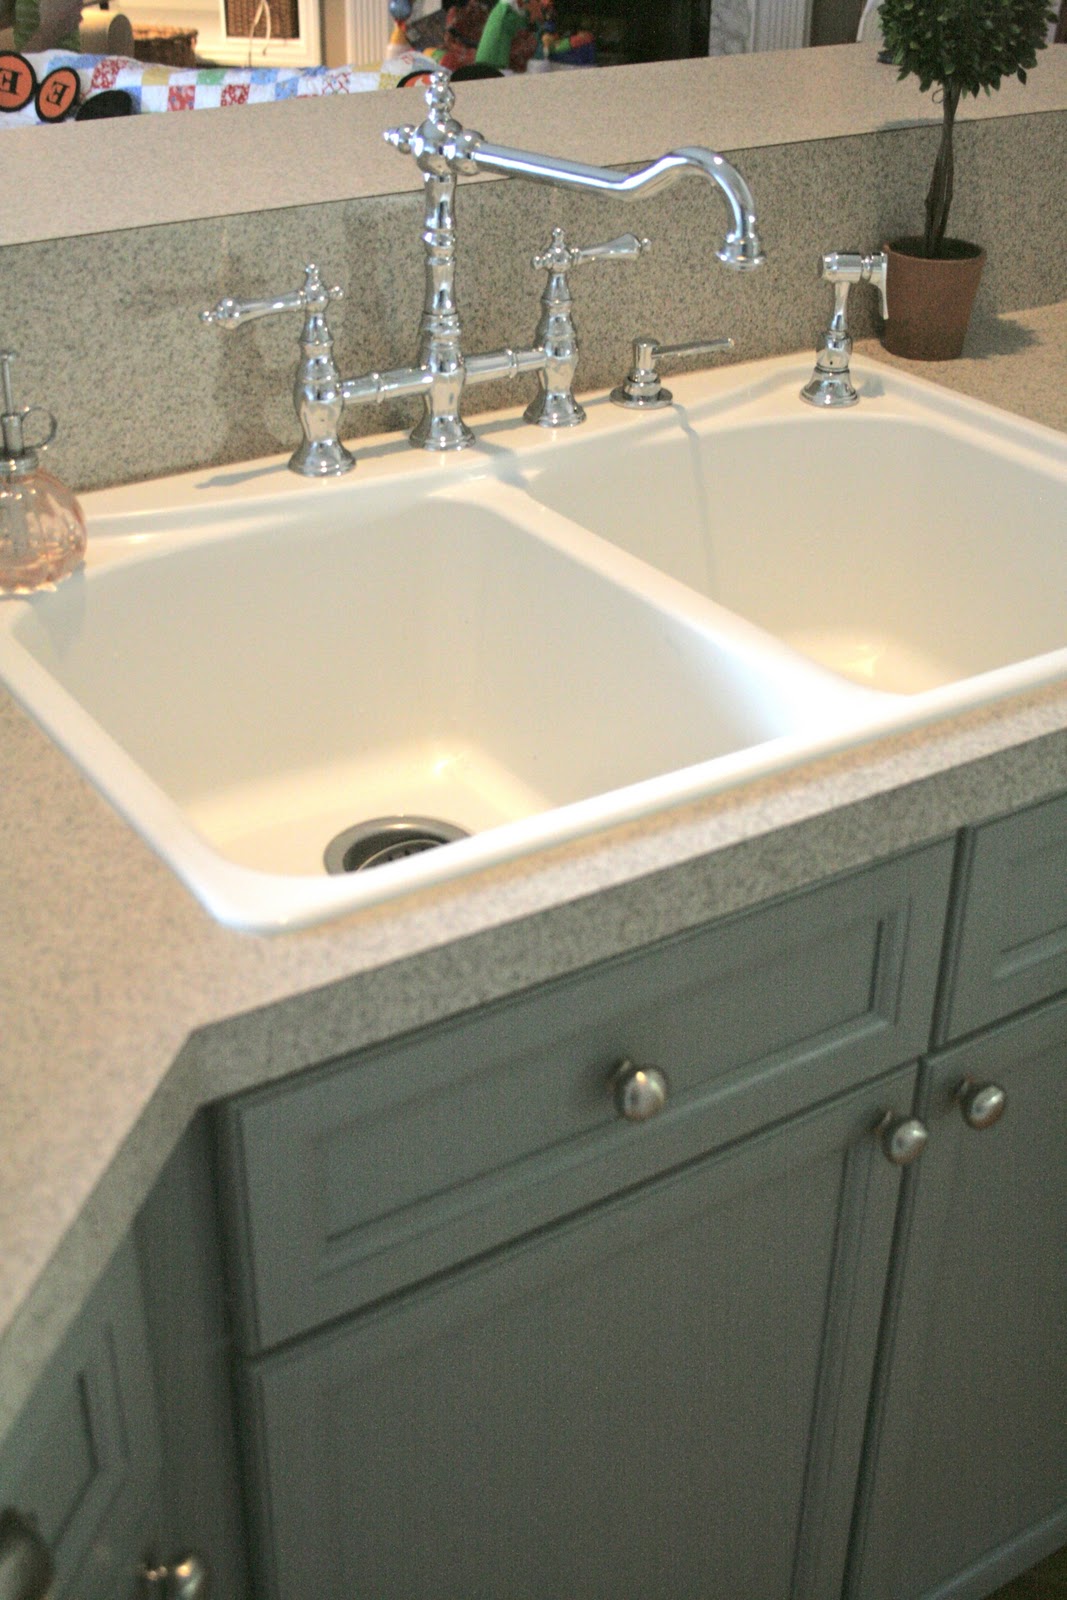
And there she is, the love of my life (well after family, cough cough). My new faucet. Doesn’t she really make the kitchen look like it’s not just trying too hard. Instead, she makes everything look on purpose.
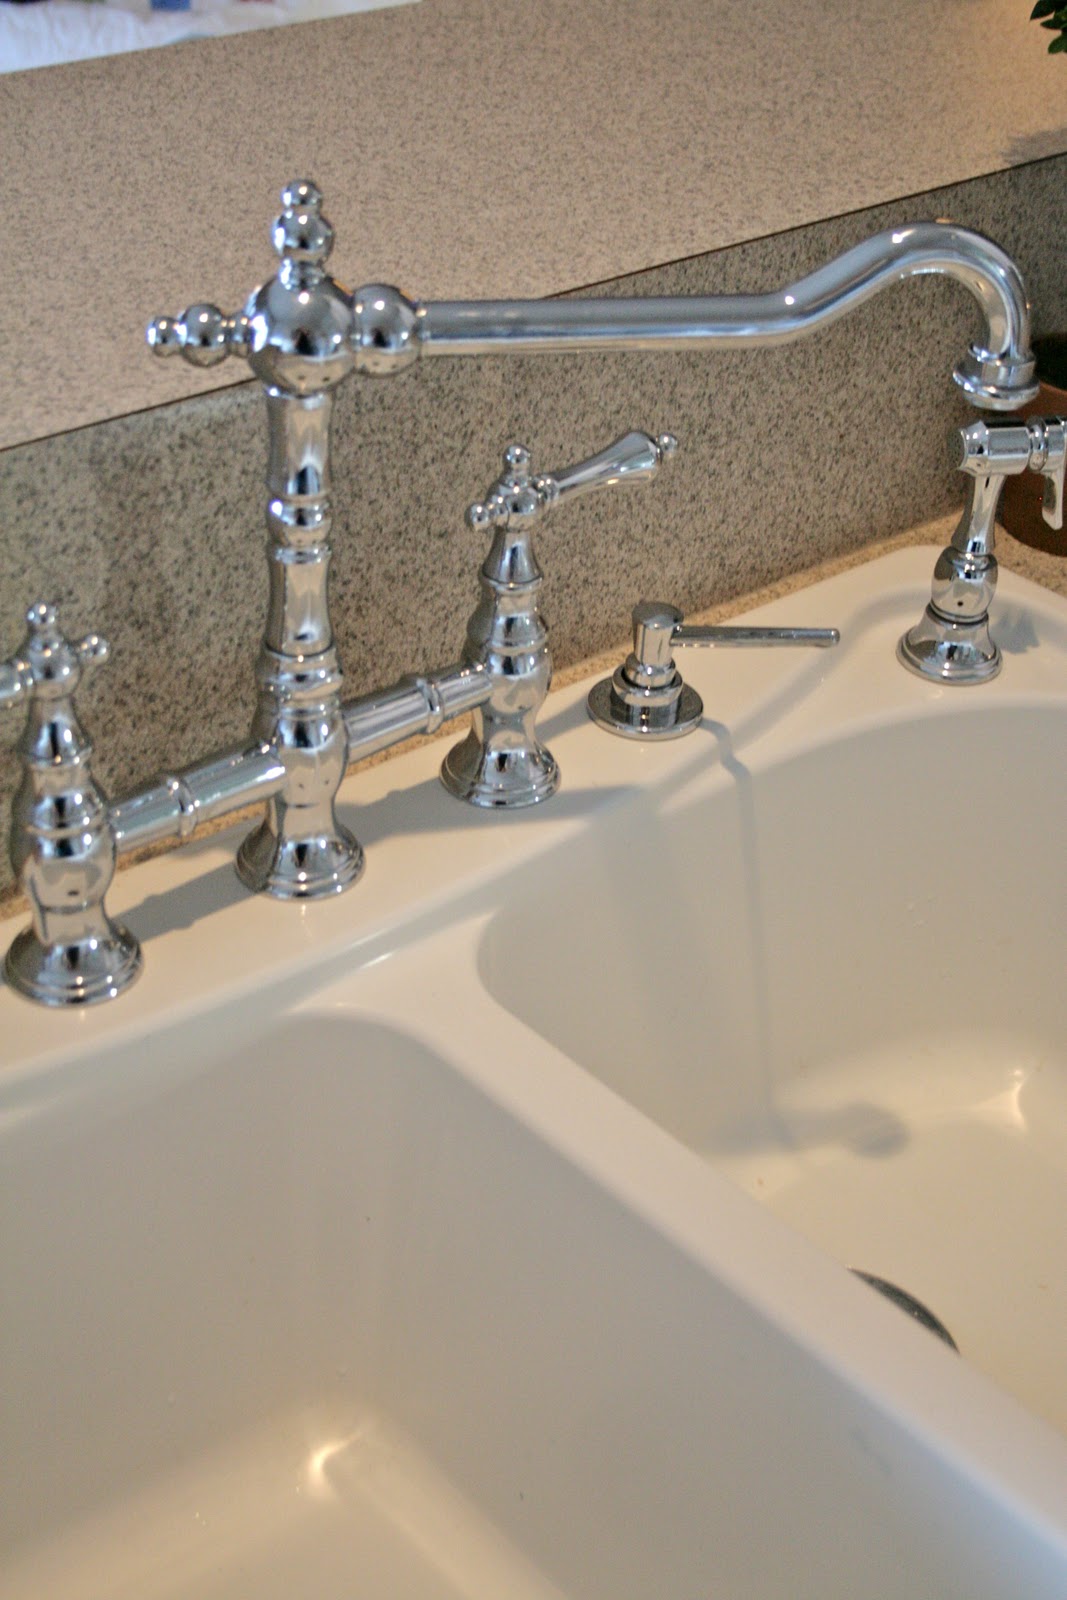
I had the most amazing luck with finding this fixture on craigslist for a fantastic deal, plus the guy installed it for us, which really ended up being worth the money, as our sink gave him a hard time (and he’s a contractor!). We ended up having to add that little soap dispenser because the faucet handle was hitting the sprayer when it was off. We were both super frustrated and unsure what to do, and then I thought of a soap dispenser and he put the sprayer in the other spot. It worked out great!
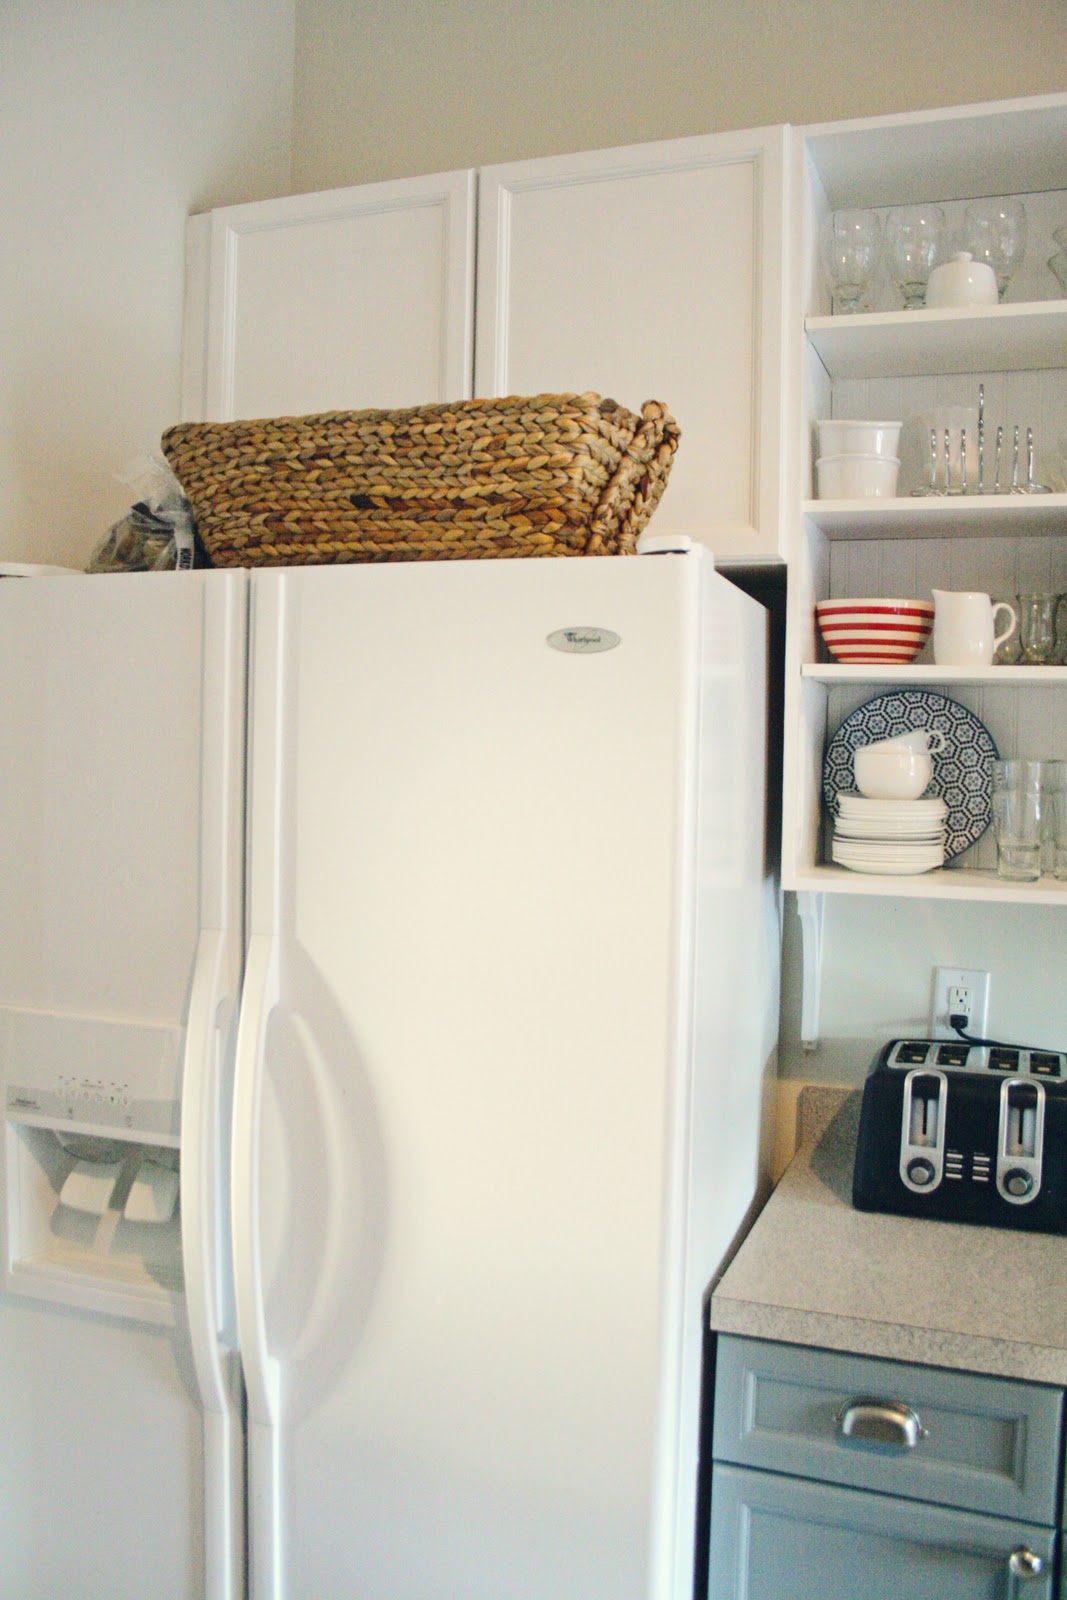
I added a walmart basket on top of the fridge for some extra hidden storage and for looks.

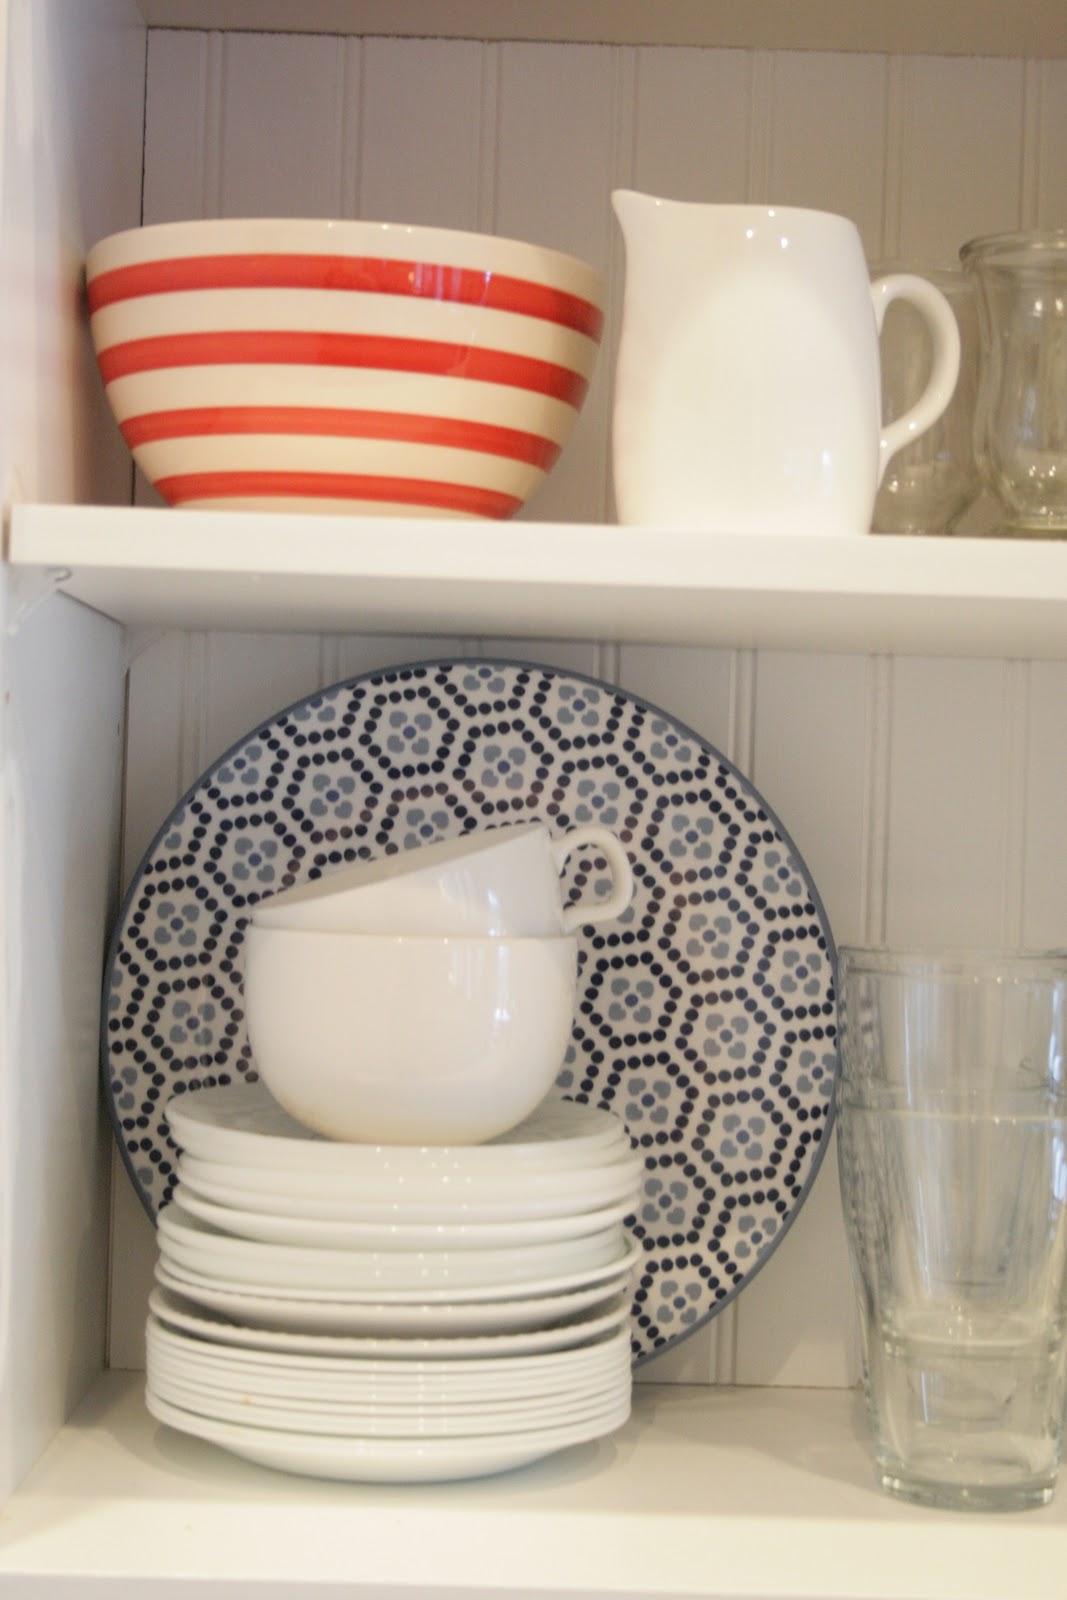
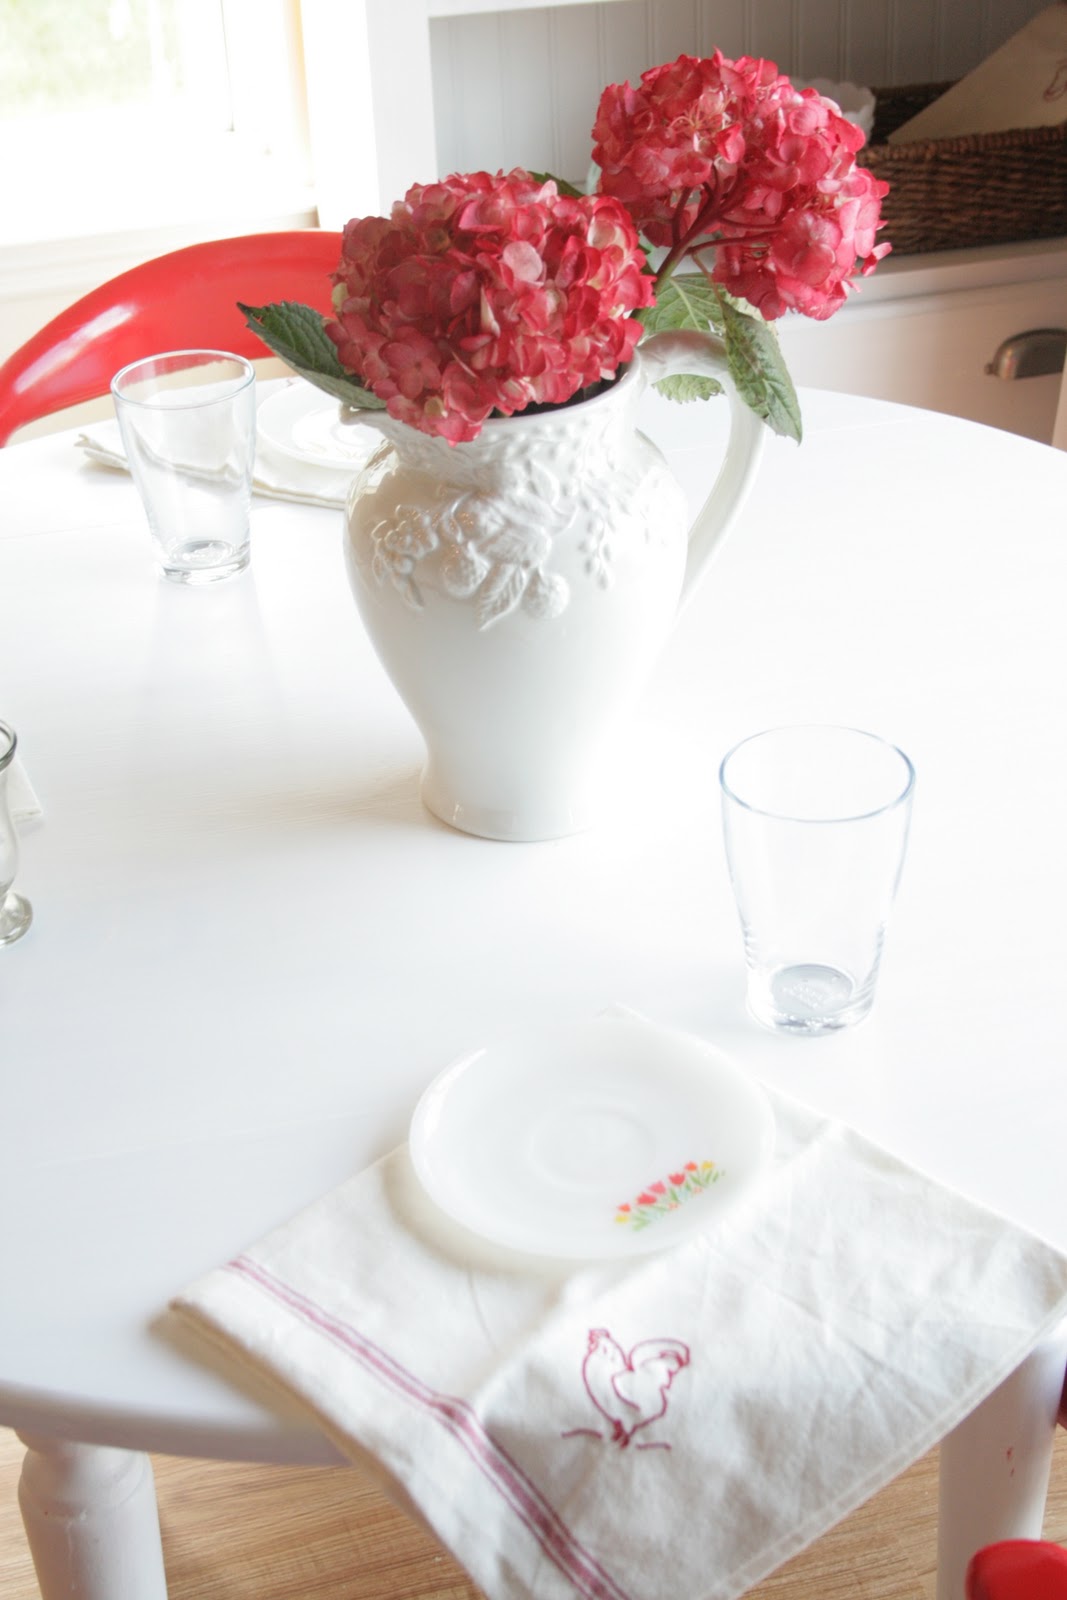
Blue patterned plates are plastic from Target, red stripe bowl from T.J. Max, cups from Ikea, small plates from thrift stores, teacups from a garage sale. I don’t think people believe me when I tell them that I get my things for really cheap. It just takes time to collect. 🙂
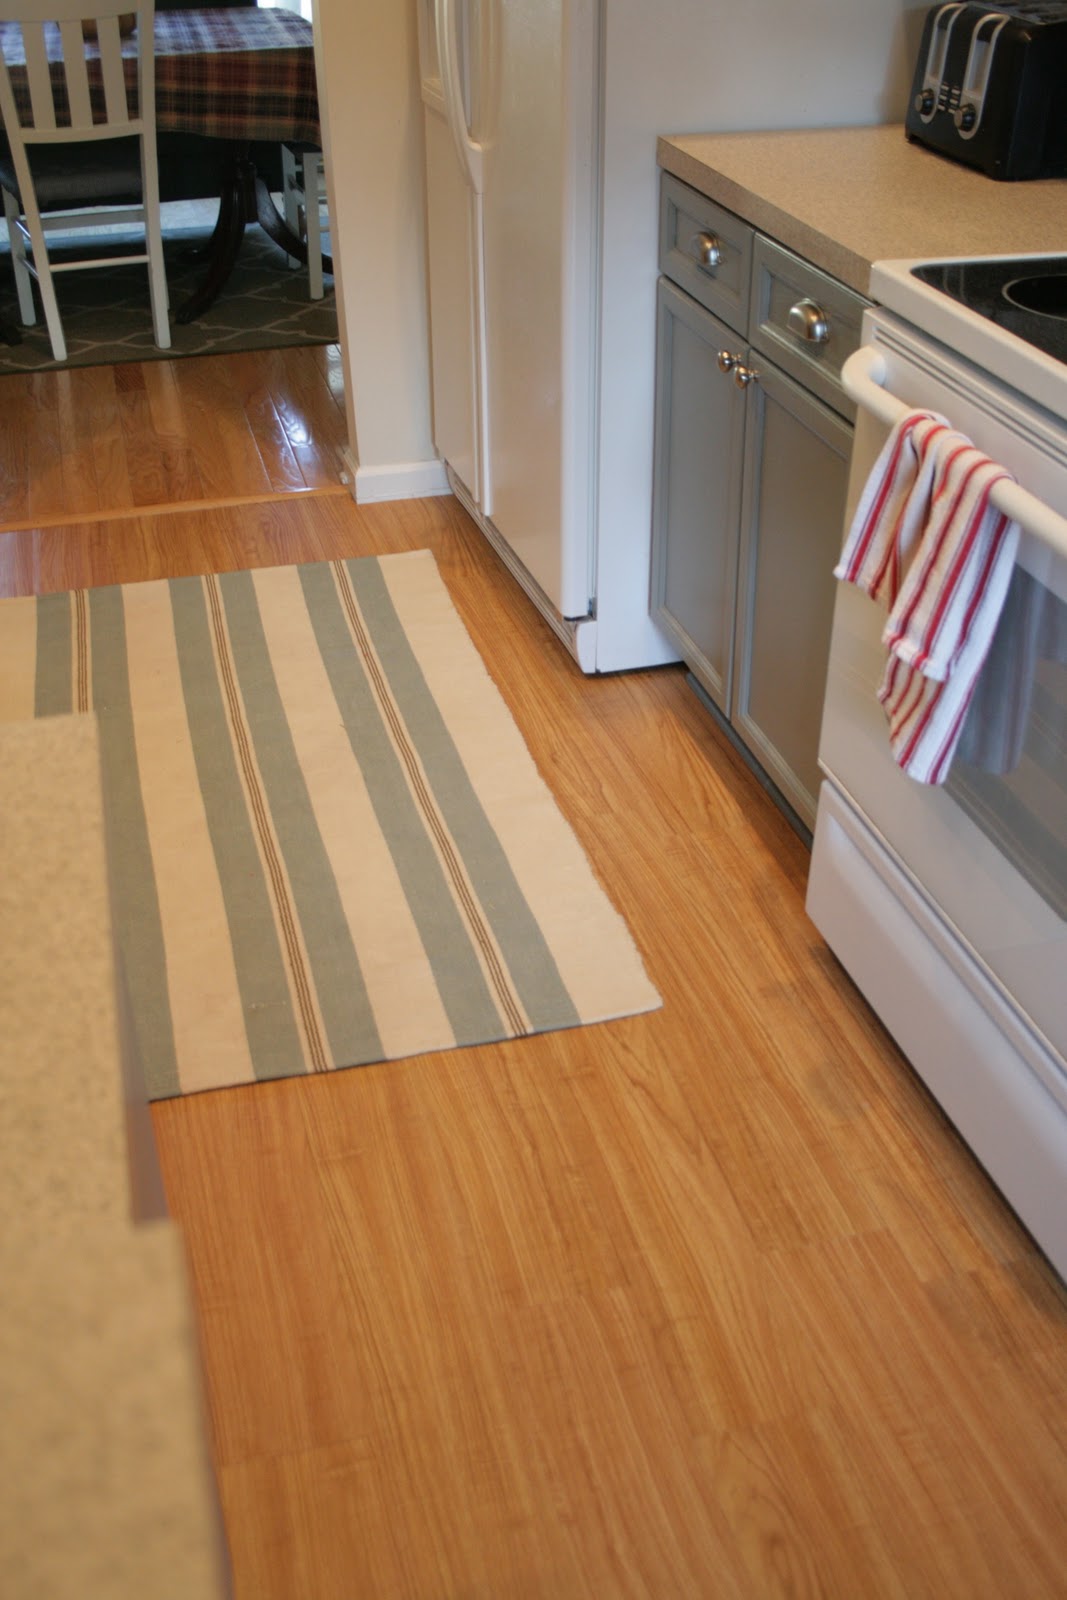
Oh lovely lovely floor. I stole the rug from our laundry room.

This is for those that wonder about wood grain. You can barely barely see it in this photo.
I tried really hard to capture it here. Like I said, it really isn’t that noticeable.

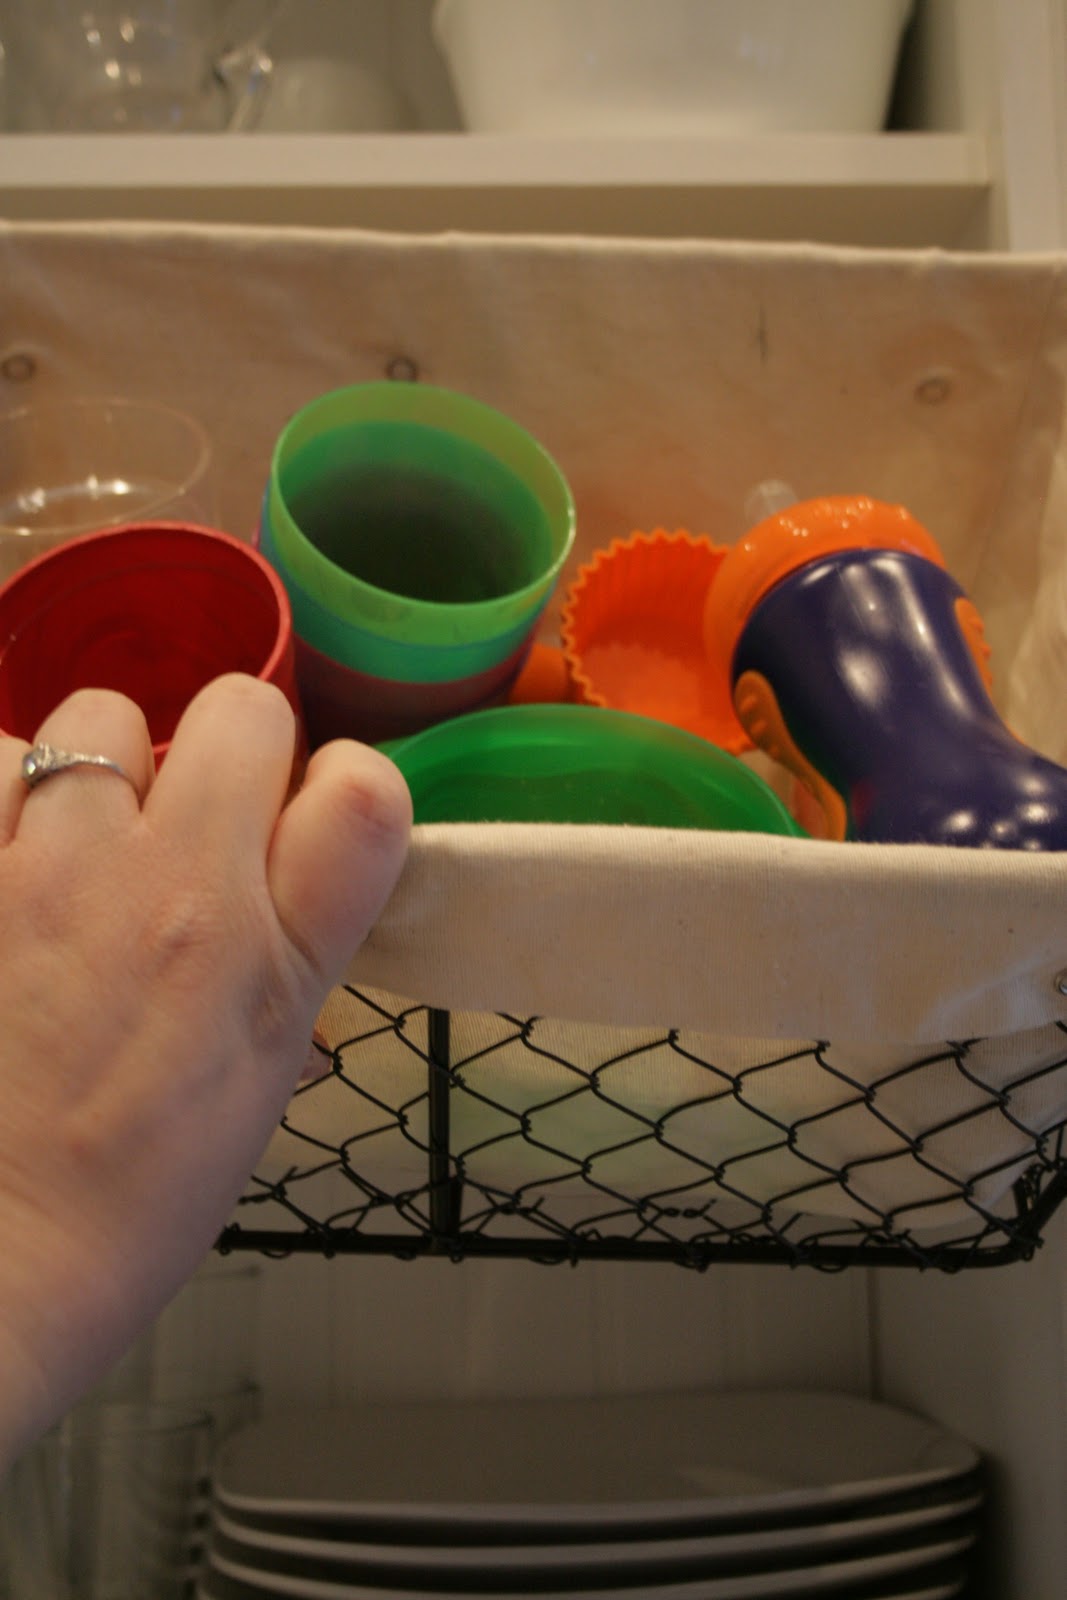
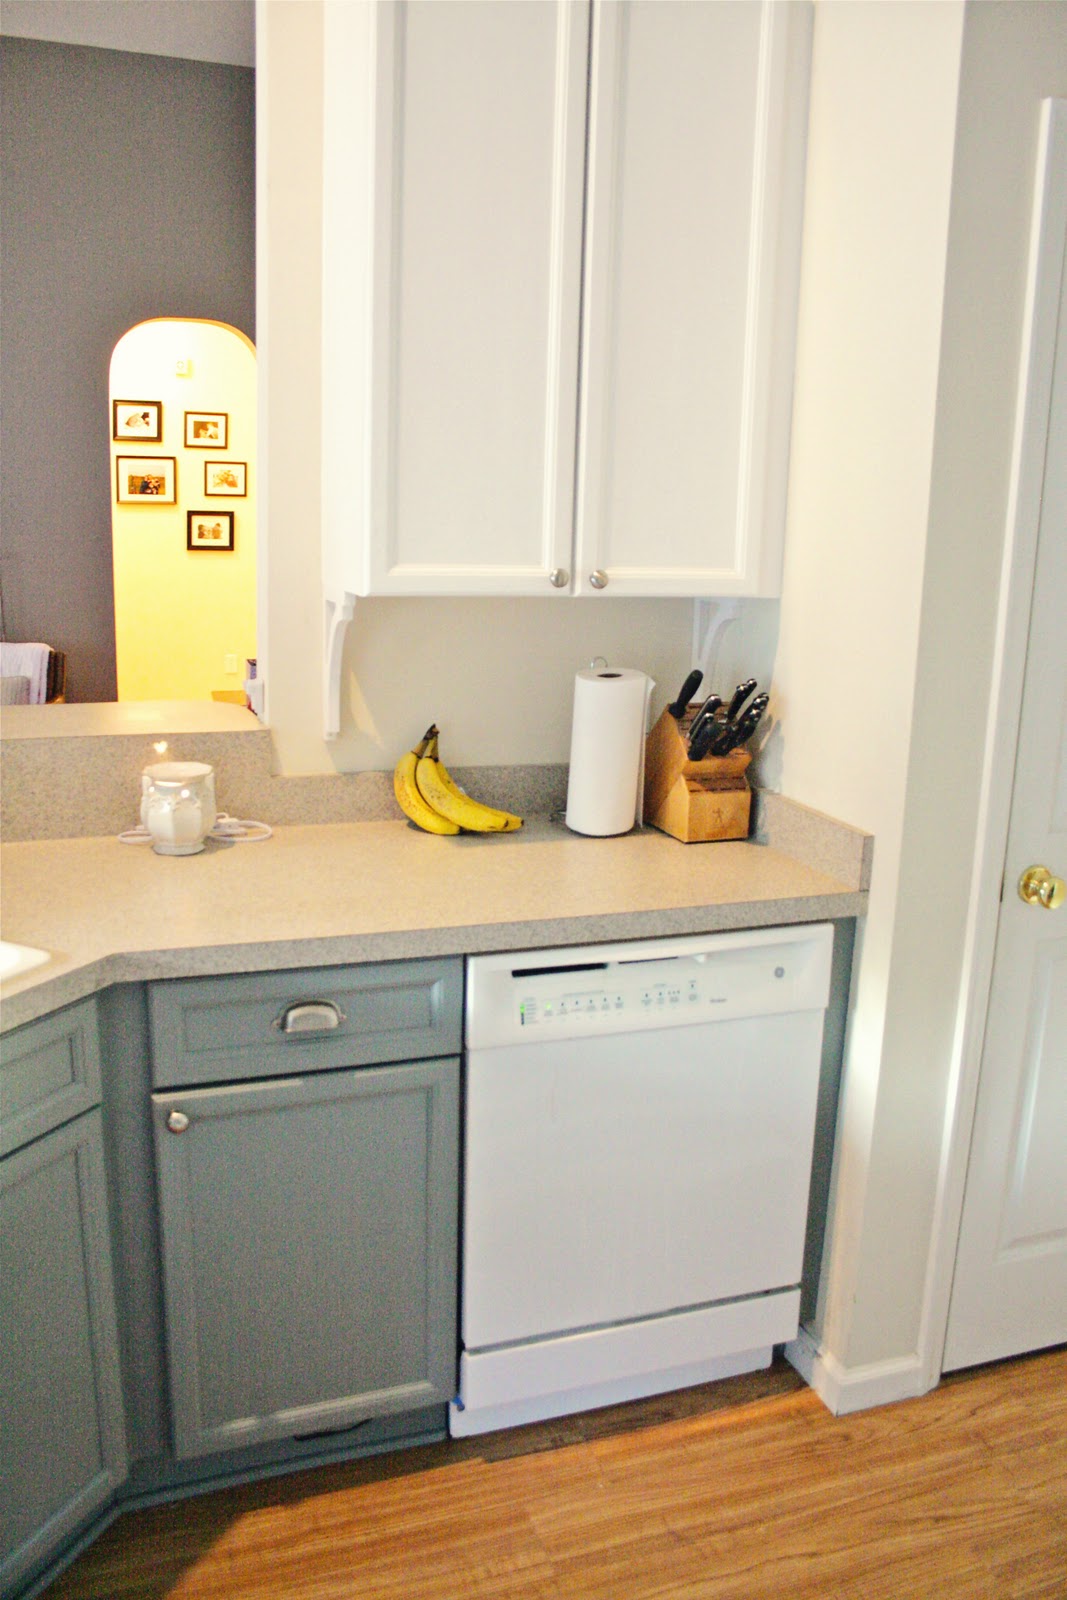
Where I keep the inevitable plastic stuff that you need with kids. Genius right? Basket found at Target.
Fake topiary also a must
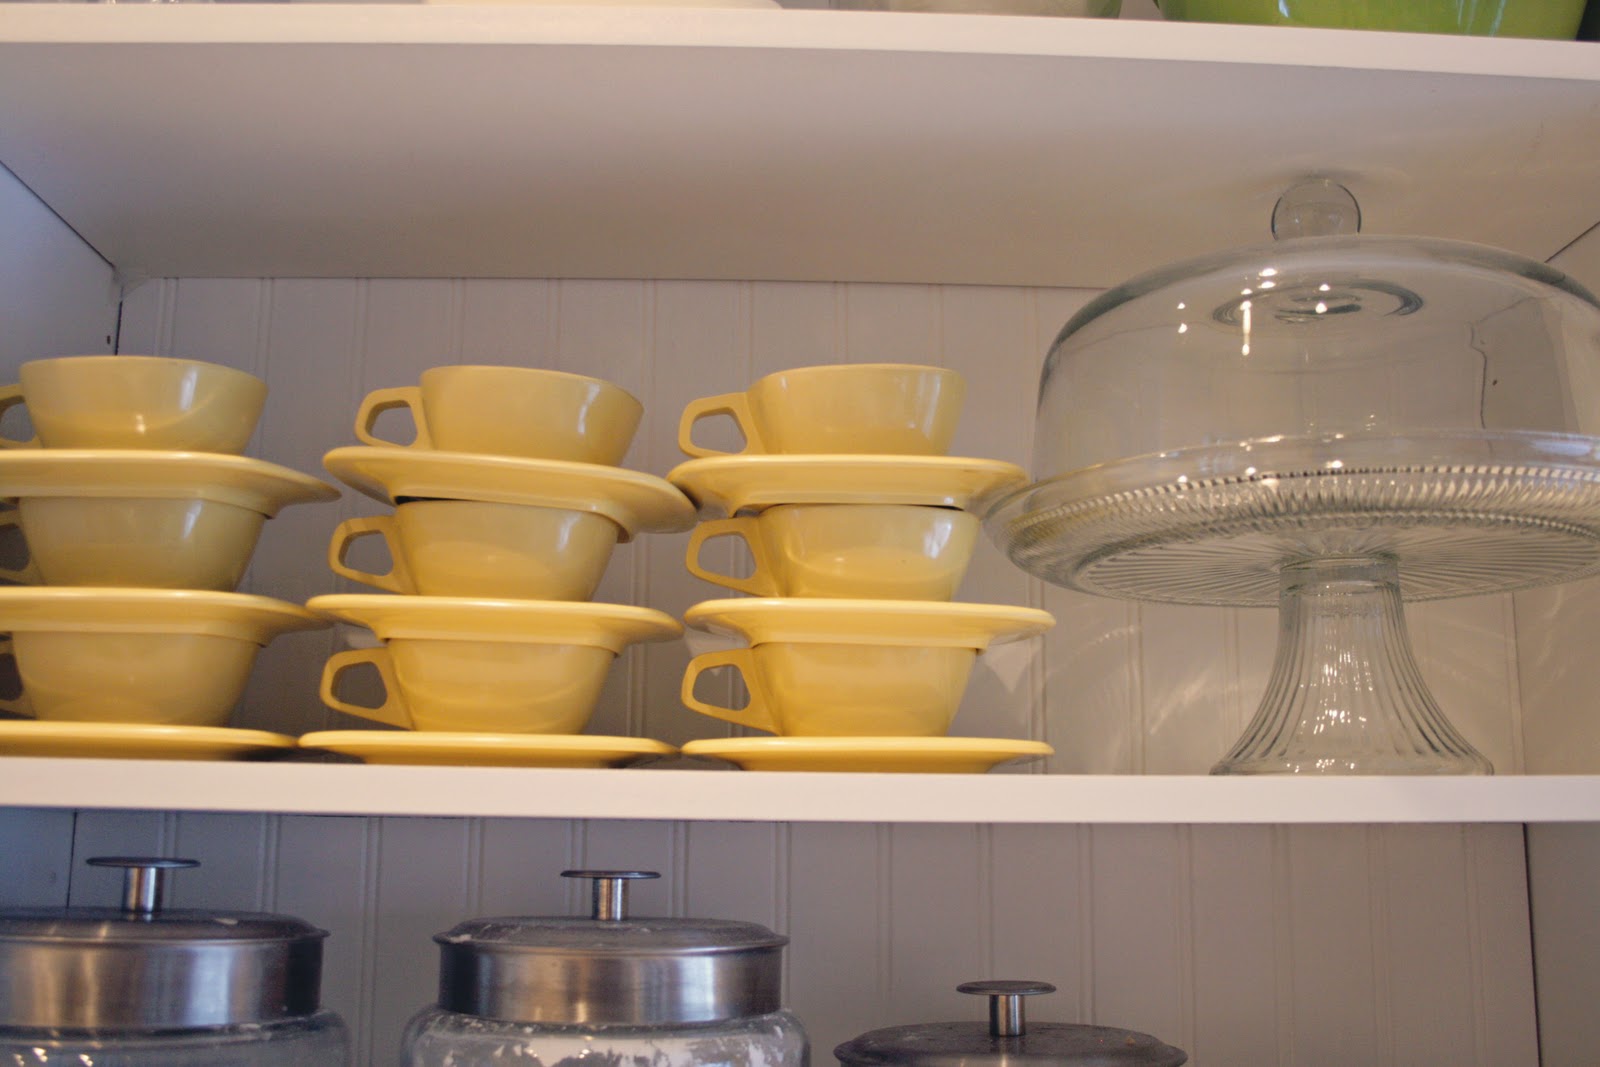
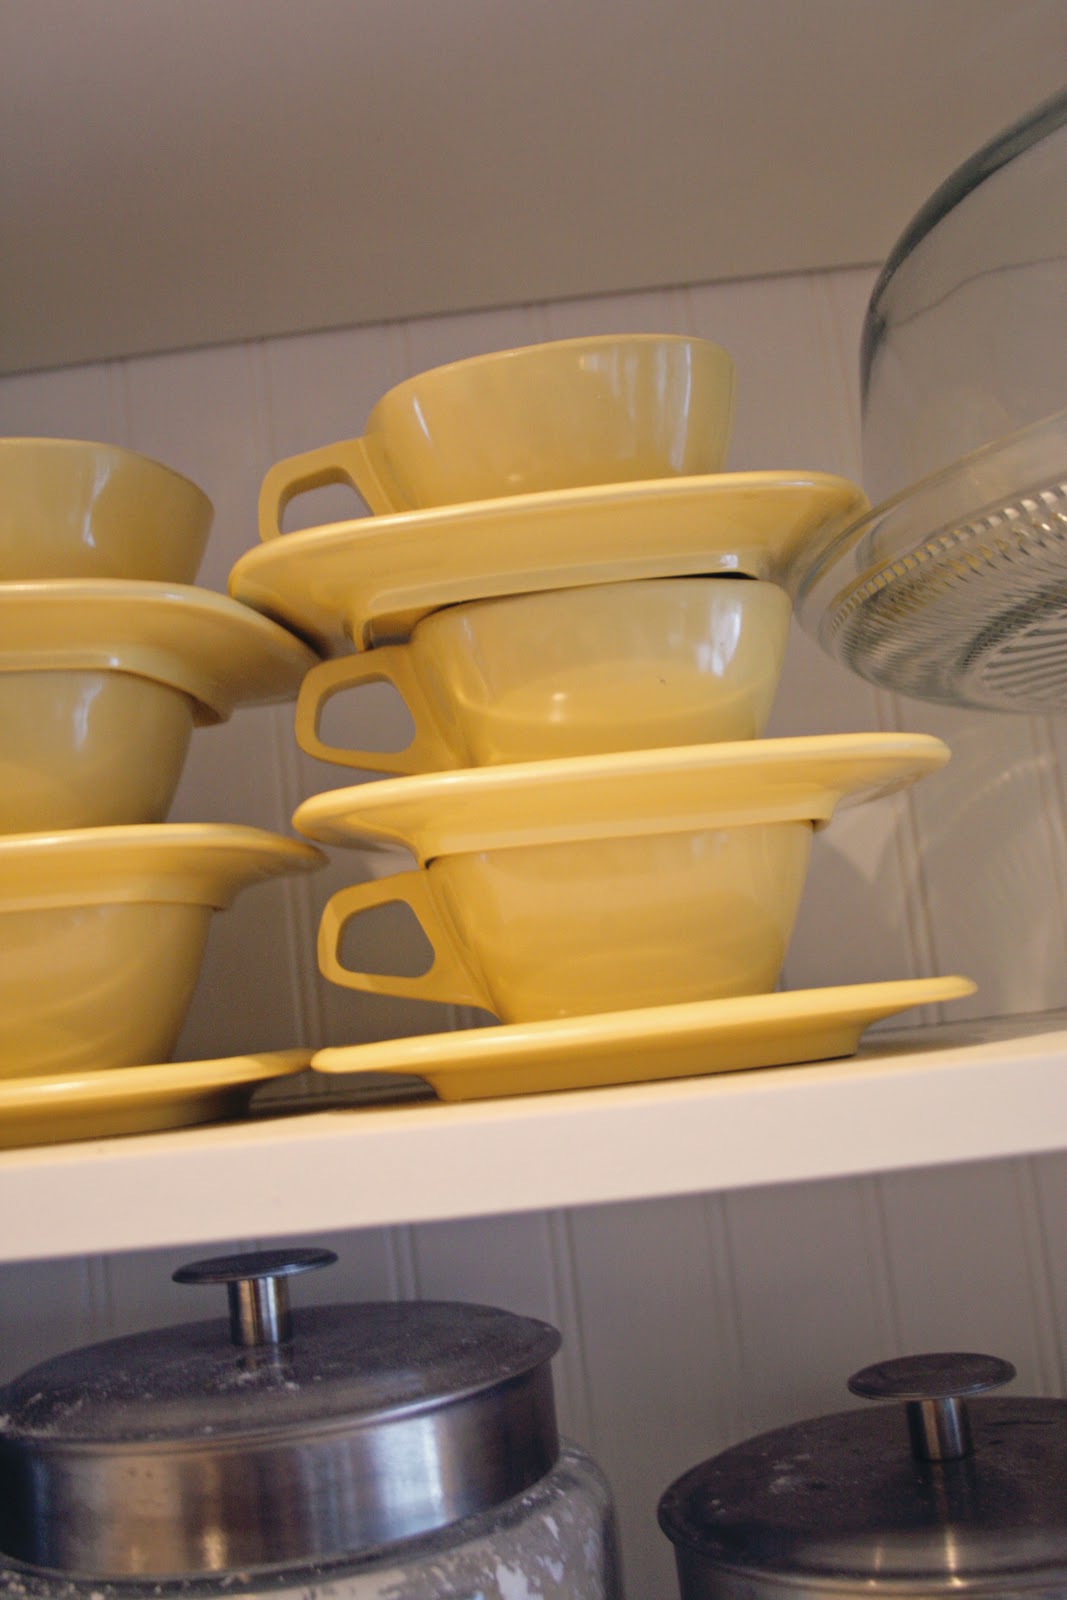
The teacups were an Etsy find that my Mom bought for me a while back. I love them and will take them to my grave with me. They will have to pry them from my cold dead hands. There’s a mental picture for ya. lol!
 |
| So there you have it at last. I hope it was worth the wait and the five million photos. If you are curious about anything feel free to comment or email me. Otherwise, you just plain better comment to tell me how much you loved it because these posts were brought to you by some serious blood, sweat, and tears. (and not just mine). ha! |
Cassity Kmetzsch started Remodelaholic after graduating from Utah State University with a degree in Interior Design. Remodelaholic is the place to share her love for knocking out walls, and building everything back up again to not only add function but beauty to her home. Together with her husband Justin, they have remodeled 6 homes and are working on a seventh. She is a mother of four amazing girls. Making a house a home is her favorite hobby.


It is SO beautiful! I want to come live in your house :0) I love how fresh and open your kitchen now looks, I feel like I should look out your window and be over looking the ocean or something ultra fabulous like that, because lets be honest, your kitchen is now, ULTRA FABULOUS :0) Thanks so much for the inspiration!
Thanks for all of the nice comments everyone! A few of you have asked what color I used and my process. I detail a lot more of the process on my blog, but I used the Cabinet Transformations Kit by Rustoleum. I did the bottom cabinets in their Seaside (no glaze) and the top cabinets were painted in Pure White. The kit has you use brushes and includes the top coat–everything you need.
Let me know if you have any other questions, it was a big deal for me to finally paint my cabinets, but I’m so glad I did!
So…. soooooothing…. It’s like a kitchen at a beach house, without any obviously beachy/cheesy decor. I LOVE IT. My favorite part is definitely the faucet – what a WOW fixture. I am truly impressed at your hard work, and hope you really enjoy the fruits of your labor (in cobbler form, perhaps?)
LOVE IT!!! I’m trying to convince myself to paint my cabinets (want the look, just not all the mess) and seeing them turn out likes yours reminds me that it will be worth the mess when it’s done! Thanks so much for sharing!
Love the redo …. did you sand the cabinets first? Kilz Primer or something else. I have been wanting to redo my cabinets but am SCARED!! This really makes me want to take the plunge but want to get it done right the first time.
What a beautiful kitchen!! It must have taken forever but worth the effort. I wish I was that creative
This is a truly amazing and wonderful makeover! Your skill in creating what the mind’s eye sees is marvelous. This kitchen went from being a basic floor model to a magazine cover. Thanks for sharing with people who only dream of dream homes.
Oh my goodness, I love it! And I love how you explain everything. 🙂 The kiddie plastic stuff hidden in the basket was my fave. It’s absolutely beautiful. I have one question. Why did you decide to paint the upper cabinets white instead of matching the base cabinet blue?
I LOVE your “new” kitchen. Best of all are the red chairs, I want them!!!! But there are so many details that I really really like, like the faucet, the crab picture, the new color to the cabinets, the carpet, the wire basket and the blue plates …
The only thing that I would have done differently: I am not a huge fan of open wall cabinets and would’ve tried to have frosted glass panes inserted to the old door frames, so you “almost” see what is in there … 😉
You did a great job and thanks for sharing so many pictures!!!
Jule
I love this whole remodel – you have courage! And patience. Can you tell me the color you used on the bottom cabinets? Thanks!
I just stumbled upon this post and would LOVE to know what color you used on your bottom cabinets??