Useful Tips for Customizing Ikea Floating Shelves
Do you love the look of floating shelves, but need a cheaper and easier option? Try this Ikea Hack for turning an simple floating shelf into a Pottery Barn-Inspired showcase wooden ledge shelf!
Can I Customize a Floating Shelf?
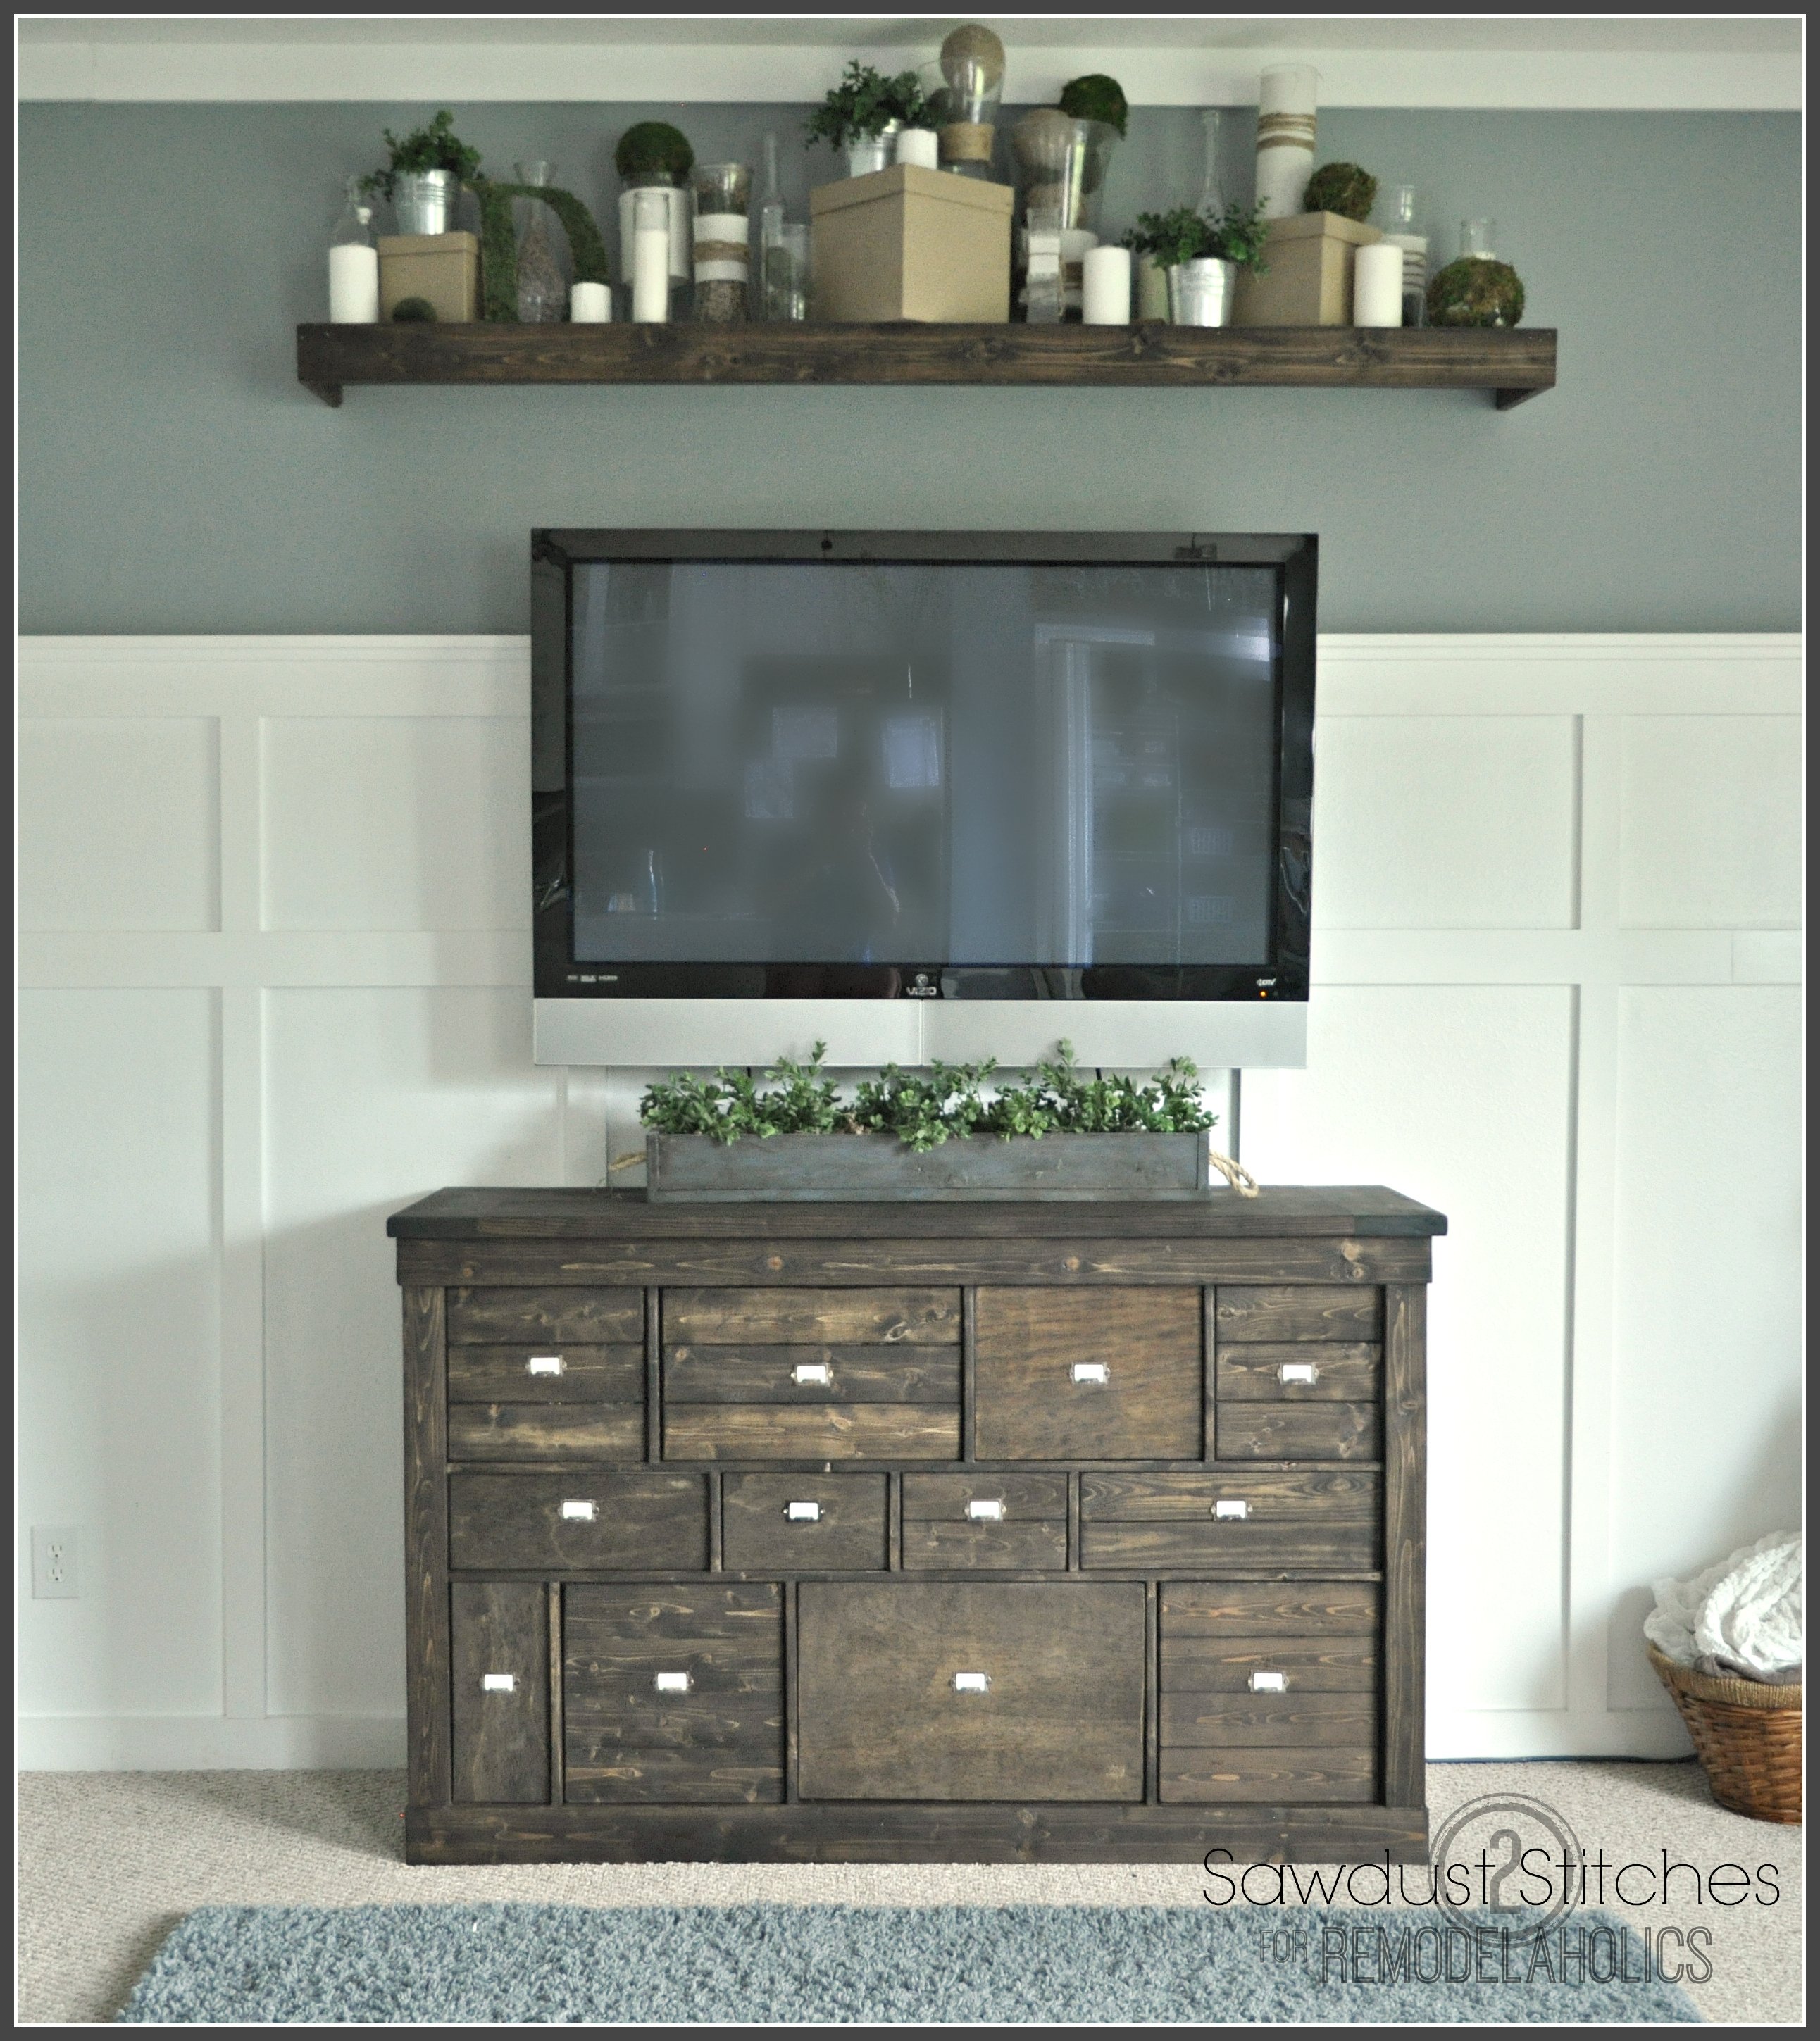
Hey there! Corey here, and I have a good tutorial for you today. Do you remember last month when we learned how to make this media center? Well, today I am going to show you how to make that adorable floating shelf!
Not only is it gorgeous, and a perfect match to my console, it is also a cheap Ikea hack!
No doubt you have seen these “Lack” shelves available at Ikea? They are fairly inexpensive and they come with all the hardware for installation. So if you are a newbie DIYer or simply feeling lazy, this is the project for you!

So let’s get started!
IKEA Hack: Floating Lack Wall Shelf into Pottery Barn Picture Ledge
This post contains affiliate links for your convenience. You can see our full disclosure here.
What supplies would I need to build this shelf?
Materials Used:
- 1×4″ boards
- Stain
- Sandpaper
- Nails
- Wood Glue
- Ikea Lack Shelf
Tools Suggested:
- Sander (Optional)
- Nail Gun (or hammer)
- Miter Saw
We are going to tackle this project the same way we did the Media Center. We will essentially be hiding the laminate finish.

What Type of Wood is Used for this Floating Shelf Hack?
Using strips of 1×4″, I measured the length and sides of the shelf and cut accordingly, cutting the corners on 45 degree angles.

The 45 degree angles will create a nice finished mitered corner like this:

Once everything is cut, it is ready to be sanded.

Now that the 1×4 surfaces are smooth, apply stain. I applied to both sides of the boards. I used Minwax Jacobean Stain, provided by the great people over at Minwax.

How is the Shelf Assembled?
After the stain dried, I applied a small amount of glue to the surface the area that would be applied to the laminate shelf.

For added durability, I also tacked my boards in place with a nail gun. Simply attach the 1×4″ so that the top of the board is flush with the laminate shelf.
There is an inch or two that overhangs on the bottom (I did this intentionally because I wanted to beef up the appearance of the existing shelf).

How Do You Attach Floating Shelves to the Wall?
To install, just follow the instructions that came with the Ikea shelf. They are fairly simple to follow. Once the hardware is attached to the wall, you just slide the shelf into place!

Ta da! Gorgeous.
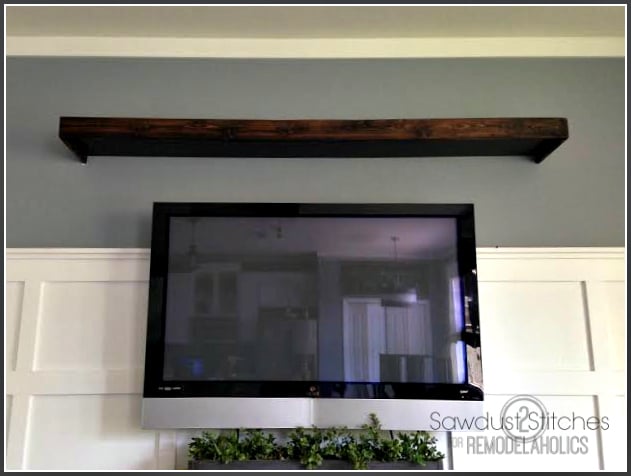
Look at how pretty those mitered corners are. I would count this shelf as a vast success. I will take the look of Pottery Barn floating shelves for the cost of Ikea any day!

How much weight can a floating shelf hold?
While there is no exact number, if you’ve installed your bracket into studs, your shelf should hold lots of items.
Now all that is left to do is stage your shelf and you are all set! If you would like to see how I decorated my shelf, you can read a tutorial on it here.

There is no reason this same basic principle cannot be applied to any number of projects. So take a look around your house, do you maybe have something similar adorning your walls?
Take luck,
Corey
Be sure to Pin this idea for later!

Love Ikea Hacks? Also check out this Ikea Hack Rustic Bookshelf, this Ikea Hack Closet Organization, and this Ikea Hack Entry Console with Organizing Tips!
Check out these 25 great DIY shelves!

Corey is the voice and grunt labor behind Sawdust 2 Stitches, she freely professes, that she has a problem... She CANNOT leave well enough alone.
She can typically be found hunched over a sewing machine and/or covered in sawdust. All in the effort to create a perfect balance of aesthetics and practicality in her home.


Wow, that is amazing! I’m going to need a shelf in the living room soon and I might just do this! WOO HOO!
It really is so easy, I had this done start to finish in just an hour or two! Good luck, and thanks for your comment!
Just pinned this for my son & fiancé for their small row house that they are still renovating & settling into. They need more display space plus storage. Don’t we all! Have a good day.
You are totally right, everyone is always looking for ways to maximize space and storage! Thanks, for pinning and reading! Hopefully their renovations goes smoothly!
Beautiful job! How did you stain a laminate shelf? I haven’t seen a lack shelf in that stain so am curious as to how you stained or covered the surface of the shelf.
Thanks!
Hey Christine, I actually purchased that shelf from Ikea a few years ago, at the time they had a black/brown color. I do know that their color selection has changed over time. You could easily use a “gel stain” on the laminate, or even a closely matched paint color !? Hopefully that helps. Thanks for reading!
This is so incredibly simple and awesome that I feel dumb to not have figure it out. My world has been rocked.
That is EXACTLY how I felt! Mind=Blown. I started looking at all laminate differently. Thanks so much for reading!
Can you send a picture with a view from the top? I’m wanting to do this but you will see the top of my shelf too.
Hi Cory, love this idea. Can I ask what color stain you used? I’m having a hard time finding that color and love it! Can’t wait to try this!
I like how the 1 x 4 pieces cover the edges to seem rustic but what about the bottom of laminate that you still see.
I agree.
This shelf would have to be installed up high so that you don’t see the laminate top and the wood edges that are not seamless.
But, doing that means you’ll also see the overhang on the edges from the bottom.
Perhaps a better hack would be to also laminate a wood board to the bottom or top to camouflage it from view — depending on how high it is installed.