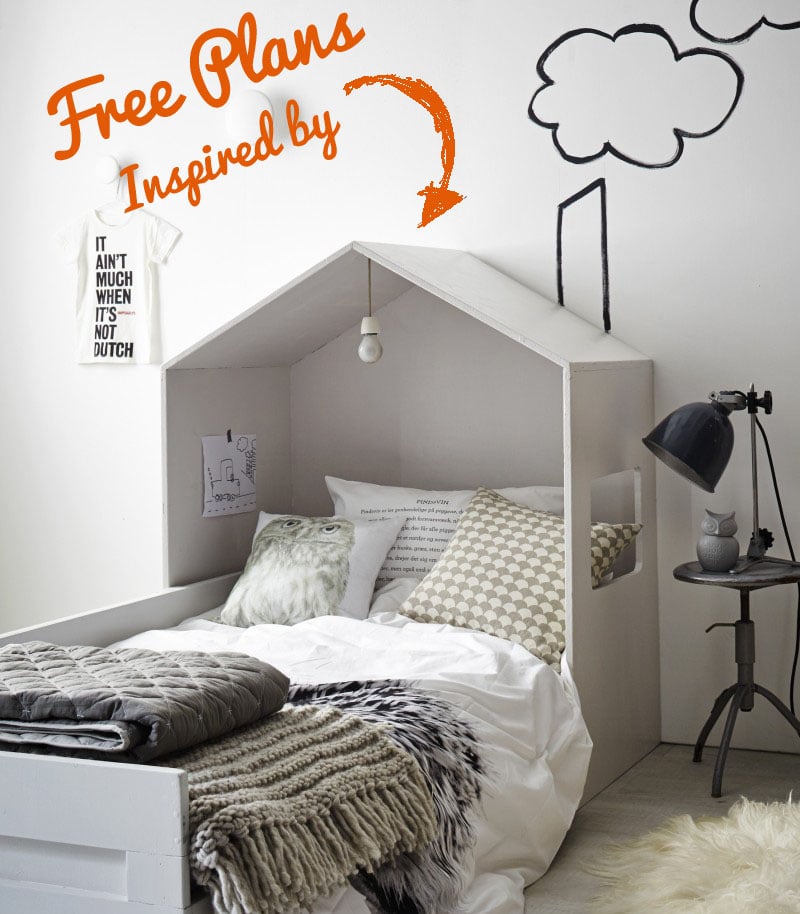
House Headboard
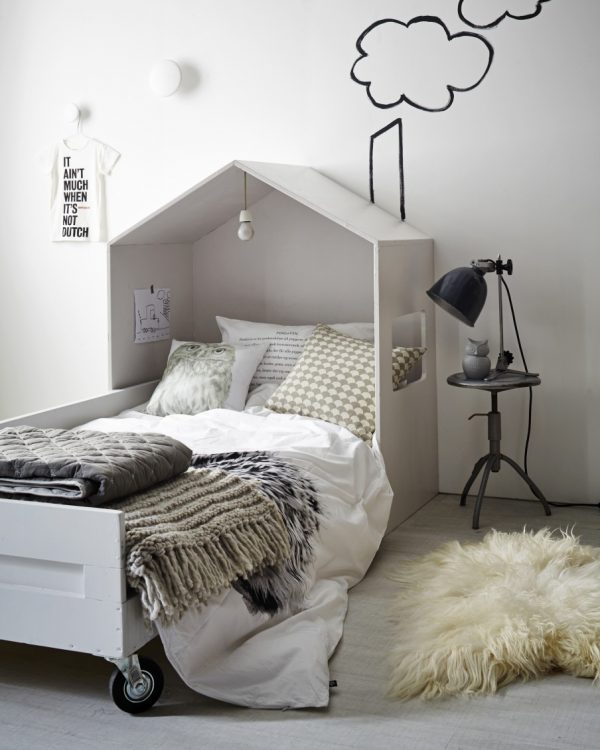
Hello again, it’s Amy from Hertoolbelt back with another build project. If you missed last weeks awesome vintage inspired corbels, you have to check them out! The build plan for this week is inspired by this hip wooden house headboard featured in a Dutch Magazine. Isn’t it fun, I especially love the painted accents on the wall with the simplicity of the house.

How to Build a House Headboard
Materials Needed
- 2 sheets of 3/4″ plywood 4′ x 8′ (if your store sells 1/2 sheets you really only need 1 1/2 sheets of plywood)
- 1 1/2″ screws
- wood glue
- wood filler
- paint/primer
- sandpaper
- corded light
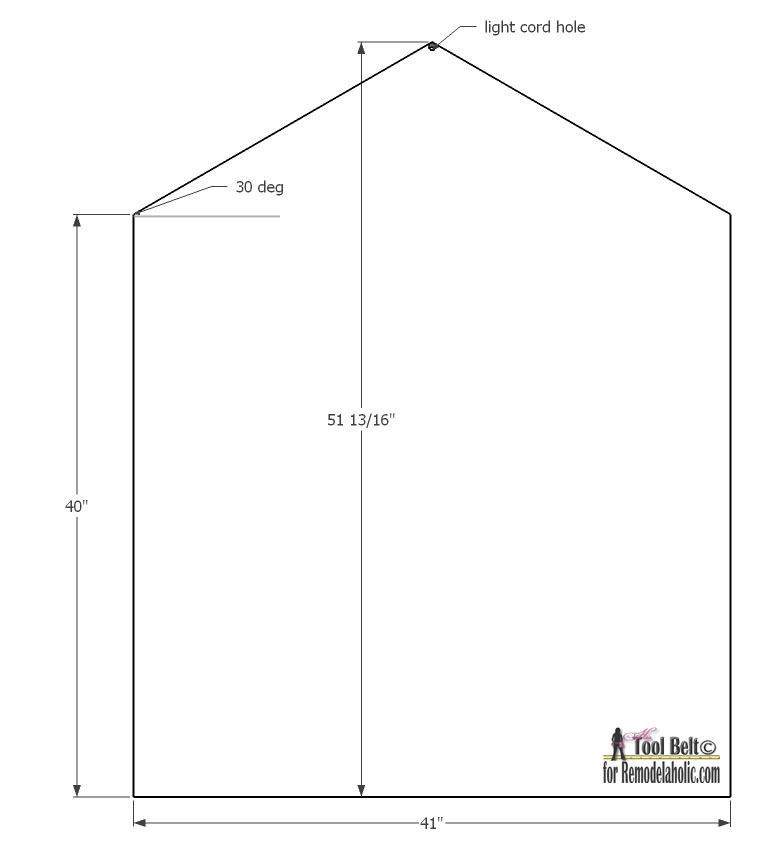
Step 1
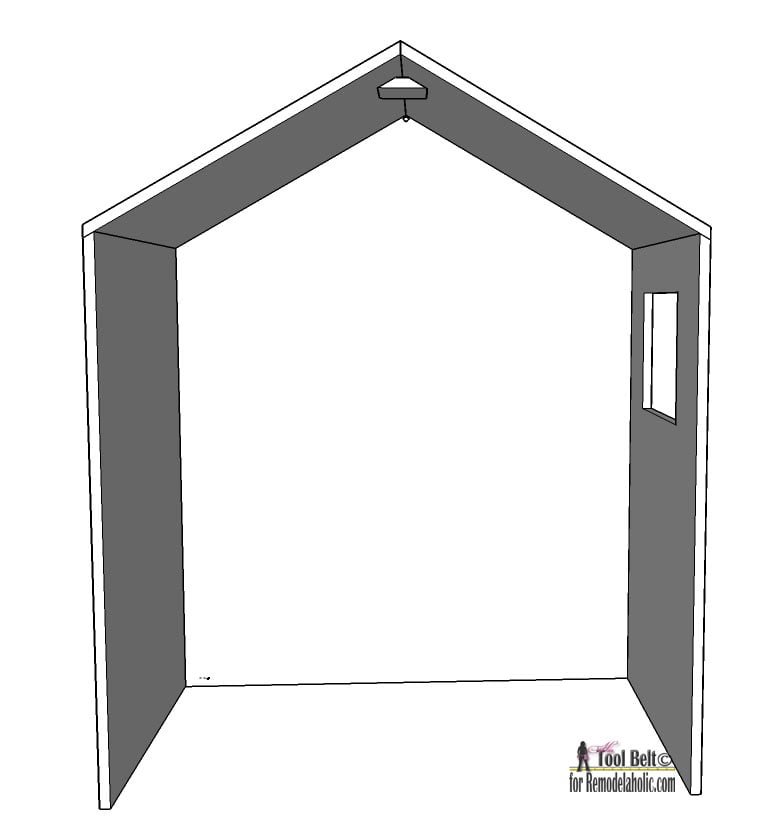
Cut a sheet of plywood at about 52″, save the other piece for the walls. Cut the plywood to 41″ x 52″. On the 52″ side, measure up 40″ then make a mark, repeat for other side. Mark the top center (20 1/2″), measure up 51 13/16″ from the bottom and mark at the center line. Cut each side from the 40″ side mark to the top center mark, making a roof peak. Drill a hole near the top large enough to fit your light cord and plug.
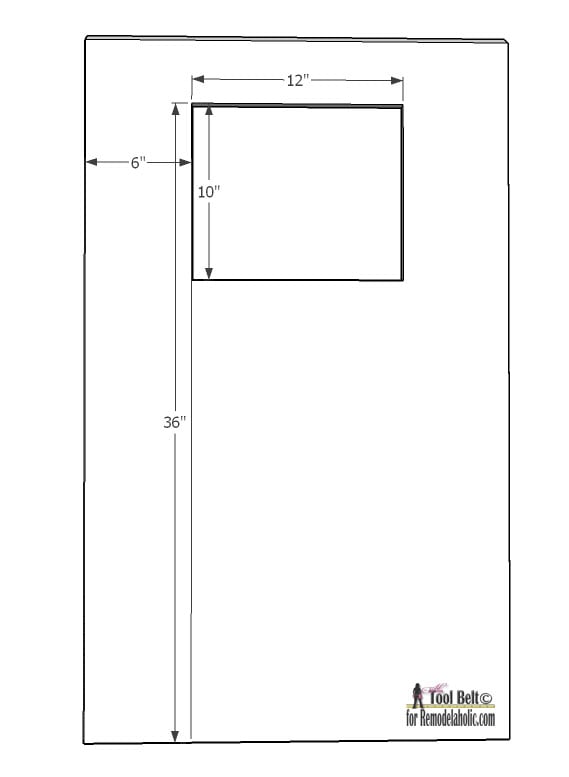
Step 2
Rip the extra plywood piece in half about 24″ (the extra piece from the back). Cut 2 pieces that are about 24″ x 40″. On the top, cut the edge back leaving a 60 deg angle.
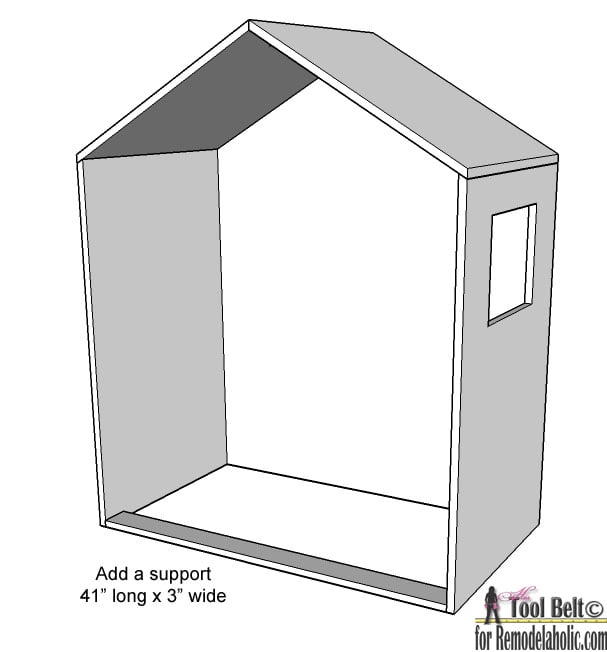
 On one of the sides, we’ll cut out a window. From the bottom, measure up and mark 36″ and 26″. From each edge measure and mark 6″. Using the marks, cut out a rectangle about 12″ x 10″.
Step 3
Cut 2 pieces of plywood that are 26 1/2″ x 24″. Cut a 60 deg angle on one of the 24″ edges. Measure down 24 9/16″ and make another 60 deg angle, making a really long paralellogram 🙂 Repeat on the other board.

Step 4
With a scrap piece of plywood, make 1 or 2 roof/light supports. Cut a piece that is 3 5/8″ x 4″. Cut each side at a 30 deg angle, this should fit in the peak of the roof leaving a little room for the cord, trim as needed.
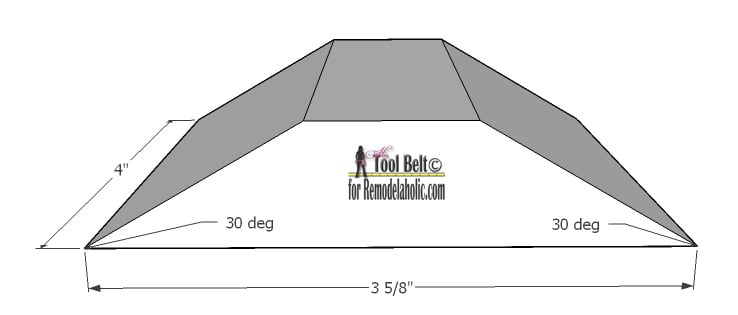
This piece will help brace the roof and hold to the light cord up.
If you anticipate needing a little extra side support (from kids pushing and such 🙂 ) Cut a piece of plywood that is 41″ x 3″.
Step 5
Along all of the joining edges we will simply screw the boards together. Pre-drill the holes along the joining edges about 3/8″ in from the edge. Use a countersink to make the screws flush. Apply a bead of wood glue along the joining edge and screw together with 1 1/2″ or longer screws. Install the roof/light supports with only screws (no glue). Add the extra side support as needed.
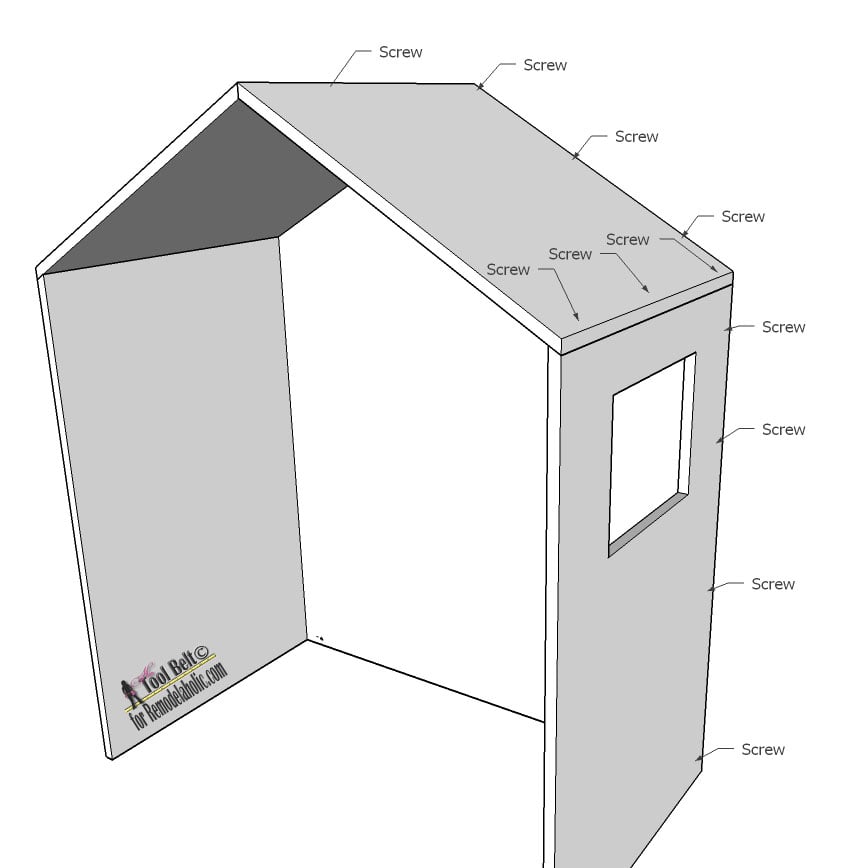 Note the backside sits inside the house, the roof is supported by the back peak.
Step 6
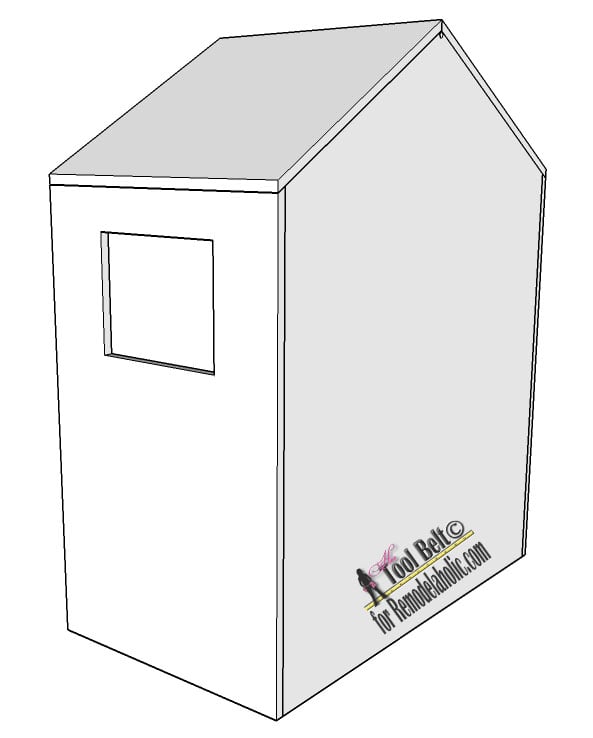
Fill the screw holes, cracks and blemishes with wood filler and allow to dry. Once dried, sand the house and filler smooth. Prime the plywood and allow to dry. Paint the House Headboard your favorite color. Once the paint is dry, run a light cord through the back hole and use the roof/light supports to hold the light cord in place. Ikea carries very similar looking light cords to the one in the inspiration picture for $5. They also carry cords with fun colors for $8.
This house headboard can be left simple for a modern look, or it can be the bones for a decorated house. It would be fun to add wood shingles to the roof like Cassity did with their Bunk Bed Playhouse. There are lots of possibilities! For more Headboard Inspiration, check out 50+ DIY Headboards.

Amy is the tool lover at Hertoolbelt. On Hertoolbelt, Amy shares DIY furniture plans, handyman tutorials, and craft patterns. She has three pint sized 'helpers' that help fix things around the house and build fun projects.


This is amazing! I’ve pinned for when my babes are out of their cribs… it would make a nice little private space for kids sharing a room.
This is amazing!
What a super cute and inventive headboard!! When my girls were younger, they would have loved it!! Pinned it 🙂
Hello! Love this idea. Do you have plans on how to make the rest of the bed? Thanks!!
Not yet, we don’t, but we will add it to our list! Thanks for stopping by, Tasha!
What is the height of the bed from floor to the top of the mattress? I am trying to figure out if I need to make my house taller for our bed. Thank you.
We didn’t create plans for the bed, but in the model 21″-22″ mattress height looks right.
Great headboard! I’m in the middle of making it for my son but I don’t see where the measurements for the two roof pieces are. Back, sides, supports… Check, check, check. Am I missing something or reading it incorrectly? Thanks.
Hi Marie,
The roof is in step 3, 26 1/2″ x 24″ with the 60 deg angle.
I am not under the step for the light supports or where to attach it
My wife sent me your diy on this head board. I love it! Do you have plans on the bed? She really wants tl to build it also.
Thanks!
Eric.
Hi Eric,
Thanks for the love! We don’t have plans for the bed, but we highly recommend Ana-White.com and I’m sure she has something similar to get you started. We’d love to see pictures when you build it!