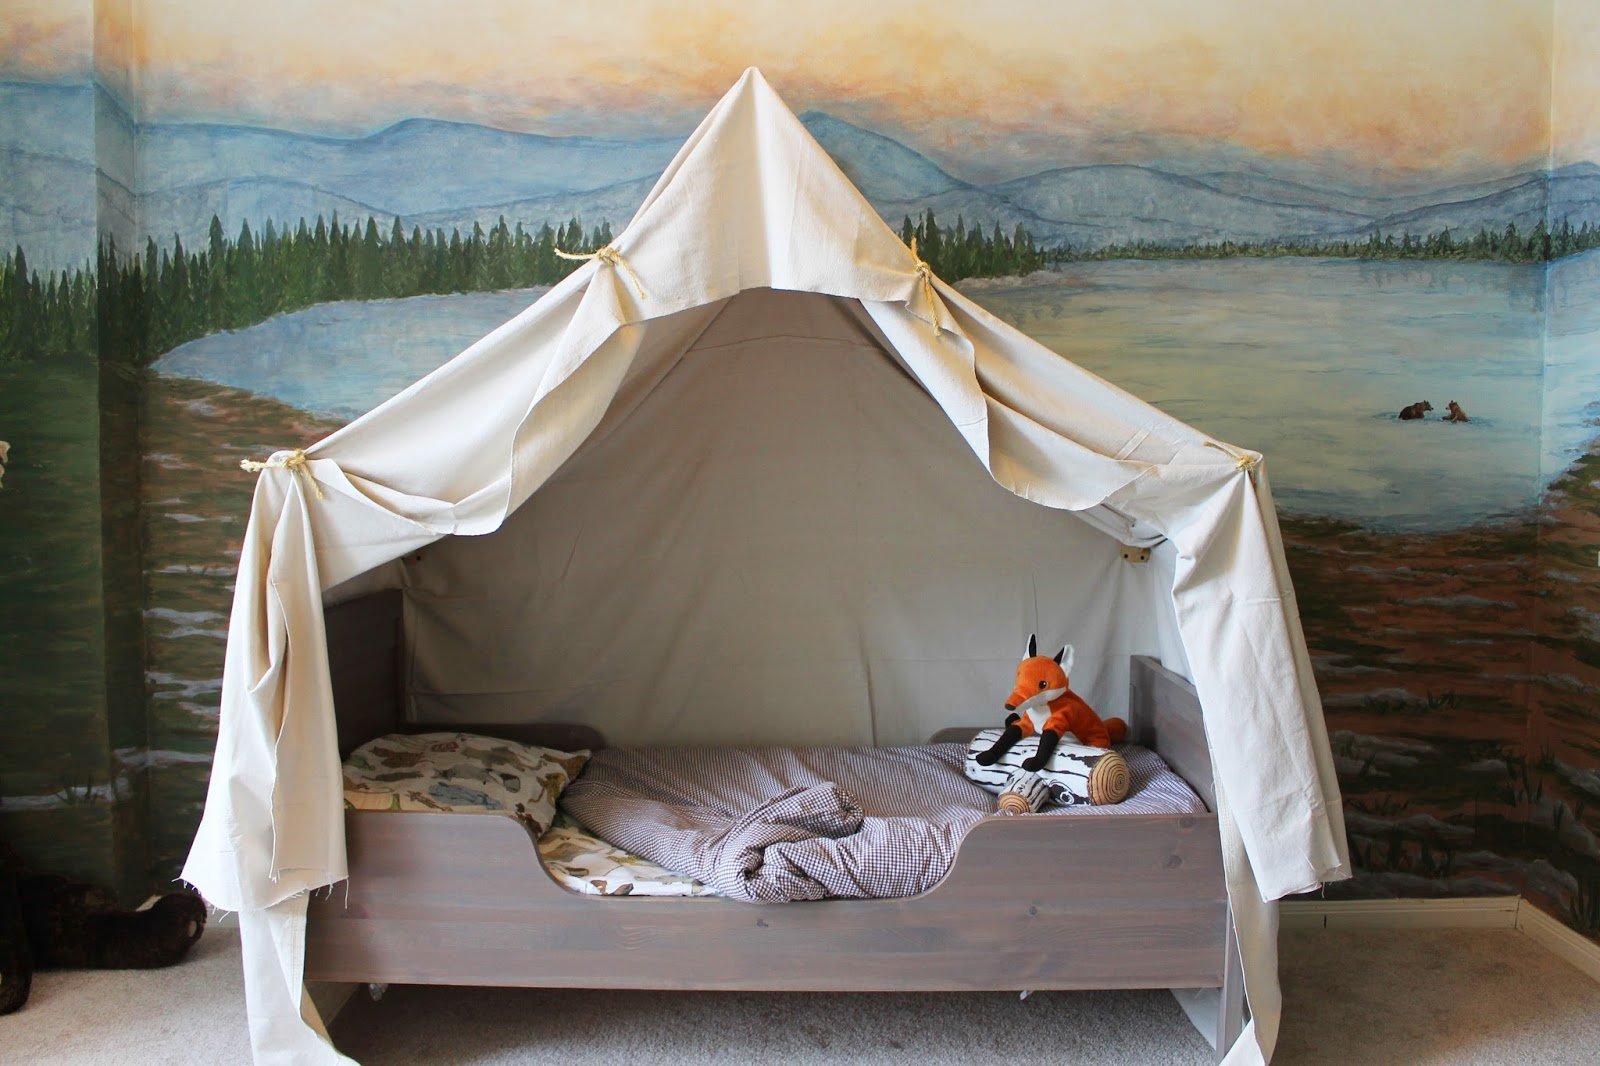
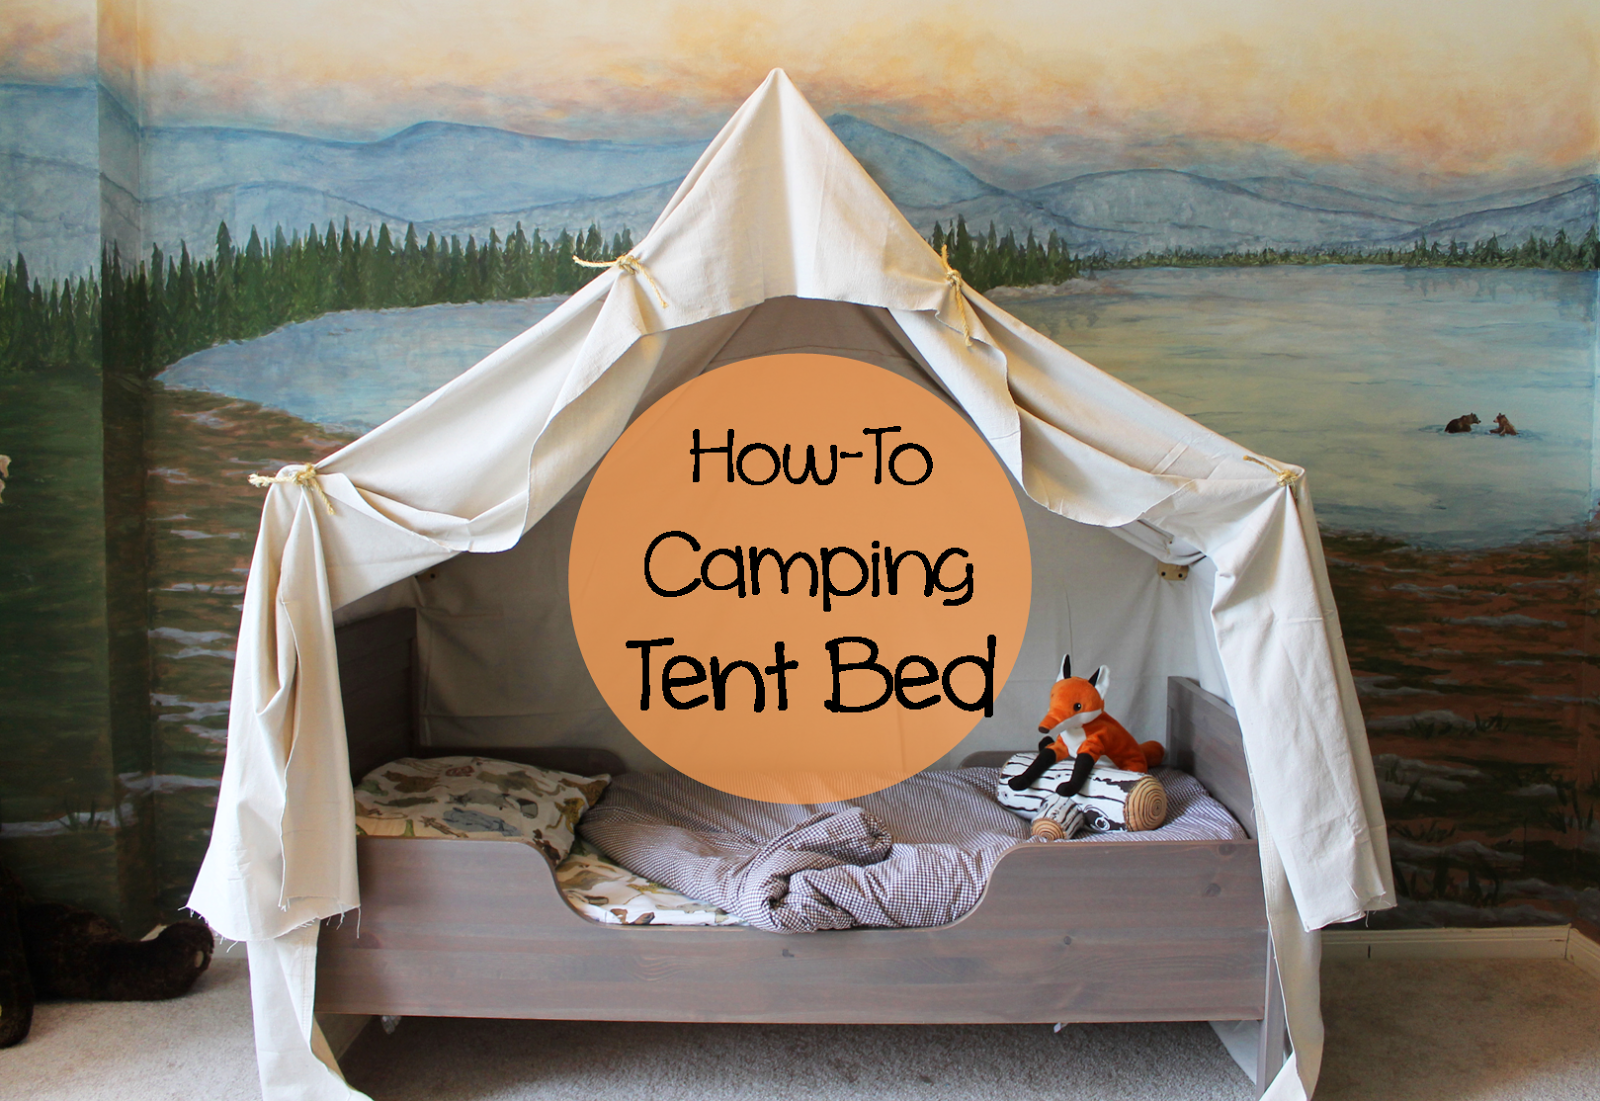
Camping Tent Bed in a Kid’s Woodland Bedroom
Did you dream of having an awesome room as a kid? Sleeping in a race car, or having a castle to play in, or even just having a slide from the top bunk? One of the fun things of having kids is seeing their dreams and remembering your own… and then understanding why your parents were so “mean” and didn’t let you have everything you ever dreamed of, especially when it came to decorating your bedroom! 🙂
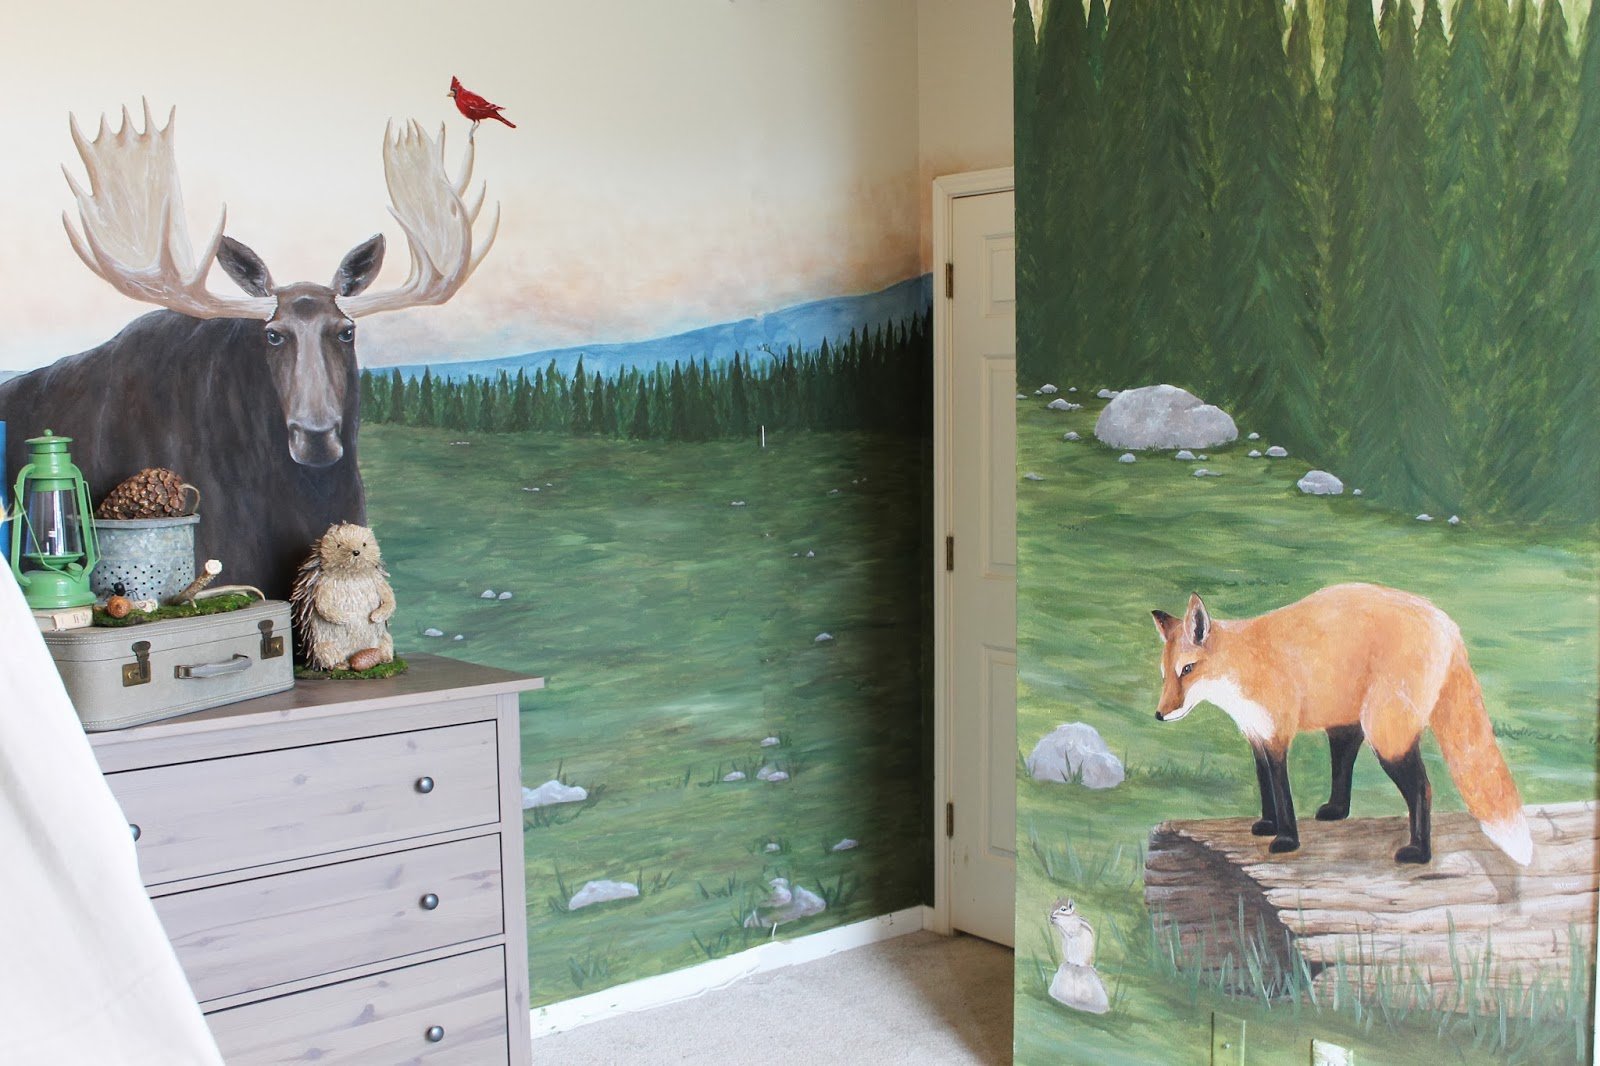
Our guest today is one amazing DIYer and a fabulous artist, and she put together a complete dream of a room for her son — woodland themed, with a beautiful mural (that she did herself!), a play campfire and the piece de resistance: this awesome camping tent bed canopy!
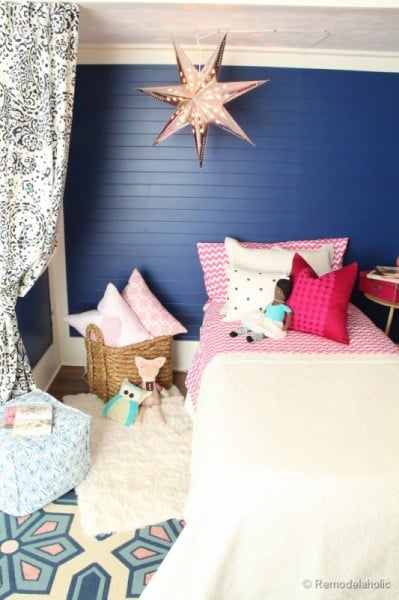
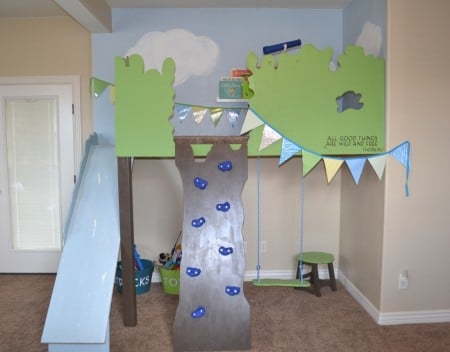
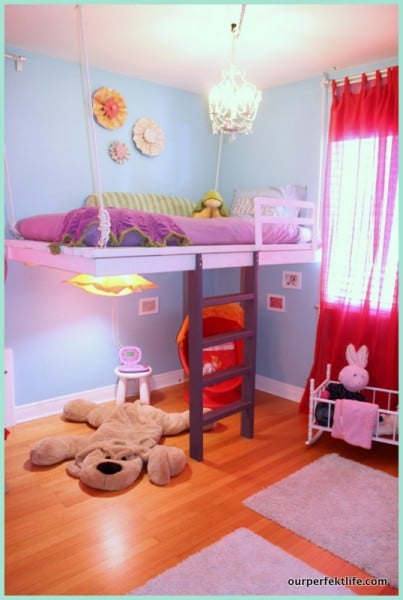
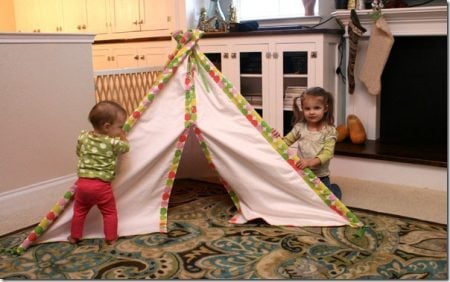
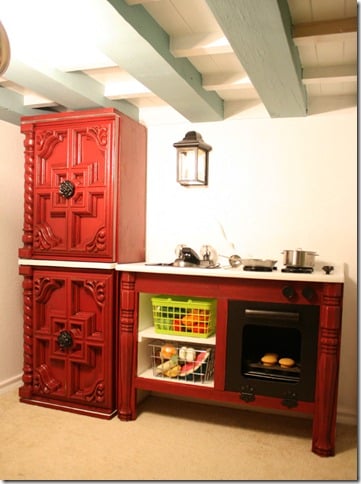
We love putting together fun areas for kids — just look at some of these that we’ve built and featured:
And, stay tuned because I have another awesome one coming up very soon! But today, the room reveal you’ve all been waiting for… here’s Alyson and her amazing skills!
How to Build a Camping Tent Bed Canopy
by Alyson of The Ragged Wren
Hello, all my fellow Remodelaholic friends…..I am Alyson, and I blog over at The Ragged Wren. I’m super excited to share with you, one of my favorite projects over at my house, my son’s Camping Tent Bed.
Let me start by telling you how his room even got to this point…
I am a Faux Painter, I paint murals, faux finishes and cabinets. I have been doing this for about 14 years now. My all time favorite thing to do in this business, is paint murals. In the past couple years, with the economy being the way it is, this isn’t something people really want to spend money on.
Hey, I get it, I wouldn’t either….better to put your money in places that get a good return, kitchens, bathrooms, etc. But our sweet kids rooms shouldn’t be completely overlooked. They need spaces that help them use their imagination, and inspire them.
I moved into our current house, about two years ago. My son (who is about to be 4) had a woodland nursery at out last home. I loved the woodland look, and still do, but I wanted to create a space here, that would last a bit longer than the baby themed woodland. I stressed over this room for a long time. I hate to do super “themey” rooms, but I do have the ability to paint it, so why not.
I started with this really simple animal idea, I thought a couple of large woodland animals tromping around the room would be cute. But on a run to the paint store, to grab some supplies, I saw the canvas drop cloth, and thought, how fun would it be to make a camping room!?!
When I tried to explain my idea to my husband… I think he thought I was joking (or a bit nuts). But I had it all mapped out in my head, though it went from a simple room, to a super elaborate room, all centered around the tent bed. So while my husband was at work, I decided to give the tent a go…if it went horribly wrong somehow, I could just take it down!
The rest of the room, was painted around the tent bed. I wanted it to feel like you were actually outside, without being outside….since camping with 3 kids, two of which are toddlers, in the hot Texas summers, is not a fun experience.

Here’s what you’ll need to make this tent….
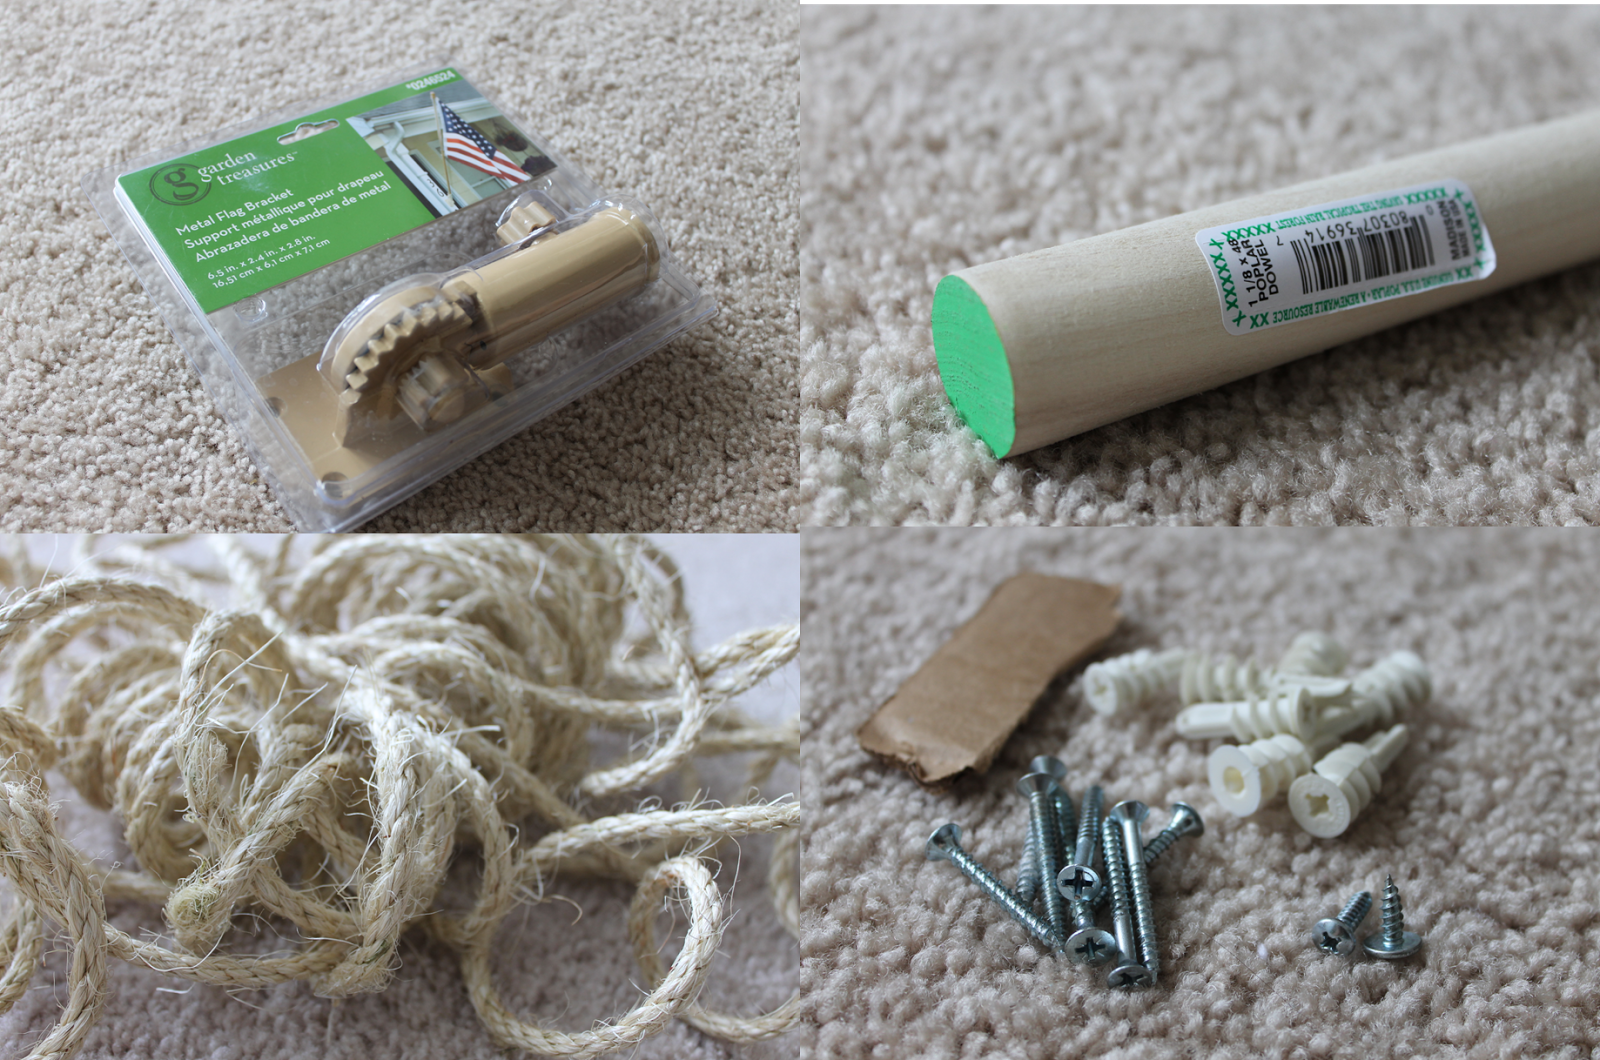
- 3 Flag pole mounts, this one is from Lowe’s and cost $10.98 each
- 3 Wood dowels 1 1/8″, ” $3.98 each (for poplar)
- Braided rope, thinner is better, $8 a roll
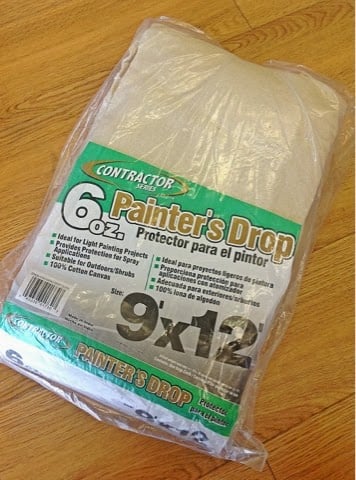
- Canvas drop cloth I used a 9’x12′ from Sherwin Williams, 6oz. weight (this is the thinnest, and easiest to work with) $11
- Piece of cardboard, or something to use as wedge (poster board also works)
- 12 Drywall anchors
- 12 Screws
- Electric screwdriver
- 3/16″ Drill bit
- Hot glue gun
- A miter box/miter saw/ or a guy at your local hardware store…that you can sweet talk into making some cuts on the store saw.
To start this project you will need to have your bed, and it needs to be in place. Once this tent is up…it’s up, you don’t want to move it.
For this room, I used a toddler bed (from Ikea), pushing it against the wall. You could also use a twin bed, and have it come straight out form the wall. When my son out grows this bed, I plan to use a twin coming straight out. There will be room inside the tent, on both sides of the bed, for some kind of tree stump nightstands. (Though I’m sure the “remodelaholic” in me will be changing the whole room by then!)
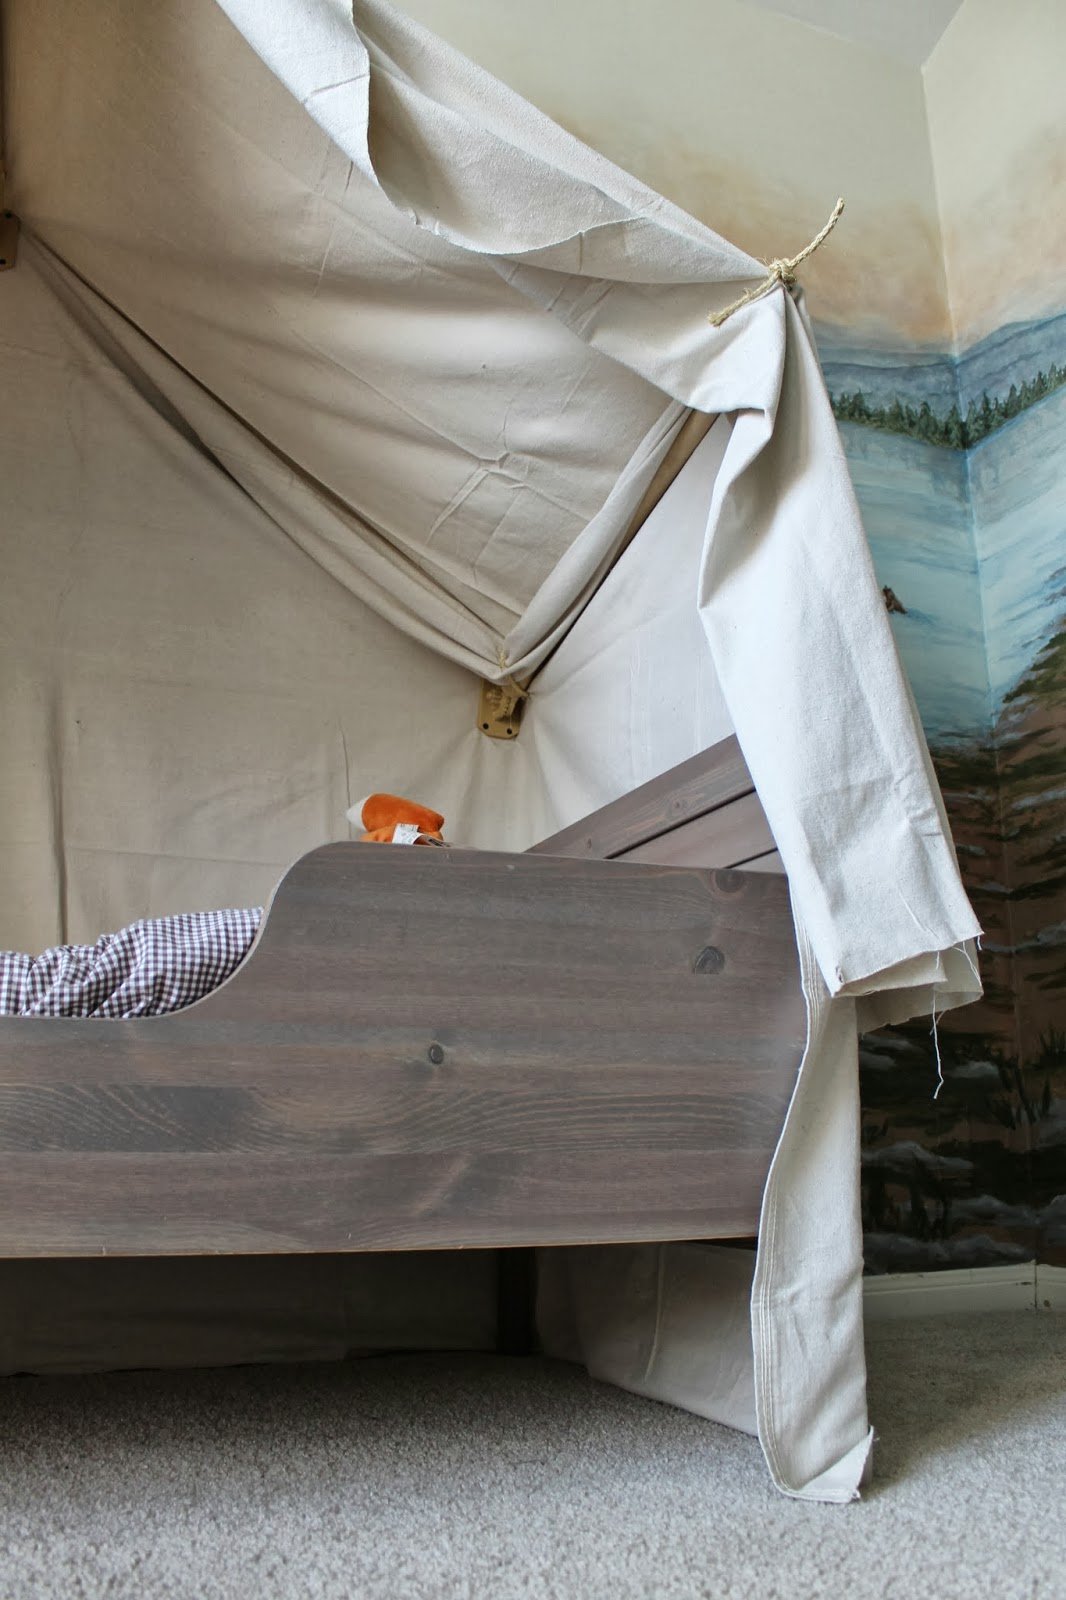
Once you have the bed positioned, decide how much headroom they need, the closer they are to the tent, the more they will mess with it. I had my son stand on his bed, and marked it on the wall. If your child is bigger/older, you may want to make the tent less deep so when they stand up they wont be inside the tent. Since this was a toddler bed, and I was trying to mask this (I secretly despise toddler beds), I put the side poles of the tent, just about 4″ from the top of the headboard and footboard.
If it helps, put some blue tape on the wall where your measurements are to get a feel of the scale of the tent when completed. Maybe have your child get in and out of bed.
When finished, the tent structure will sit higher than where it is mounted to the wall, because of the angle of the dowels (if that doesn’t make sense, keep reading it will).
This is a good time to mark your holes for the flag pole brackets on the wall….and insert the drywall anchors.

Next, you will want to get your dowels ready.
These are the dowels I used. They are poplar, but whatever wood you can find in the right size will work.
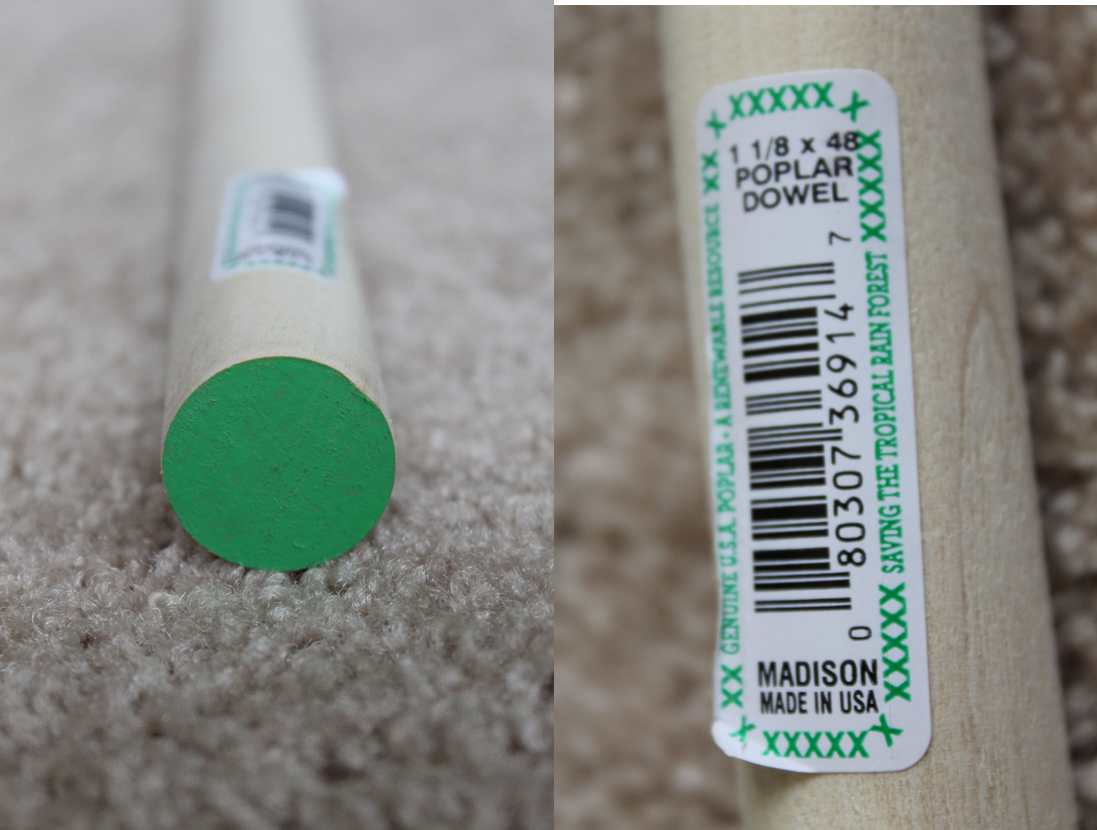
These are from Lowe’s, and this one is color coded with a green label.
This will fit a bit loosely in the holder. The next size up from this one, is 1 1/4″, and while it does fit in the holder, it only goes in about 1/4″, and it wont be secure enough.
It is best to cut the length of your dowels here, before you start drilling holes and mounting.
Decide how far away from the wall you want the tent to go. On my tent, I came out 1″ further than the bed frame itself.
Remember when your measuring, to take into account the depth of the bracket (the dowel will not sit flush against the wall), and the angle of the dowel after mounting (it will be tilted upwards).
I just held it up, eyeballed it, marked it, and put the same measurement on the other two.
No fancy methods here.
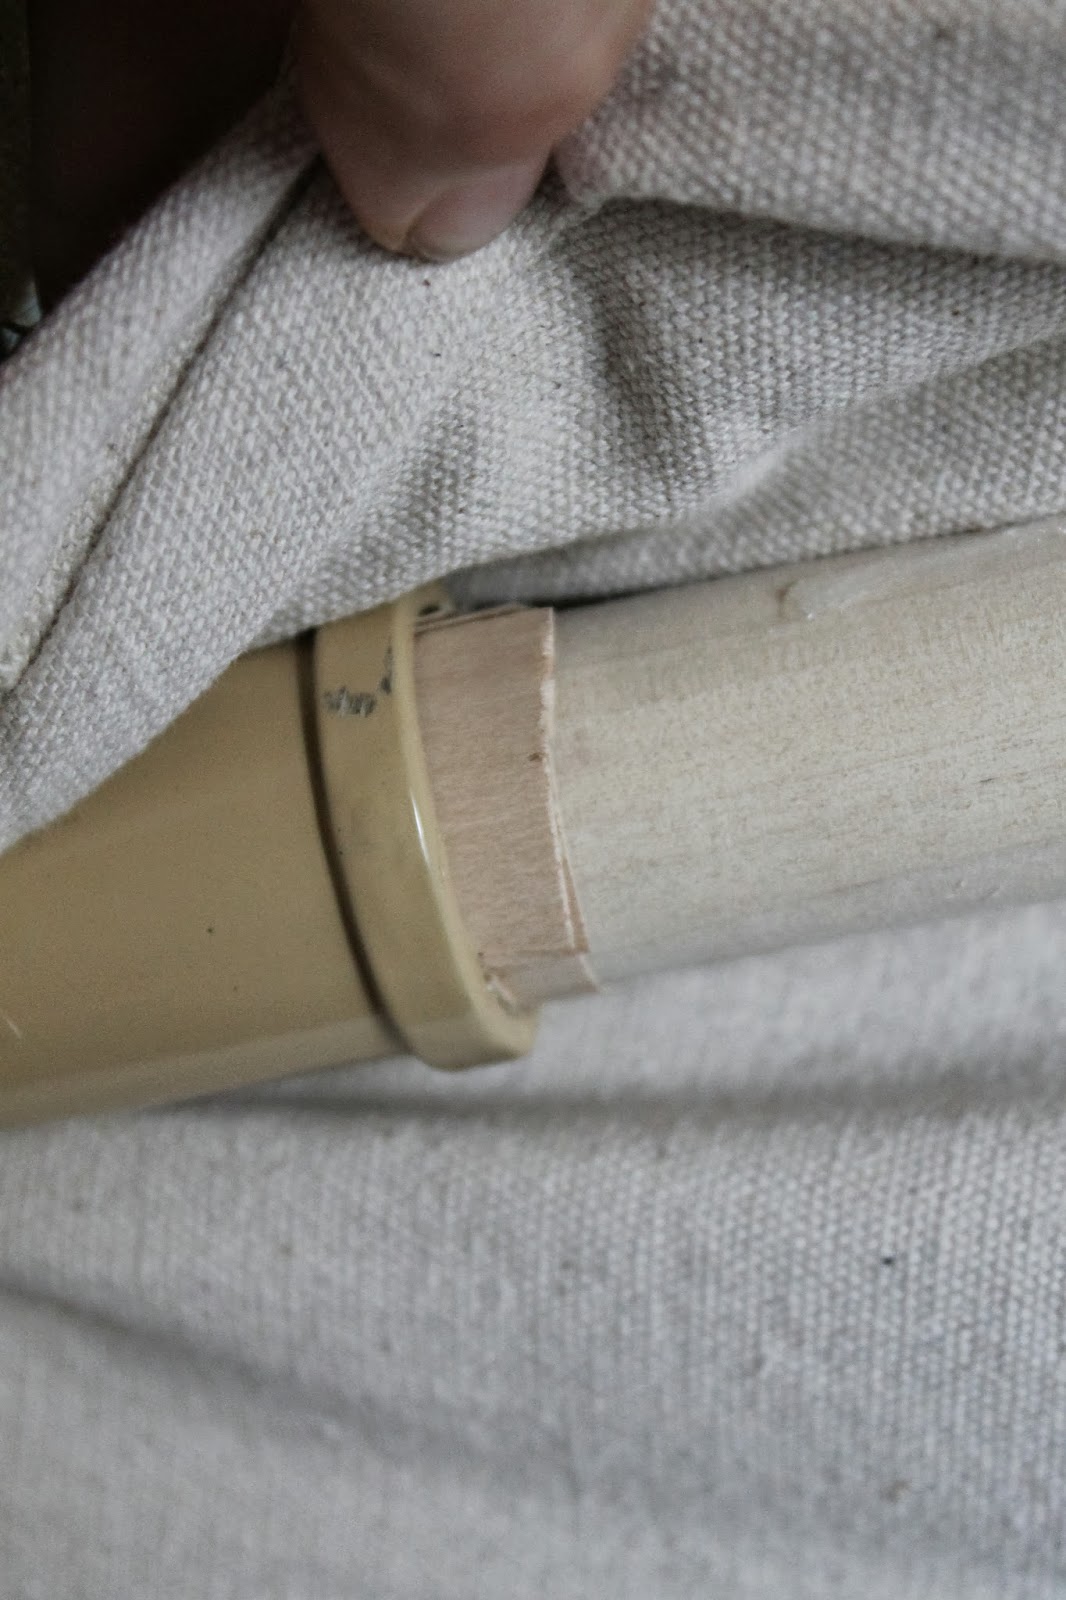
I cut the ends on a slight angle, not straight across, because of the angle that the dowels will be in. The canvas will sit more flush in the front this way, but isn’t completely necessary.
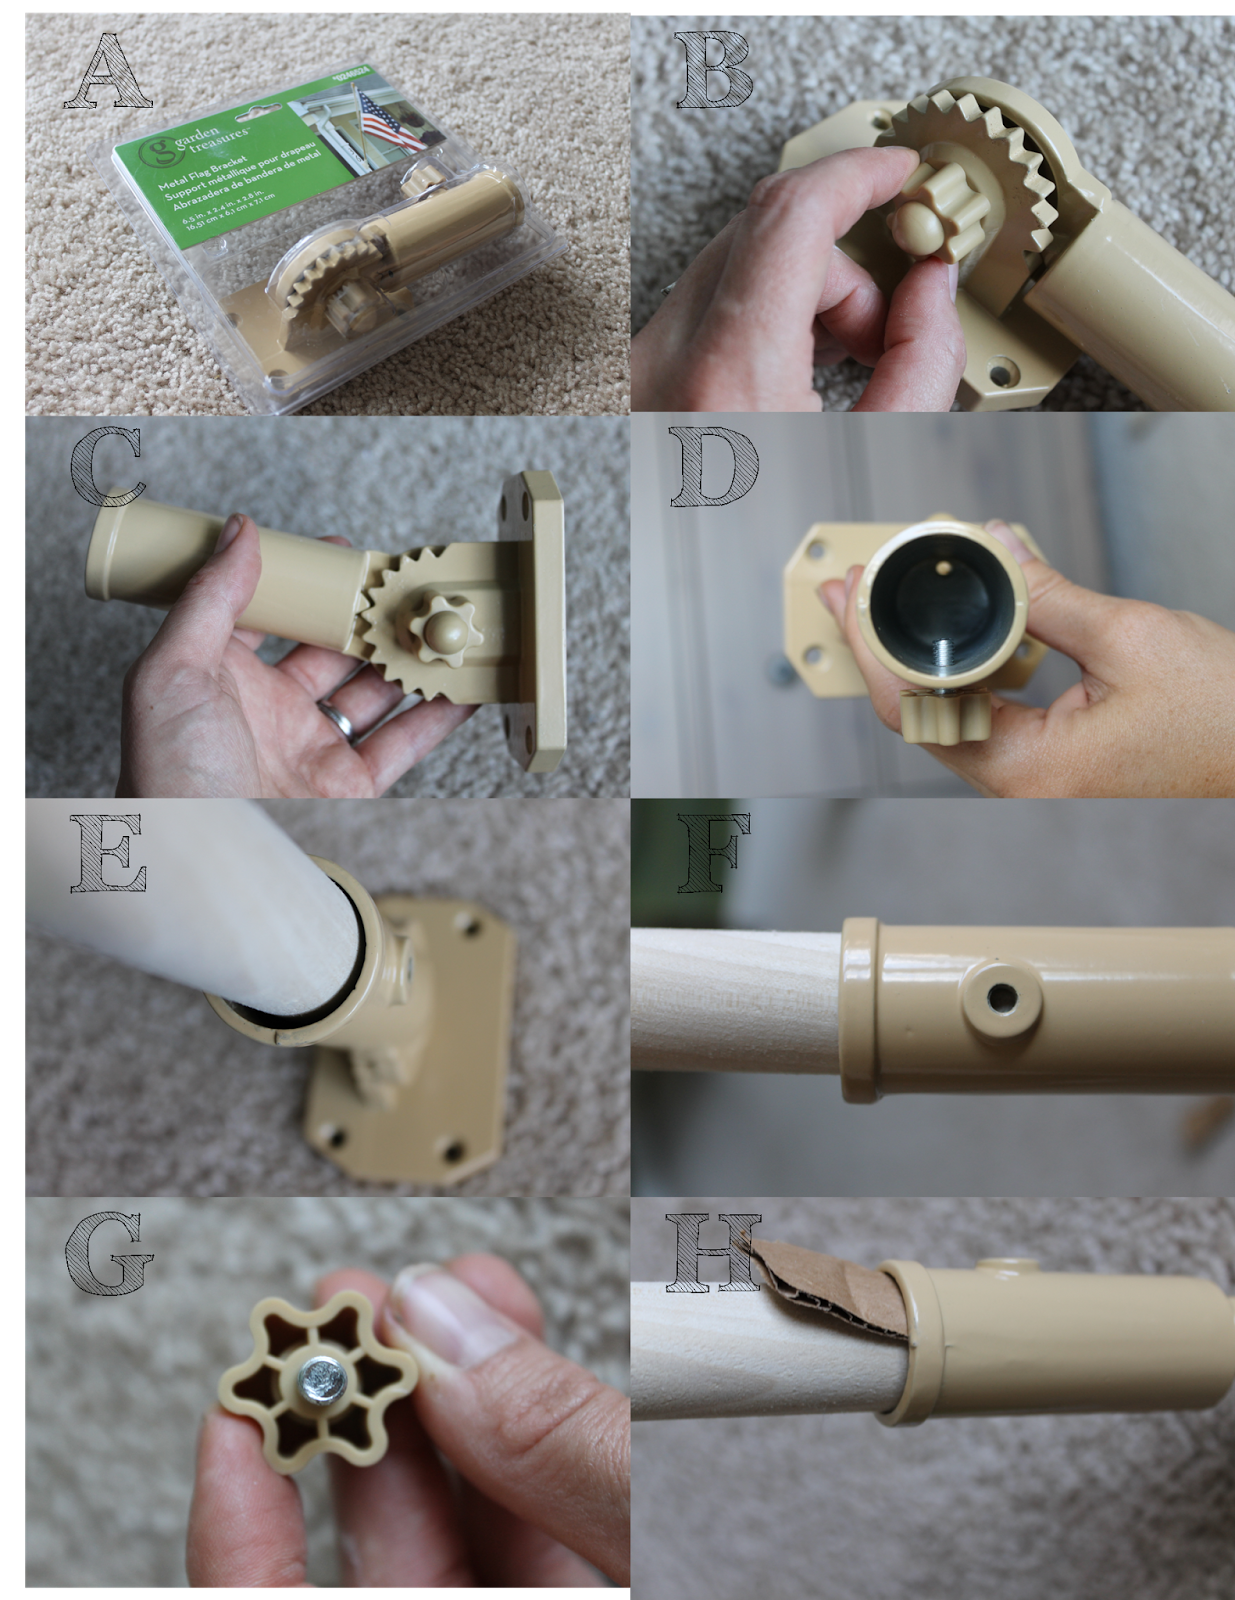
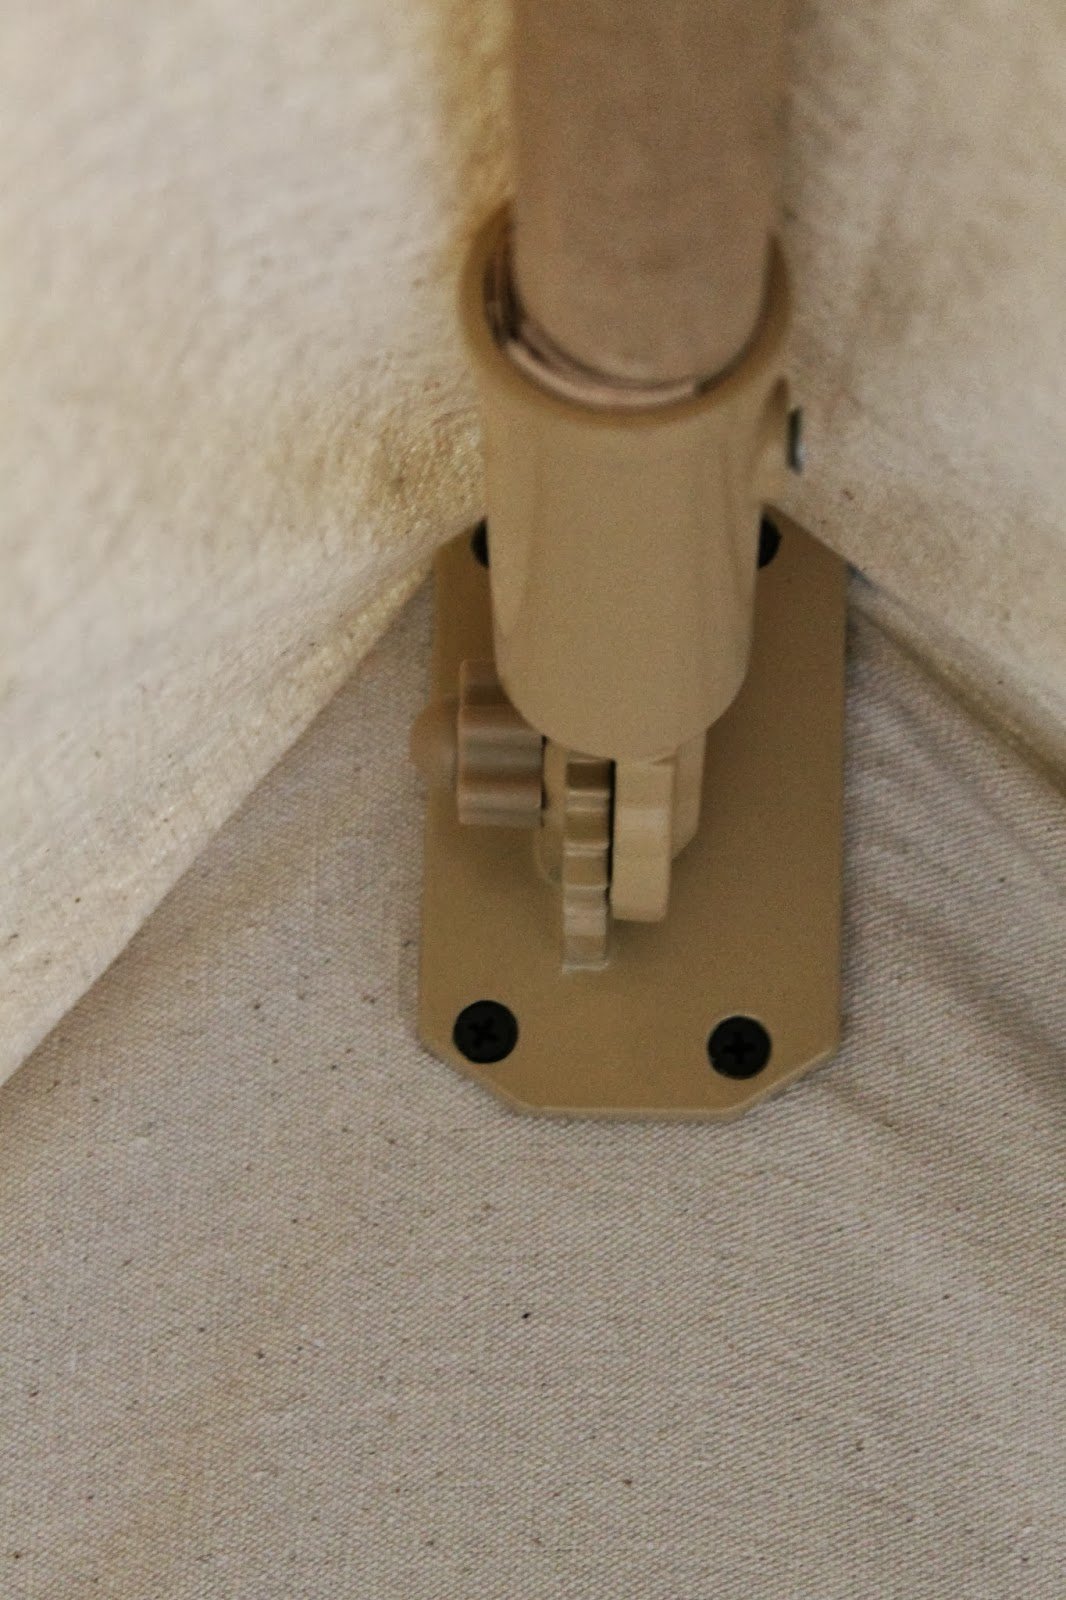
A-Metal flag pole bracket, comes in other colors, but this was the closest to the canvas color. You will have to do this three times…So you’ll be a pro at the end.
B– Loosen the side mounting screw, this one adjusts the angle at which the pole will be mounted.
C– Move the dowel holder piece, to an angled position. I have mine in the 5th notch. This is important because it will be carrying a bit of weight with the canvas, and the kids may tug at it, so you will have less resistance this way. It also props the tent up better, makes it more open inside.
D-Unscrew the pole holding screw. It blocks the dowel from going all the way in. Keep it, you still need this.
E-Place the dowel inside the mount, notice it fits loosely, there is a gap. Push it all the way to the bottom of the holder.
F-Hold in place, and with a pencil, mark the hole where the tightening screw fits in.
G– This is where you will need the drill bit… 3/16″ seemed to be a good size, you don’t want it as big, or bigger than the tightening screw pictured, or it will wiggle. You don’t need to drill all the way through, just about as deep into the dowel, as the screw is long, not even half way into the dowel. Drill right into the mark you just made on the dowel.
H-Place the dowel back in the pole holder, making sure when your doing this, the screw hole is lined up with you hole you drilled. Now you can use some card board or poster board pieces, to make the fit tight. This is just to keep it from wiggling around. I use a couple pieces of wood veneer I had laying around, I put it in a couple spots, until it fit tightly. Then, put the tightening screw into the hole.
Do this for all three brackets and poles
Now, you will get the canvas ready to attach to the wall.
Lay the canvas out flat, and find the middle.
First you will want to mark where the top pole will hit the canvas. You will want at least 10″-13″ hanging down in front of the tent (see 3 third picture). So measure 10″-13″ in from the edge of the canvas (at the center), and mark.
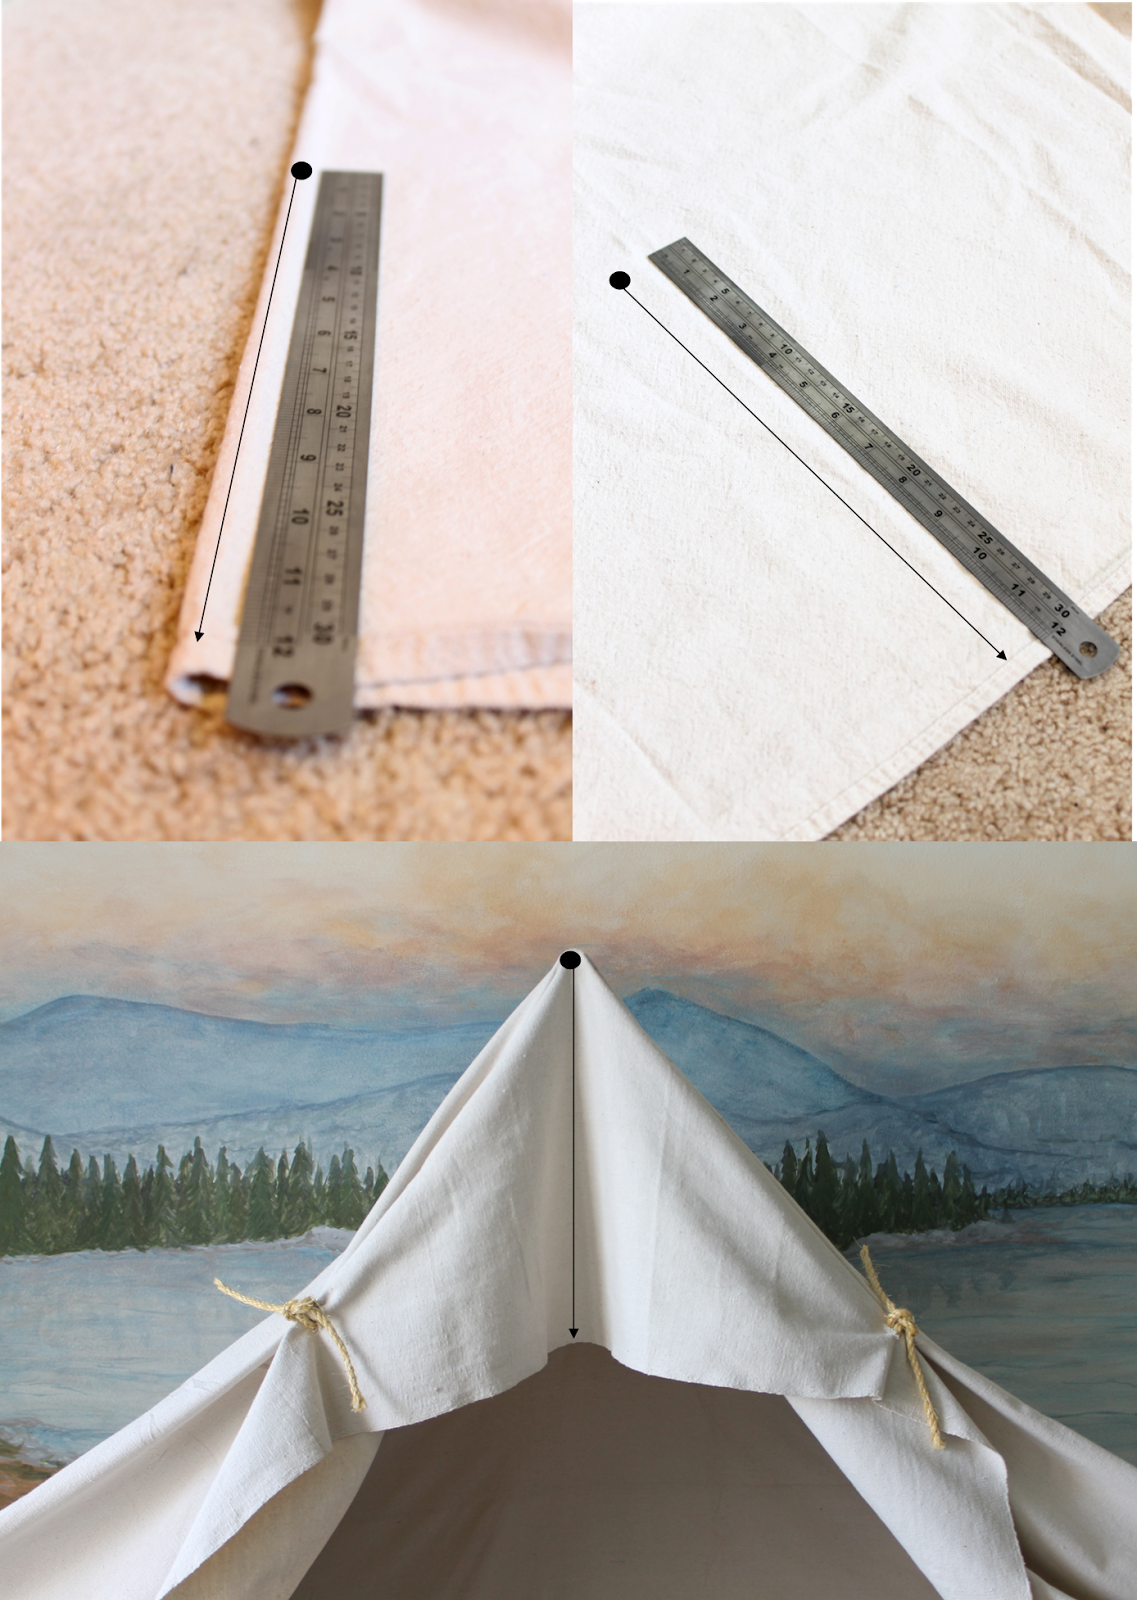
This is where your dowel will start, where it says hold here.

Next, you will want to attach the center pole, to the wall.
Here is what the angle will look like when it is attached to the wall….It doesn’t go straight out.
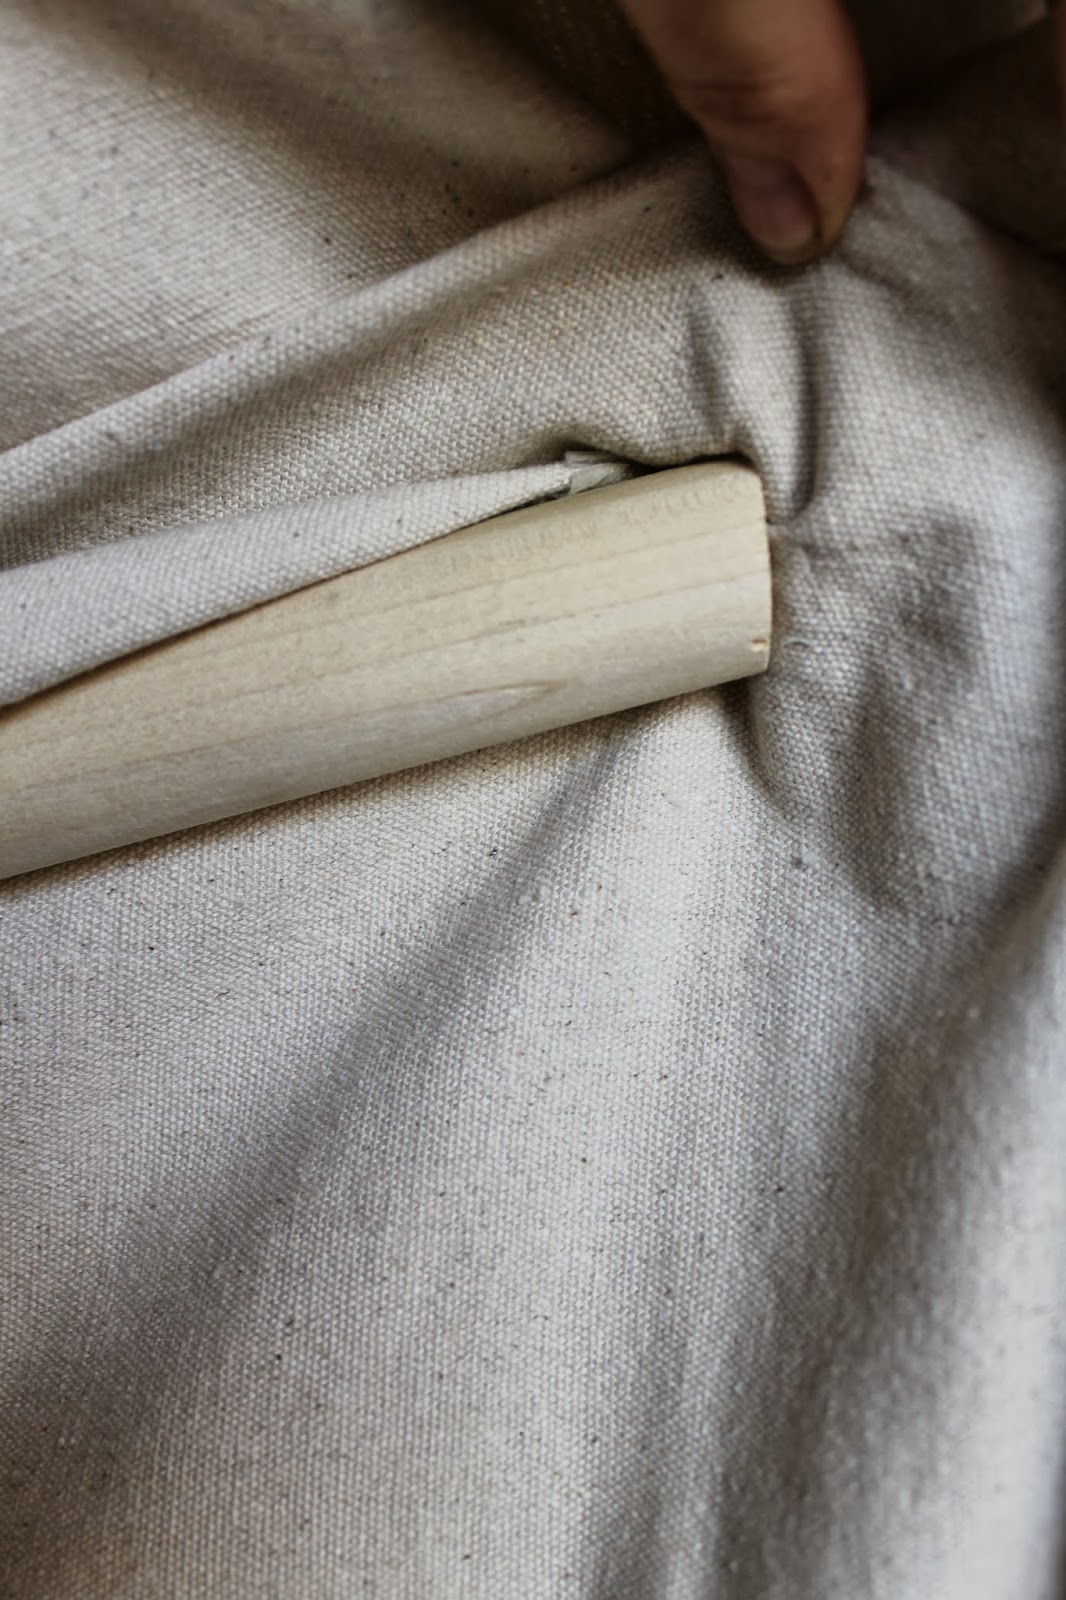
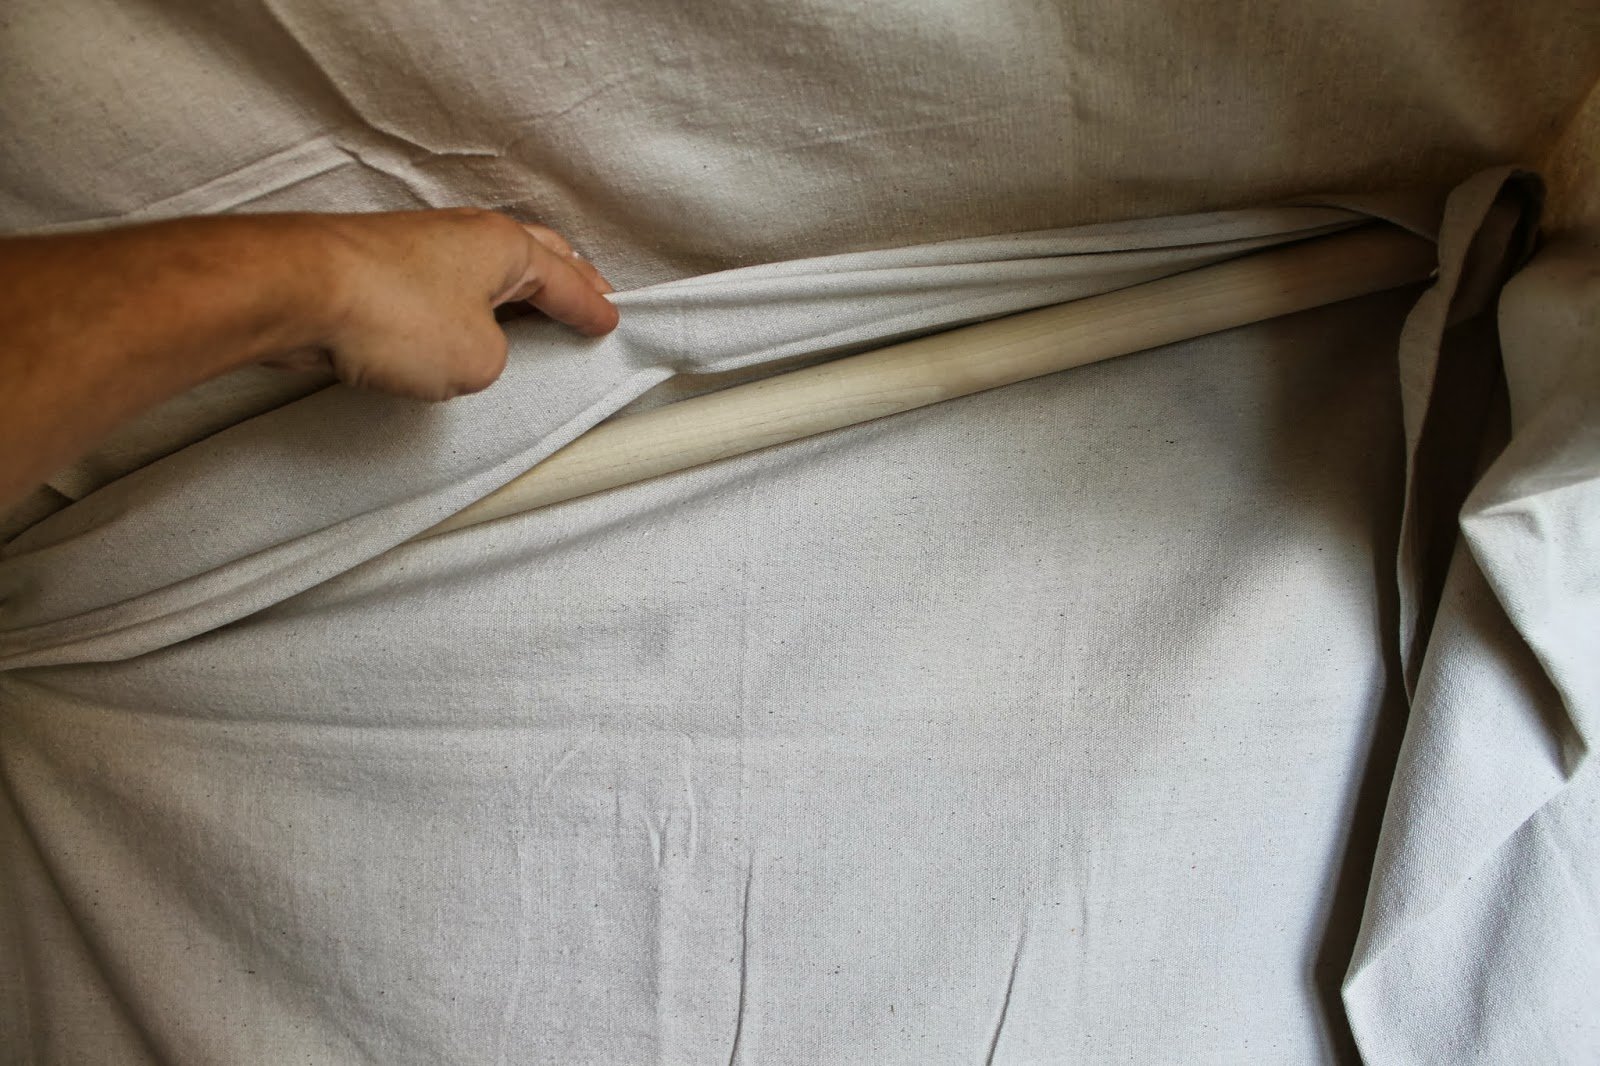
You may need two people here, since the canvas is big, it’s a bit awkward. Hold the end of dowel in your marked position 10″-13″, I put a dab of hot glue on the end of the dowel, so it would stay in place. This will be the tallest point of the tent.
Pull the canvas down over the length of the dowel and bracket, so it’s now behind the bracket.
It’s best to get under it, to attach it, having someone help hold and line up the pole above.
Should look like the picture below, from underneath where you are attaching it.
Attach the bracket to the wall with the four screws, going into the dry wall anchors…sandwiching the canvas between the wall and bracket. Pull canvas taught before screwing in.

Then, repeat the process for the left and right side, holding the rod and bracket over the pre-anchored positions on the wall, and draping the canvas over the dowel (like in the previous step). Pull canvas taught so it doesn’t drape between the top and side dowels. Again, I dabbed a bit of hot glue on the top of the dowel to keep the canvas in place. The excess will hang into the tent.

There will be extra canvas when you pull this tight. I used it to cover up the dowel on the inside of the tent. otherwise it will just hang there.
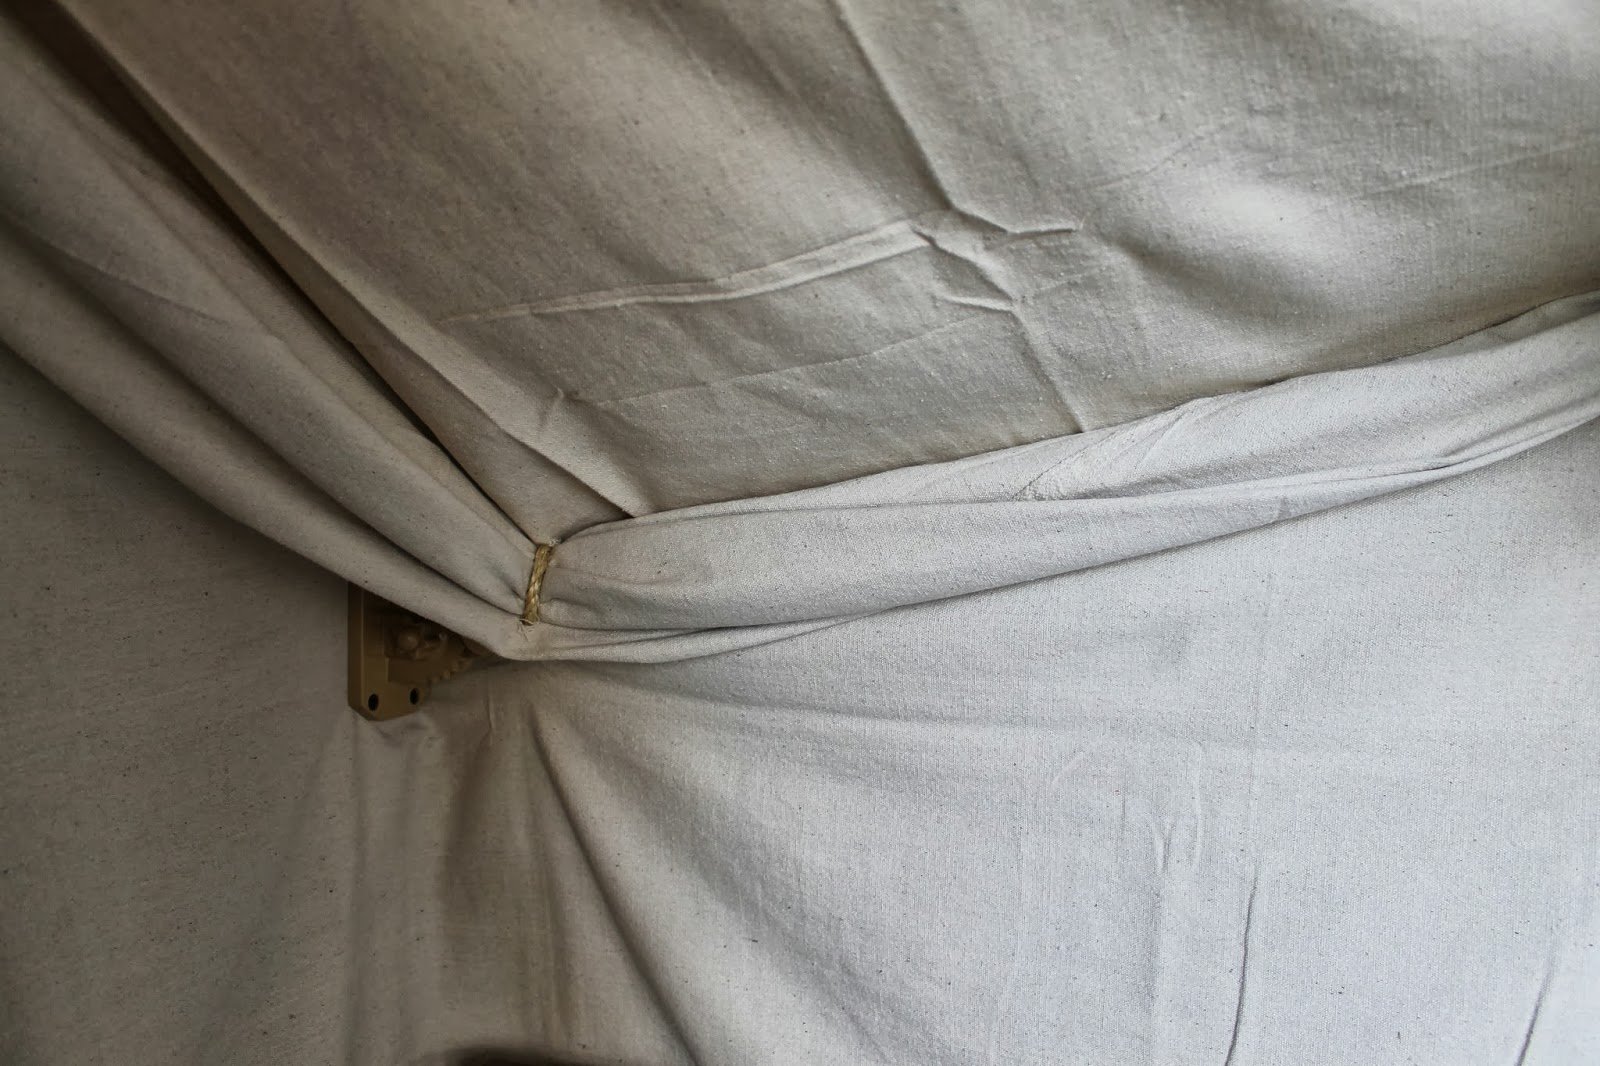
Now you will secure the canvas to the dowel ends. Before you do this wrap and tuck any extra canvas, until you get the look you want, and then screw it into place. You can cut and hot glue pieces together, if you don’t want the extra showing. This is meant to be a outdoor tent look, so cleaner is probably not better here.
 |
 |
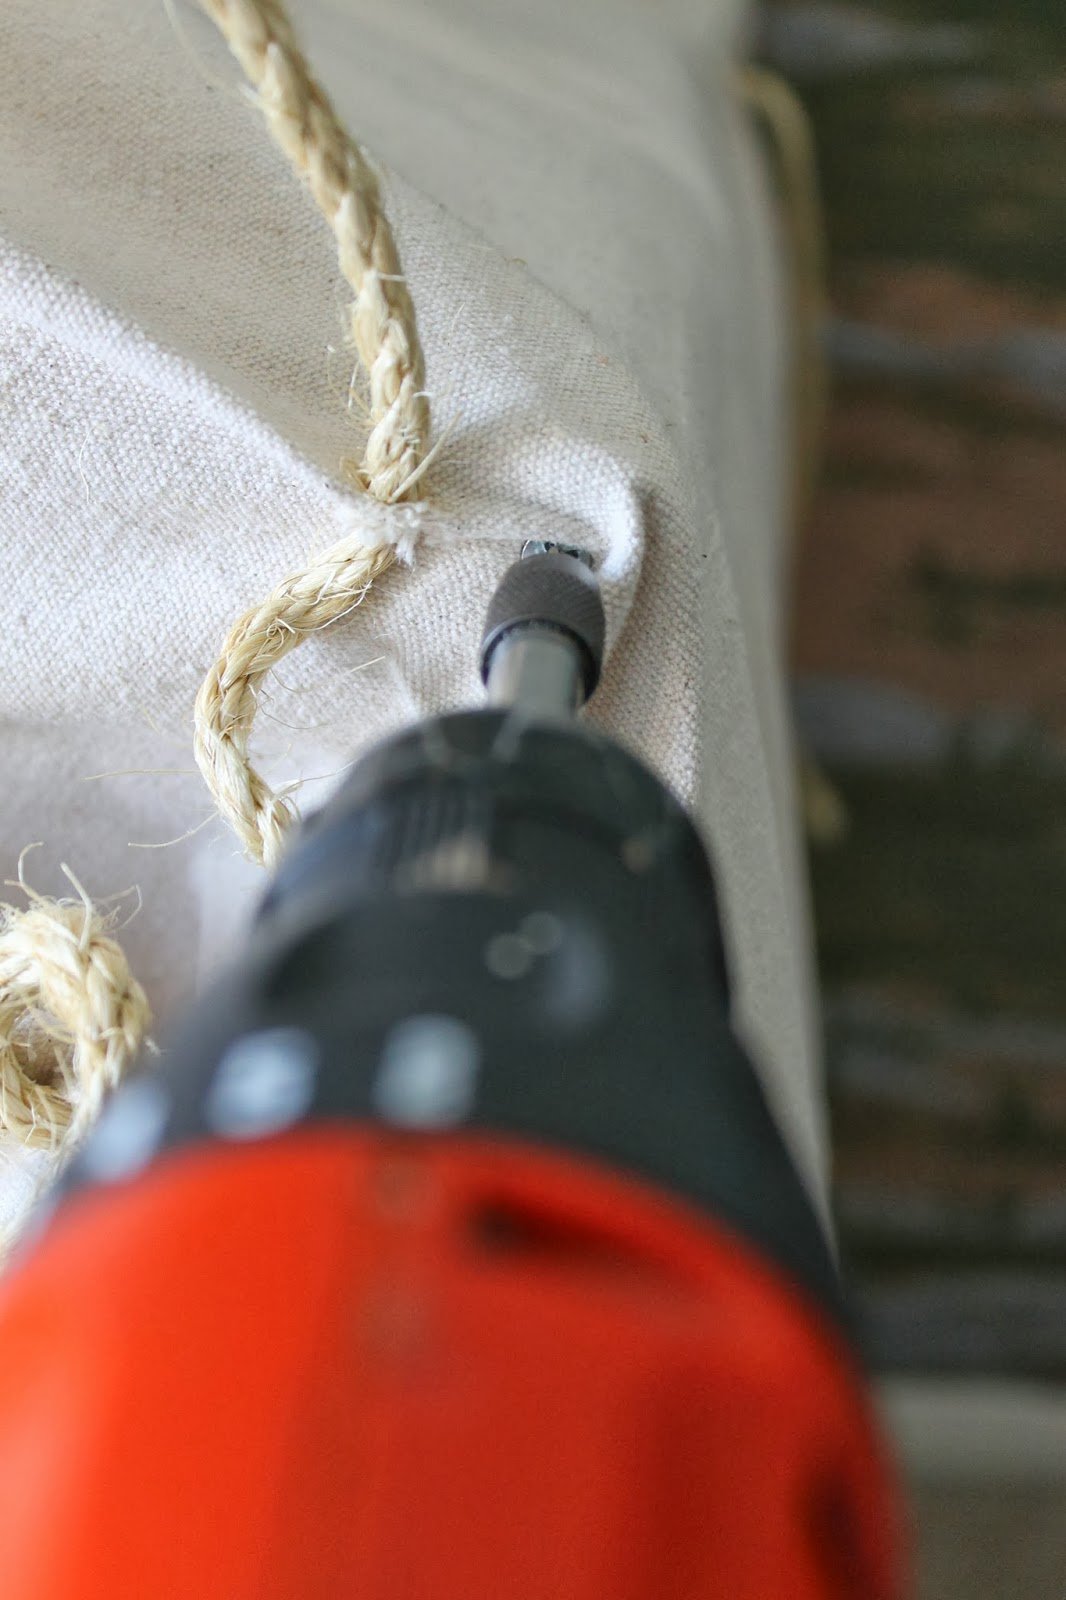
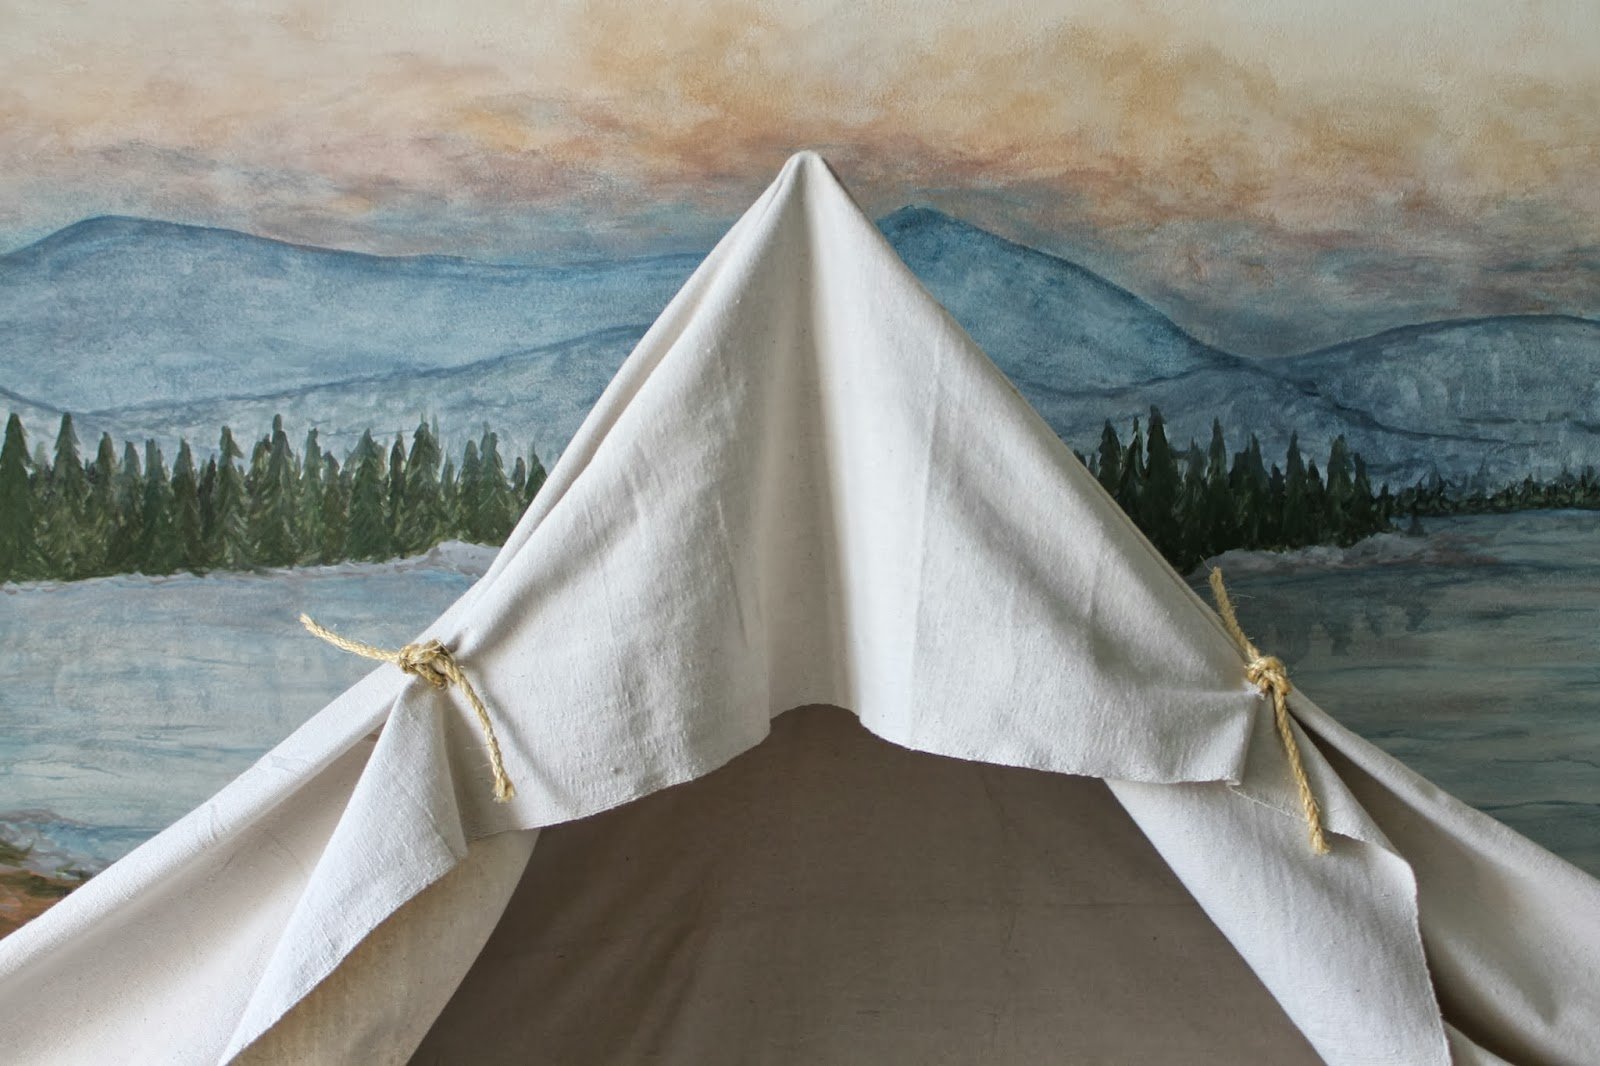
To gather the fabric, and really give it the tent look….I cut two holes in the fabric, on the top seam, and on the piece that draped down. This will eventually cover up the end of the screws. Play with this before you cut the holes, you want the drape to look natural, and not all gathered up in front. It took several rearrangements to get it where I wanted it. Remember what you did, as you will be doing it again on the other side.
I thread a piece of the rope through each hole, pulled and tied it twice.
 |
 |
This is how the gather will look

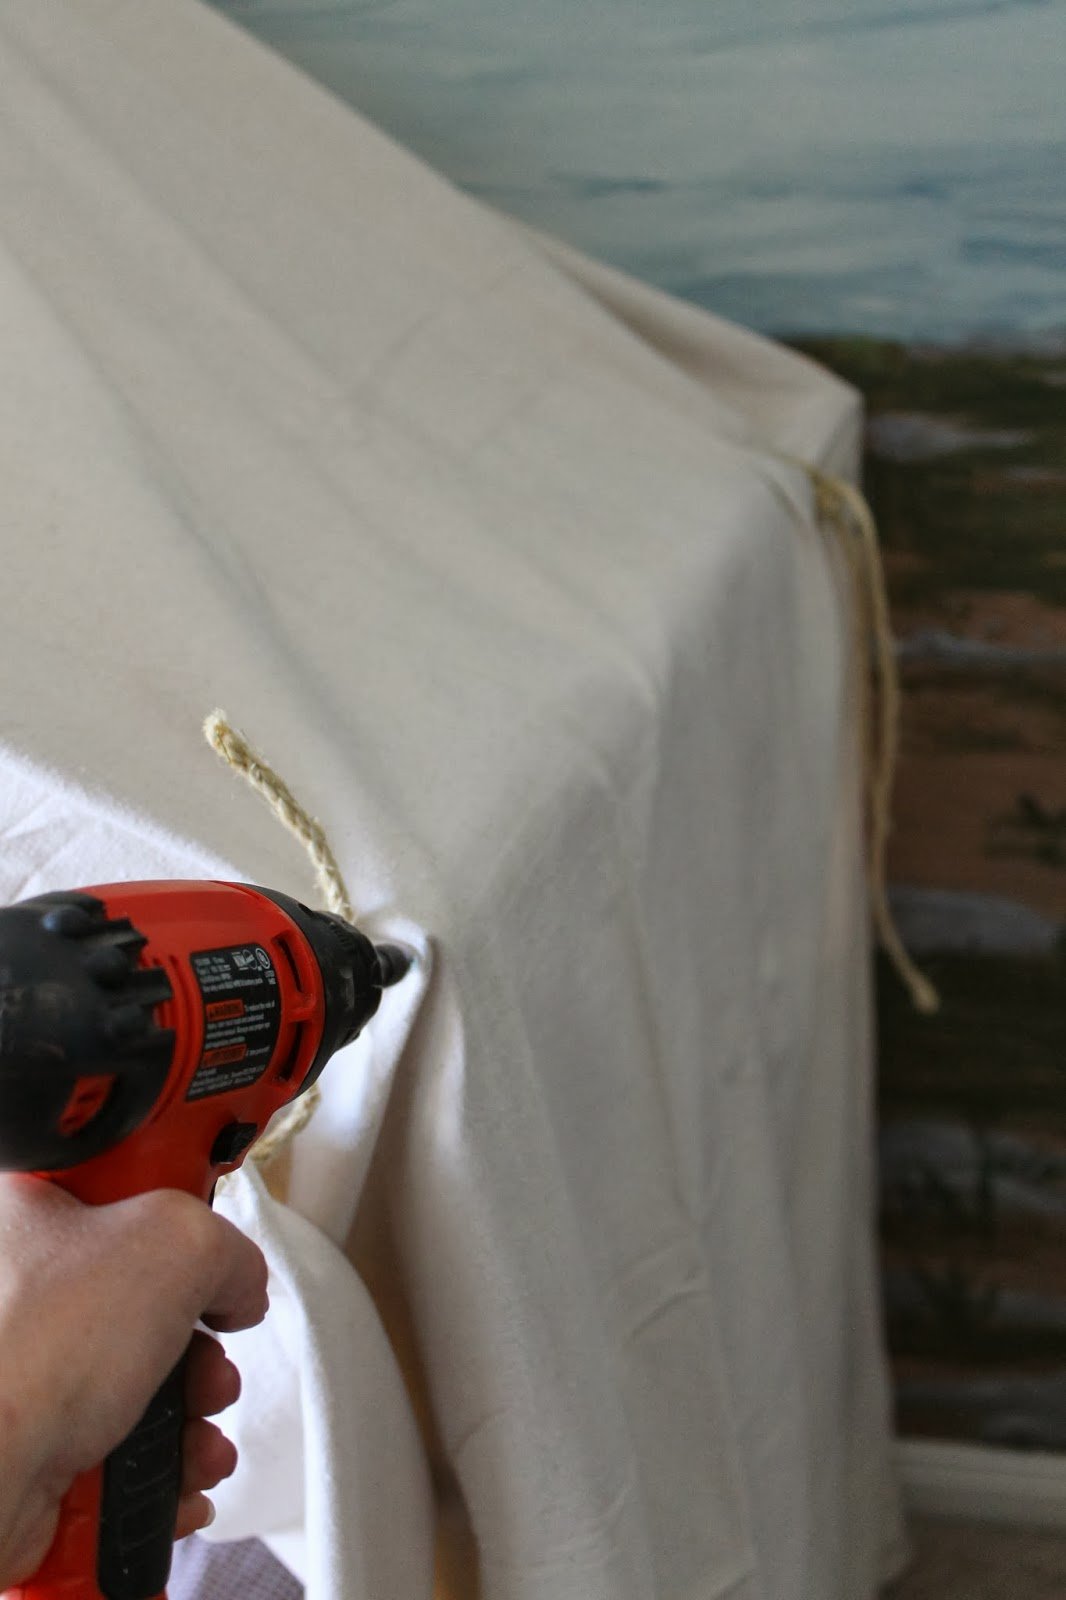
Some of the fabric will drape to the floor, and depending on the bed you use, and the height, it may not. Mine hit the floor a bit longer on one side than the other, and I just cut it off so it was even. Obviously I didn’t take my time measuring 🙂
For the top front of the tent, I used the rope to attach the front and top pieces together. I wanted it straight across in the front. So I held it where I wanted it, and pinch the top and front canvas together, made holes, and put the rope through.
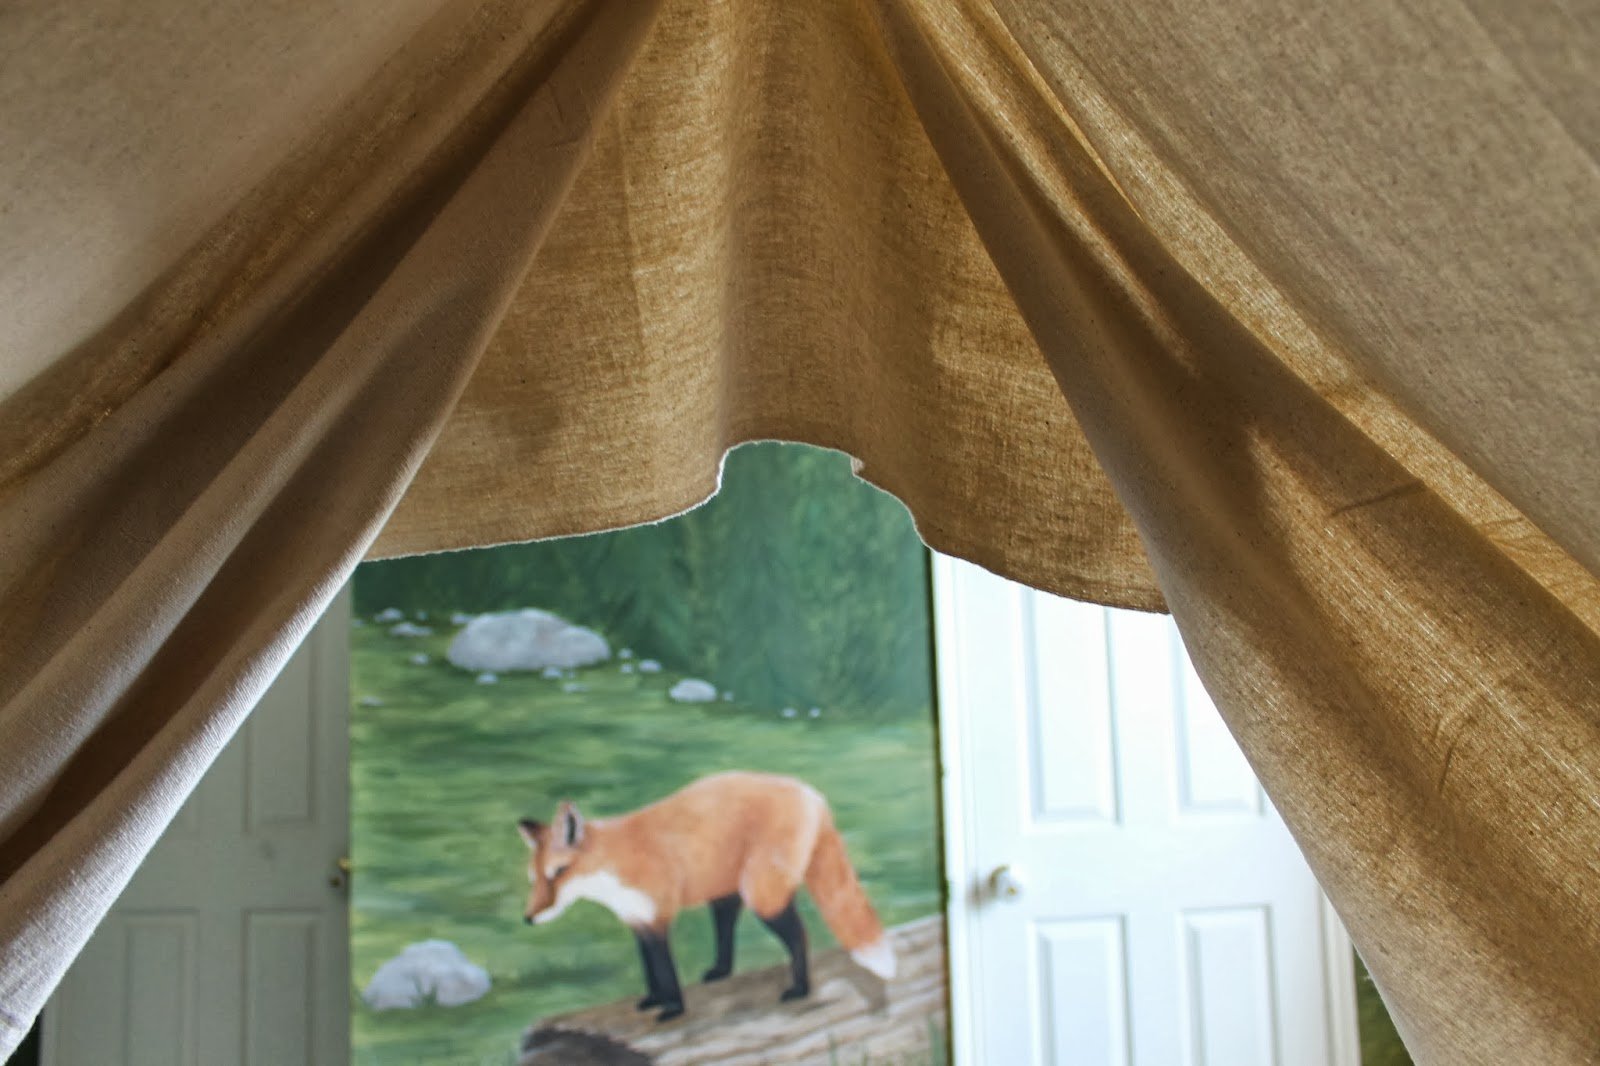
This is the view from inside the tent
This is how the sides of the tent look. Without sewing and really mapping it all out you will have excess fabric. If you want a cleaner look you could take the extra time to do that. I think it should look like a tent some kids and a camp counselor put together outside, so very imperfect. Or at least claim that’s what you wanted it to look like.

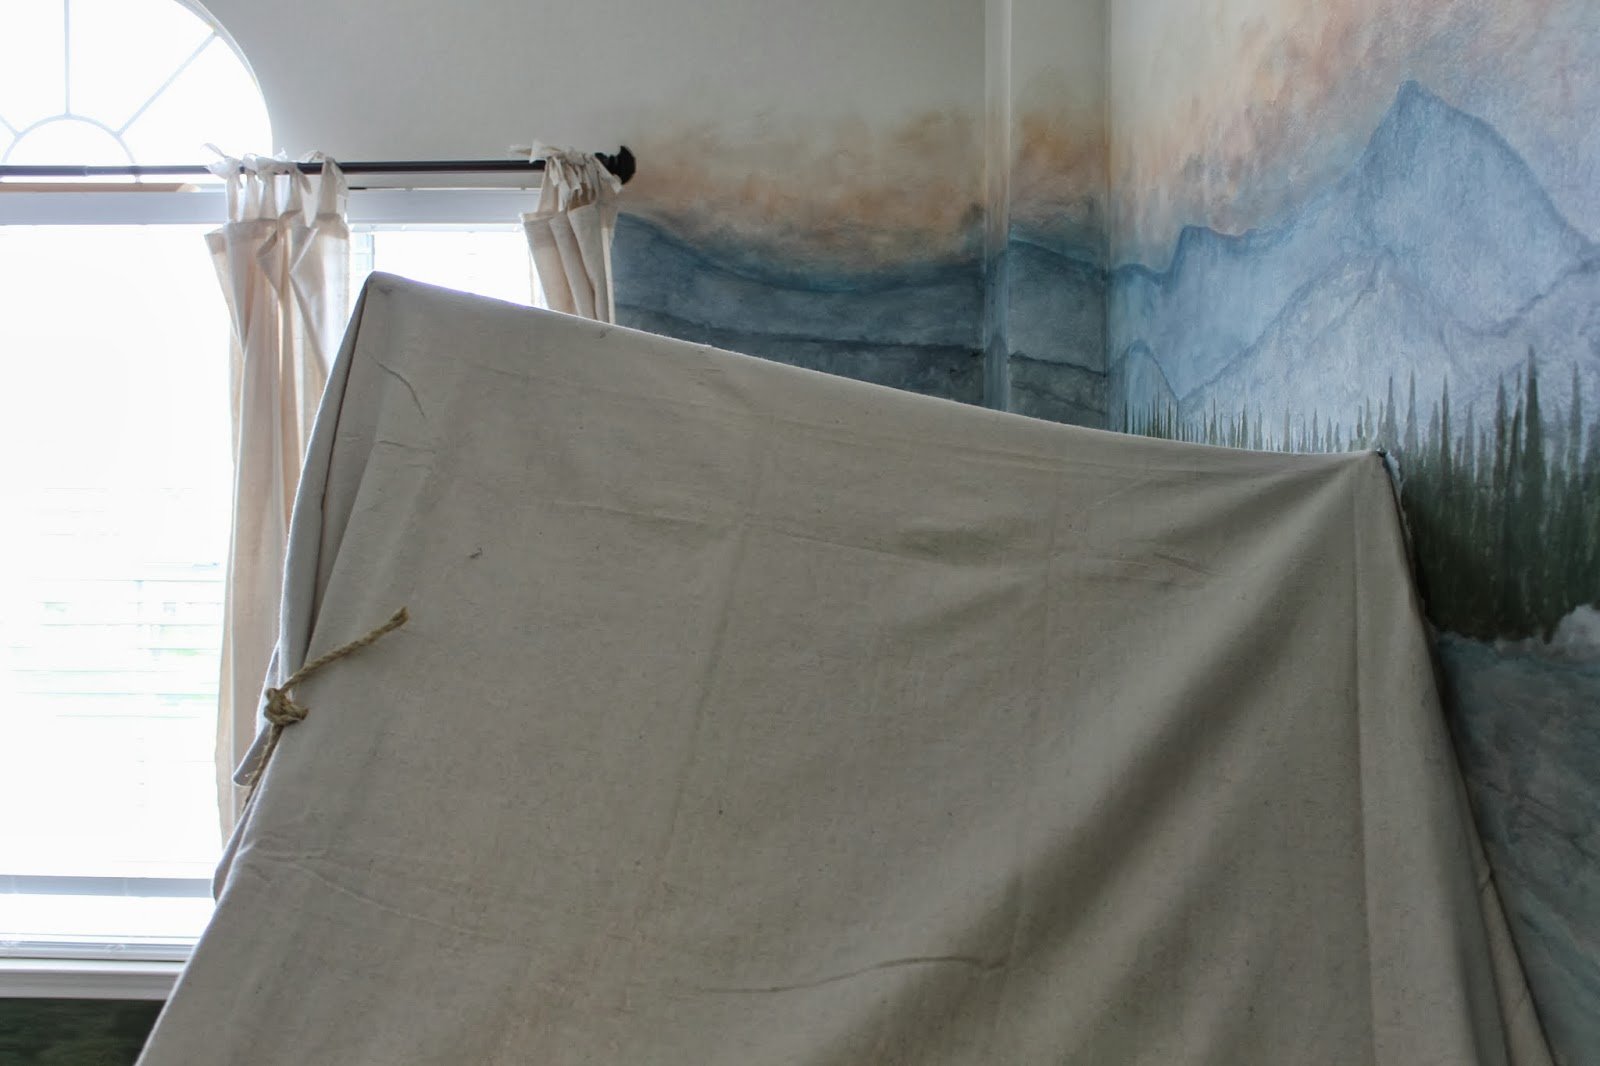
Here is what you will end up with….
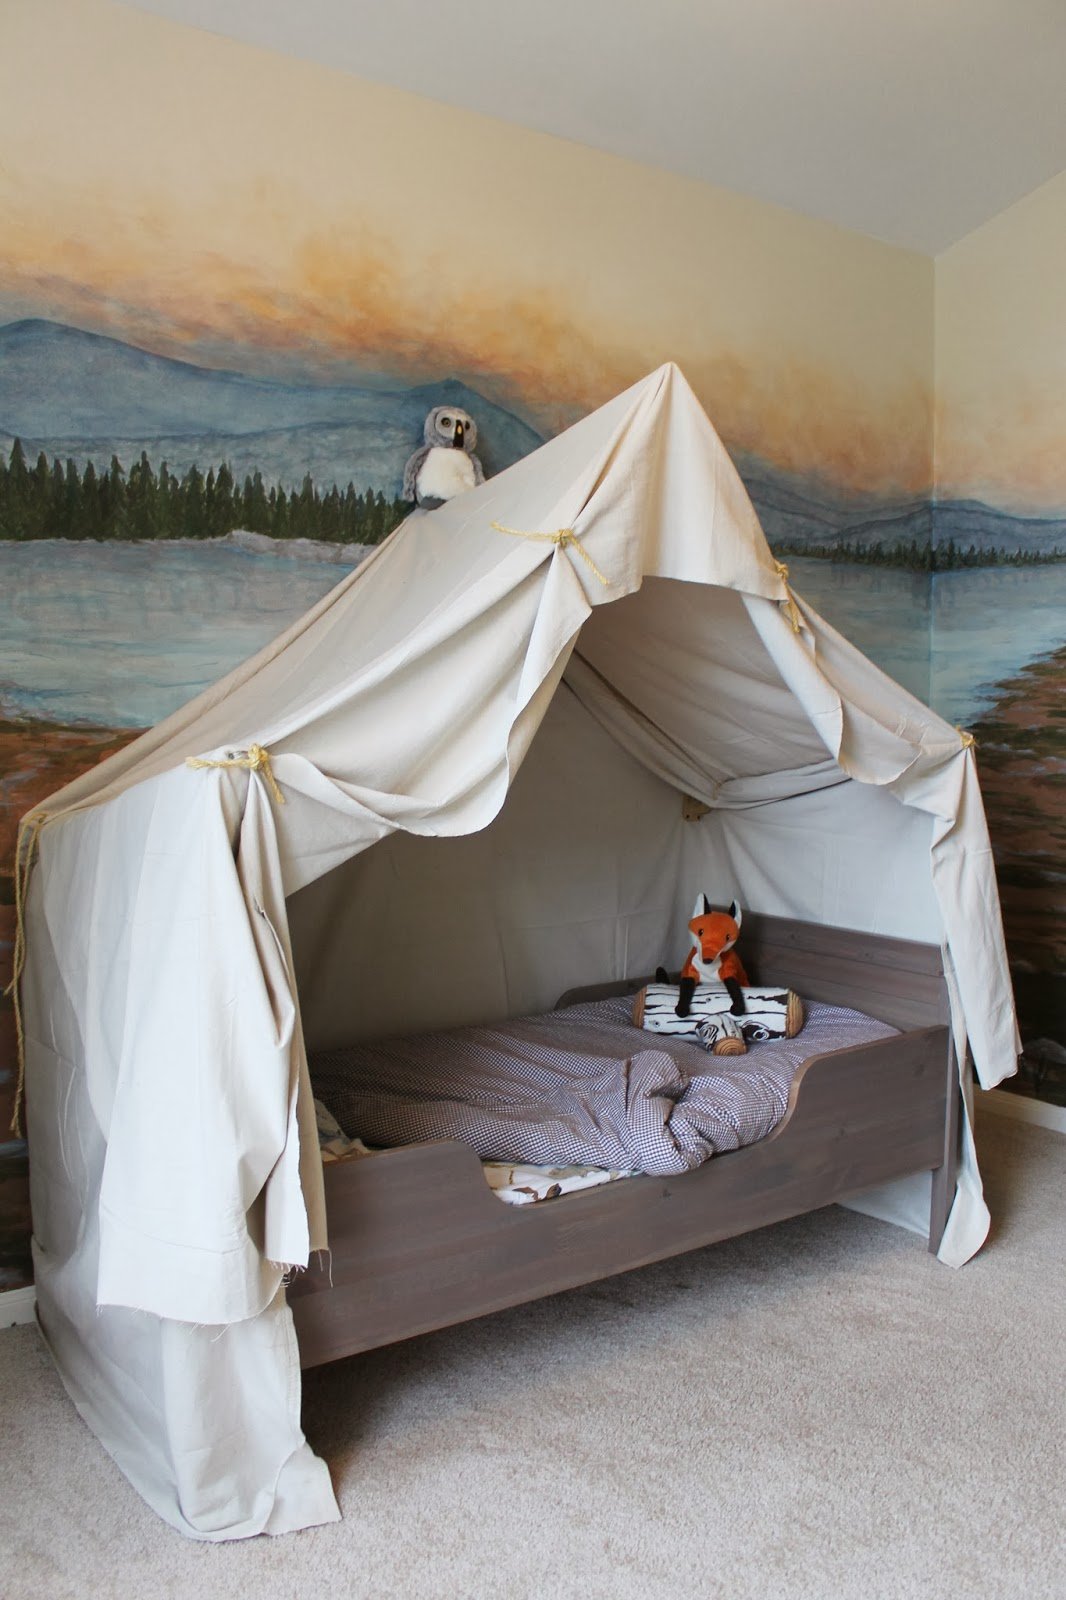

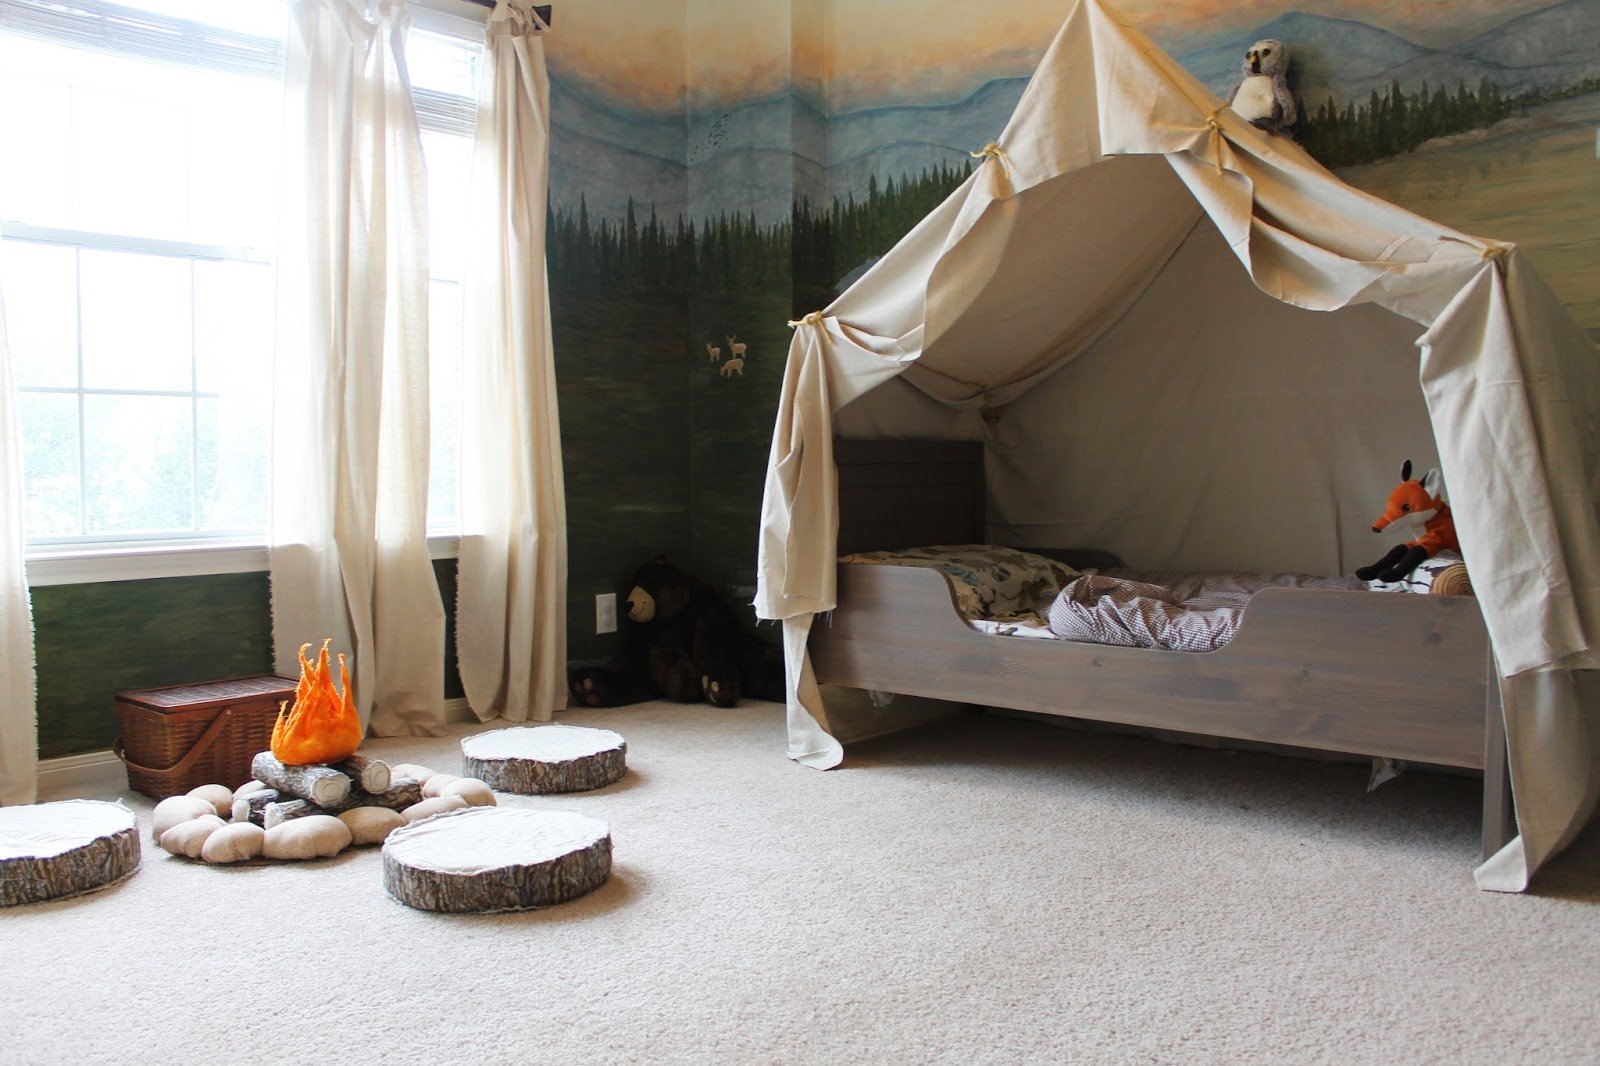
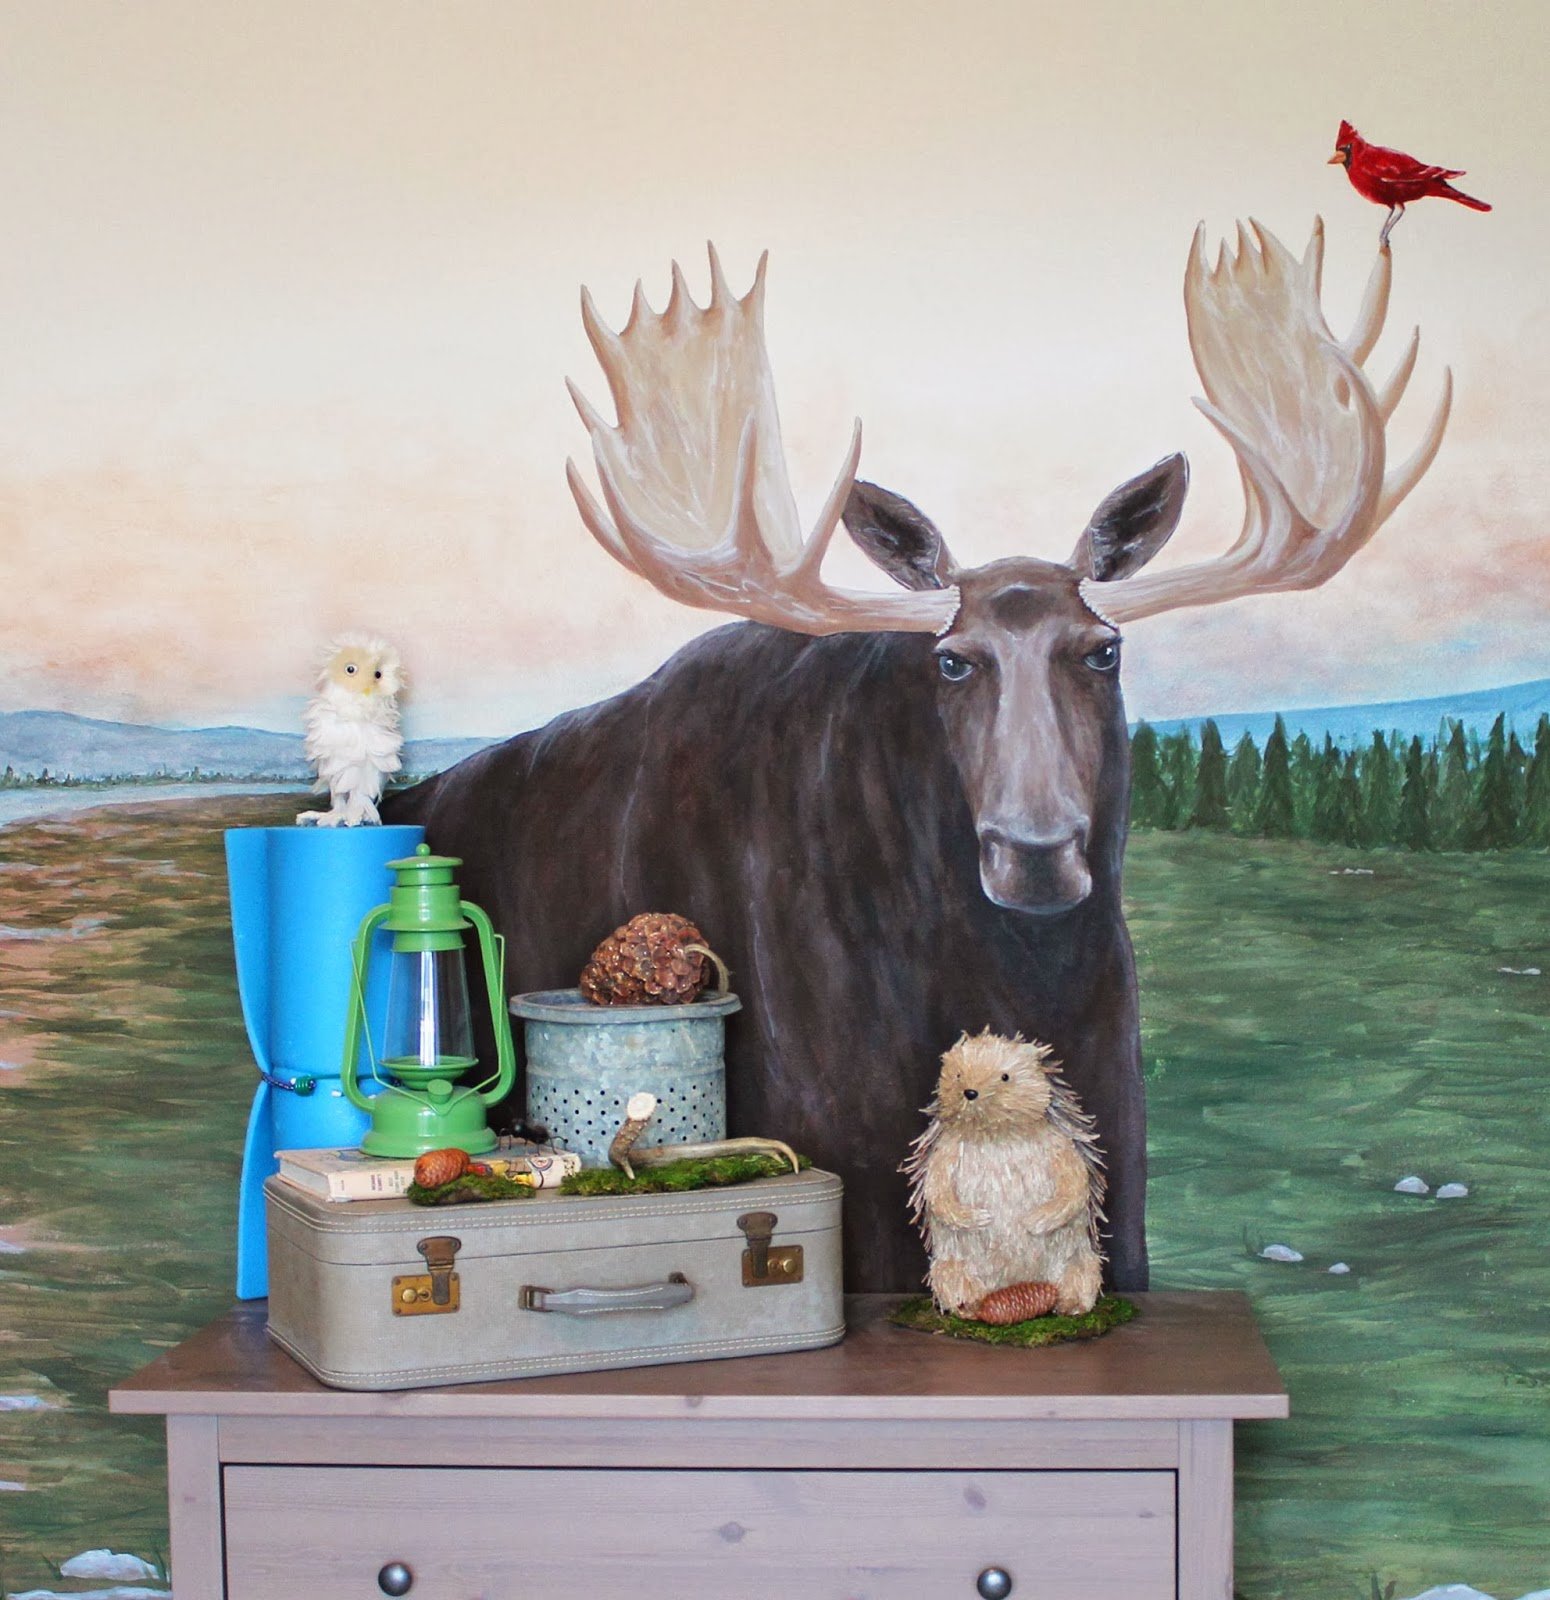
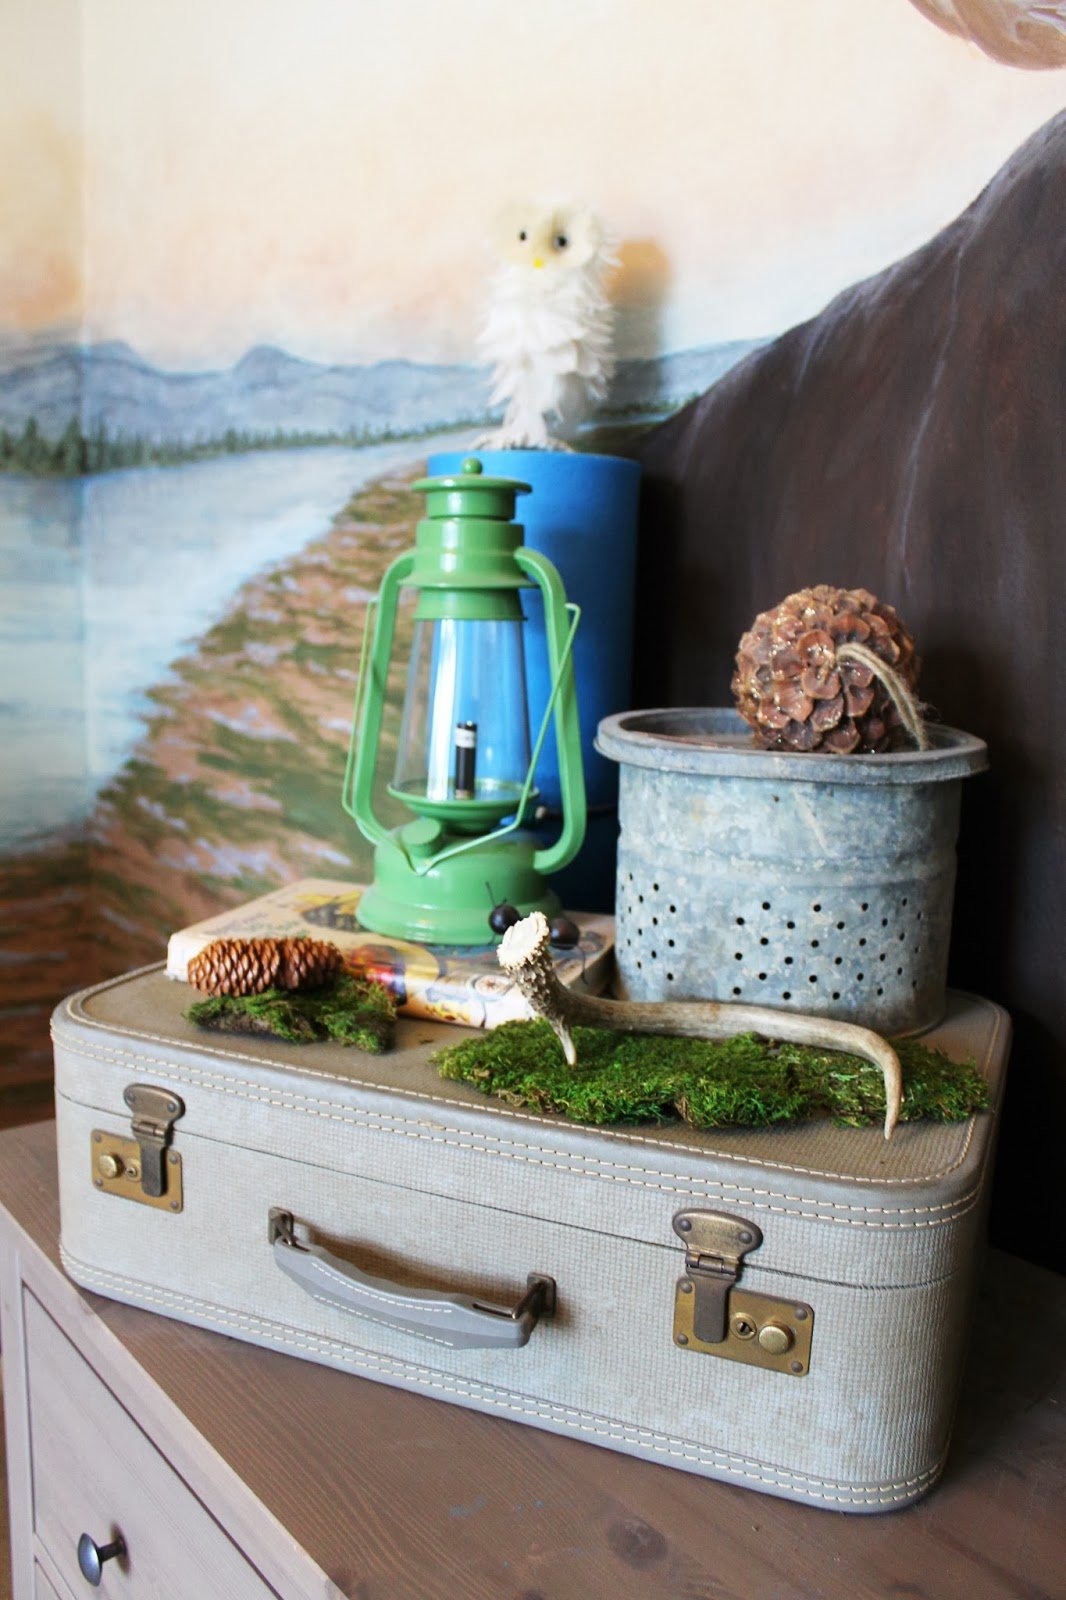
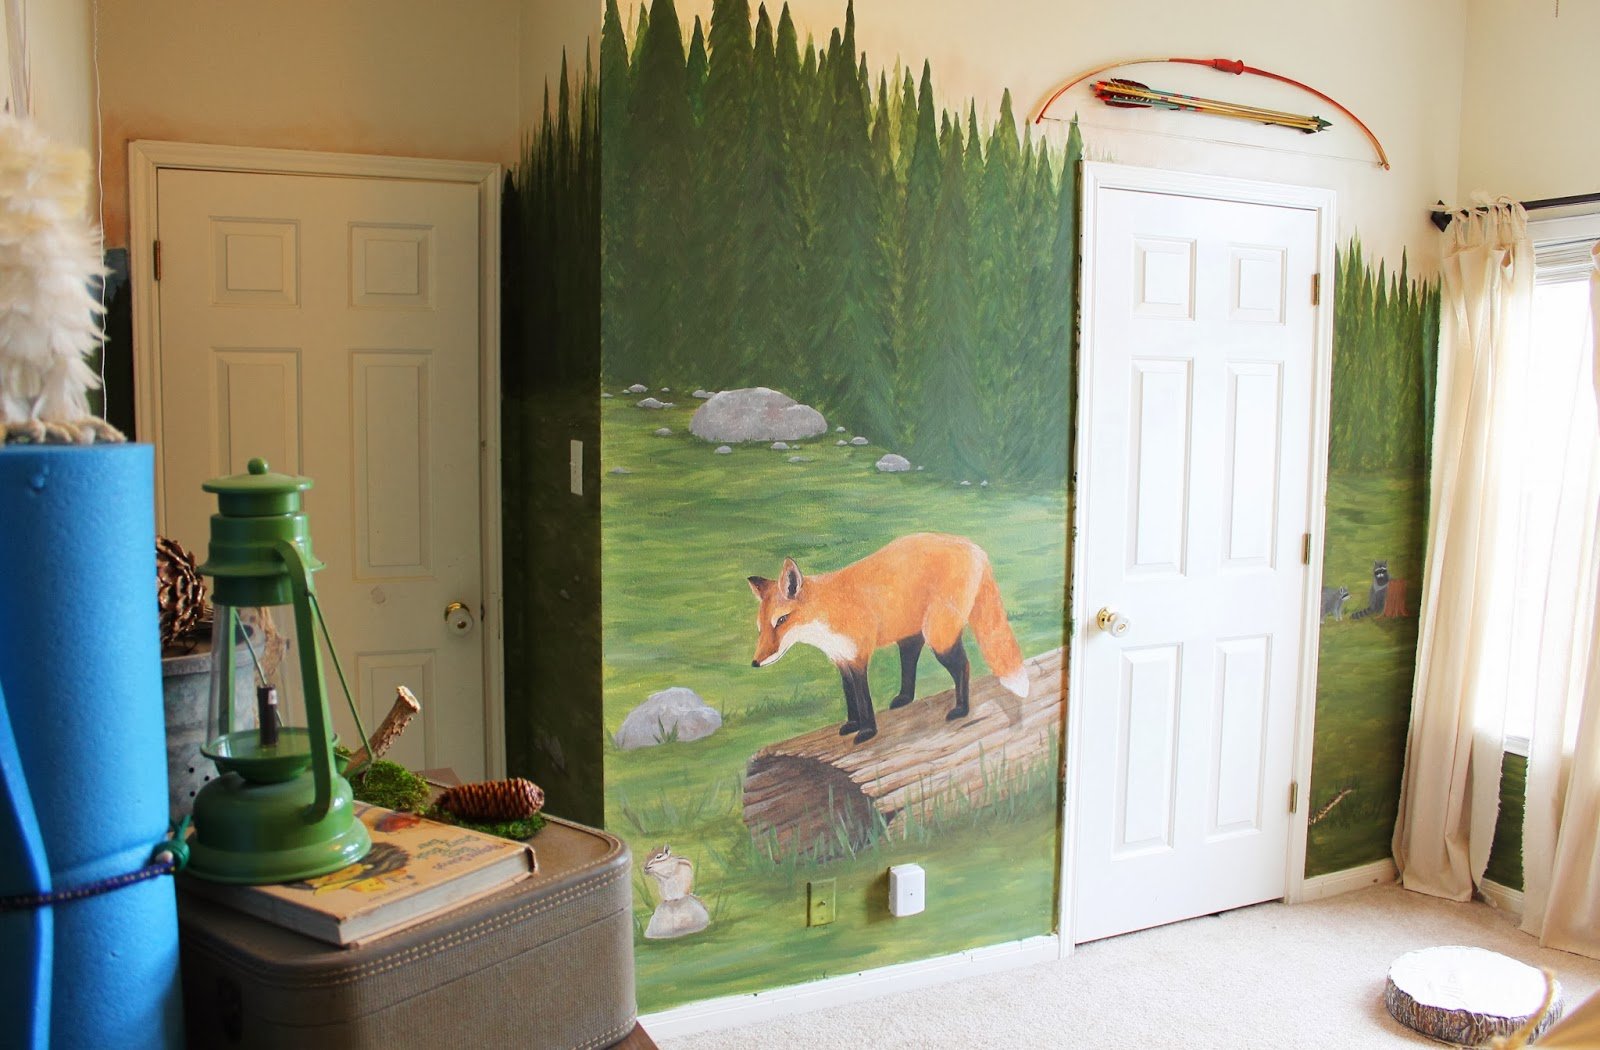
A peek at the rest of the room…..
…see how it all came together Here.
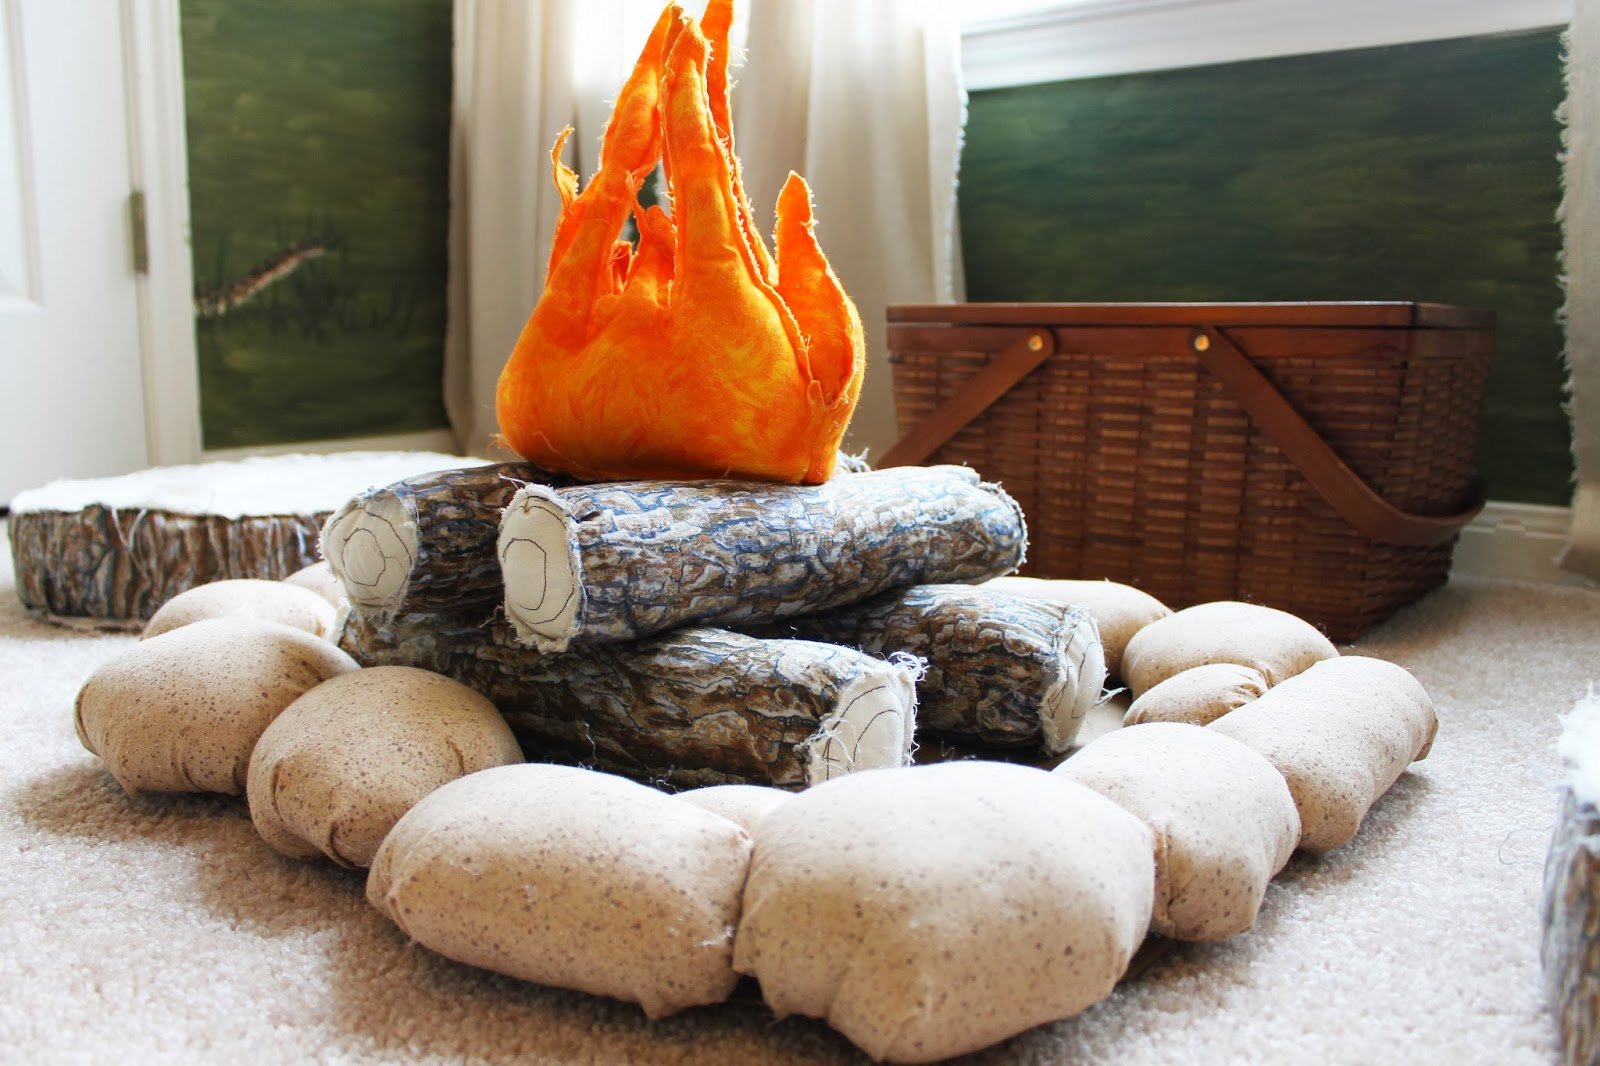
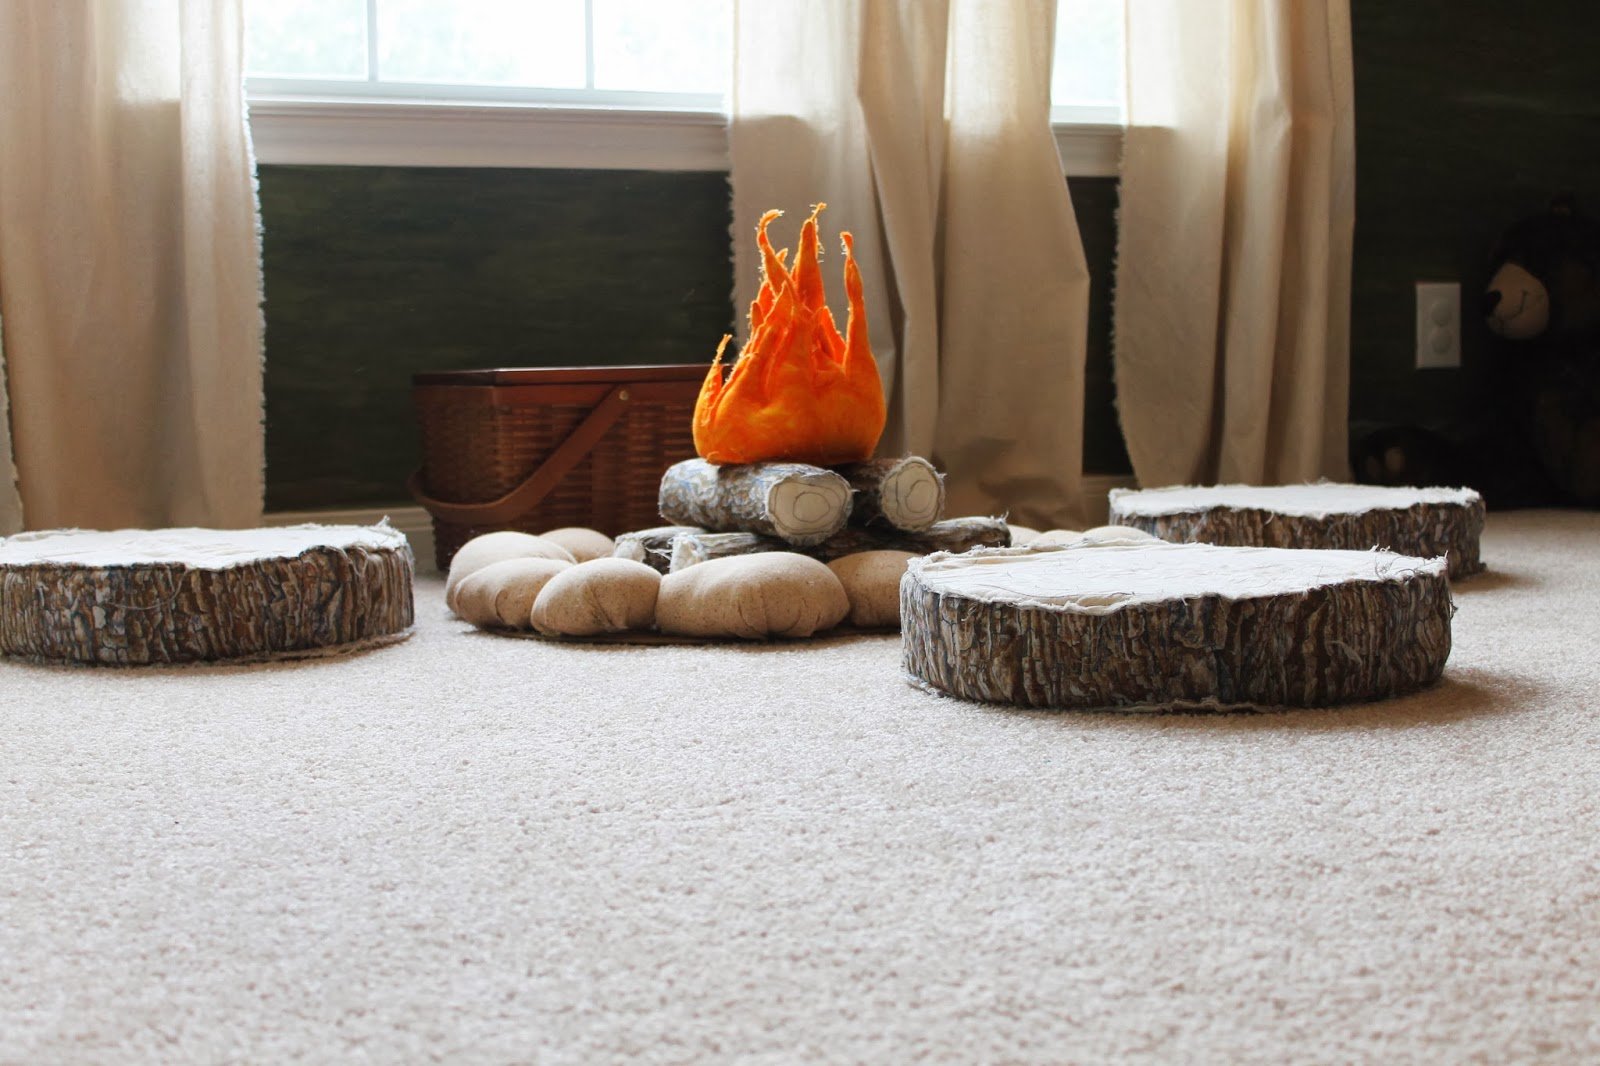

Check out the super simple, Campfire Set Tutorial Here.
Be sure and check out my blog for more DIY, decorating and paint projects, and tips from a pro!
—————————————–
Head over to The Ragged Wren to pay Alyson a visit!
Lorene has been behind the scenes here at Remodelaholic for more than a decade! She believes that planning projects and actually completing them are two different hobbies, but that doesn't stop her from planning at least a dozen projects at any given time. She spends her free time creating memories with her husband and 5 kids, traveling as far as she can afford, and partaking of books in any form available.


Thanks ladies for the feature! So glad to share this easy project with all your remodelaholics!
Thanks for being our guest, Alyson!
This is amazing!! I love everything about the room and I want to try to create something like this for my boys in their playroom. Thanks for sharing!
Thanks, Holly!
Easy project? -Wow!!! -you are an artist, super-creative. This room is absolutely amazingly beautiful. I am sure your children love it. Thanks for sharing.
Damn I am 35 and would love for my bed to have a tent around it.
Can you post how you made the tented bed canopy. not sure how to recreate it and my daughter would love it!
All the info is in the post, Rachel 🙂
I’m curious about the bed frame. Where did you find it?