Bunk Bed Playhouse Building Tutorial
It is that time of year again! Happy Birthday to me… (literally today is my birthday, YAY!) but that is beside the point because today is the first day of Sherwin-Williams’ NATIONAL PAINTING WEEK!!! Be sure to visit SWPaintingWeek.com AND there are two other lovely projects today. So check out Design Crush’s Bathroom project and City Sage’s Side table project!
Anyway, we have been killing ourselves for the past month to finish a huge project, in very little time for your benefit of course!! (well, you and my kids!!!)
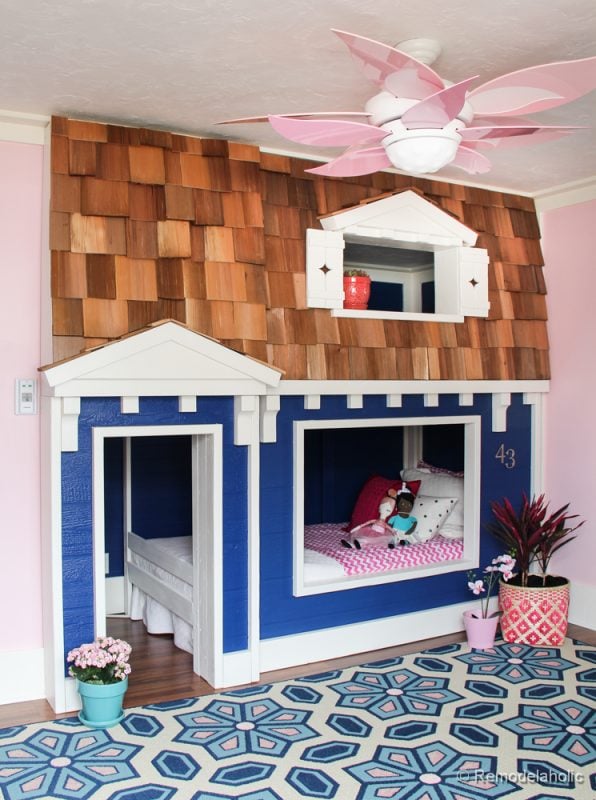
This year’s project has been a while in the making, almost 2 full years (apparently, it is true, good things come to those who wait!). When we first moved in, my daughter’s current bedroom didn’t actually exist, it was a big open family type room (the 4th living room in this house), so we built it in and created a bedroom. So this whole project has been taking quite a while. I’ve been showing you little bits of my plans for Etta’s room, and my main goal was that I knew I really wanted to do something cool with the bed nook that we created when we built in the room. So today, we are so excited to show you our bunk bed playhouse, I feel like we need a trumpet playing! It is that exciting!
It was a lot of fun to build and our girls LOVE it too (technically if I was allowed to make believe and run around like a kid all day long, I don’t think you could get me out of it!)
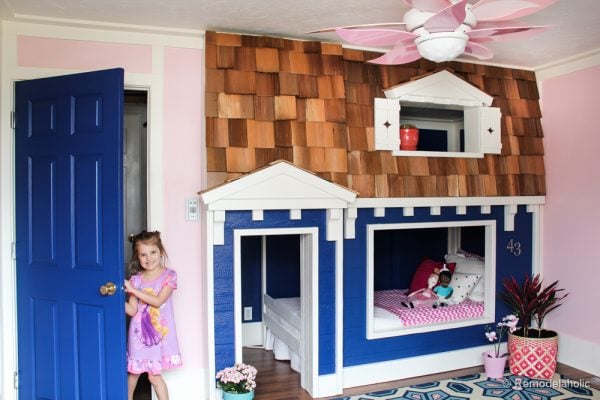
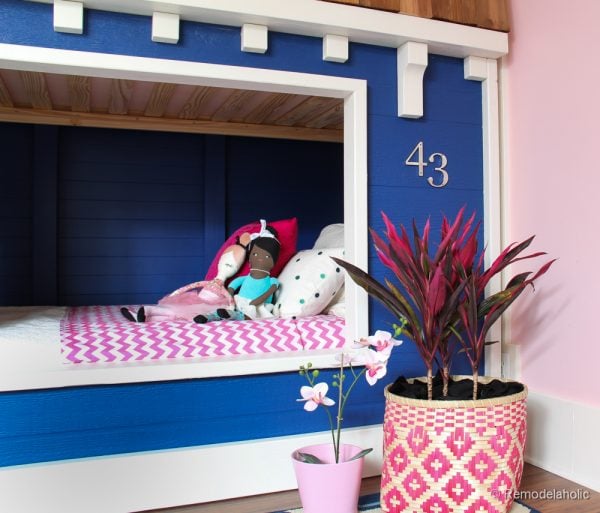
Since this is Sherwin-Williams National Painting Week, I need to be sure and point out the house’s color, I just really love this blue paint! It is Sherwin-Williams, Dignity Blue (SW 6804), with the trim Westhighland White(SW 7566). (since someone might ask, the walls are: Impatiens Pink (SW 6582).
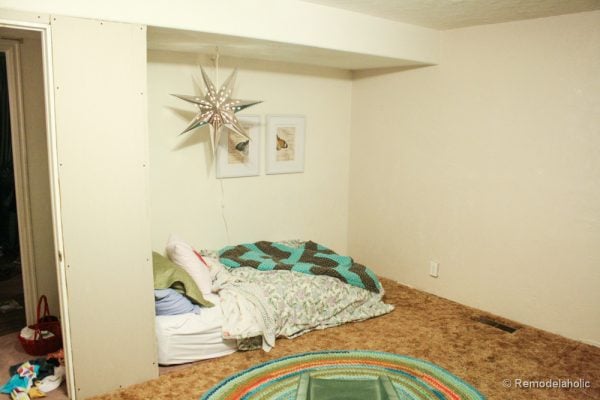
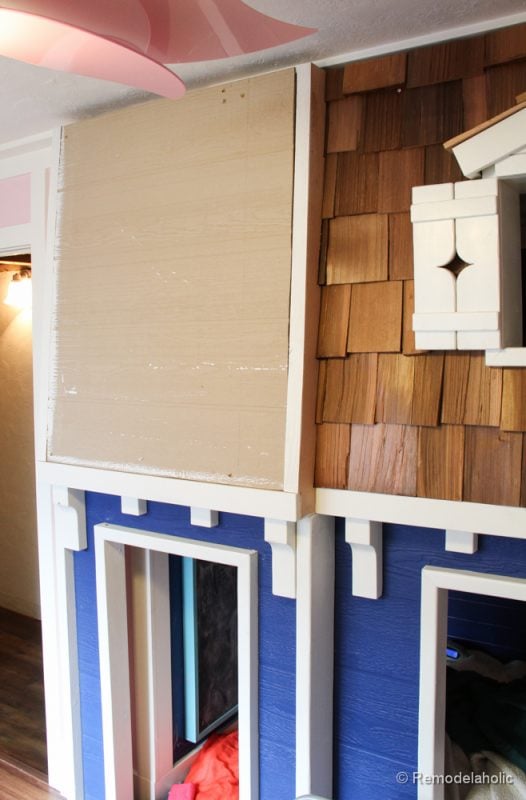
The before picture (once we had built in the wall and doorway on the left), because before pictures are good for my remodeling soul, especially when you are tired after a big project! So good to see just how far you’ve come!
Let’s get this party started! Woot! Woot!
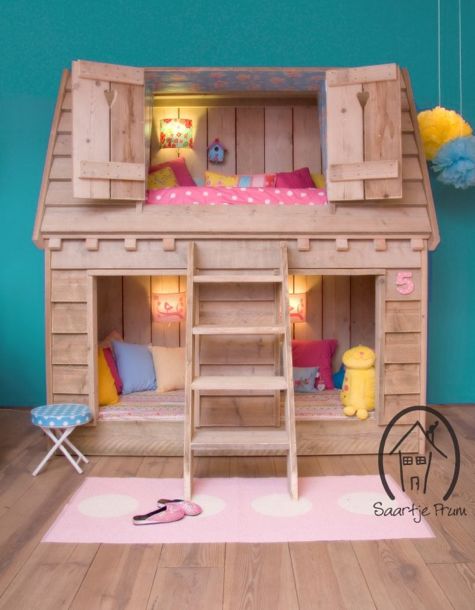
As always, we start off with an idea in mind of what we want to accomplish. I wanted a nook playhouse and bunk bed. I had been scouring for inspiration images, and found this one, and it was by far my favorite bunk house that I had seen. So once we had an idea of where we wanted to go, we got started customizing it for our space.
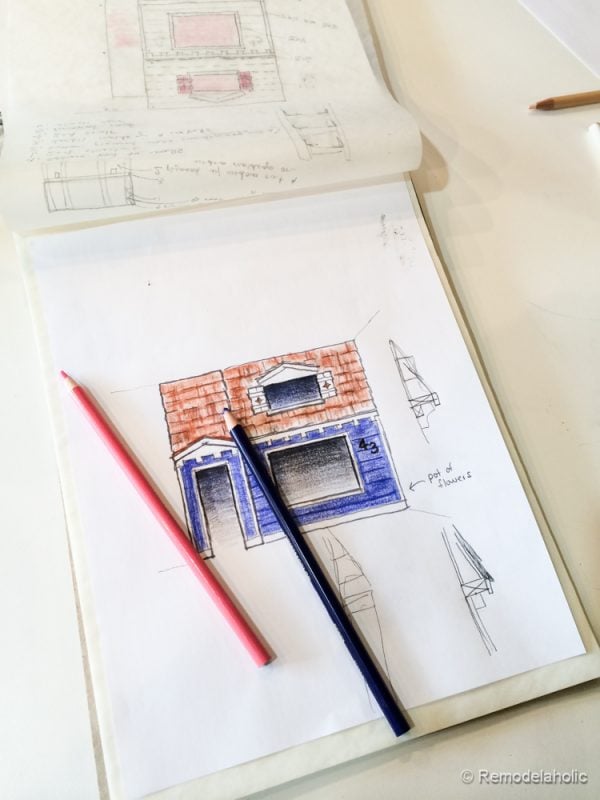
We start sketching, changing and making it work. Justin and I are a great team in that way, as long as we can sketch while we talk, we usually work very well together (as opposed to no paper and pens, which makes for an uncomfortable discussion… we are both too creative minded, we picture things differently and get frustrated)!
After we have a sketch in mind, Justin will often use a 3d modeling program to work out kinks, and really be able to see what is going on at different angles. But, whether or not you know how to model something in 3d, never underestimate a few hand sketches and colored pencils. We even made black and white copies of the house sketch and let our girls color them while we did too. Once we had this down on paper I knew it was exactly the direction we needed to go.
The cost will vary depending on where you start. We purchased a Mydal bunk bed from Ikea to get started and save time. The supplies for the actual house building is from $250 – $300 prices may vary depending on where you buy your supplies and if you do the exact same thing, or change it up. This cost does not include the bunk bed.
Break Down the Sections:
Since we are living in a rented space, we designed this bunk bed playhouse to be removable for when we find our next house. I am not going to lie, this made the plans a LOT more intense than your average project. But I like that the removable approach this will work for whatever reason may come up, moving or when the child grows out of it, whatever the reason. So there are four sections, Besides the extra building time it made installation a BREEZE! Bonus, someday when you are done using it, you could give it away or sell it and it will still be usable for the next family!
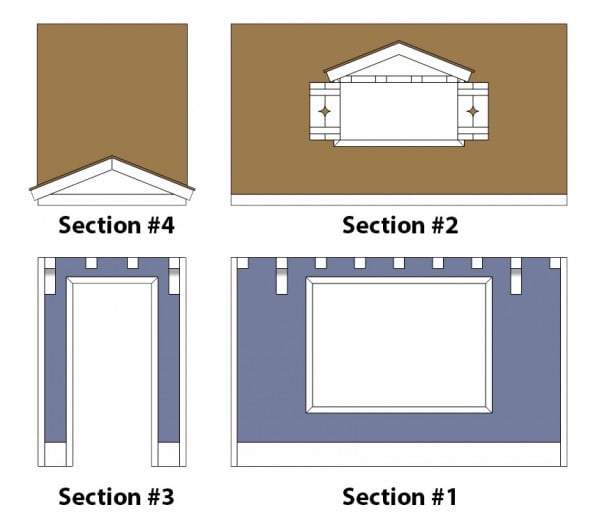
By the way, the door section is optional, but if you have the space it is a fun addition!!
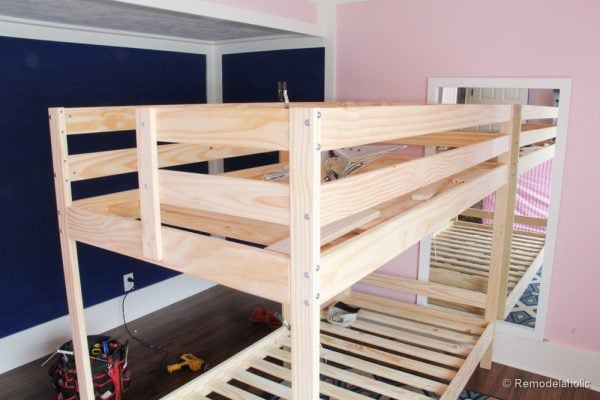
First we started by making a couple modifications to the Ikea bunk. Namely, we moved the ladder from the long side of the bunk to the end. We did however return the safety rails to make sure that we weren’t doing anything that would put our girls at risk.
We didn’t attach a new ladder to the bed. We are going to make a new ladder that will be separate, and will make climbing into the upper bunk easier for the littles. We’ll have plans for that in little while!
This was a SUPER intense project. I am not gonna lie. HOWEVER I think that anyone with moderate to beginner skills can do it, but it will take you some time. My very experienced in the building arts, husband still had a 3 week (almost full time) project to get it done, so if you are on a time line, make sure you plan accordingly. We will have an in depth tutorial coming, it just might be a few posts long! But because I don’t want you to feel like you can’t do it, just watch this video of how quickly it came together and hopefully that will get you excited to try it!
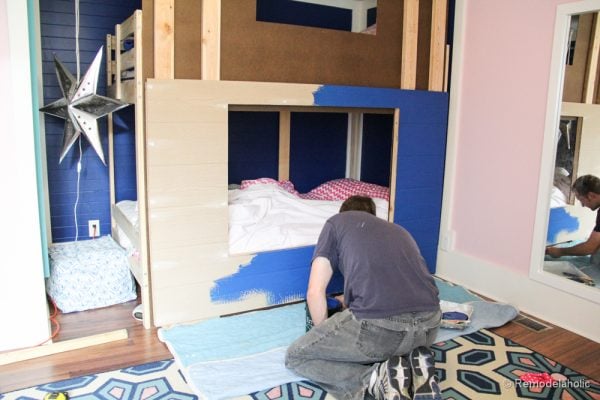
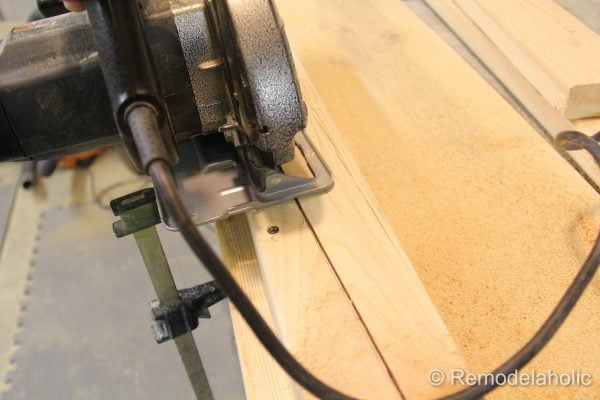
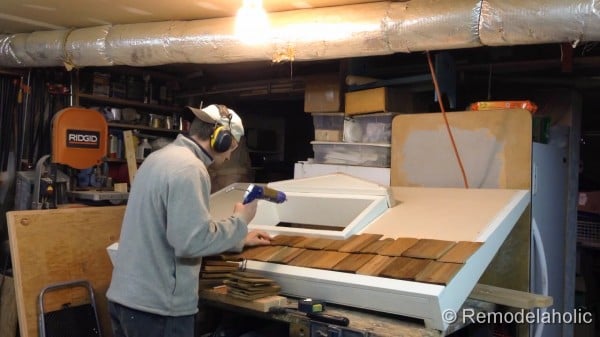
Below I will show you a few highlights while the building took place.

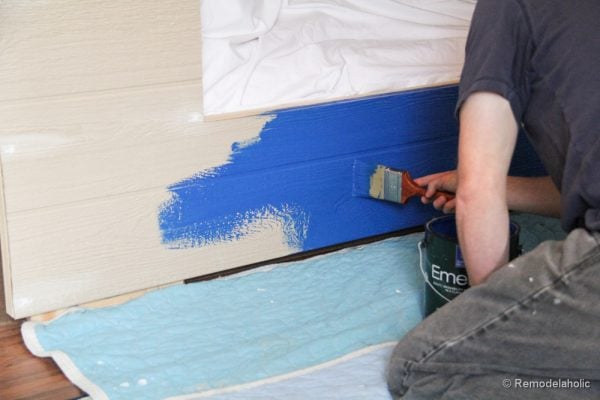
Our lovely Dignity Blue (SW 6804) Sherwin-Williams paint going on! This really is one of the fun parts when the color is there and you can begin to imagine what it will really look like!
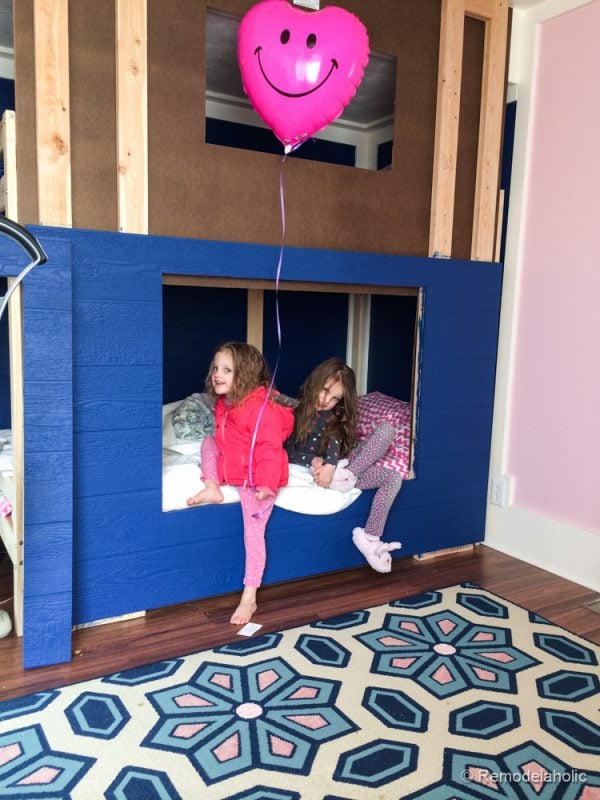
The girls are fans! So that makes me happy!
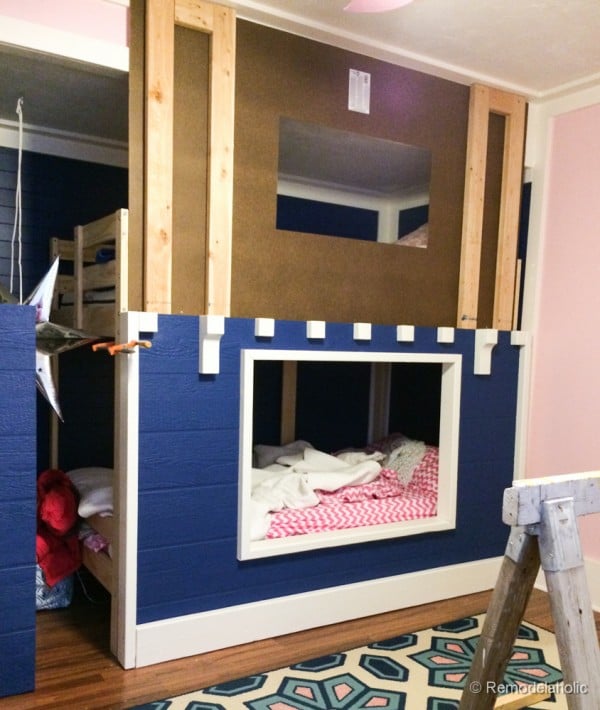
With the trim in place it is really getting exciting!
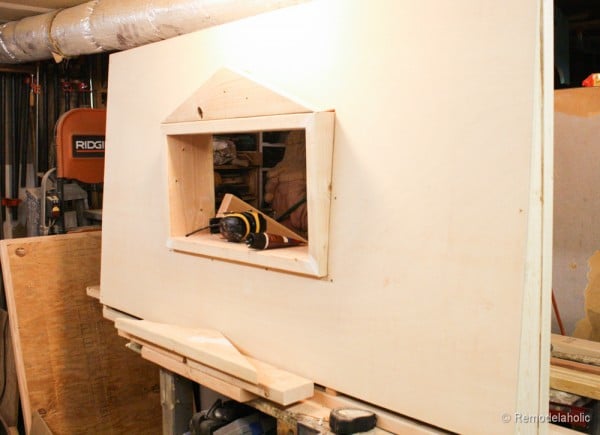
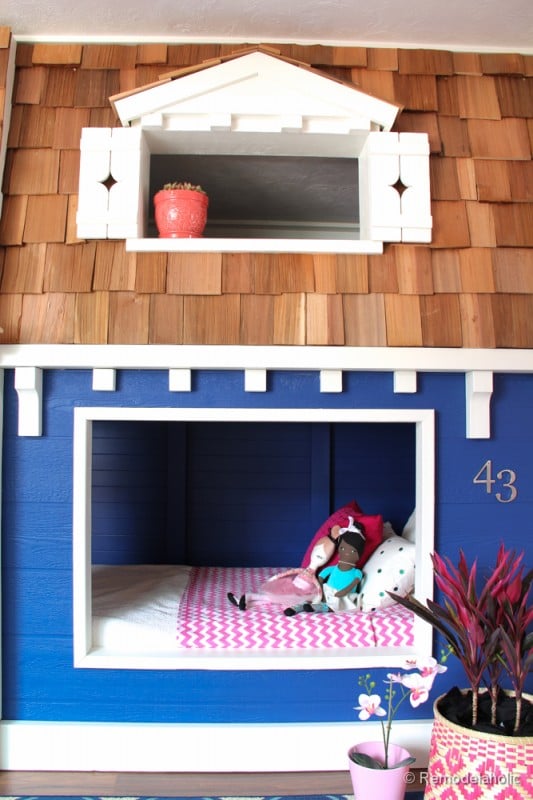
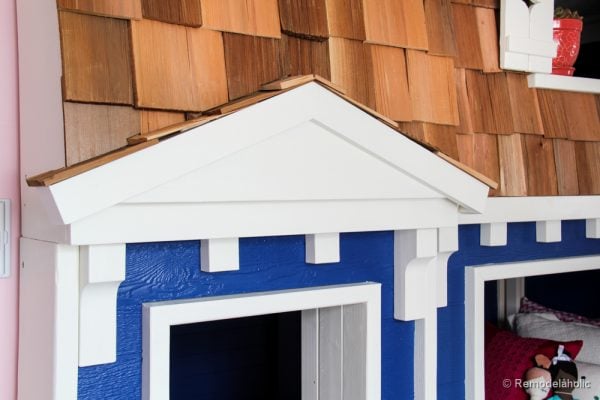
The roof section is by far the most complicated building portion, because we wanted a pitched roof.

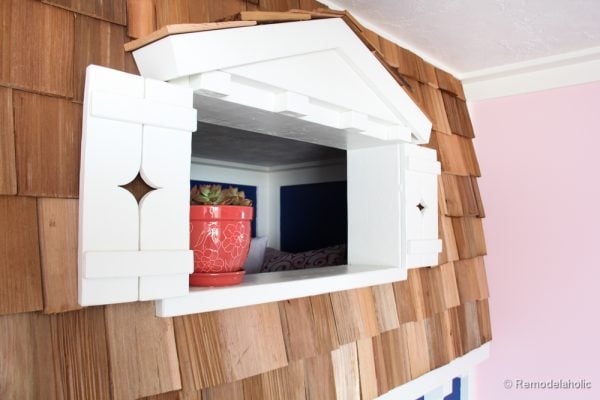
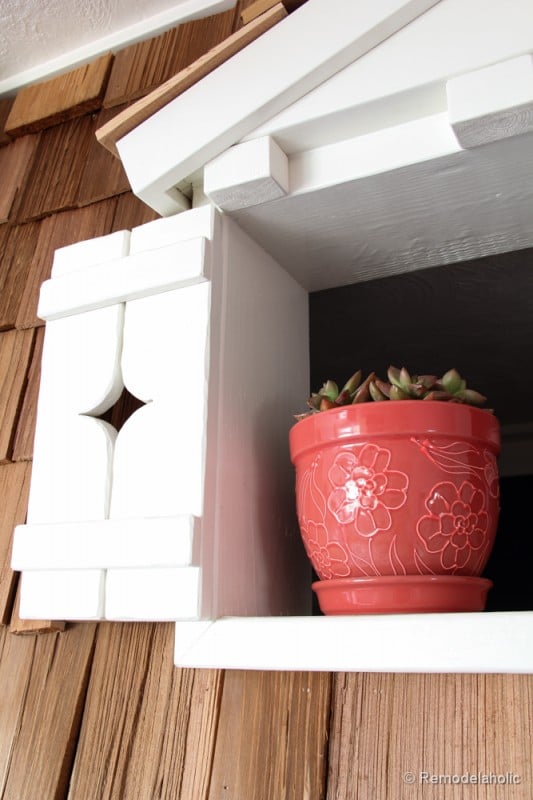
I love the little gabled windows! They add so much to the overall look of the little house!
We painted all the trim before installing the wood shingles. The color is Westhighland White (SW 7566) by Sherwin-Williams!
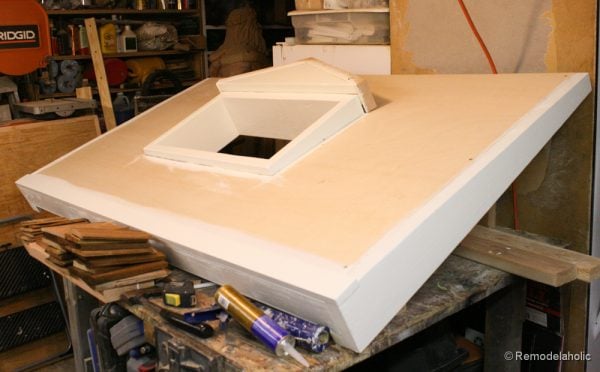
Roof in place!!!
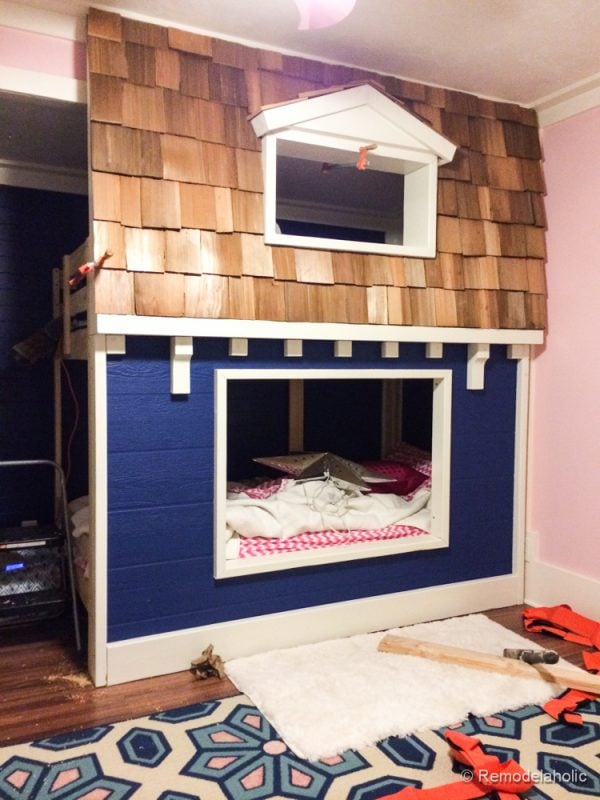
Getting the door section in place! I wanted to point out, if cedar shake shingles are too expensive, you could use the same siding we used below and either paint it a coordinating roof color or faux paint shingles, but I liked the texture the siding as rather than flat plywood. We always try to use the scraps we had left from project to make sure we didn’t need to buy extra supplies.
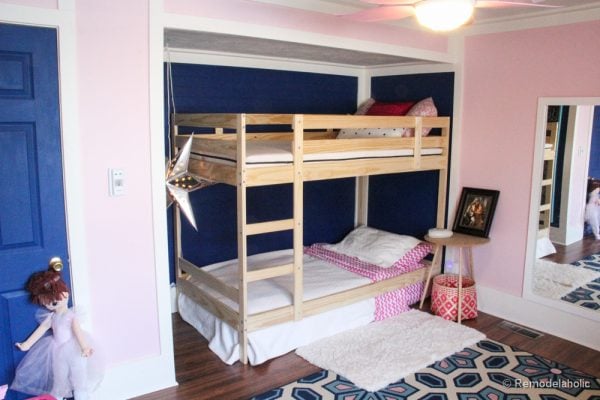
Um DONE…FINALLY! That was A LOT of work! But look how happy she is!

And don’t forget the other fun Sherwin-Williams painted projects from her room.
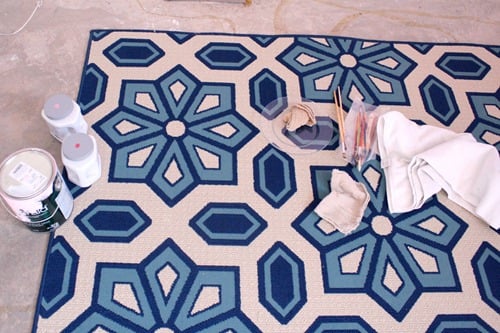
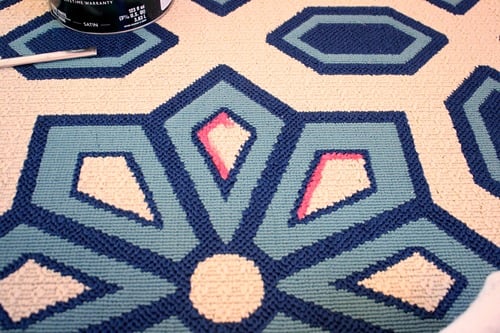
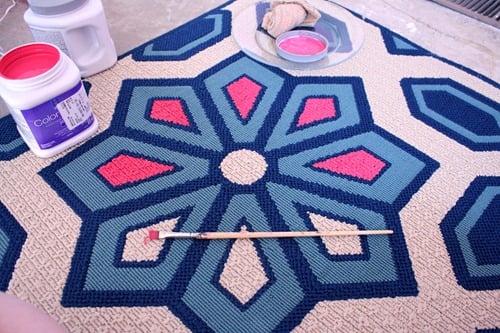
First the Painted Rug. I couldn’t find the exact rug that I wanted in my budget. So I added the paint color from her room onto a rug that I found and I love how it turned.
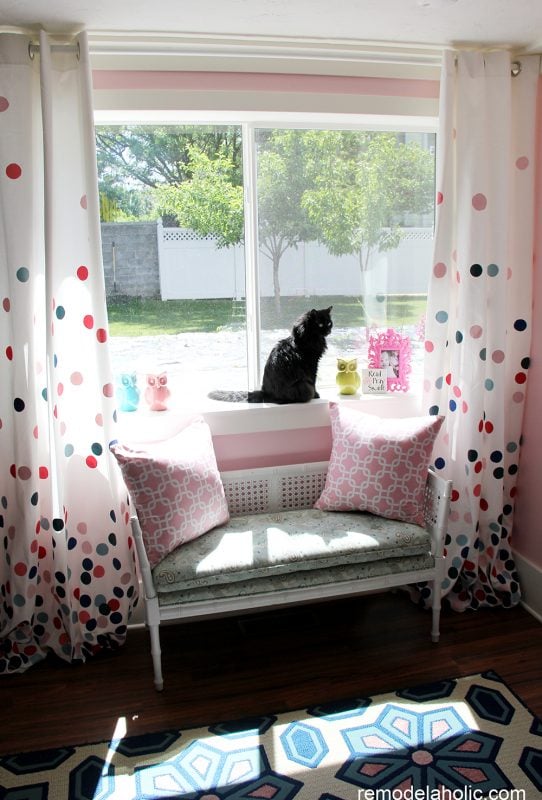
Painted Confetti Drapes One of my favorite projects ever!
And last but not least my old furniture into a built-in closet hack! It is AMAZING what a little elbow grease and paint can do!
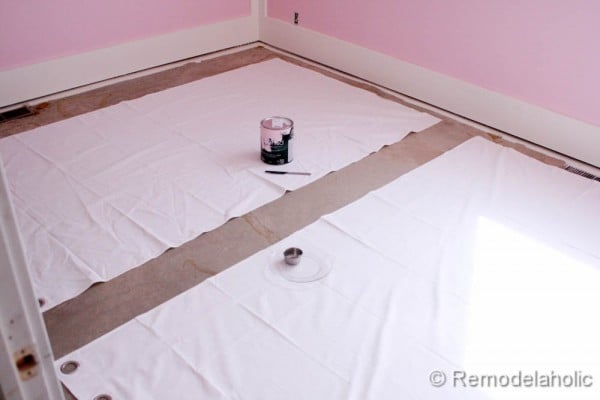
Before:
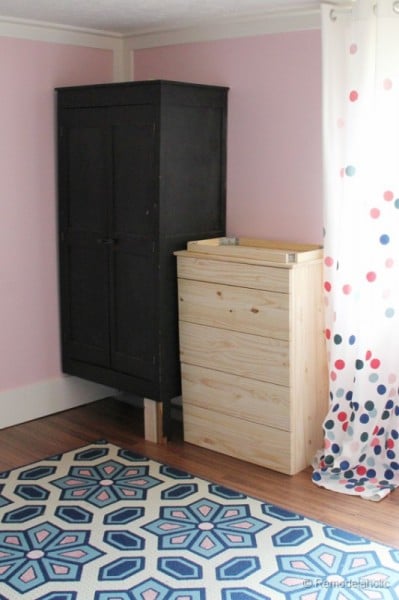
After: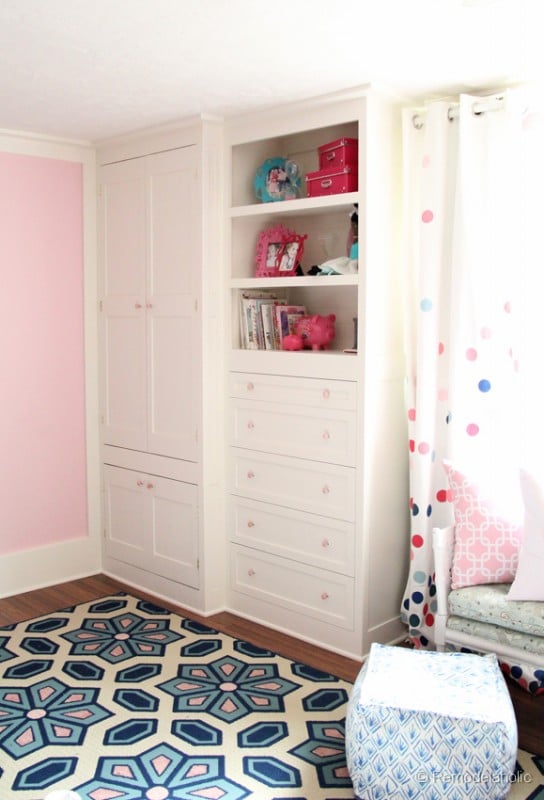
In case you are wondering, these are the colors that we were working with in the room.
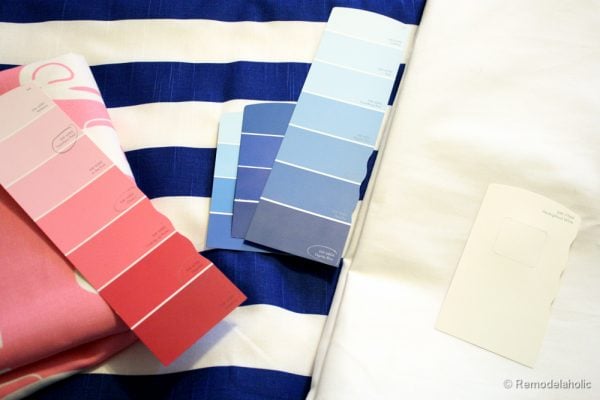
I used Satin paint from Sherwin-Williams in their Emerald line of paints!
Sherwin Williams – Impatiens Pink (SW 6582) walls
with accents of Cheery (SW 6584) and Heart Felt (SW 6586) painted rug, and painted confetti drapes
For the house blue I chose Dignity Blue (SW 6804)
Deep Sea Dive (SW 6718 ) and a mix of Deep Sea Dive at 25% (additional confetti drape colors)
and the White is Westhighland White (SW 7566).
Oh and because I can’t help it, one last look!
Again, now that you made it through this incredibly long post just a reminder that there are two other lovely projects today. Be sure to go check out Design Crush’s Bathroom project and City Sage’s Side table project!
Tomorrow three more great projects! Check out Vintage Revivals, Four Generations One Roof and Simply Grove.
Thanks to Sherwin-Williams for sponsoring this project and for putting together such a great group of bloggers for National Painting Week, I am so honored to be a part of it again!
Cassity Kmetzsch started Remodelaholic after graduating from Utah State University with a degree in Interior Design. Remodelaholic is the place to share her love for knocking out walls, and building everything back up again to not only add function but beauty to her home. Together with her husband Justin, they have remodeled 6 homes and are working on a seventh. She is a mother of four amazing girls. Making a house a home is her favorite hobby.


So Amazing! What a lucky girl!
Thanks Darrielle!
Absolutely lovely!!
How do you make the beds when you are changing sheets? It looks very difficult.
I still want one !!
I haven’t quite figured that out!!! I want to make “sleeping bags” That are attached to the sheets… So I can put it on in one fell swoop! We will see what we do!
When my girls had bunk beds, I learned that a smaller duvet [made from sheets] that can be fluffed atop the mattress (No tucking) is the solution to the top covers; but the bottom sheet still needs to be put on. I never tried this, but I had a friend put on TWO bottom sheets at once and then pulled off one at a time, which cut in half the number of times she had to wrestle with fitted sheets. A bendy foam mattress is also helpful–but you will still do a LOT of crawling back and forth to get the dang bed made up. (a little late to be switching mattresses, I suppose!) Next step–teach the girls to change their own sheets. My rule about room decor was always: is this MORE work for me, or LESS?
I LOVE the two sheets idea! I used to do that with my babies cribs, 1 sheet and mattress protector then another double layer… I will have to do that for her bed!We do have the thin foam mattresses right now so that they are easy to manipulate!!
And I am TOTALLY game with your next step, of teaching them to change the sheets themselves, that is such a great point! The good news is that it is already less work for me in that they play so much more intently and I LOVE to hear their imagination. For example I walked in there this morning because I overheard my 4 year old say “Mom, can you help me?” Apparently they were playing house because when tried to answer my 3 year old, said to me, “Mom, can you please go out?” and as she shut the door in my face, I heard her reply in the sweetest mommy voice ever “What do you need darling”. It had me totally giggling!
Somebody just pitched an idea like that on SharkTank. see if you can search through some of the recent episodes to find it. Think it was within the last 2 months
So I literally just finished a product review to solve your problem here:
https://www.eastofvanwinkle.com/2014/04/product-review-beddys.html
I commented earlier with a link directly to their site. I think everyone with kids and/or bunk beds could use this bedding.
It’s adorable, but I had the same thought. How do you change the sheets? LOL You can tell I’m a mom of a little one in a crib, so I think about those kinds of things.
So I should say that we did purposefully put in thinner 4″ foam mattresses that are easy to manipulate. So putting on the sheets aren’t hard, but it is keeping the bed made that I still need to figure out!
Check these out
https://www.beddys.com
Perfect solution!!
Great solution!
Cass~ This is absolutely amazing! I bet the girls are over to top excited.
The easiest way I could find to change the sheets was on the bed in the middle on my knees. Slip the fitted sheet over the end of the head of the mattress and walk backward on your knees pulling the sheet and climbing off the bed at the same time. Once off the end fit the sheet to the bottom of the mattress. It was a weekly challenge to change ds’s sheets and should be an Olympic Event in breaking a sweat but if I’d not been short I’ve have never made it. haha. Hubby had built one of those beds/with the desk area underneath for ds when he was in middle school. I miss those days.
JaG
If I had a gold metal to give you I totally would! It is hard to see them growing up so fast, but definitely fun!
I have only one word. WOW! Your girls are so lucky and I hate you just a little bit right now for giving kids everywhere unrealistic expectations 😉
I laughed out loud when I first read your comment! I feel like I am living vicariously through them… I never had anything like this myself and always used to draw up playhouse plans as a kid (always a Remodelaholic).
on a serious note, I do want to be careful though not to stifle their creativity by giving them too much that they don’t have to imagine and pretend… So we do keep some things on the down low… or really try to encourage them to play and pretend!
Wow I wouldn’t mind having one of these for myself. Kind of a mini get-a-way. I can just see all 5’11’ of me climbing up into that . Oh well, I can dream. It is just spectacular.
Marilyn, I climb in it all the time with my girls. It’s a lot of fun and a great place to hide and take naps.
Absolutely amazing!! I love, love, love it!! Everything in the room is perfect!! You totally rock!!
Thanks a bunch, Crystal!
Oh my goodness this turned out absolutely fabulous! I love love love the detail of the pitched roof with the cedar shingles- totally worth it. And those adorable little shutters and the trim- What lucky girls you have! : )
Ps. Happy Birthday!! : )
Cassidy- you did such an amazing job on this!! I love how you used such simple bunks but they look anything but simple. I love all the little details that bring it home!! 🙂
WOW!! I am seriously inspired. That is awesome! We have a big empty basement just waiting for something cool like that! I bet your kids love it!
Thanks, Jessica!
This is just..OMG…amazing. I had a couple of ideas to keep the cost kinda low, but it definitely wouldn’t be NEAR as nice or durable…actually I’m embarassed now to say this but I’m just gonna go for it anyway. Okay, what if you could sorta cut cardboard (like from a good, sturdy box) and paint it to look like the cedar shingles, with some kind of protective coat over that…and glue the snot out of it the way you nailed your shingles on (with a REALLY good glue… Like E-6000 or like liquid nails or something).and for some of the trim pieces, maybe you could use really dense styrofoam and hot knife some of the shapes out, and paint that with a good exterior paint(that can be used on styrofoam), and then glue the snot out of that wherever you’re gonna put it…May not work on all trim pieces but ? Perhaps some of it? This is TOTALLY just some random thoughts, I have no idea if this would work or not! I have quite a bit of styrofoam leftover from Halloween (made tombstones) and boxes would be super easy to come by…hopefully there’s “somebody” out there that think like me, or I’m going to feel so stupid!
I am glad you shared your thoughts! Thank you! In fact, I love the card board shingles idea. That would be totally cost effective (As long as you’re kiddos aren’t the destructive type!!). The good thing about the cardboard shingles is that they aren’t really accessible from the kids playing, so they would probably be safe for a long time. BUT I have to advise that you stick to wood for all the trim because that gets stepped on, climbed on and bumped into. Foam couldn’t handle that kind of beating, wood will ultimately last longer and hold up better, saving you time and money! (and besides going with cheaper structural lumber instead of finished will save you QUITE a bit on lumber to begin with!)
I don’t even have words to describe how cool this is! I can’t wait to show Shane! You guys are an amazing team and your girls are super lucky 🙂
Thanks Stacy! It was a lot of fun to build. If only I had my tools when I was 10 building forts in the back yard.
What an amazing project! Those are two adorable, lucky girls!! And the built in closet that you made is beyond amazing! You guys did a great job! Thanks for the inspiration!
Just now seeing this post and WOW! Just wow! I love this room and how ridiculously creative you guys are! I have been wanting to do something like this for my little guy. I wish he had a nook in his room and his closet is not deep or large enough. Anyway, I am super impressed and love everything you have done. Well done and high five! 😀
Love the idea! Just curious where you purchased your shingles? I’ve been looking for something similar for a project, but haven’t started because any cedar shakes I can find are ridiculously expensive.
I noticed my neighbor wasn’t using some of his, so he let me have them. So if you can find people that want to clean up their garage that’s how I did it.