DIY Built-In Entryway Table with Board and Batten
Whether you’re blessed with a spacious entryway or a smaller entry, finding storage solutions for this busy zone can be tricky! Some use their entryway as a mudroom, some call it a drop zone, and some of us just call it chaos 😉 so I love finding easy solutions to make the entrance feel like more organized place. Our guest today took two of my favorite elements — wainscoting/board and batten and built-ins — and combined them by brilliantly adding a small and simple built-in entryway table between two battens of the board and batten!

We completely redid our entryway, including adding these great wood wall bins, perfect small storage for hats, gloves, or tiny shoes 🙂

You can add oodles of storage in an entry niche with this DIY locker and cubby setup — for around $100! Tutorial here. 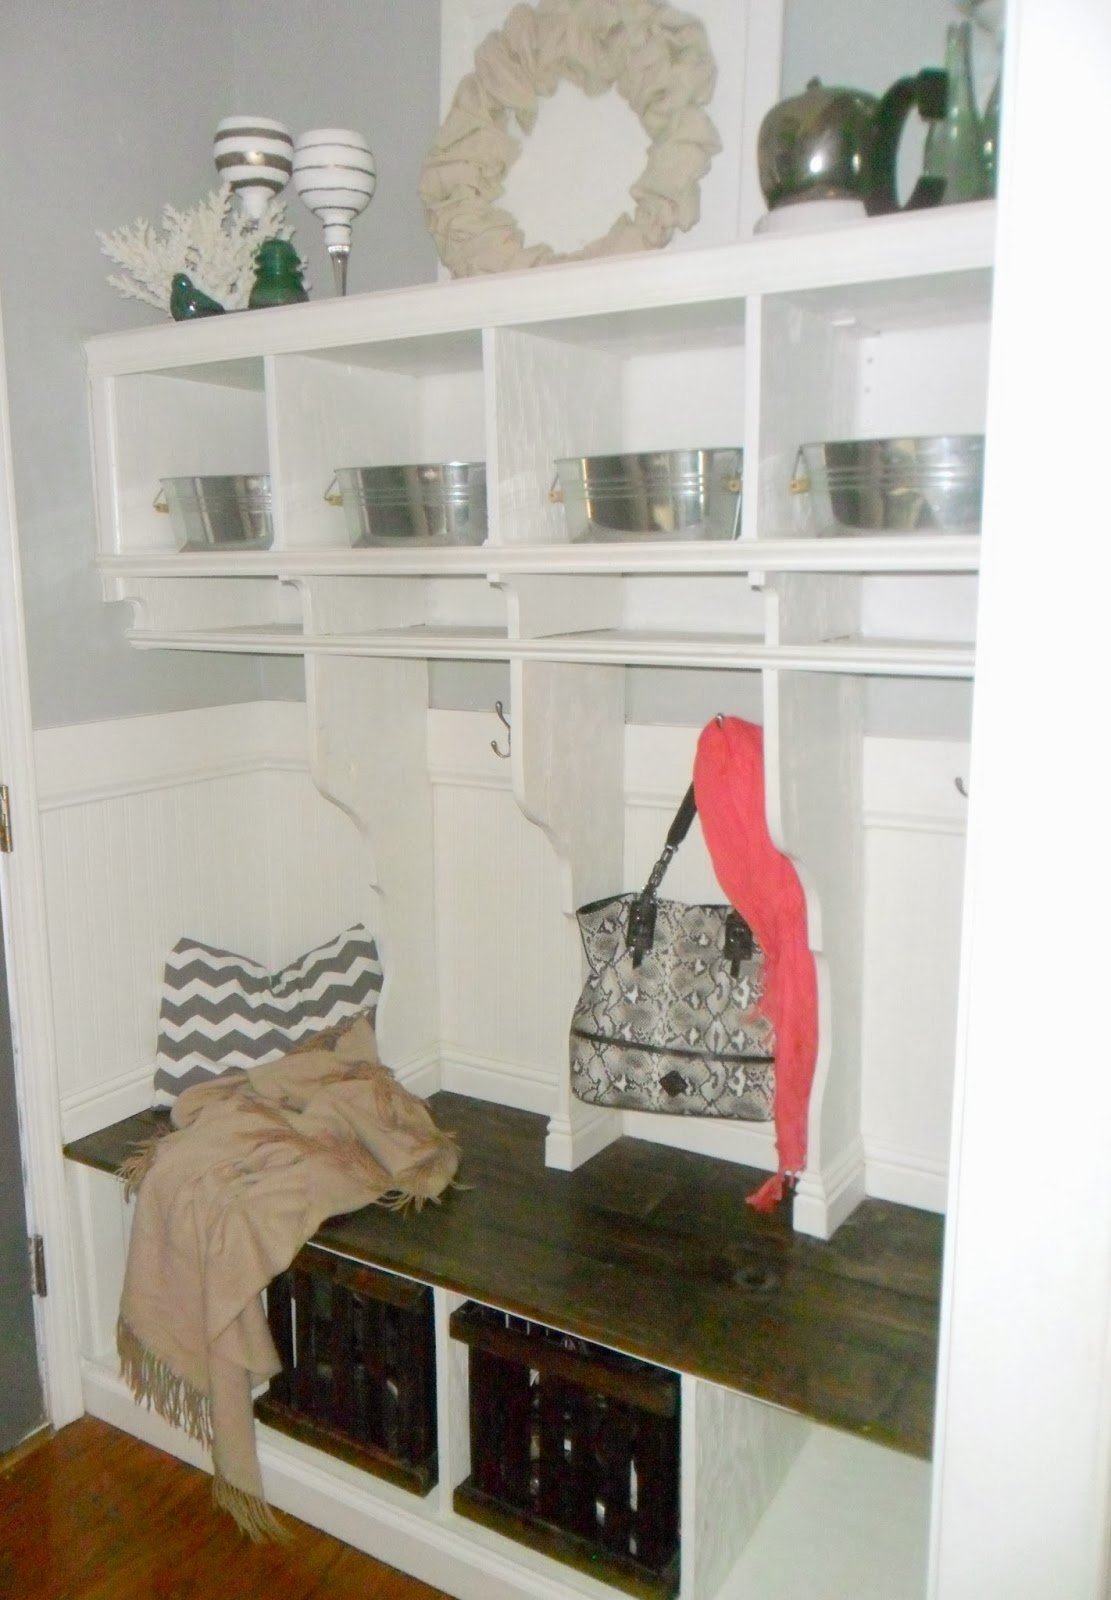
Sometimes organization is as simple as putting a hook where it needs to be! This Pottery Barn inspired organizer is quick and inexpensive, and so useful! Tutorial here from Sawdust2Stitches.

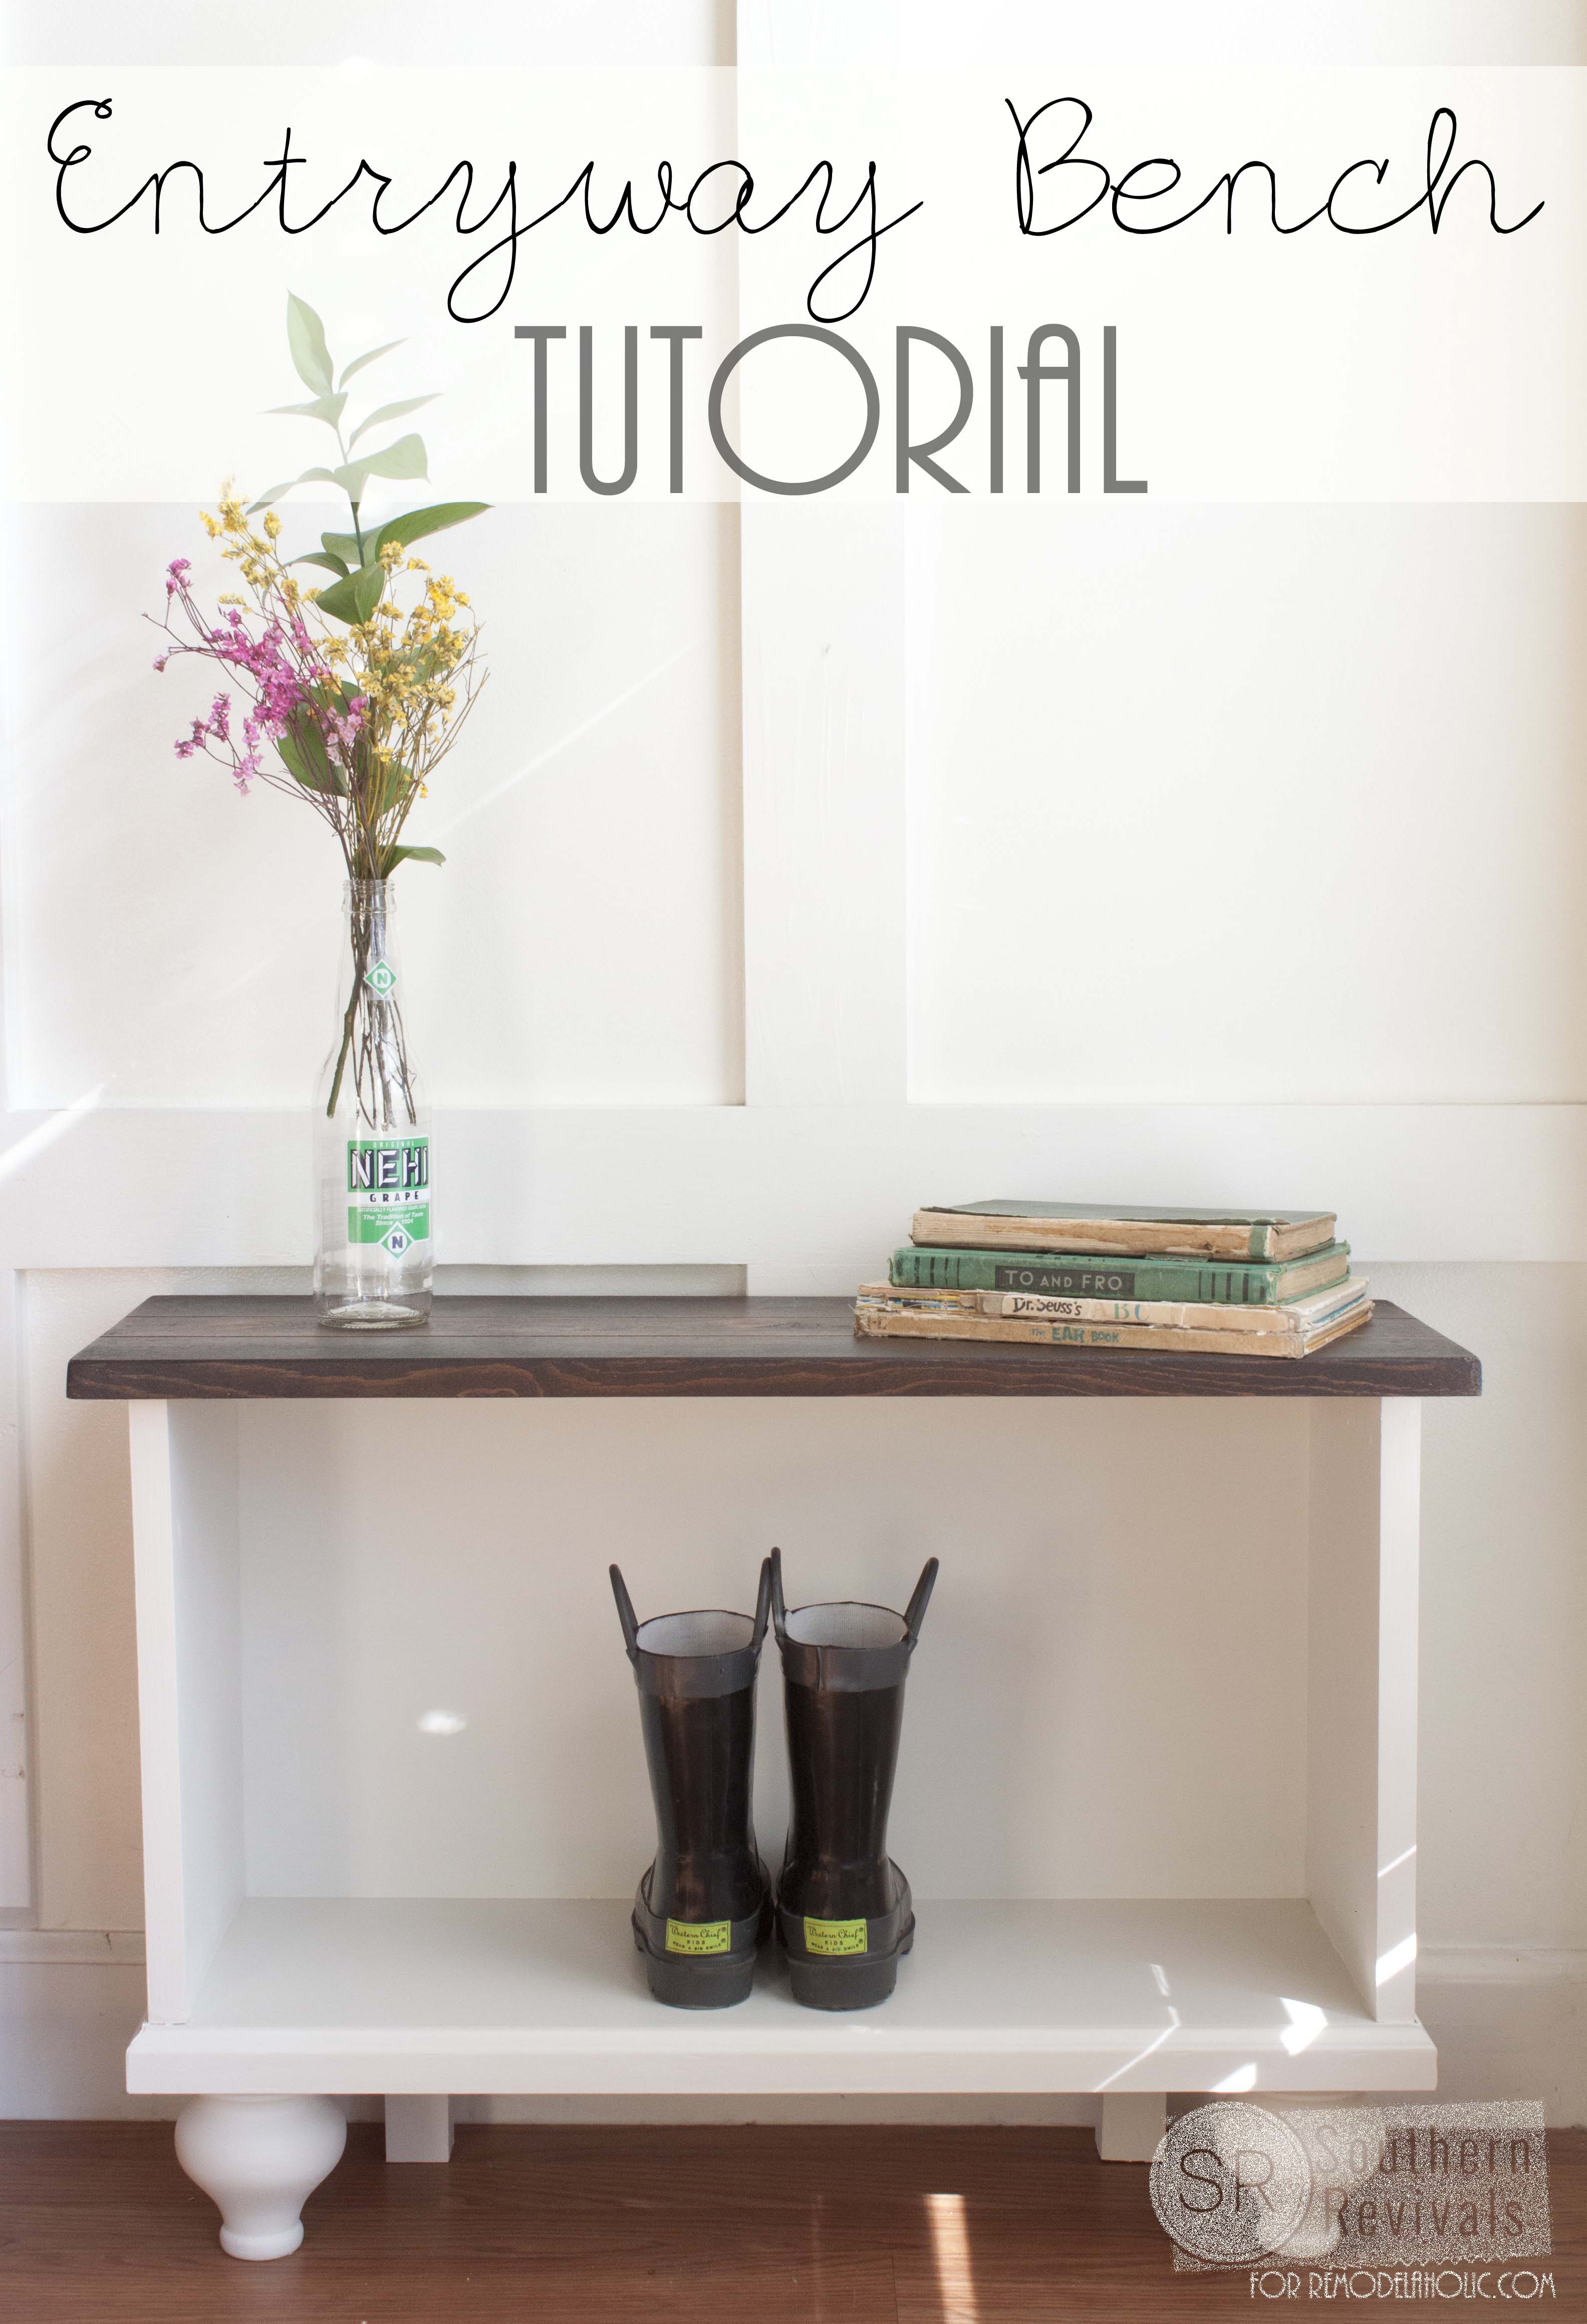
Seating is a must in most entries, and this entryway bench gives storage for shoes, too! Tutorial here from Southern Revivals.
And if you need a storage table — start at your local ReStore or thrift store or maybe even dumpster 😉 We built this table from an old kitchen cabinet, adding the legs and details to make a great-looking storage console for our entry! Get the full details here. 
Now, here’s the lovely Tara to tell you all about her brilliant entry table/desk/storage area — give her a warm Remodelaholic welcome! (and don’t miss the building plan to go along with this tutorial here)
How to Build a Built-In Entryway Table
by Tara from Lehman Lane

If you have never visited our blog before my husband Jason and I love to fix up our old houses and help our friends and family do the same. We are currently fixing up our 3rd fixer upper, a century old farmhouse outside of Philadelphia, one DIY project at a time. Some of my favorite projects so far are creating a stone patio fire pit with some fun beam benches, refinishing our standard dining table and remaking it into a Restoration Hardware inspired one and turning our master bedroom closet into our son’s bedroom.
Ever since we have moved into our old farmhouse I have struggled with how to organize and decorate our entryway. I have had 5 different pieces of furniture (no joke) in our foyer in the last 2 years, that’s a lot of moving furniture:). Because our foyer is the first room you see when you walk into our home we I wanted it to feel clean and welcoming and having it cluttered with the wrong furniture didn’t help. So this is what we did.

We got rid of the boring blank wall by adding some wainscoting. We started by adding 1x4s for a board and batten look. We used stain grade pine because we wanted a nice smooth surface to take the paint. We planned to put the built in table into the middle square so we just played with the spacing until it felt right. Jason used his finish nailer to attach the boards to the wall studs. Once the table is in place we will add a cove molding on the interior of the board and batten squares to give it a more finished look.

To create the table Jason purchased 16″ wide pine edge glued panels. We used landscape fabric (it’s just what we had lying around…you could use a roll of paper or cardboard, etc) to create a template for the curved legs. (Click here to see the drawn-out building plan and free printable template.) Knowing that we wanted the table about 12-14″ deep at the top and we wanted it to curve into the wall to meet the 3/4″ baseboard we marked off our 2 points on either end and just started drawing curves between them. Once we were happy with the curve we cut out the template. Once you cut it out you can hold it up to the wall and more clearly see if it’s what you were thinking. Then you can continue tweaking it until it’s perfect. We then simply used the template to draw the shape on the wood panel and cut it out with a jigsaw. Once you have one cut out you can use that as the template for the other. Just flip it around and use the other side of the same piece of wood panel. Here’s what Jason had left of the panel after cutting out two legs.

After giving those curved edges a good sanding to smooth out the cuts Jason attached the legs to the inside of the vertical boards of the wainscoting running on either side with finish nails.

Next we added the top. We cut the top to be 1″ wider on either side and 1″ deeper than the legs and attached it with some finish nails. We added a 1 x 1.5 underneath the top and around the legs. We faced the table with a nice poplar 3/4″ cap molding and added a base shoe molding upside down underneath the cap molding. Here’s come closeups of the molding we used. The first is the molding for inside the board and batten wainscoting, the second is what we used for the face of the table, and the third is the shoe molding we put on top of the 1 x 1.5 butting up against the cap.
 |
 |
 |
Here’s a picture with the top on and Jason is attaching the molding to the table.

To really secure the table to the wall Jason used a horizontal board that butted up to the top of the table and screwed this to the vertical studs in the wall. Once that board was secure Jason was able to screw up into that board through the bottom of the table. Remember to always pre-drill your holes so you don’t split the 1x4s. This gave the table the strength and stability it needed. This essentially attached the table to the studs. The kids could now hang on it and it wouldn’t budge :).
All of the wood used was bought at our local Lowe’s. It cost us a little less than $100 for the supplies. We did already have the paint and a some of the trim used on the table.
Overall the table is 46″ tall and 30.5″ wide at the widest spot (molding included) and 13.5″ deep (including molding). The legs are 37″ tall not counting the 5.5″ base molding and 12″ deep at the top. We also added a small shelf under the table top for my mail basket. That shelf is 4.5″ tall and 12″ wide.
We added a 1×2 shelf to the top of the board and batten wainscoting and finished it with a small crown molding underneath. This next picture also shows the bead molding inside of the board and batten squares.


Next we filled the nail and screw holes with wood putting, did a quick sanding, and got to painting everything white. Overall it took us about 2 weekends to finish with soccer games, church activities, and other normal weekend projects going on. So it’s a good 2 day weekend project if you don’t plan on going anywhere :). Here is our finished entryway table:


I really love the simplicity of it. I love that it is functional yet doesn’t take up any floor space. Just big enough for what we need, a basket for keys and a basket for mail and a little space left over to decorate:). And Jason loves that he never has to move a piece of furniture there again ;).

———————————————-
Thank you, Tara, for being our guest! I love what you’re doing with your cute farmhouse!
Remodelaholics: Click here to go to the next page for the sketched building plans of this entry table
and be sure to pay Tara a visit over at Lehman Lane for her fall home tour, and don’t miss her pallet barn door or smart shoe cubbies!


Thank you again for featuring my built in entryway table.
Take care, Tara
Thank you for sharing with us, Tara!
I love the Finished product of each view. My future product is a 1940 house. This house was built with the real solid wood.