Entry and Staircase Makeover Reveal
Yesterday I showed you the entry and stair project review. And you can check out all the individual stair posts under my stair tag.
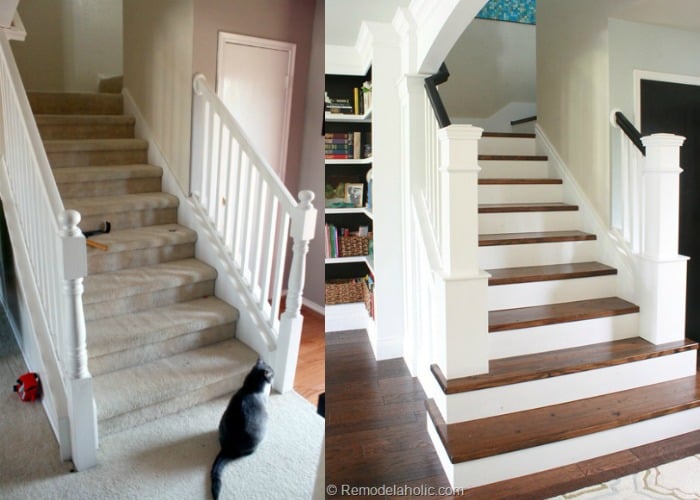
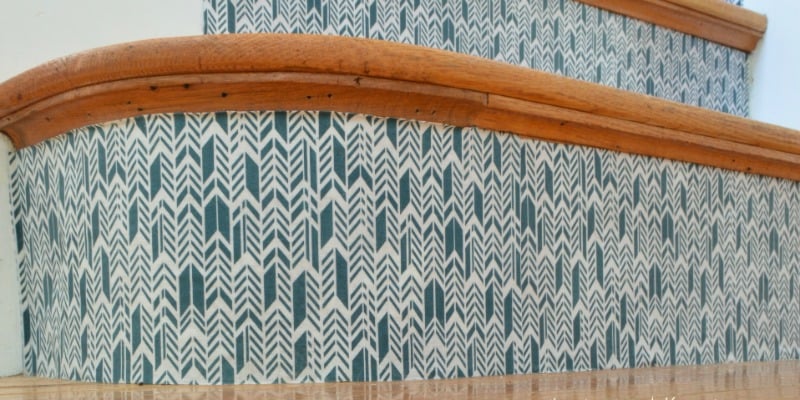
Beautiful Staircase Makeover!

Just a reminder of the before:


 |
 |
So let’s just let the pictures tell the story. Hope you enjoy!
The view from above:
 |
 |

 |
 |
 |
 |
 |
 |
Overall view of the space:


So finally this is the staircase makeover reveal, I hope you like it!!! (the occasion calls for three exclamation marks for sure)
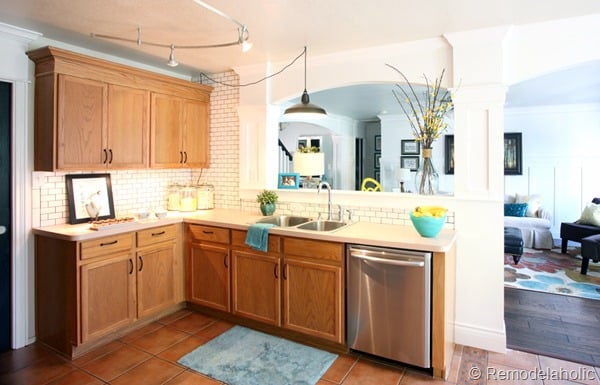
And if you do check out the kitchen makeover and dining room reveal in our park house… more rooms to come soon! I’d love to hear what you think!
EDIT * I’ve had a lot of emails asking about the flooring we used.
I posted all about it in the living room floor installation post. Hope that helps!
If you are wondering about the blue artwork in the hall the tutorial to make that is at the link!
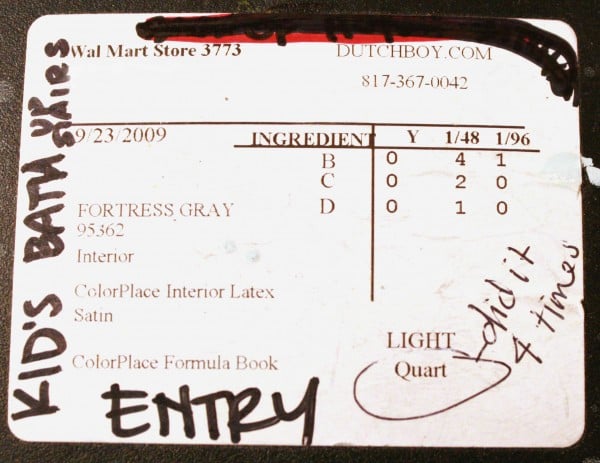
I’ve had a LOT of questions about the paint it is Fortress Grey in the Dutchboy line.. I used left over paint that I had from an upstairs bath. I bought the paint at Walmart a few years ago. Here is the label, they accidentally only added enough for a quart the first time, so they did it four times. How is that for confusing… but here you go!
——————–Update 5/21/2016——————
Check this out!
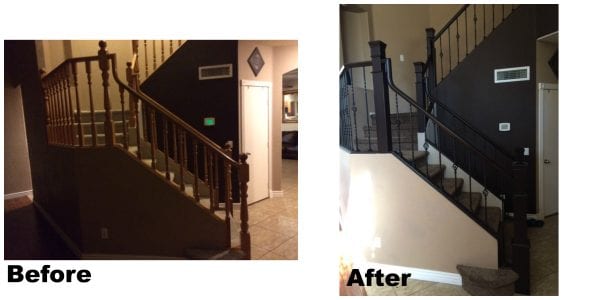
Readers Annie and Scott sent us these photos of their staircase makeover. Here’s what they had to say about it:
Just followed directions, except no wooden spindles, spent a little more $$ and purchased wrought iron, so worth it! Very easy to install, and so elegant looking!
Beautiful transformation, you two! Definitely elegant!
Do you have a project inspired by one of our posts that you’d like to share? We’d love to see it! Let us know here.
Cassity Kmetzsch started Remodelaholic after graduating from Utah State University with a degree in Interior Design. Remodelaholic is the place to share her love for knocking out walls, and building everything back up again to not only add function but beauty to her home. Together with her husband Justin, they have remodeled 6 homes and are working on a seventh. She is a mother of four amazing girls. Making a house a home is her favorite hobby.


Stunning!! What a transformation.
Did you post anywhere how you did the archway and moldings down the sides anywhere? I love them and we are looking do an identical archway to separate our kitchen and livingroom. It is currently one huge room.
Tiffany, if you follow the tag Park House Living Room, that will give you most of the posts we did with the columns and moldings and arches.
I love your makeover but are your stairs slippery? I have had problems with this in the past with wood stairs, I don’t think the rack with the hats and mitts etc. fits the style, can the rack go on the inside of the closet door instead.?
You do have to be careful wearing socks, because it is slippery, just like a wood floor. And the rack can hang on the back of a door if you would like. As long as there is the clearance for the bins.
I love it! Thank you so much for sharing. I have been wanting to re-do our stairs for a long time but thought it would be budget prohibitive. But you were able to do this very affordably. You’ve inspired me to give it a try. Thank you!
Thanks for the comment, Pauline!
what a beautiful transformation. It’s gorgeous!
Thank you, Karen!
utterly gorgeous! i just worry the floating shelf will often get bumped into and the pretties will bite the dust!! hope not 🙂
It wasn’t a problem for us! 🙂
Are the posts something u can put over ur old ones or so u have to remove the old and install new? I have the wood stairs and am definitely painting the stair faces white but would love to change the rail and posts without major work. Thanks!
We completely took ours out, but check out this tutorial for the details on building around the existing newel post: https://www.remodelaholic.com/2014/12/stair-banister-renovation-existing-newel-post-handrail/
Thanks!
Awesome Job on the steps. Our carpet on the steps has been removed and its just waiting its turn to be redone..
My husband is trying to figure out how you widened the bottom two steps.. any pics on that? He says he cant figure it out since it looks like you cut the bottom supports!
I am in love with this remodel!! I would love to know how you did it! Do you happen to have a link I could find? It looks amazing!
This is so amazing I mean you have a gift that staircase went from looking an 80’s or 90’s subdivision stock home staircase to a staircase that you could easily invision in the home of an English Dukes estate or the staircase from a fancy 1800’s Victorian age home I mean it’s just gorgeous. What I’m wondering though is where did you purchase that door and if you don’t mind me asking how much was it I’m having problems finding a nice front door right now.
Thanks for the compliments. We picked up the front door at the Restore for cheap! I don’t know where you would be able to find another. Sorry that doesn’t help.
I see you cut off the stair nose. Can you please tell me what the new tread depth is?
Thanks.
We used 2×12’2, so the actual tread was 11 1/2″
As a professional hardwood floor installer I can say first hand that those floors are absolutely stunning! I’m curios to know who came up with the design? It looks great!