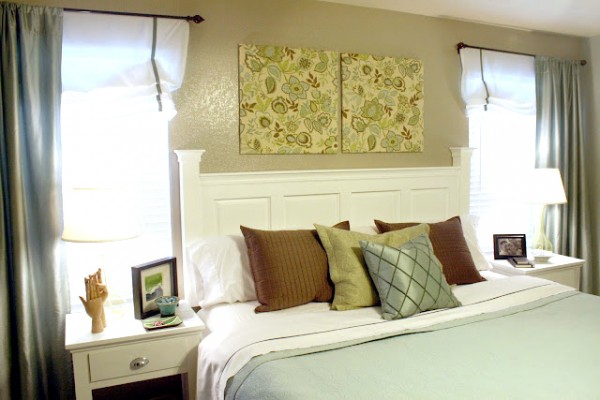
Easy DIY Bedroom Art Tutorial
Okay, so I made this DIY headboard about 3 years ago, but about every week, even now, I get asked where I found the art above the headboard. So, I have decided to give you a really quick easy tutorial to follow to make this bedroom art, since it is DIY and super easy to make.
The great thing about this project is that it is a great way to pull any color scheme together, like I talked about in how to pick colors for your home., and it can be any style of fabric, including DIY stenciled fabric so it can match your color scheme perfectly!
Easy DIY Bedroom Art Tutorial
Supplies: Plywood or OSB, Quilter’s Batting, fabric of choice, staples, Sawtooth Hangers
Tools: Staple/Brad Nail Gun, scissors
- I bought an 4’x 8′ OSB 1/2 thick sheet at Home Depot and had them cut it to size for me. (I did 8, 2′ x 2′ pieces, but you can make this any size you want.)
- Wrap the boards with quilters batting (available at any sewing store). Wrap the batting from the front, around the sides and pull it nice and tight to avoid wrinkles. Staple to the back about an inch inside the outer edge. Trim excess.
- Now cover with your favorite fabric. Be sure your pattern is straight and square.
- When stapling the fabric, to avoid wrinkles, start you staples in the center of the board. Staple one set of sides at a time. (side 1 and 3 and then side 2 and 4 see diagram below) then work your way out from the center to the corners pulling stapling and checking on the alignment of the fabric as you go.
- Wrap the corners like you would a present, fold them and then and staple on the back.
- Trim any excess fabric
- Nail on hanging hardware.
- Done!
It is THAT easy!!
Please share it, I appreciate and pins or social shares! THANKS! There are a few affiliate links in the post, just to test out how they do.
Cassity Kmetzsch started Remodelaholic after graduating from Utah State University with a degree in Interior Design. Remodelaholic is the place to share her love for knocking out walls, and building everything back up again to not only add function but beauty to her home. Together with her husband Justin, they have remodeled 6 homes and are working on a seventh. She is a mother of four amazing girls. Making a house a home is her favorite hobby.


I love it!!
Thanks Crystal you always brighten my day!
This is so quick and easy! I might try it with smaller sized boards, to make a patchwork type pattern. Thanks for the inspiration!
I love that idea! Good Luck!
Beautiful and easy! Thanks for the tutorial, I am buying a new home soon and will be using this idea!
yay! i am so glad!
That art is super cute! I love it!
Thank you! And SO easy!
Looks beautiful! Thanks for the tutorial – looks very easy to follow so I’ll be giving it a go =)