AHH! I am so sorry that I have let this go for so long! I have been trying to catch up with life since we got back from North Carolina, and a million things have been on my plate… learning to juggle it all is NOT my forte yet… and can I (sheepishly Ba- aad Girl!) admit that we are technically not done completely with the stairs so that is another reason why I haven’t finished up. But this is real life… and a hectic one at that, so I am not sorry I am not quite done, but I am sorry to keep you’all hanging!
Okay where were we?
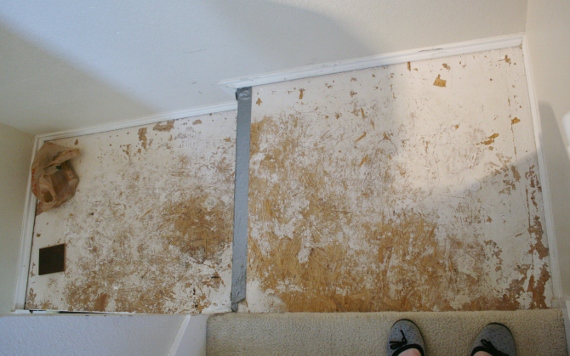
We just filled the gaps on the sides and I painted… and then we lived like that for 1 year (at least…) Finally a few months ago, after we had installed our flooring I realized that we could finally move forward. We had been waiting on choosing our living room flooring, because we were trying to match it!
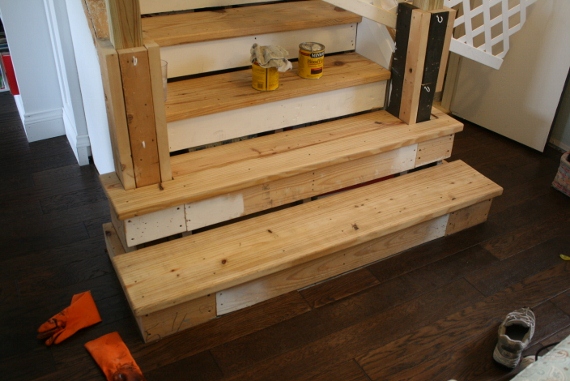
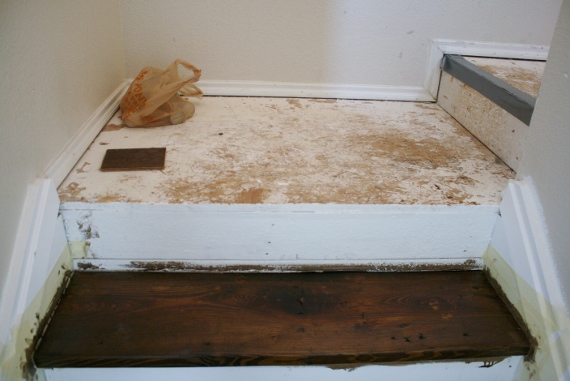
One day while Justin was at work and I had napping babies, I stained the bottom two stairs.
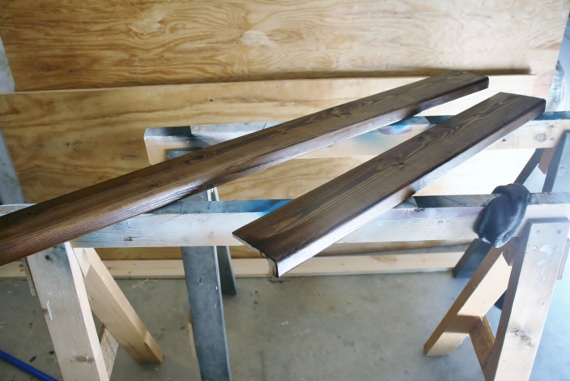
Before the stain, I used a wood conditioner, remember this is pine we were working with soft woods require a stain conditioner to help with even coverage!
After the stain conditioner is applied, you can’t see much of a difference?… well the gloves are moved.
And finally stained! YEA!
This happened to be stain that we just had on hand, Minwax Dark Walnut Oil Based Stain, but you can see below that it matches really well, and will look even closer with a coat or 4 of poly!
Now here they are from the opposite direction with a coat of Poly they pretty much disappear! NICE!
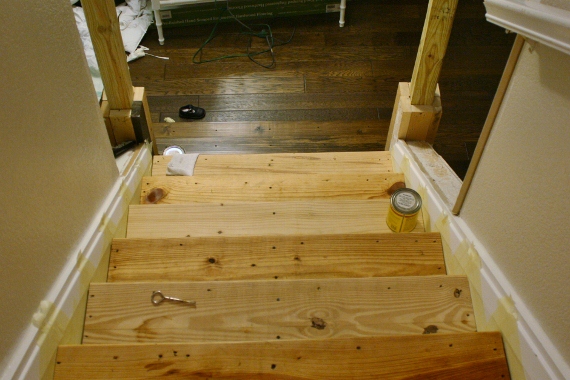
Okay, I had to stain the rest, and we could have removed each tread but I was too impatient- so I just taped them off and stained away. I actually stained every other stair, I’m not sure I would have thought of this, but that is what Kate did, and it was a genius idea. If bloggers are good at one thing, it is using great ideas they find on other blogs… gotta love blogdom!
Okay conditioner again! See if you notice my little help in the picture. I have an object sitting on each unconditioned stair so that I wouldn’t mix them up!
Stain…
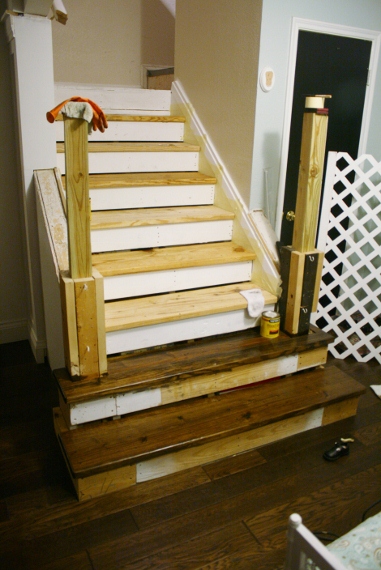
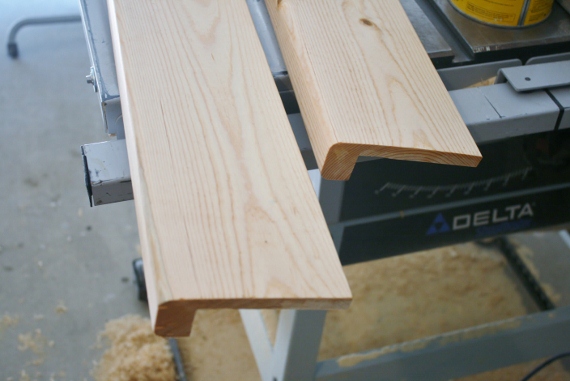
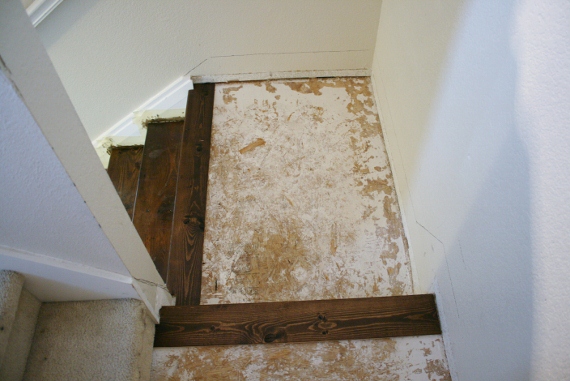
At this point we had the two landings to deal with. We decided to use a 2 x 6 as the nose, since it would match the existing treads, and was a lot cheaper than the alternative.
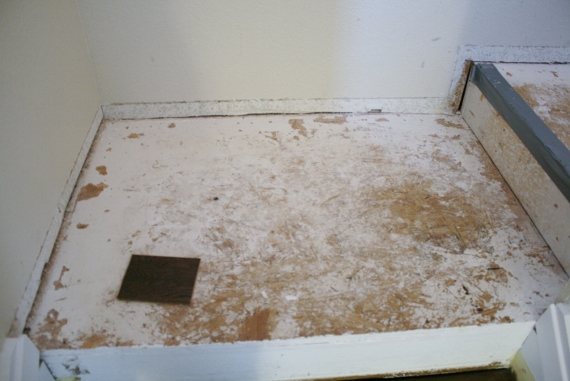
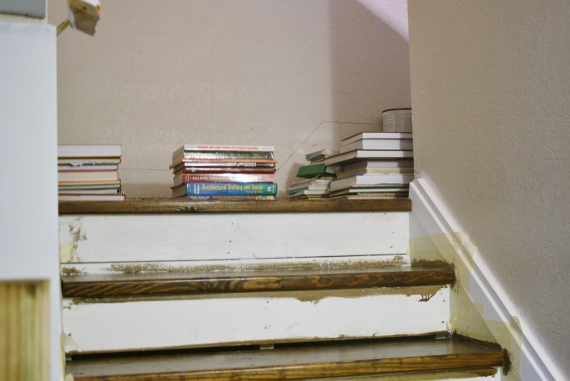
Before:
One 8′ 2 x 6 is all we needed, and Justin cut it on the table saw, so that the back was as thick as the left over flooring we had from the living room (Actually, this is where it was good luck came in. You see, when you install flooring you are supposed to add 10% or so for waste, so we had just enough for the stairs!… without wasting any flooring! I LOVE that!)
Before they are installed:
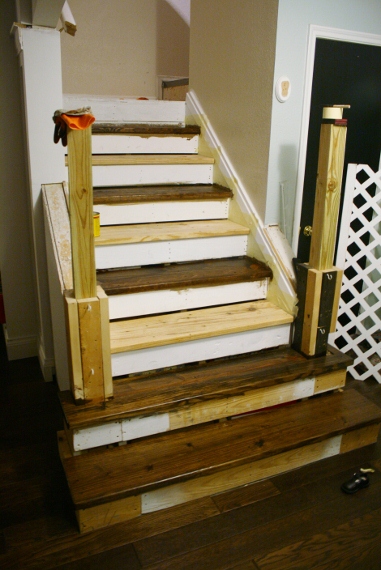
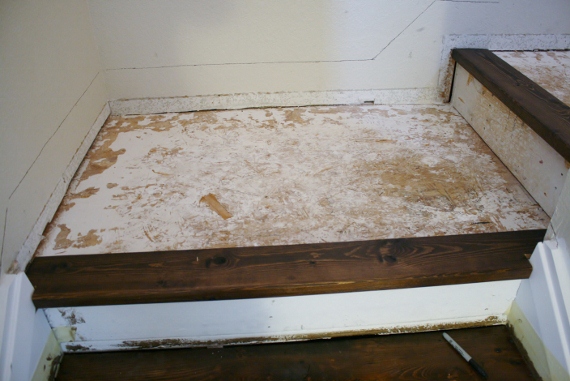
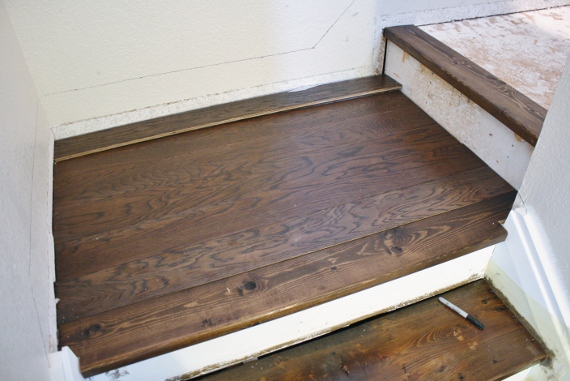
After:
You can see that the nose matches the other stairs perfectly! YEA!
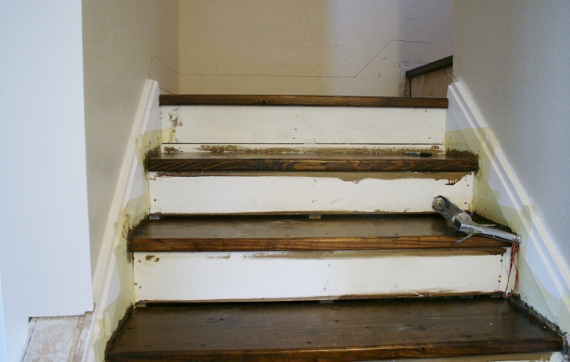
and yes I realize the risers look awful! Good things come to those who wait…
Dry fitting the flooring.
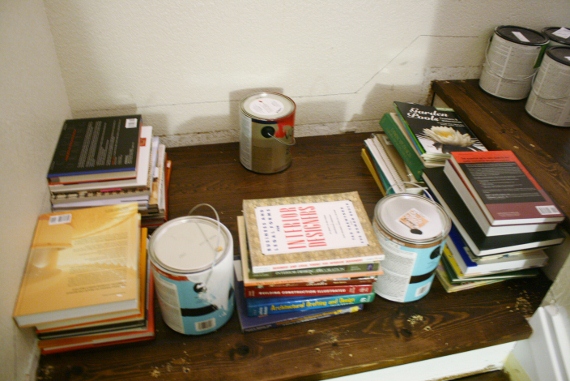
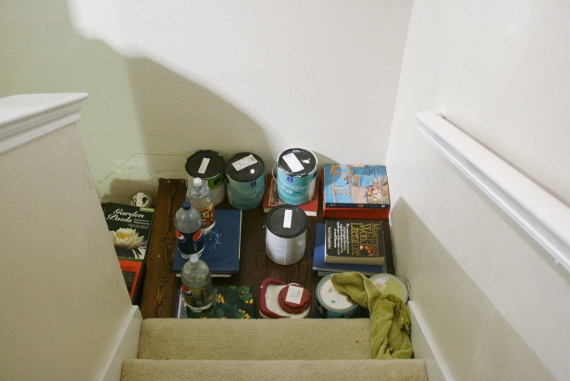
Then, after cutting the boards to fit, we just glued it down… and stacked as many heavy things on there that we could find for the night to make sure they would stick down- FOREVER!
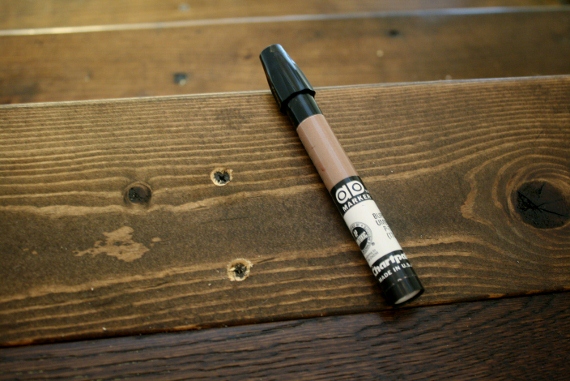
Oh, and my college Chartpak markers come in handy every now an then for quick fixes… good thing cuz we almost went broke buying these babies, that are like $4.00 EACH!! YIKES!…bikes… name the movie!
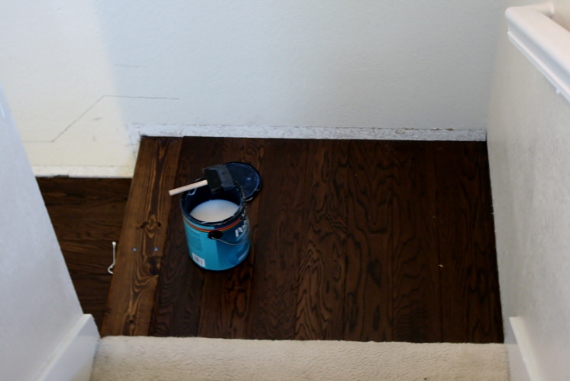
A quick coat of poly… by the way I went with water based… I will go with oil next time, it is just so much stronger and considering the traffic a much better choice. We’ve already had a few nicks… but we just chalk it up to character! ( I have an explanation for everything!)
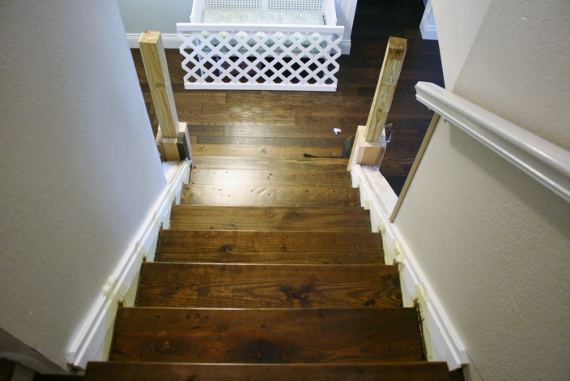
A look down at the finished treads!
And a look up… obviously the risers are in need of some finishing… coming soon!
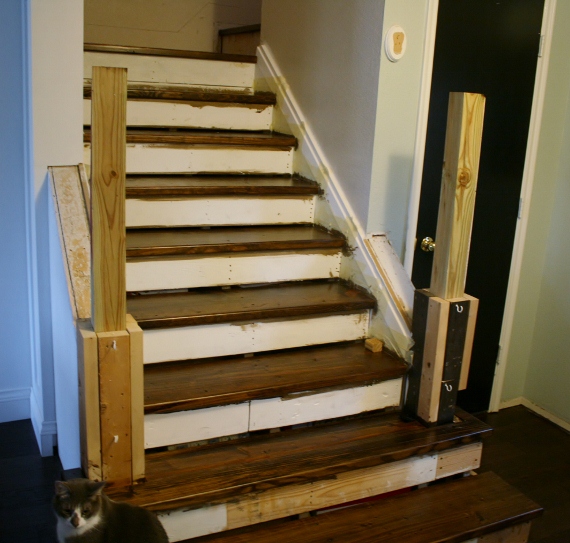
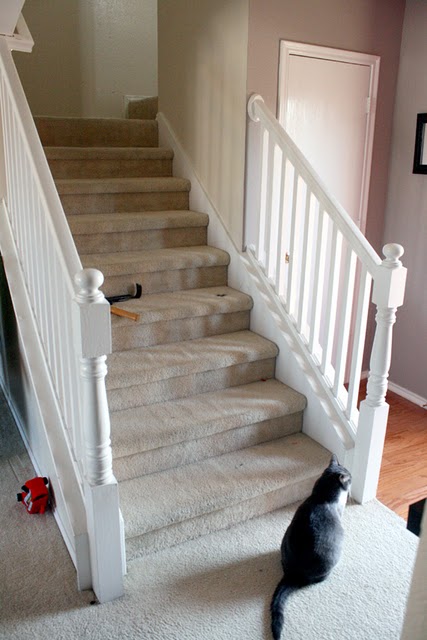
Here is a reminder of the before for fun:
Apparently Buddy likes to have his picture taken, which on a personal note makes me So sad because we had to place him in a new home a few weeks ago, due to some aggression issues he had with our other cat, that made it to unsafe to be around the babies. We miss you Buddy, but love you.
What is next… besides risers…
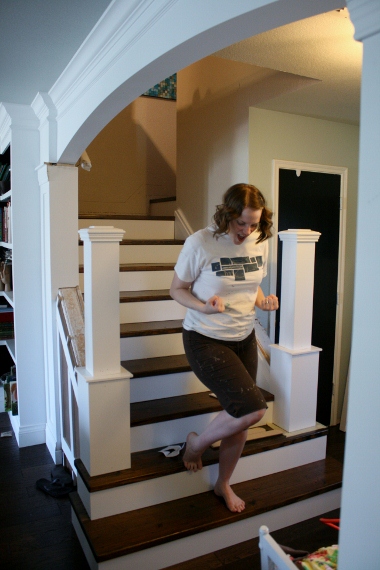
Excuse me while I do a happy dance in my painting clothes…
and hug a tree, uh- I mean newel post, it was a tree once, right?
In case you want to follow along, check out these posts too:
Remodelaholic is written by Cassity and Justin. Cassity has a degree in interior design and Justin is a landscape architect, so we adore everything that makes up a HOME! We love to share home remodeling ideas and projects we’re working on. From huge kitchen renovation ideas to small bathroom remodels, there isn’t anything we won’t try to tackle (at least once!). We are in the midst of our third whole home renovation, (check out house 1 and house 2 as well, so there should be a lot more inspiration coming your way. We hope that you will stop by often for home design inspiration, tutorials, interior design tips, delicious recipes and what going on in our family life.
Cassity Kmetzsch started Remodelaholic after graduating from Utah State University with a degree in Interior Design. Remodelaholic is the place to share her love for knocking out walls, and building everything back up again to not only add function but beauty to her home. Together with her husband Justin, they have remodeled 6 homes and are working on a seventh. She is a mother of four amazing girls. Making a house a home is her favorite hobby.
We love hearing from fellow Remodelaholics, so let us know what you like about this and leave any questions below in the comments. If you've followed a tutorial or been inspired by something you've seen here, we'd love to see pictures! Submit pictures here or by messaging us over on Facebook.
Please check out my video posting on youtube. It shows my renovation project which entails replacing the carpet on all floors with floating bamboo hardwood flooring.
Next plan is to remove the carpet from the stairs and re-do them with stain, paint, etc.. just as you’ve done yours.
My main problem is coming up with something to give the stair nose (bull nose) at the landing a clean look to incorporate the new flooring with the re-done stairs.
Jan a lot of wood flooring has matching bull nose pieces for this situation. I would talk to a flooring person at lumber liquidators or the like. If you are handy you can make one yourself, but you will need quite a few tools.
Either way i think one of the tools you are going to need to fit that bullnose piece in is a hand coping saw there are going to be some interesting cuts! Or you could use a multi-tool and cut out some of the weird areas and caulk after the fact…
The piece of wood that is screwed to the top of that stair (that looks like a bull nose I think it needs to be removed, but it might be holding up your carpet… might be good to have someone come into your home and really investigate… this could be a handy friend, but I think two or three minds working together usually come up with good solutions!
Jenni,
I just added the link that you are looking for, where we mentioned filling the gaps. I hope that helps explain it in detail. Thanks for the comment.
We are building a table out of pine and I’m having a hard time getting it dark enough after the conditioner. How did you achieve the color? I tested with dark walnut and provincial. Thanks!
Lisa,
Allow the stain to soak in 10 -15 minutes and DON’T put a lot of pressure on the rag when you wipe off the excess. You aren’t trying to remove the stain, just wipe up any puddles, does that make sense? Then as long as the color looks good, let it dry. If you need to add more after that do. I can’t remember if I had to do two coats, but that is okay, you may even have to do three or four to achieve the color you like. However, not to sound like a commercial but there is a new stain product out there by Rustoleum that is AMAZING! One coat to full color and dry in an hour ready to poly…I wrote about it here: https://www.remodelaholic.com/2013/03/fabulous-wood-stain/, I think right now that it is only available at Lowes. It is worth a try, if you can’t get the color you are looking for I LOVE the Kona color most!
I LOVE LOVE LOVE this project and seeing your before and after results really makes this seem so attainable in my house. I haaaaaate the builder-grade carpet that runs all the way up the stairs and throughout the upper floor. We’ve already removed all traces of that sub standard flooring on the main level, so this project would take care of the rest of the publicly-seen areas.
Thanks for documenting your journey for the rest of us to learn from!
A good water-based poly is actually stronger than oil-based. Varathane makes a great high-traffic poly, but you’re going to pay twice what you paid, and you won’t find it at home depot or lowes. It’s well worth the cost. That said, you used framing grade pine for the treads so nothing is going to prevent dents and scrapes.
Hey there, Cassity – I am late to the game but very much appreciate your post. I, too, have two landings plus the top of the stairs to deal with. I cannot, for the life of me, figure out how you cut the 2 x 6’s to create the perfect bullnose. Can you help me, please?
Audrey, this is Justin, thanks for liking the post. I created to bullnose with the table saw. I had to cut out a portion of the 2×6 so the bullnose would hang over the edge and the other end be the thickness of the flooring we used. It was a little tricky. you could also route out the wood as well. The best image I have is half way down the post showing the wood profile laying on the table saw. I hope that was helpful? Good Luck!
Woooow! I am so excited I came across this blog/ post. Your stairs look amazing! I am also installing pine treads, but am nervous that the wood grain/ stain from prefinished floor won’t match and flow from the landing to the stairs- did you have any issues with that?


 Remodelaholic is written by Cassity and Justin. Cassity has a degree in interior design and Justin is a landscape architect, so we adore everything that makes up a HOME! We love to share home remodeling ideas and projects we’re working on. From huge kitchen renovation ideas to small bathroom remodels, there isn’t anything we won’t try to tackle (at least once!). We are in the midst of our third whole home renovation, (check out house 1 and house 2 as well, so there should be a lot more inspiration coming your way. We hope that you will stop by often for home design inspiration, tutorials, interior design tips, delicious recipes and what going on in our family life.


Please check out my video posting on youtube. It shows my renovation project which entails replacing the carpet on all floors with floating bamboo hardwood flooring.
Next plan is to remove the carpet from the stairs and re-do them with stain, paint, etc.. just as you’ve done yours.
My main problem is coming up with something to give the stair nose (bull nose) at the landing a clean look to incorporate the new flooring with the re-done stairs.
Please let me know what you can suggest.
Thank you.
Jan a lot of wood flooring has matching bull nose pieces for this situation. I would talk to a flooring person at lumber liquidators or the like. If you are handy you can make one yourself, but you will need quite a few tools.
Either way i think one of the tools you are going to need to fit that bullnose piece in is a hand coping saw there are going to be some interesting cuts! Or you could use a multi-tool and cut out some of the weird areas and caulk after the fact…
The piece of wood that is screwed to the top of that stair (that looks like a bull nose I think it needs to be removed, but it might be holding up your carpet… might be good to have someone come into your home and really investigate… this could be a handy friend, but I think two or three minds working together usually come up with good solutions!
Good luck!
Cassity
Here is the link:
https://www.youtube.com/watch?v=AGNiZPYMOBw&feature=youtu.be
For some reason, I can’t seem to get to the post where you talk about how you filled the gaps. Can you please explain this?
Jenni,
I just added the link that you are looking for, where we mentioned filling the gaps. I hope that helps explain it in detail. Thanks for the comment.
I love the staircase! I noticed you have cats…I have been looking to re-do my carpet staircase. How has your new staircase held up with your cats?
Dawn, We had no problems with them scratching them up. (they no longer have front claws but they do have back claws) Still, no issues whatsoever!
We are building a table out of pine and I’m having a hard time getting it dark enough after the conditioner. How did you achieve the color? I tested with dark walnut and provincial. Thanks!
Lisa,
Allow the stain to soak in 10 -15 minutes and DON’T put a lot of pressure on the rag when you wipe off the excess. You aren’t trying to remove the stain, just wipe up any puddles, does that make sense? Then as long as the color looks good, let it dry. If you need to add more after that do. I can’t remember if I had to do two coats, but that is okay, you may even have to do three or four to achieve the color you like. However, not to sound like a commercial but there is a new stain product out there by Rustoleum that is AMAZING! One coat to full color and dry in an hour ready to poly…I wrote about it here: https://www.remodelaholic.com/2013/03/fabulous-wood-stain/, I think right now that it is only available at Lowes. It is worth a try, if you can’t get the color you are looking for I LOVE the Kona color most!
I LOVE LOVE LOVE this project and seeing your before and after results really makes this seem so attainable in my house. I haaaaaate the builder-grade carpet that runs all the way up the stairs and throughout the upper floor. We’ve already removed all traces of that sub standard flooring on the main level, so this project would take care of the rest of the publicly-seen areas.
Thanks for documenting your journey for the rest of us to learn from!
Jessica, you are welcome! Thanks for reading our blog.
Not only does this inspire me to do the same. or similar. to my stairway, but the way you ‘write’/blog makes it fun to read. Thanks.
Thanks for the comment and compliment, Katrina! We’d love to see pictures of what you do!
A good water-based poly is actually stronger than oil-based. Varathane makes a great high-traffic poly, but you’re going to pay twice what you paid, and you won’t find it at home depot or lowes. It’s well worth the cost. That said, you used framing grade pine for the treads so nothing is going to prevent dents and scrapes.
Thanks for the tips, Jeff!
Hey there, Cassity – I am late to the game but very much appreciate your post. I, too, have two landings plus the top of the stairs to deal with. I cannot, for the life of me, figure out how you cut the 2 x 6’s to create the perfect bullnose. Can you help me, please?
Thank you!
Audrey, this is Justin, thanks for liking the post. I created to bullnose with the table saw. I had to cut out a portion of the 2×6 so the bullnose would hang over the edge and the other end be the thickness of the flooring we used. It was a little tricky. you could also route out the wood as well. The best image I have is half way down the post showing the wood profile laying on the table saw. I hope that was helpful? Good Luck!
Woooow! I am so excited I came across this blog/ post. Your stairs look amazing! I am also installing pine treads, but am nervous that the wood grain/ stain from prefinished floor won’t match and flow from the landing to the stairs- did you have any issues with that?
Appreciate any advice-thank you!