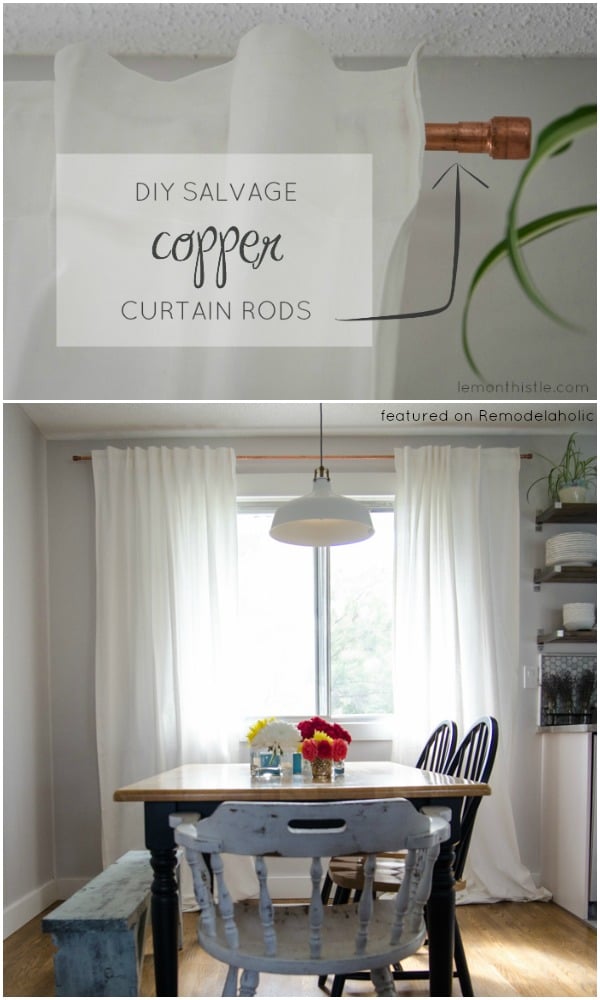
Upcycled Copper Pipe Curtain Rod
Continuing our kick-off of All Things Windows, we have Colleen from Lemon Thistle here to share an inexpensive and stylish *upcycled* curtain rod. We’ve shared before how to use conduit to make a curtain rod, but we love this twist (and finials!) on the idea.
Check out all of the window goodness here, or share and browse using #AllThingsWindows on social media. Don’t forget to come link up your window-related blog posts or Instagram photos at the party, too!
Copper Pipe Curtain Rod + Finial
by Colleen of Lemon Thistle
Hi Guys! I’m Colleen, the girl behind Lemon Thistle– home to DIY, Parties, and Home Decor (and lot’s of babies). I’m so excited to be sharing my DIY Salvage Copper Curtain Rods with everyone here at Remodelaholic. But first, let’s get to know each other a little bit, shall we? I’m a mama to 1 year old twins, I love a good handmade party, and my awesome hubby and I are working our way through major renovations on our new home. Oh, and we’re operating on a budget too- so rest assured this DIY is an affordable one!
Now on to the curtain rods! These babies were a long time coming, could you believe we lived in our place for four months without hanging curtains? Talk about NO privacy. I needed the Week of Windows back in April y’all. And since I’m a slow mover, I still need to hem the curtains (but our kiddos are having so much fun playing in them, I’ve really been putting it off). But the curtain rods are more than done- and that’s what this post is about, right?
Can we talk about copper for a minute? I love the trend, but it’s all shiny shiny. That’s great if you’re using new copper pipes, but I tried to clean my salvage copper and it did not shine the way new does. And I kind of like it that way! When we bought our place, we had to have some un-fun work done, like an upgraded electrical panel and a new hot water tank. BUT when he was replacing our hot water tank, our plumber took out a bunch of copper piping to fit the larger tank and solve some of the plumbing issues this house had. Looking at the pile of scrap inspired this project.

I’m sure you’ve seen some copper curtain rods out there, and I loved them but none of them had been quite right for our space. I don’t love how industrial the use of flanges are for our space, and I didn’t like how low profile and slick to the wall these were, but I also didn’t like how bulky the finials were on this version. These are all gorgeous in those spaces… but weren’t quite right for us. So I decided to wing it and create my own. I’m glad I did.
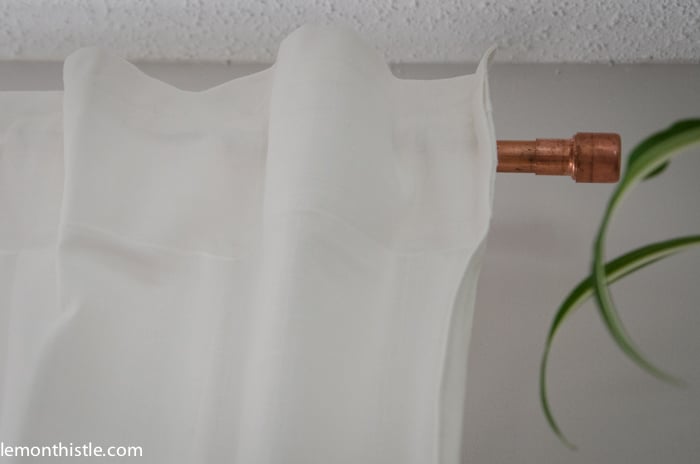
The pipe we had is half inch pipe (that measures the inside of the pipe, keep in mind). So I hit up Home Depot to see what they had. I wanted something simple like these plain end caps but something that would make a bit more of a statement. I ended up picking out a 1/2 inch to 3/4 inch piece and adding on a 3/4 inch cap. It was perfect! Just big enough to look like a proper finial without being so big that takes away from the minimal-ish design choices we have going on.

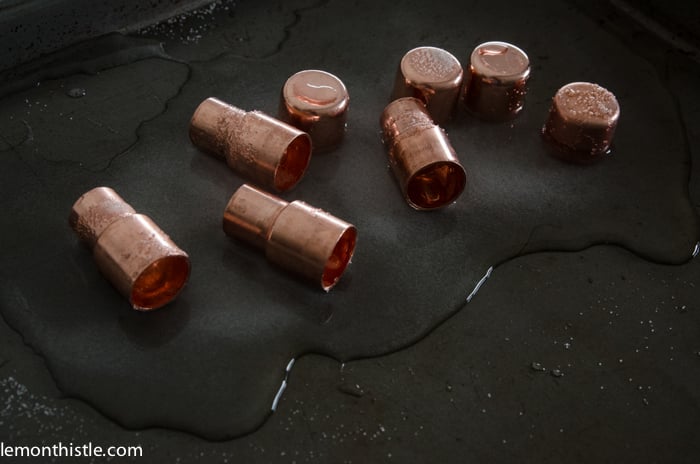
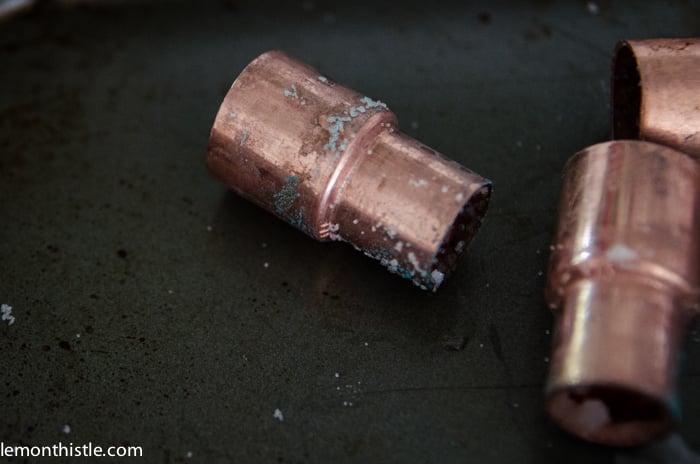
The sort-of patina these guys were treated to was a happy accident. I was trying to clean my salvage pipe and the finial pieces at the same time and one of the methods was with salt and vinegar. I was in the middle of applying the treatment to the finial pieces at which point my babes woke up and the treatment was left on for an hour or so… which turned the shiny copper piping to what you see here. At first I was really bummed and tried to scrub it off, but then realized that it matches our salvage pipe so much better and it’s totally unique. So now you know… leave salt and vinegar on the copper for longer than the recommended time and you’ll oxidize it! Which really, I should have known.
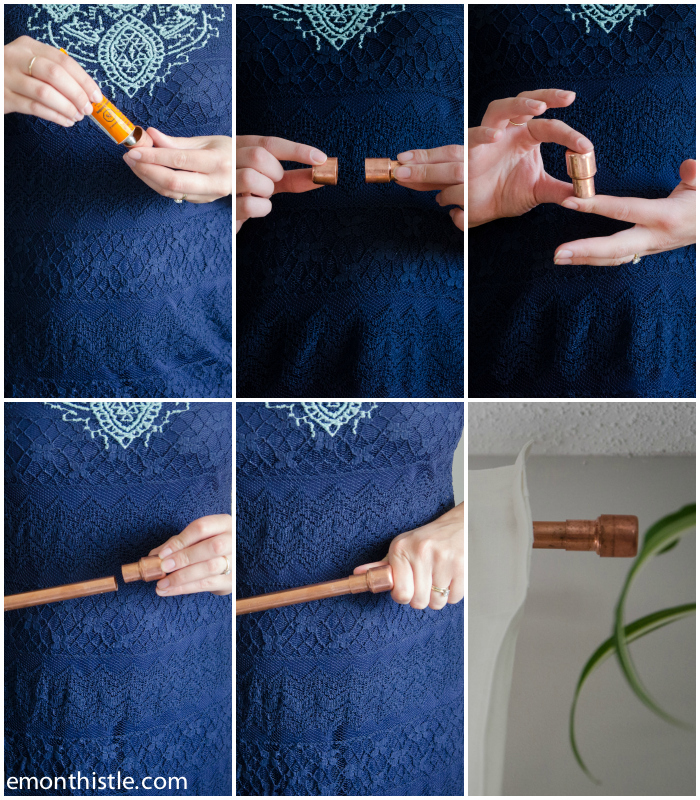
So I started by gluing the end cap to the piece that changes sizes. I did this because the caps are made to be really loose. I didn’t want these falling off. Then I attached all that to the pipe. This is a snug fit so I didn’t glue it at all, which works out nicely to take curtains on and off easily.


To mount the curtain rod, I bought standard curtain mount hardware for $3 bucks at a discount store and pulled out my favourite copper spray paint: Krylon Metallic. I sprayed the screws it came with as well to get them to match by standing them up in a container of rice.
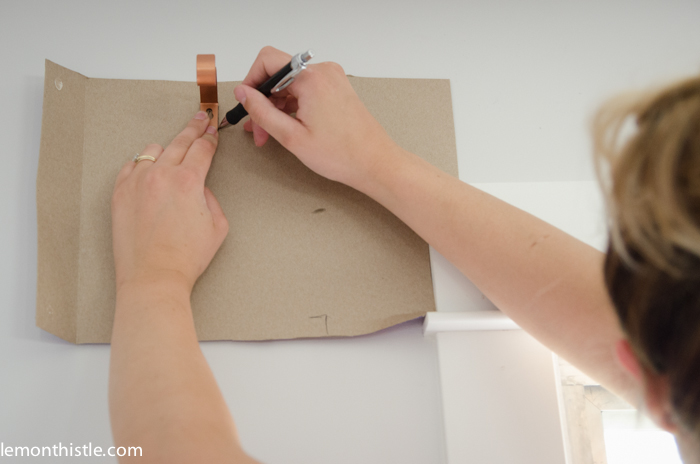


To hang the curtains evenly, I used a piece of cardboard to mark where the anchor should be- by far the easiest way to do this!
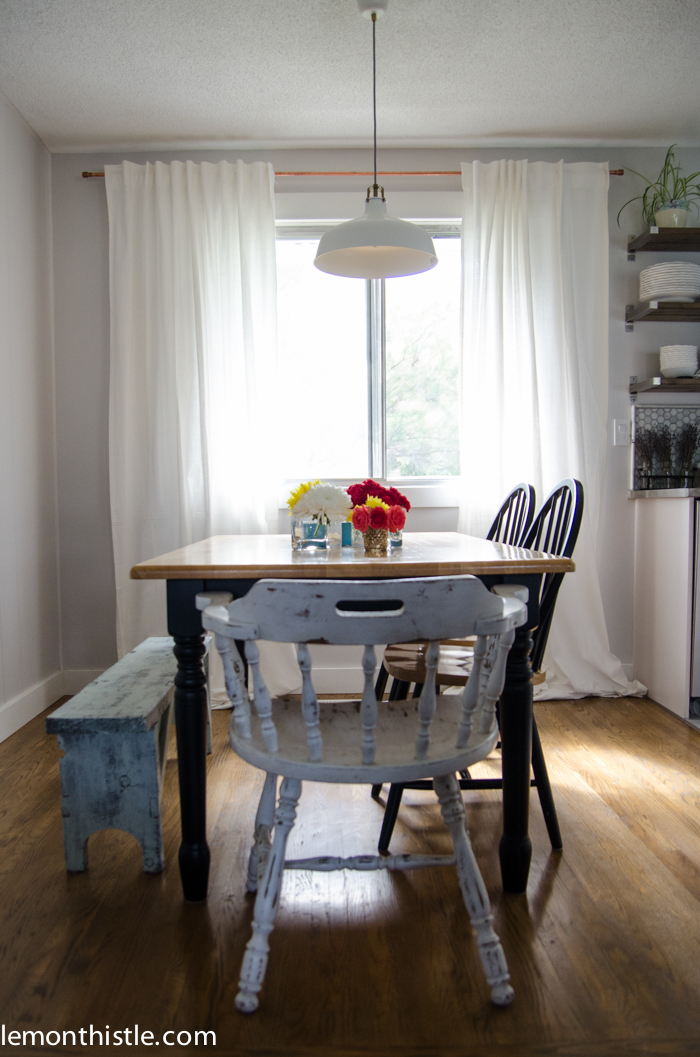
Oh and a funny moment happened last week when I realized these were coming off the wall. I was so mad I couldn’t believe how quickly my 80 pound drywall anchors pulled out! Then I went up to fix and realized I’d completely forgotten to use them at all! These guys somehow survived my kids playing hide and seek and climbing them with just a little tiny screw into the drywall. They’re safely affixed to the wall with mega wall anchors now. So please remember to do that the first time around and you won’t have a heart attack when your 11 month old pulls your curtain rods down.
What do you think? Are you on board with the copper trend or do you think it’s better left for plumbing?
———————————————
Thanks for sharing, Colleen! So glad we found you and your lovely blog at the link party!
Remodelaholics, go visit Lemon Thistle and check out more great projects like her IKEA-hack open shelving and $10 giant chalkboard.
Coming up later in the week:
(be sure to subscribe by RSS or email to get updates for every post of All Things Windows)
Rustic Barnwood Shutters

Faux Roman Shade Tutorial
[inlinkz_linkup id=450403 mode=1]
Lorene has been behind the scenes here at Remodelaholic for more than a decade! She believes that planning projects and actually completing them are two different hobbies, but that doesn't stop her from planning at least a dozen projects at any given time. She spends her free time creating memories with her husband and 5 kids, traveling as far as she can afford, and partaking of books in any form available.


I’m so excited to be part of #allthingswindows! Thanks for including me 🙂
So glad to have you, Colleen!
Does the patina that develops on copper ruin your white curtains?