Small White Kitchen Makeover with Built-In Fridge Enclosure
The kitchen is the heart of the home, and it’s definitely a major factor in purchasing a home, even for us demolition-minded DIYers. Sometimes kitchens just need small changes, and sometimes they need BIG, like Texas-style big, changes. Knocking out walls, moving cabinets — big changes definitely make a difference!
But when you’re limited by space, time, or money constraints, you can still be creative and give your kitchen a major overhaul without taking a sledgehammer to the walls. Our guest today took her small, orange kitchen and transformed it into this beautiful white kitchen, with a built-in fridge enclosure, subway tile backsplash, butcher block countertops, vinyl plank flooring… so many beautiful touches!

Ay ay ay, are you drooling? Drool a little bit more over these amazing and small kitchens, and then I’ll let Kaylor show you how she and her husband worked their magic…
 Functional Galley Kitchen | Fabric Paper Glue
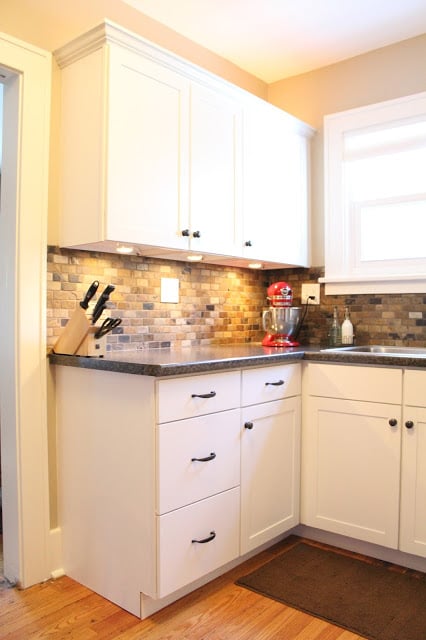 Small White Kitchen with Slate Tile Backsplash | lovetodecor8 featured on Remodelaholic
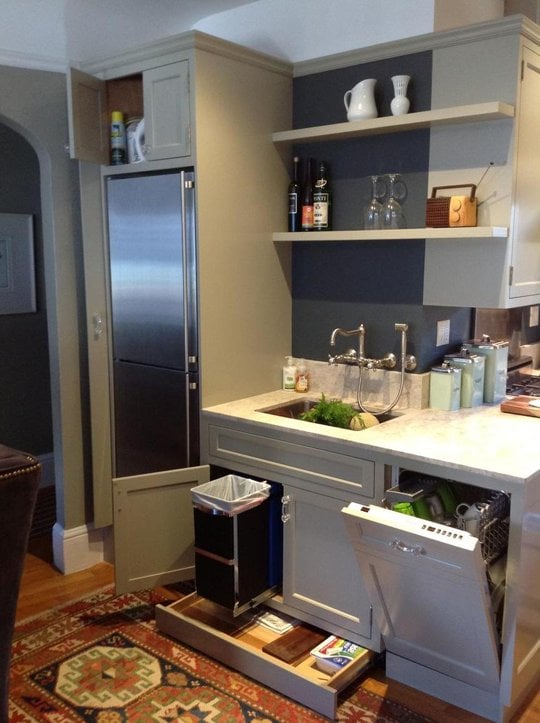 Maximized Small Kitchen Space | Maureen on The Kitchen
 Small White Kitchen Remodel| She Got Married
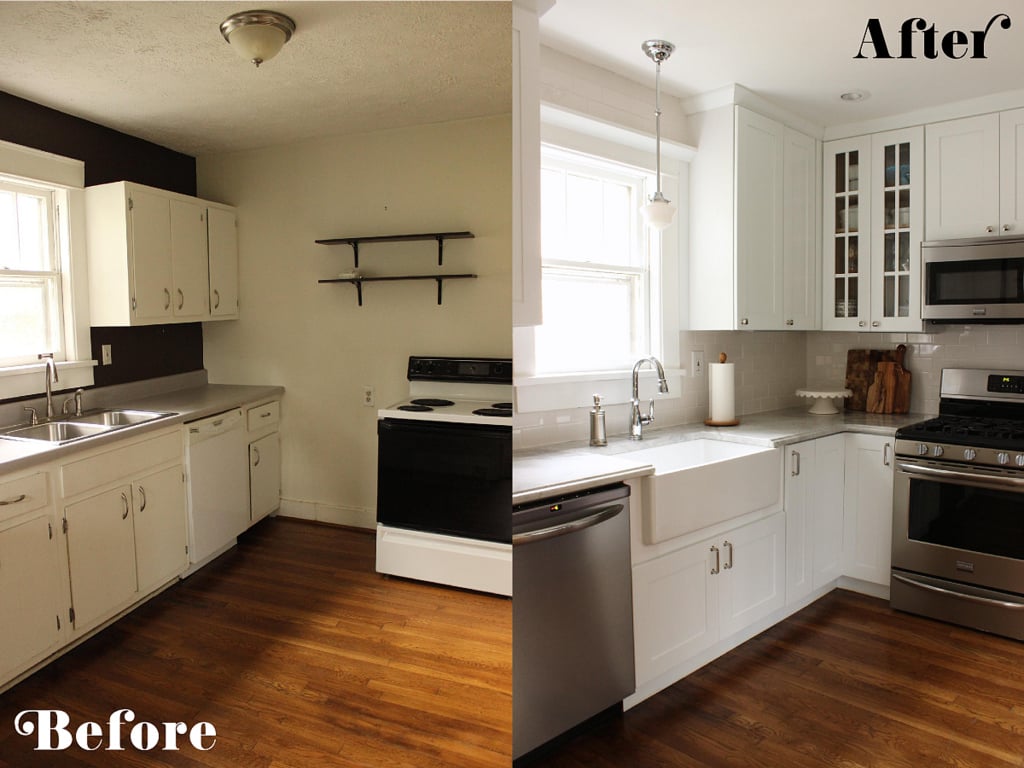
And now, here’s Kaylor to knock your socks off with the before and afters of her kitchen remodel:
(Update: See more photos of Kaylor’s kitchen and how the wood countertops are holding up here)
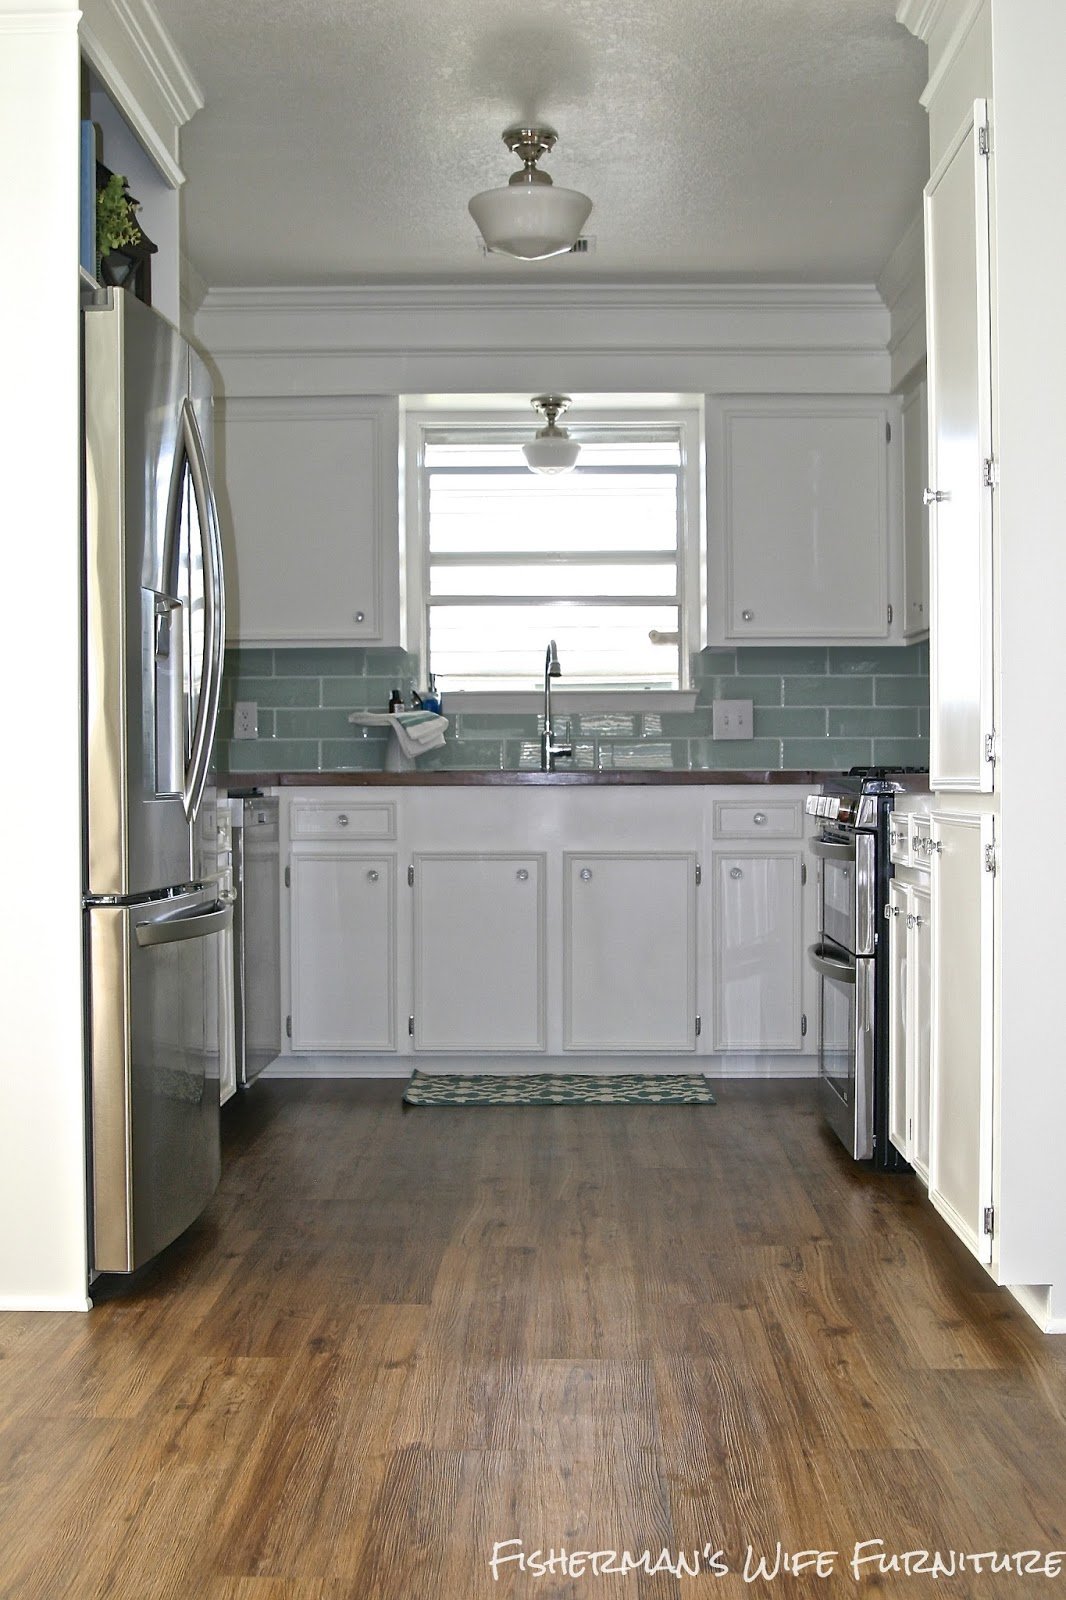
Small White Kitchen Makeover with Built-In Fridge Enclosure
by Kaylor of Fisherman’s Wife Furniture
This post contains some affiliate links for your convenience. Click here to read our full disclosure policy.
Hi, y’all! My name is Kaylor and I am the owner of Fisherman’s Wife Furniture. I am a former math teacher that turned my passion for rescuing furniture and DIY into a business. The blog started as a way to show my portfolio to perspective clients but has become a great way to share my work and ideas with fellow DIYers.
One of my favorite posts is a gorgeous dresser make over that you can see here but my most popular furniture post is a dresser turned into dog food storage and feeding station. Check out that project here. Over the past few months, most furniture has been put on hold for our house updates and getting settled into our new home.
My husband and I recently moved back to Texas and bought a 1980’s waterfront house that had only been used as a vacation home. In fact, over the past nine years it had barely been used at all. For home buyers that love to DIY, this is gold! The need for updates was a great bargaining chip for price negotiations and we didn’t have to tear out anything new just because it wasn’t our taste. We have been in the home a few months now and have painted and updated everything but the bathrooms. Today, I am going to tell you about our unbelievable kitchen transformation.
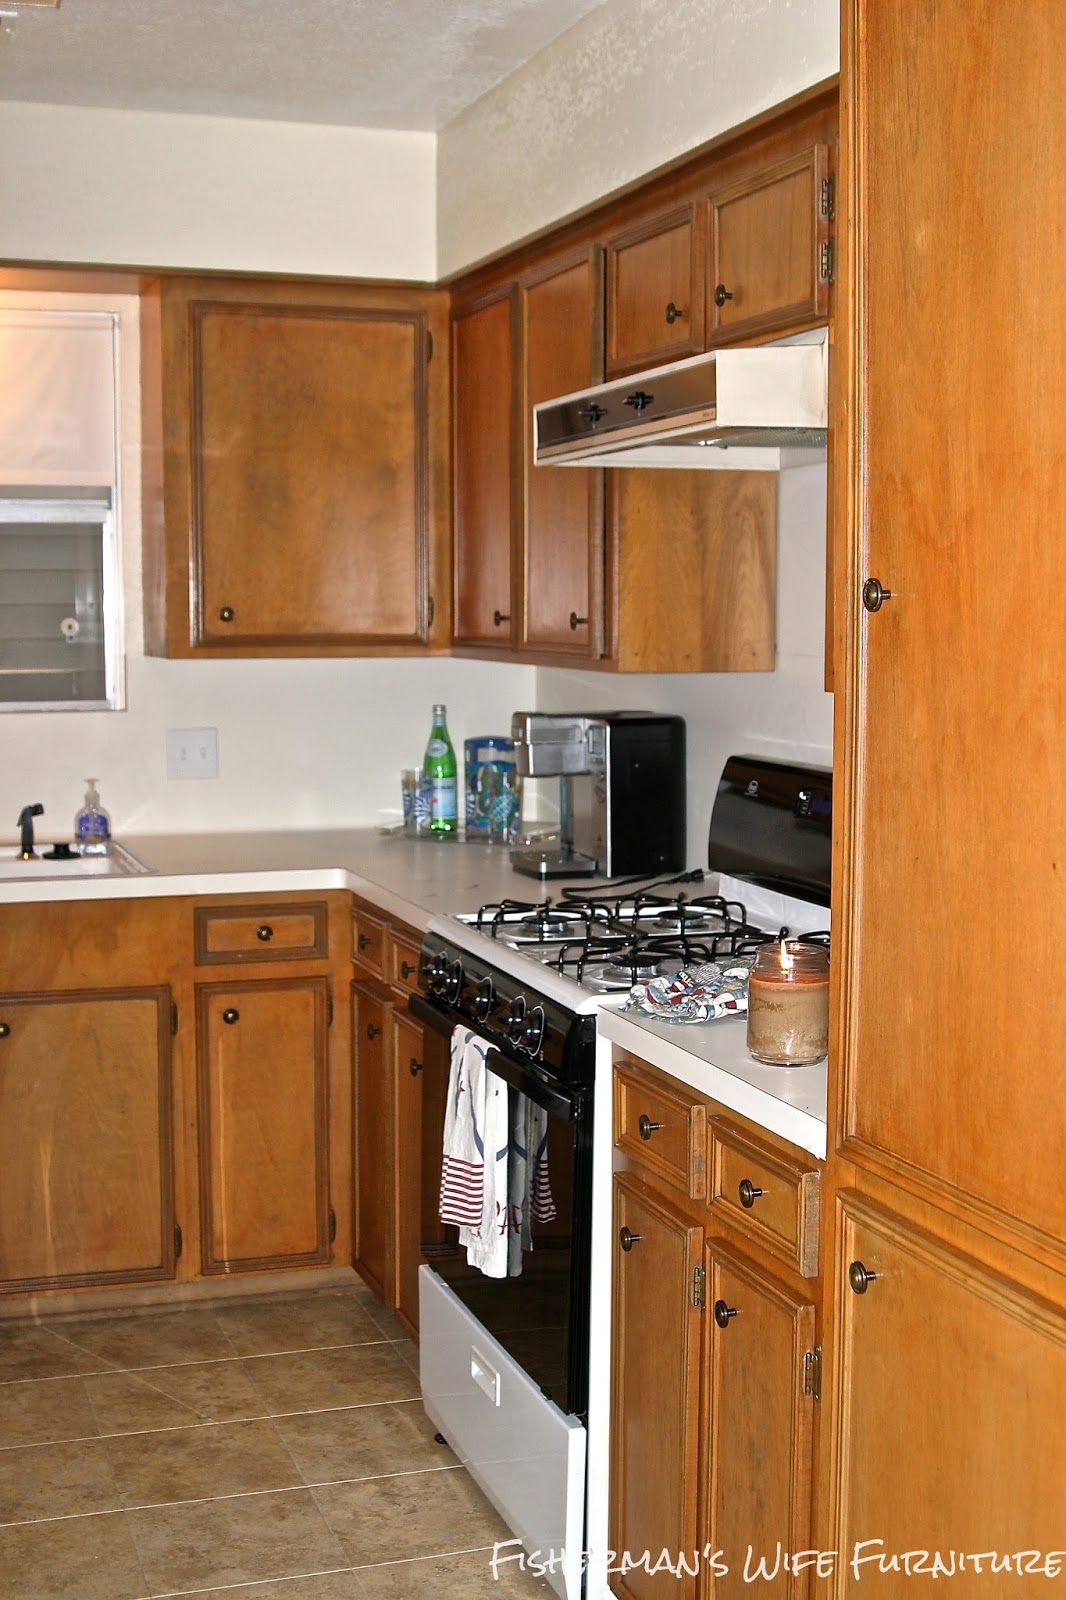
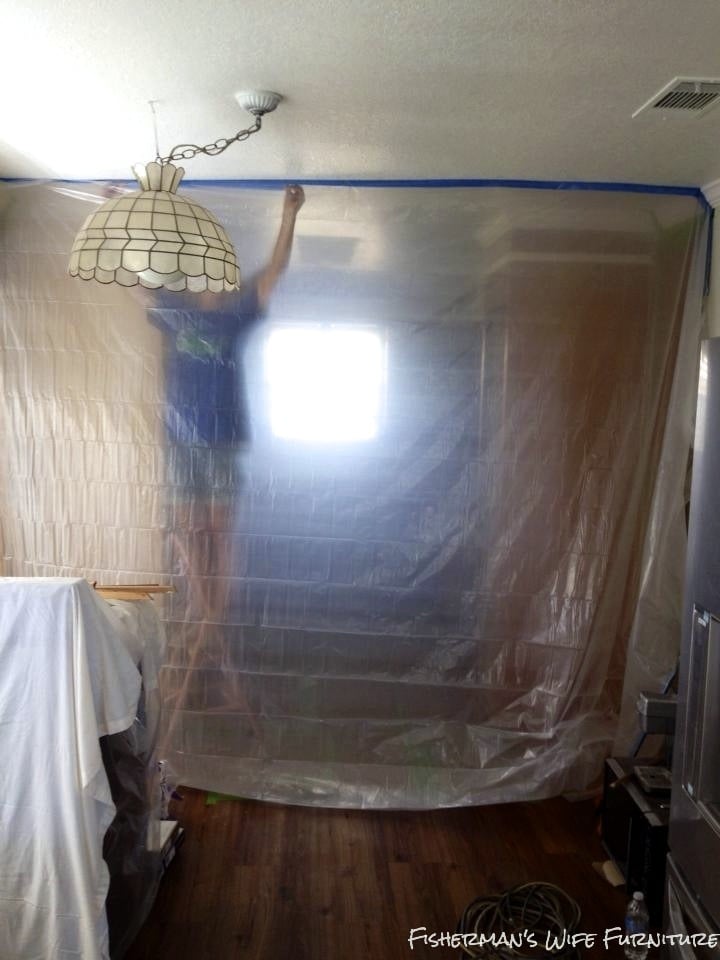
Even an experienced DIYer would have winced a little when they saw this.
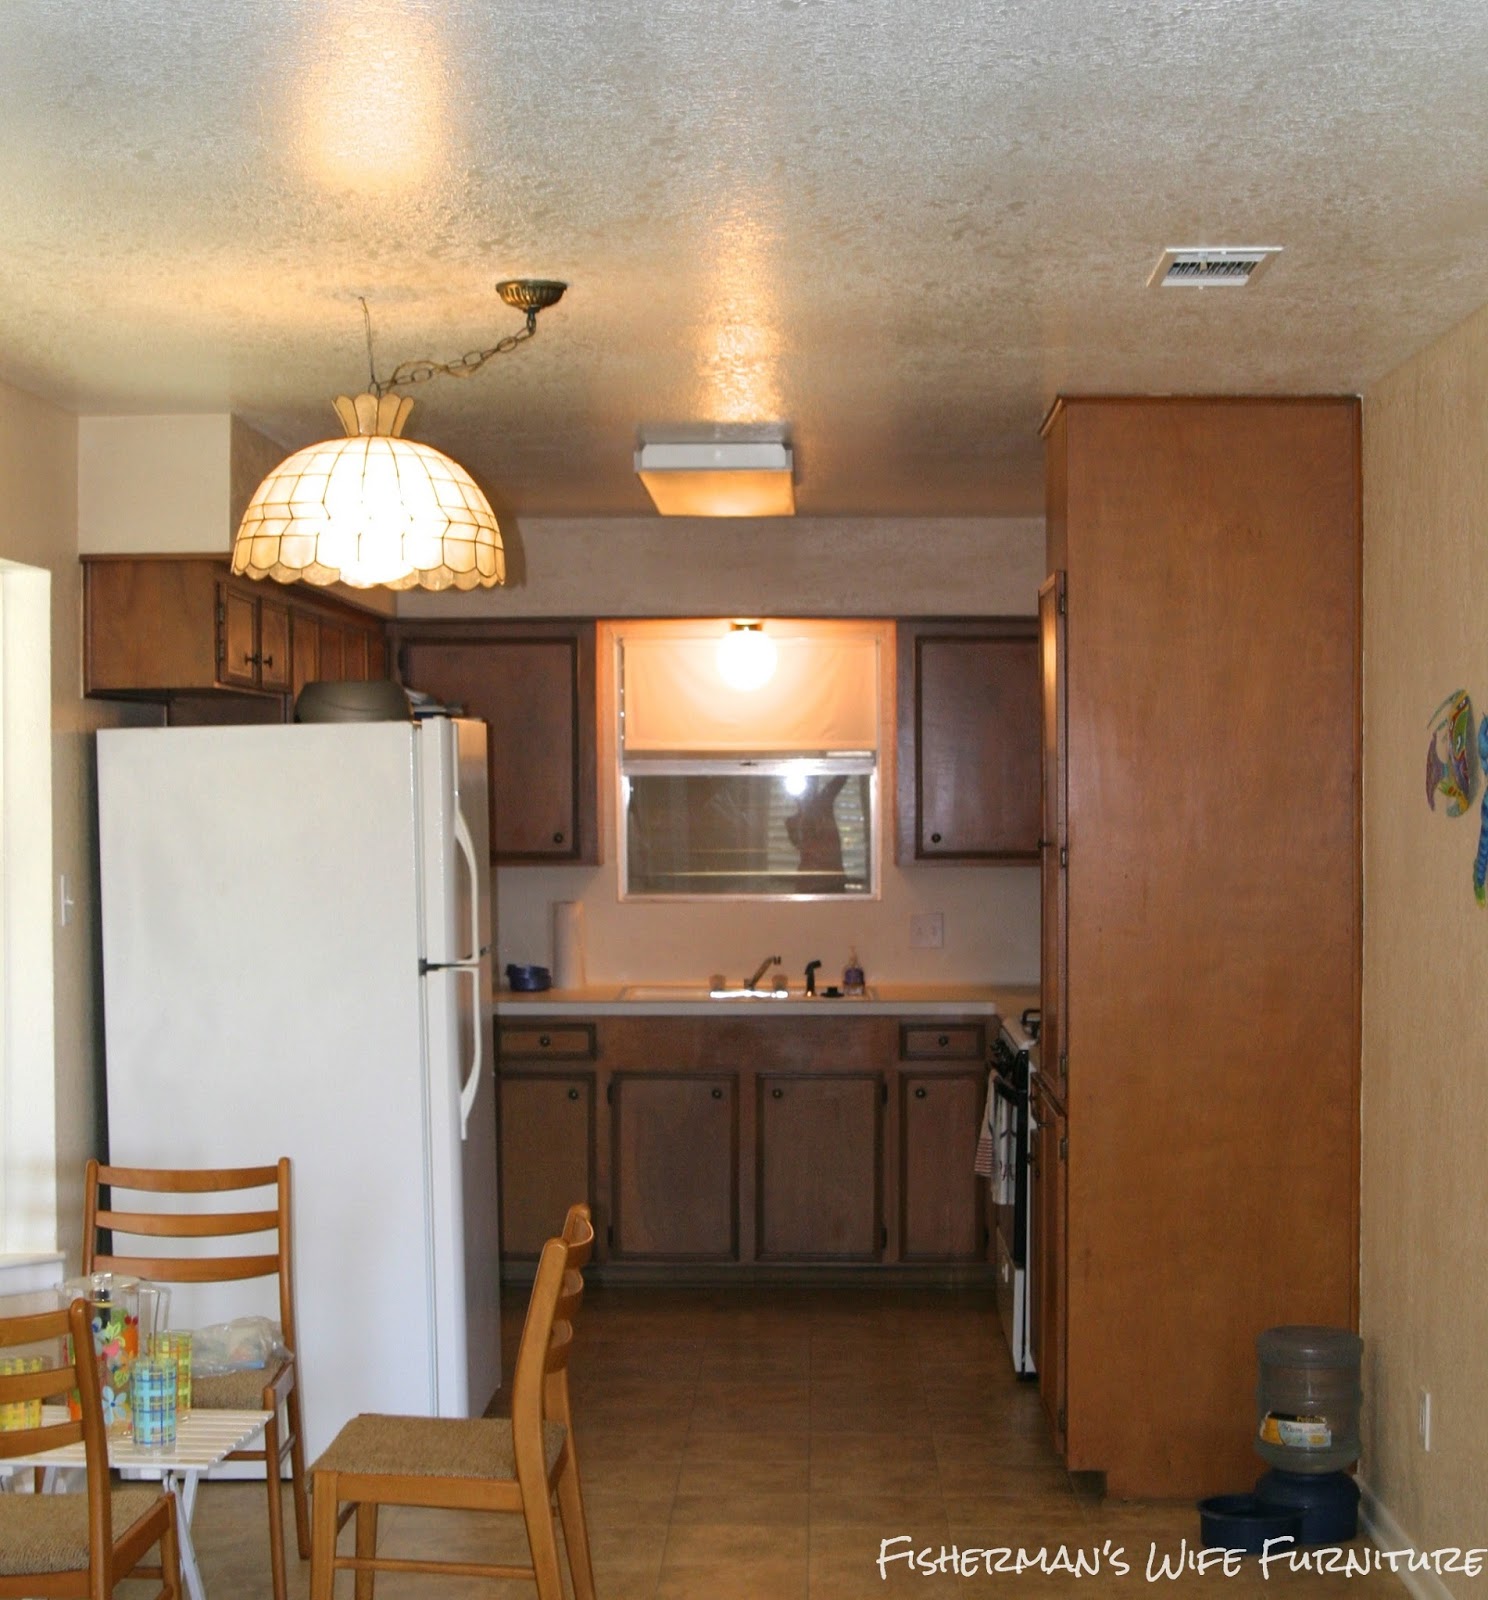
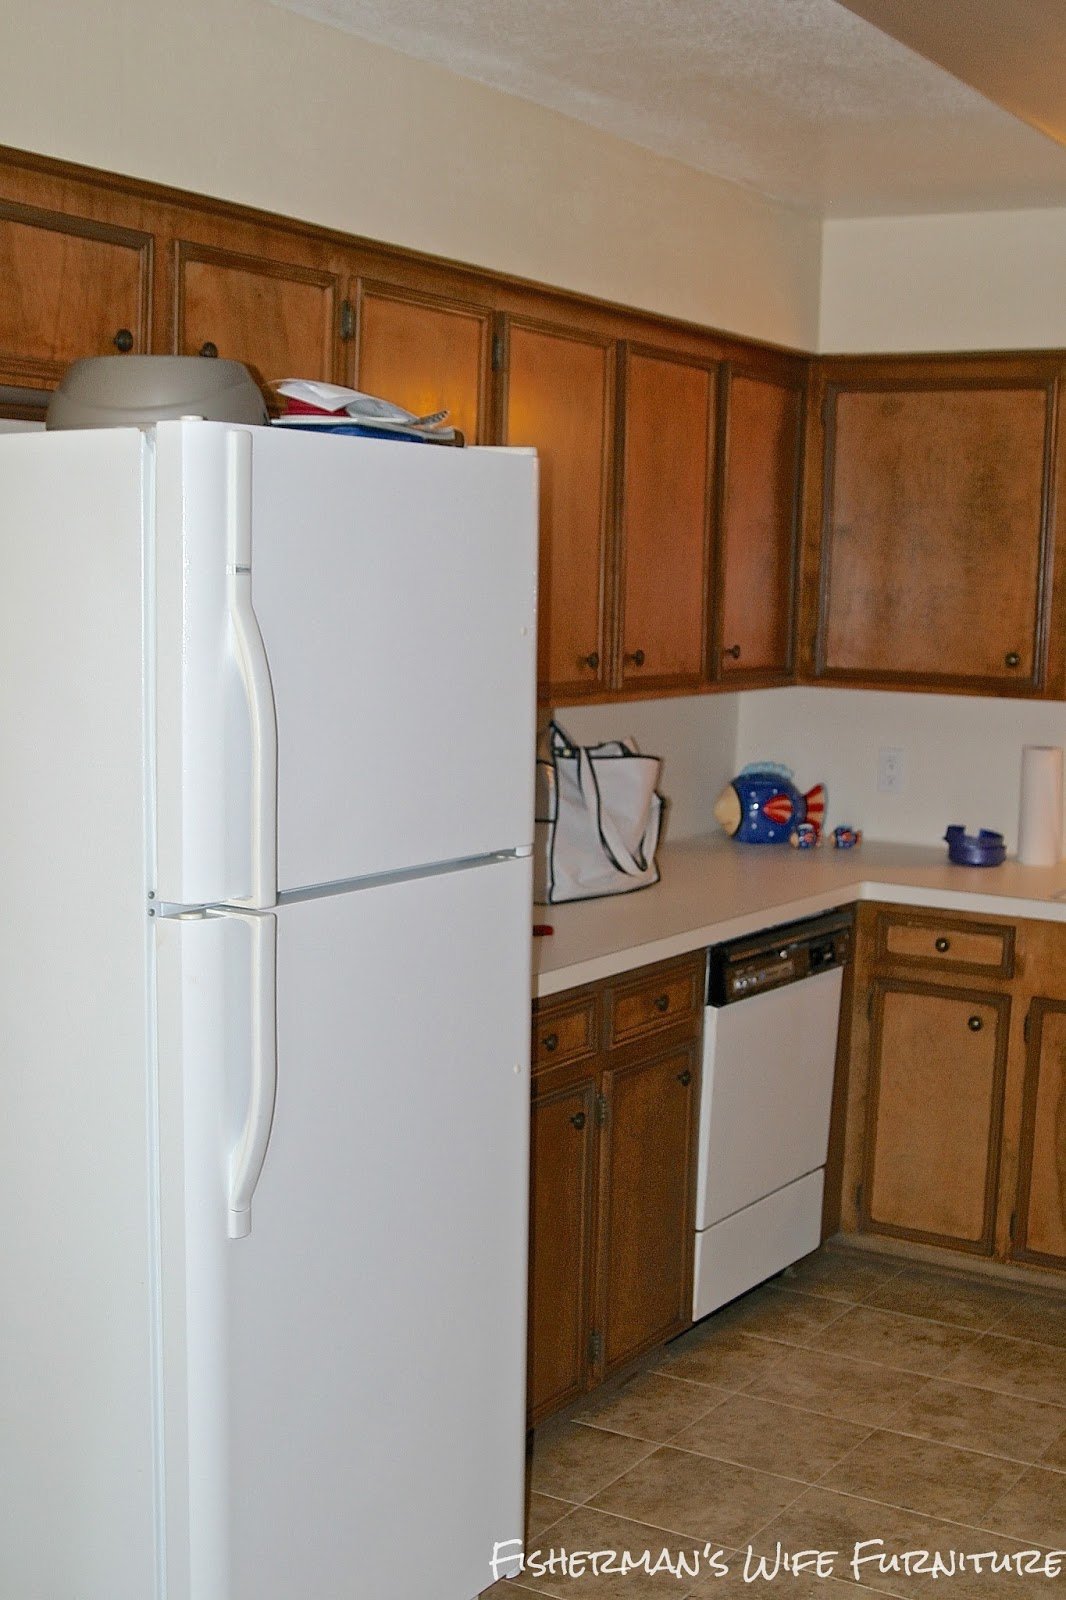
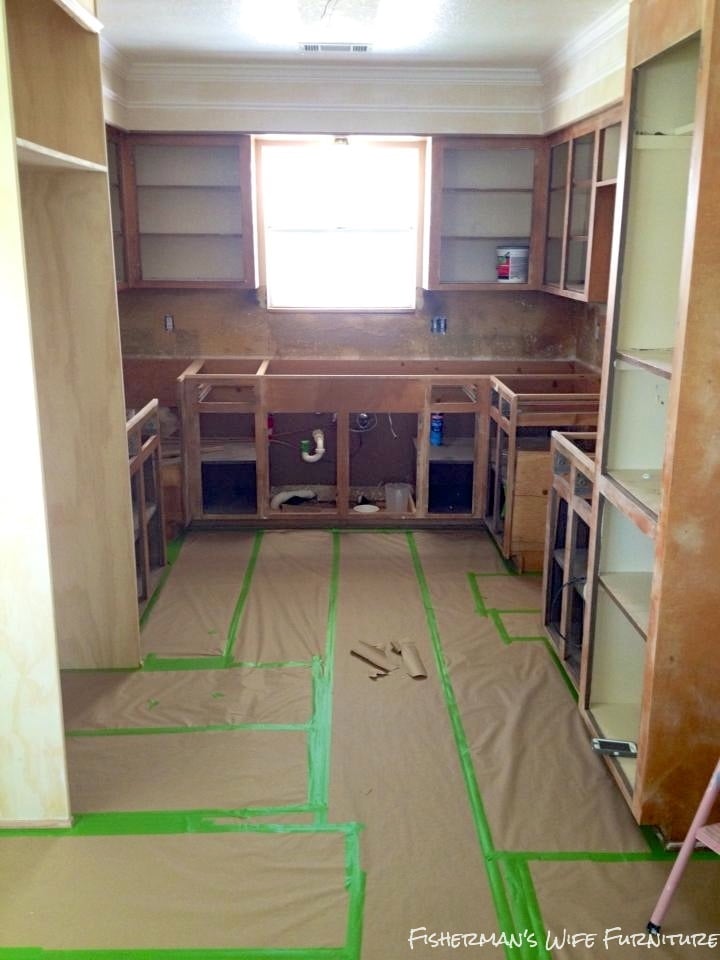
The space was dark, cramped, cave like and let’s not leave out, orange. The home is all second story living and the overall square footage is only 1300 square feet. There is nowhere to expand into current square footage and adding on was out of the question so I had to come up with a design to rescue this kitchen keeping the current footprint.
Of course, I had a Pinterest board for a future home so I had an idea of the look I wanted but I wasn’t sure if I could accomplish the look on our $10,000 budget, which almost half was taken up with buying my amazing new appliances. This is our second home to remodel/update so we had an idea of what to expect and that includes the unexpected. We were so lucky that after demo, we found there were no hidden or unexpected repairs needed. Also, we realized the cabinets are solid wood and were custom built for the home. They just needed some major help to bring them to the current decade. I wanted a custom look on a budget so we did several things to make the cabinets look expensive.
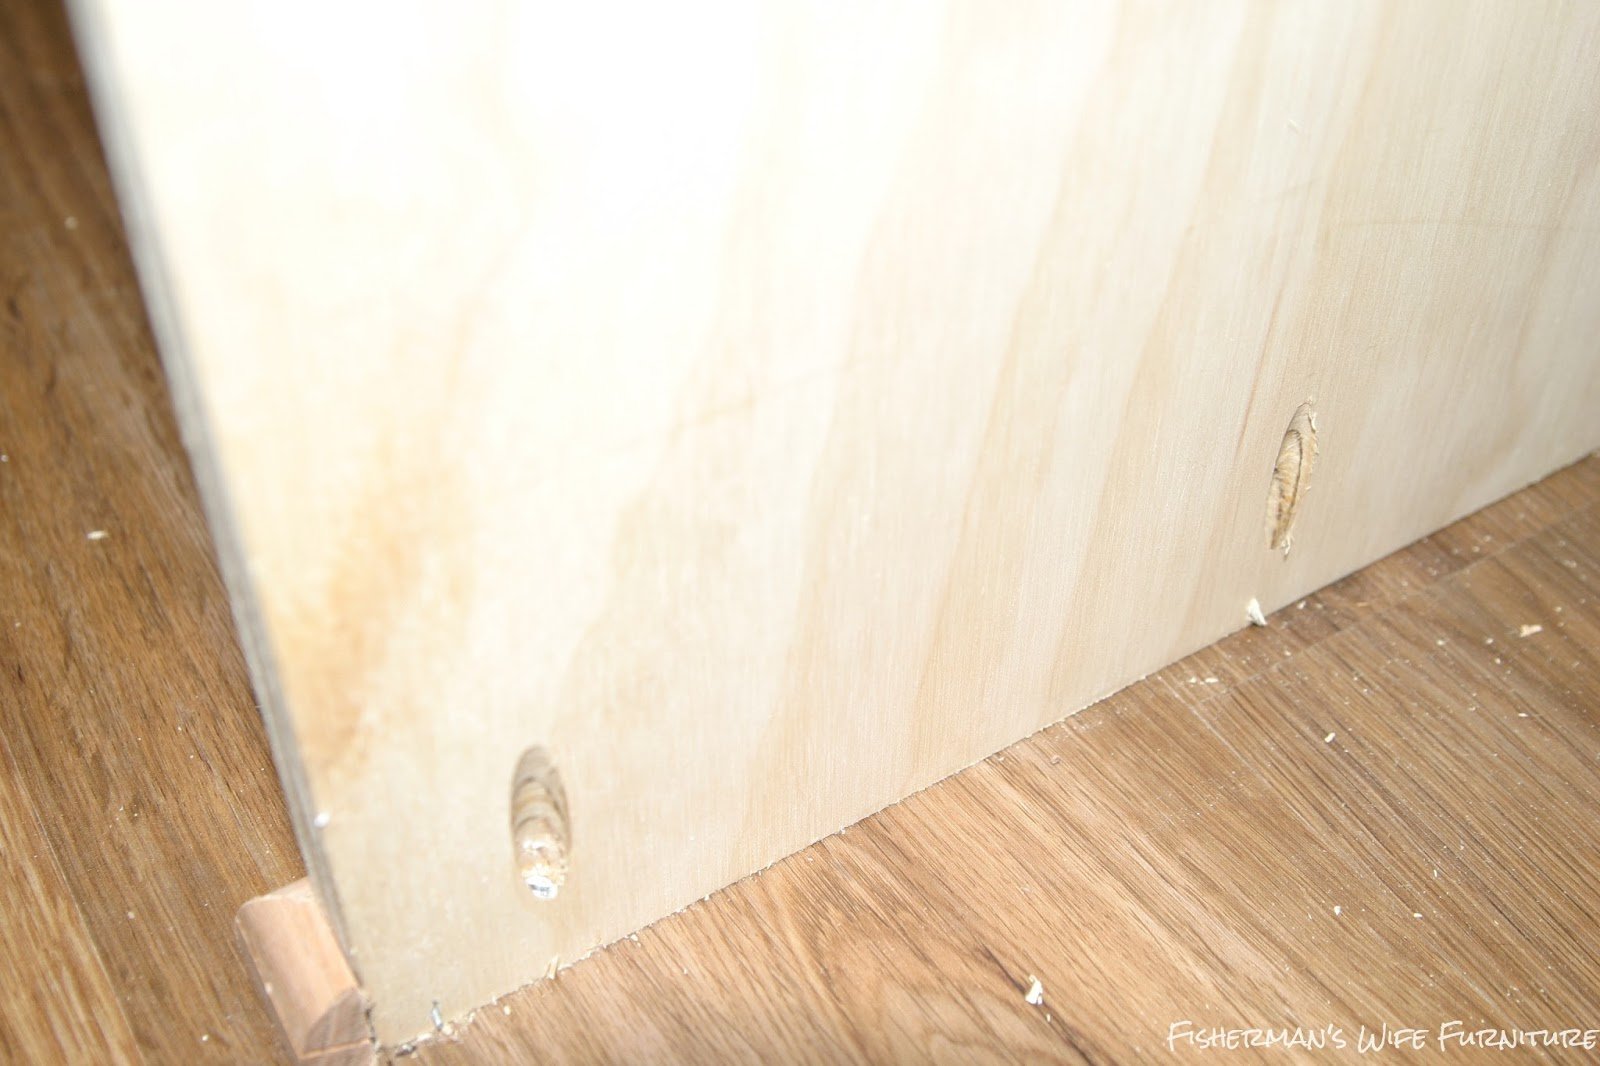
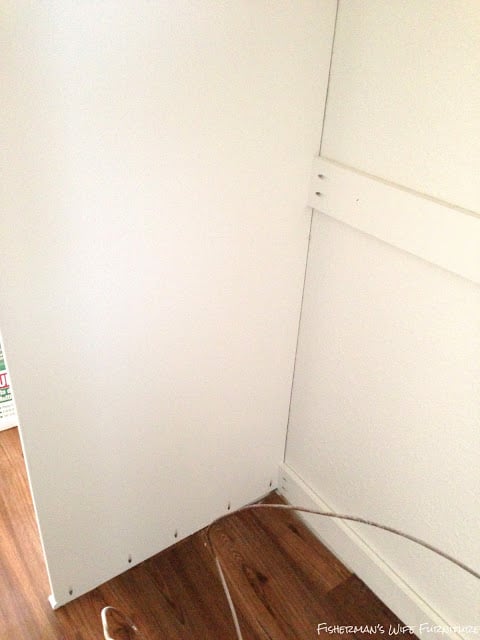
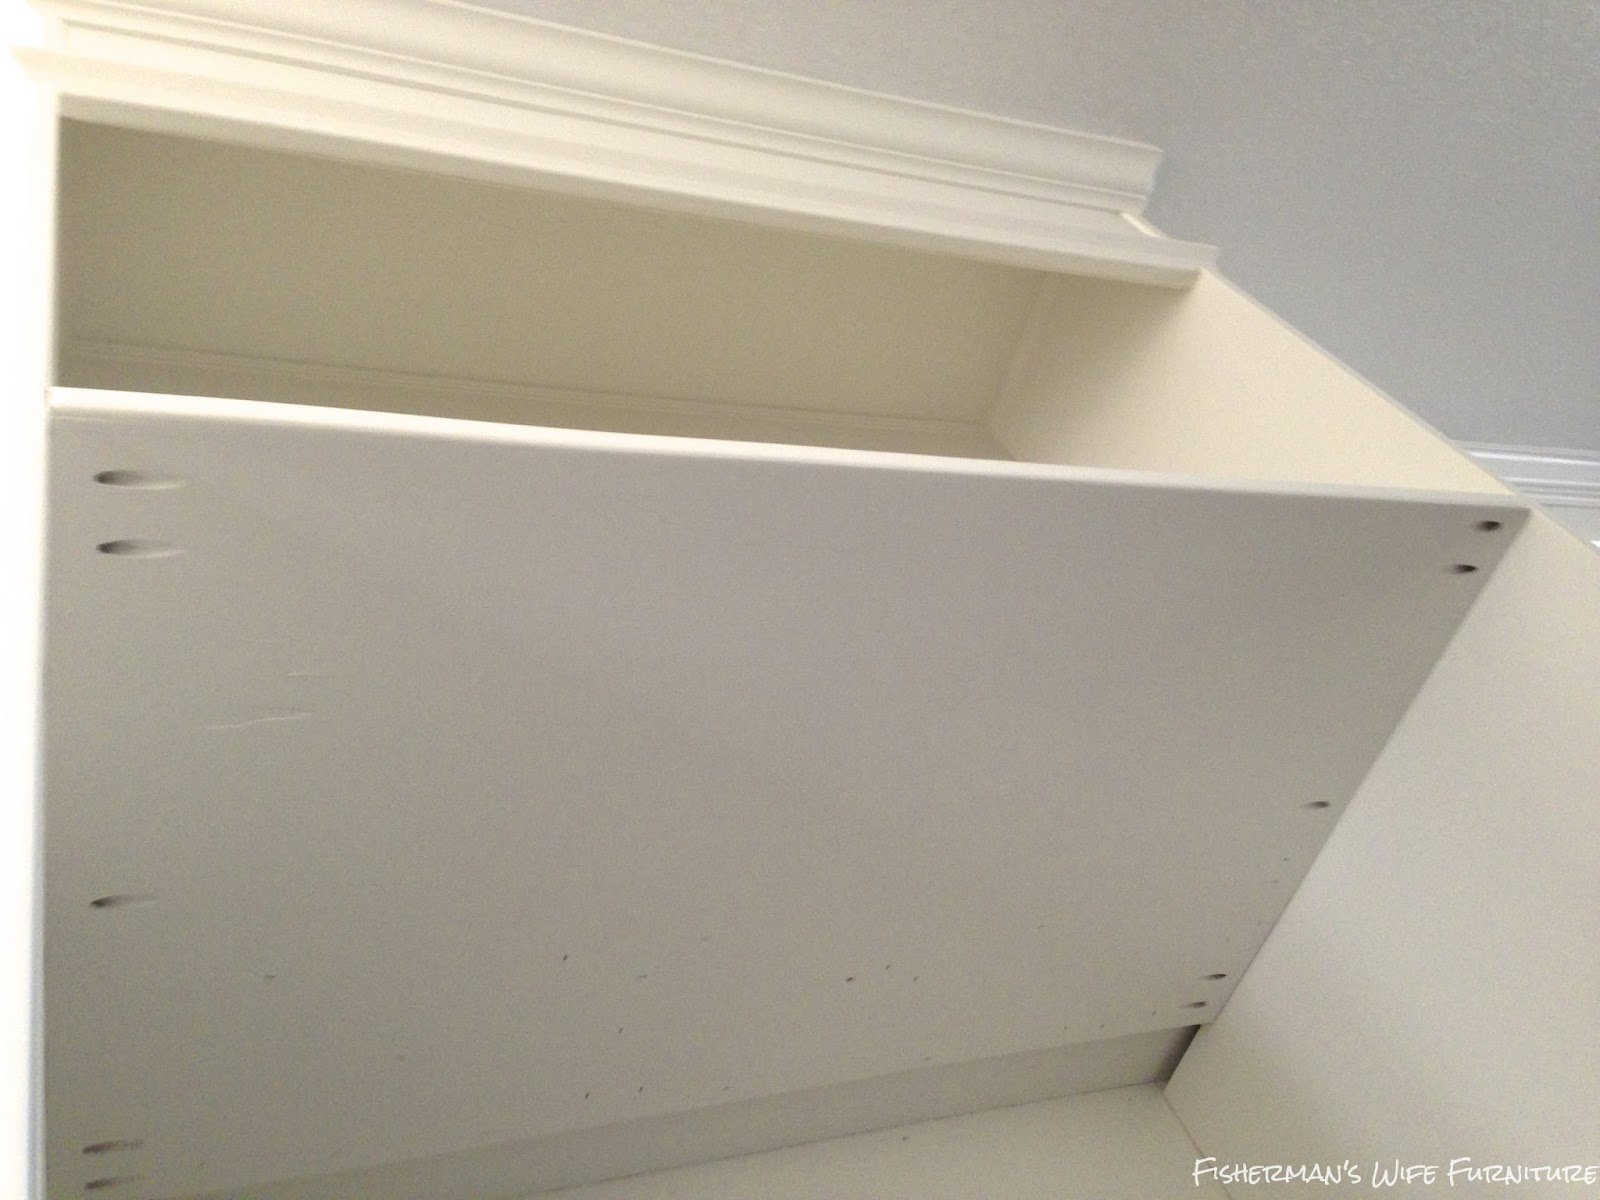
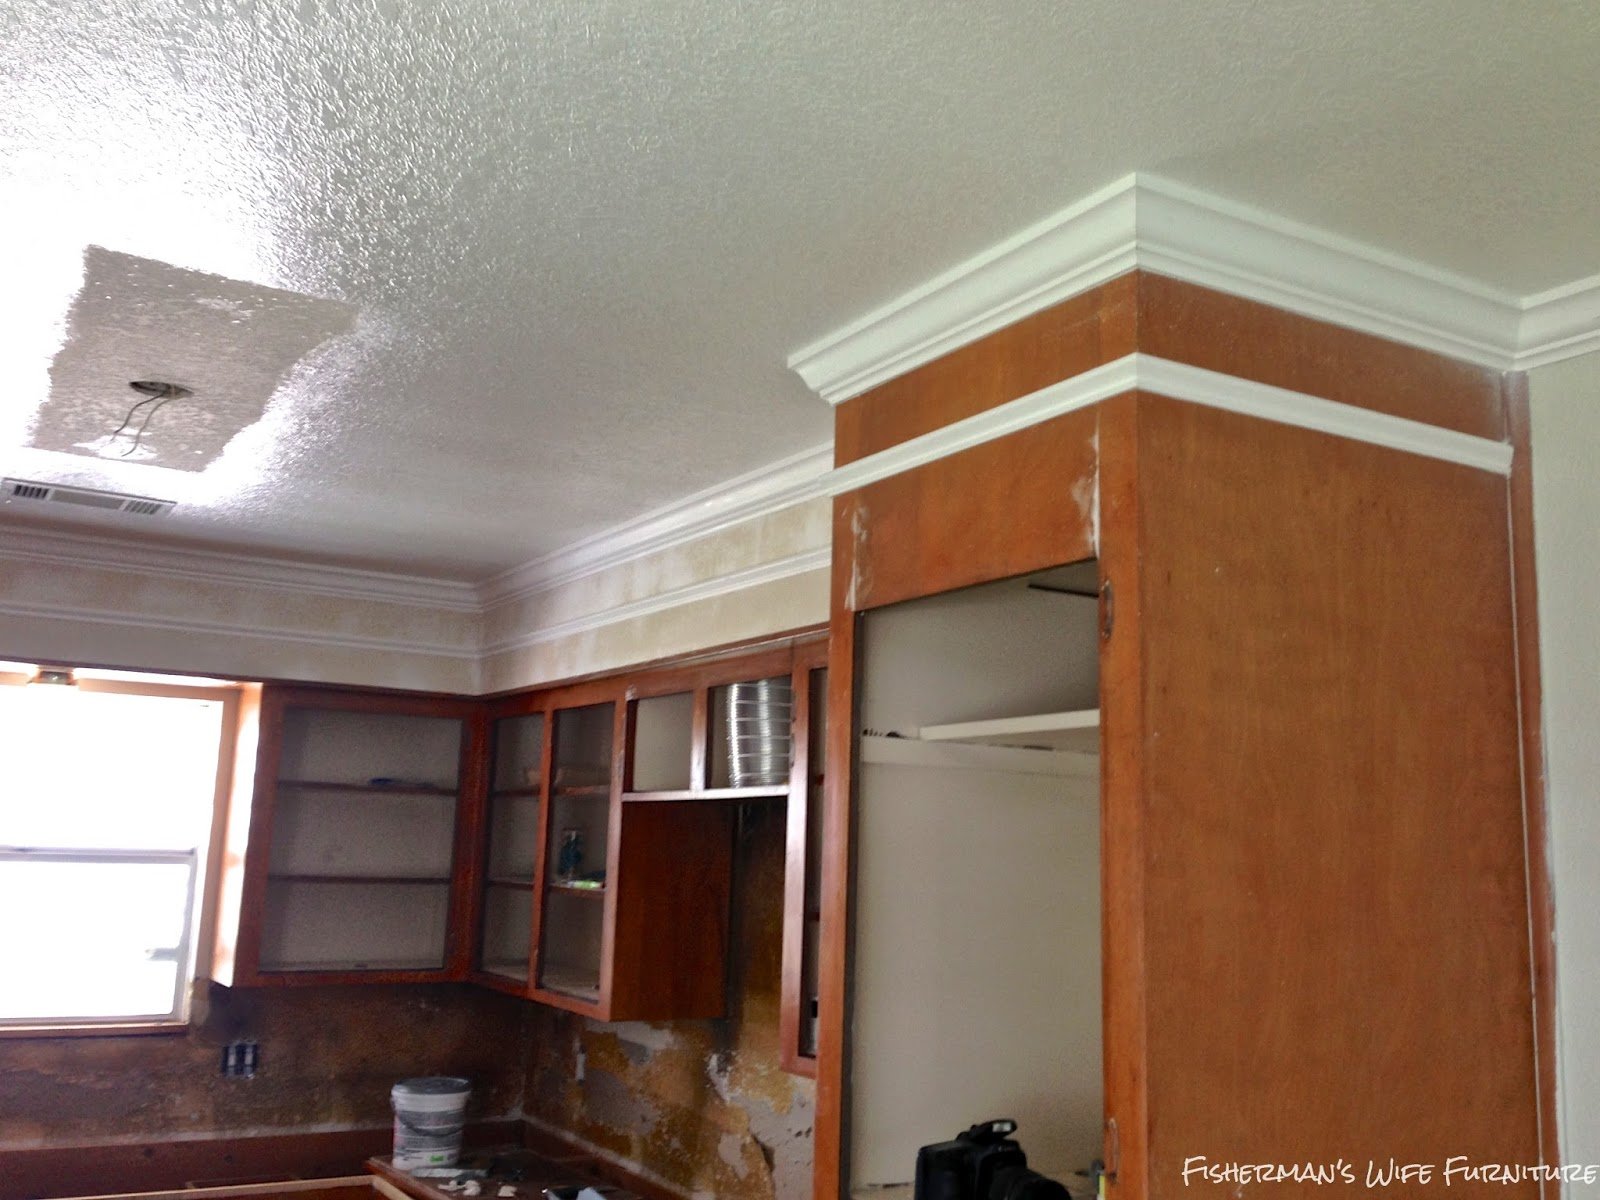
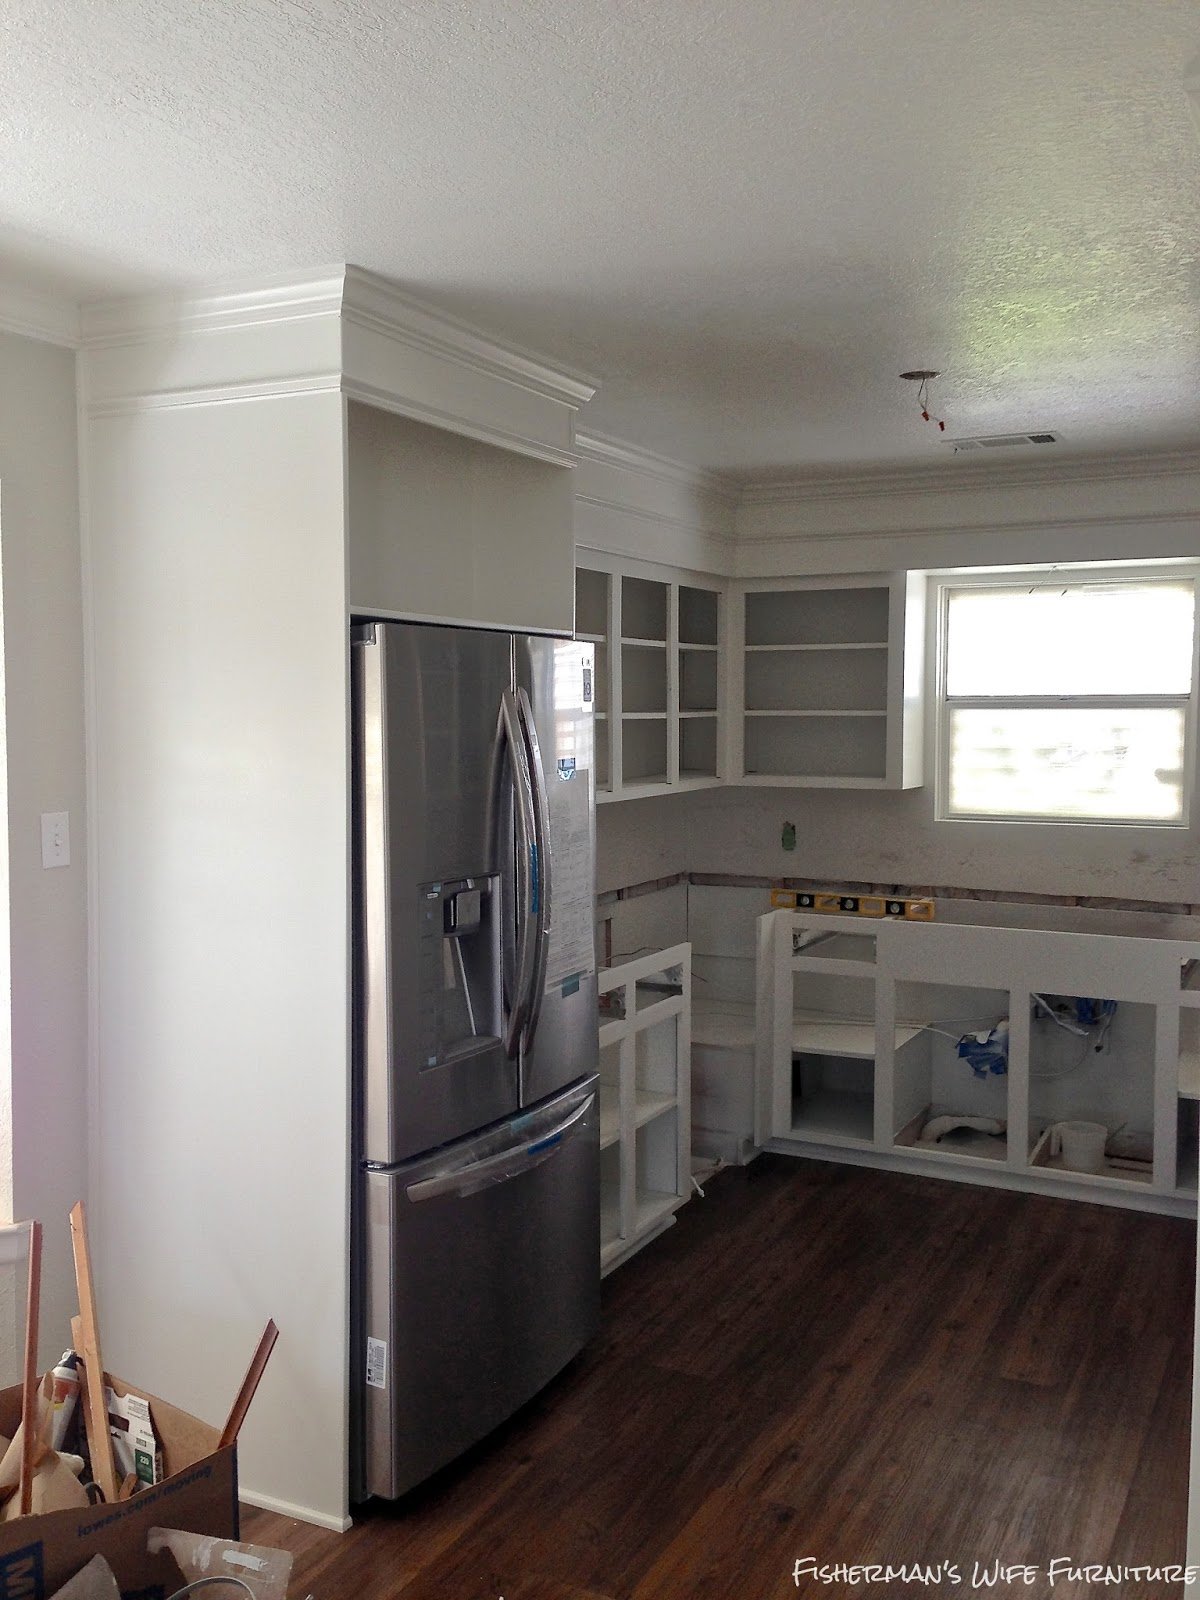
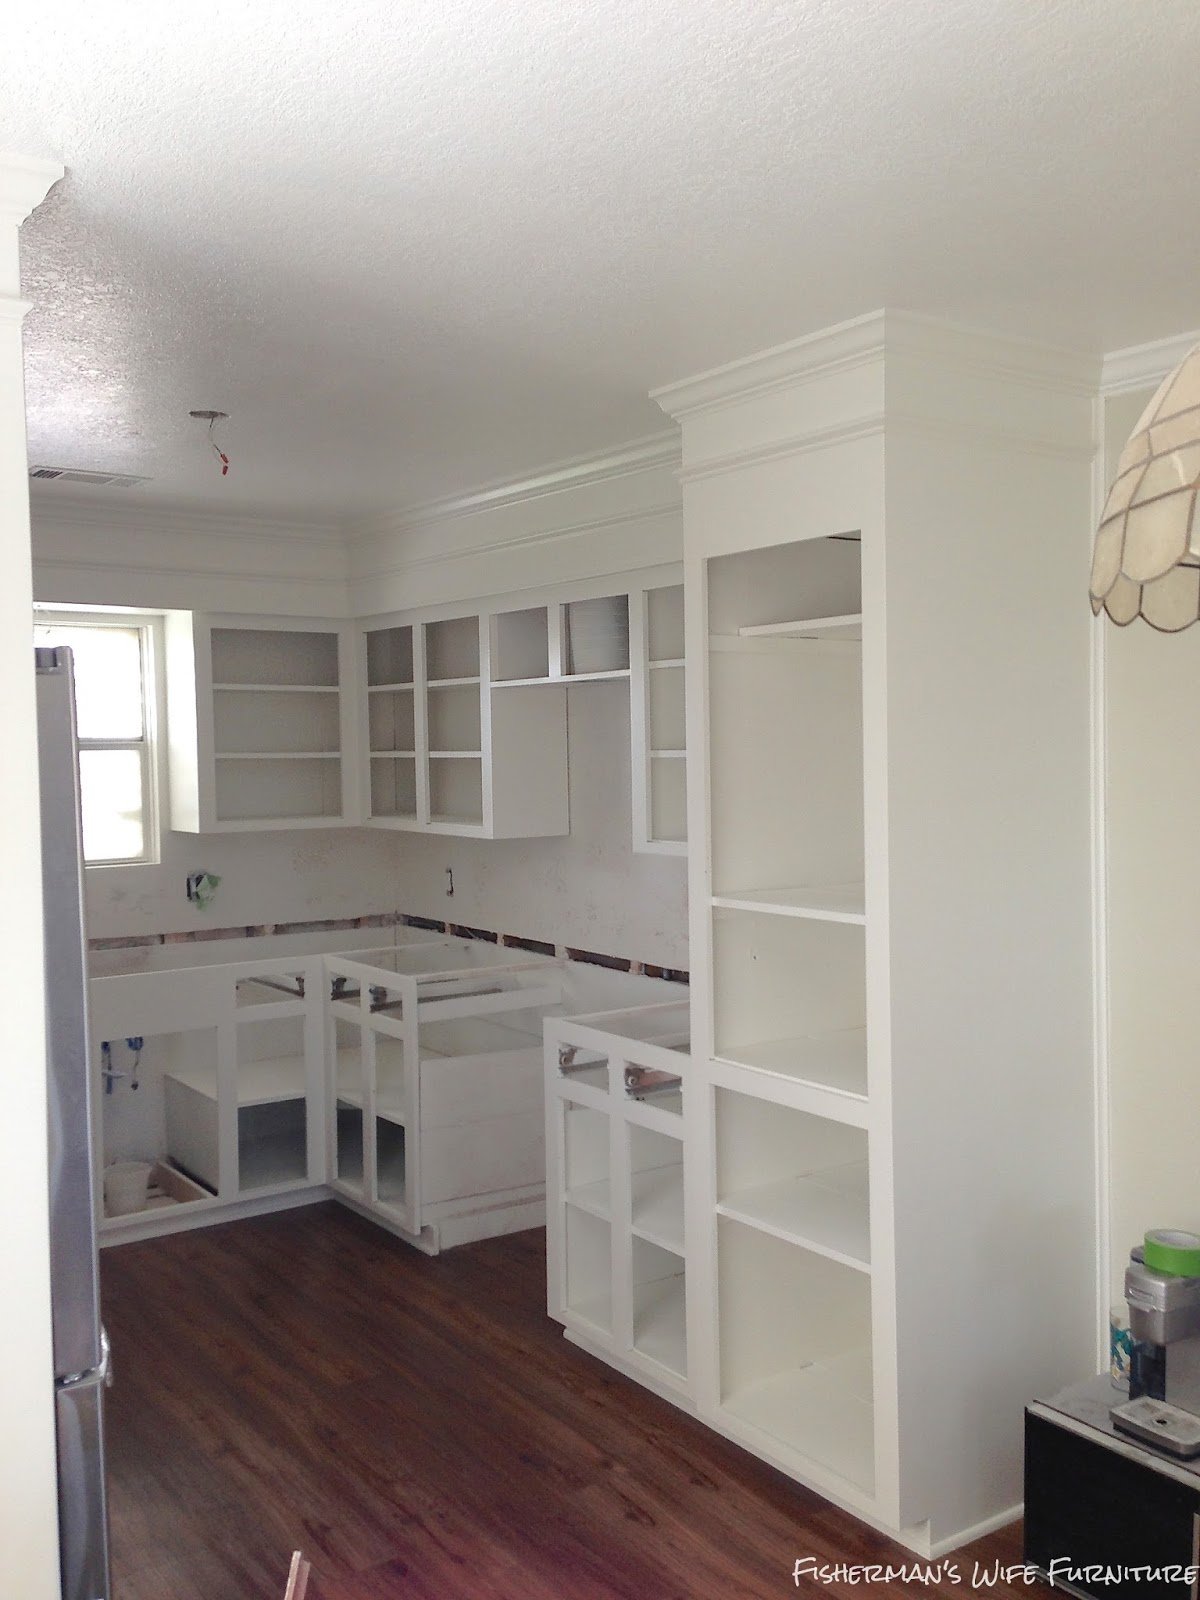
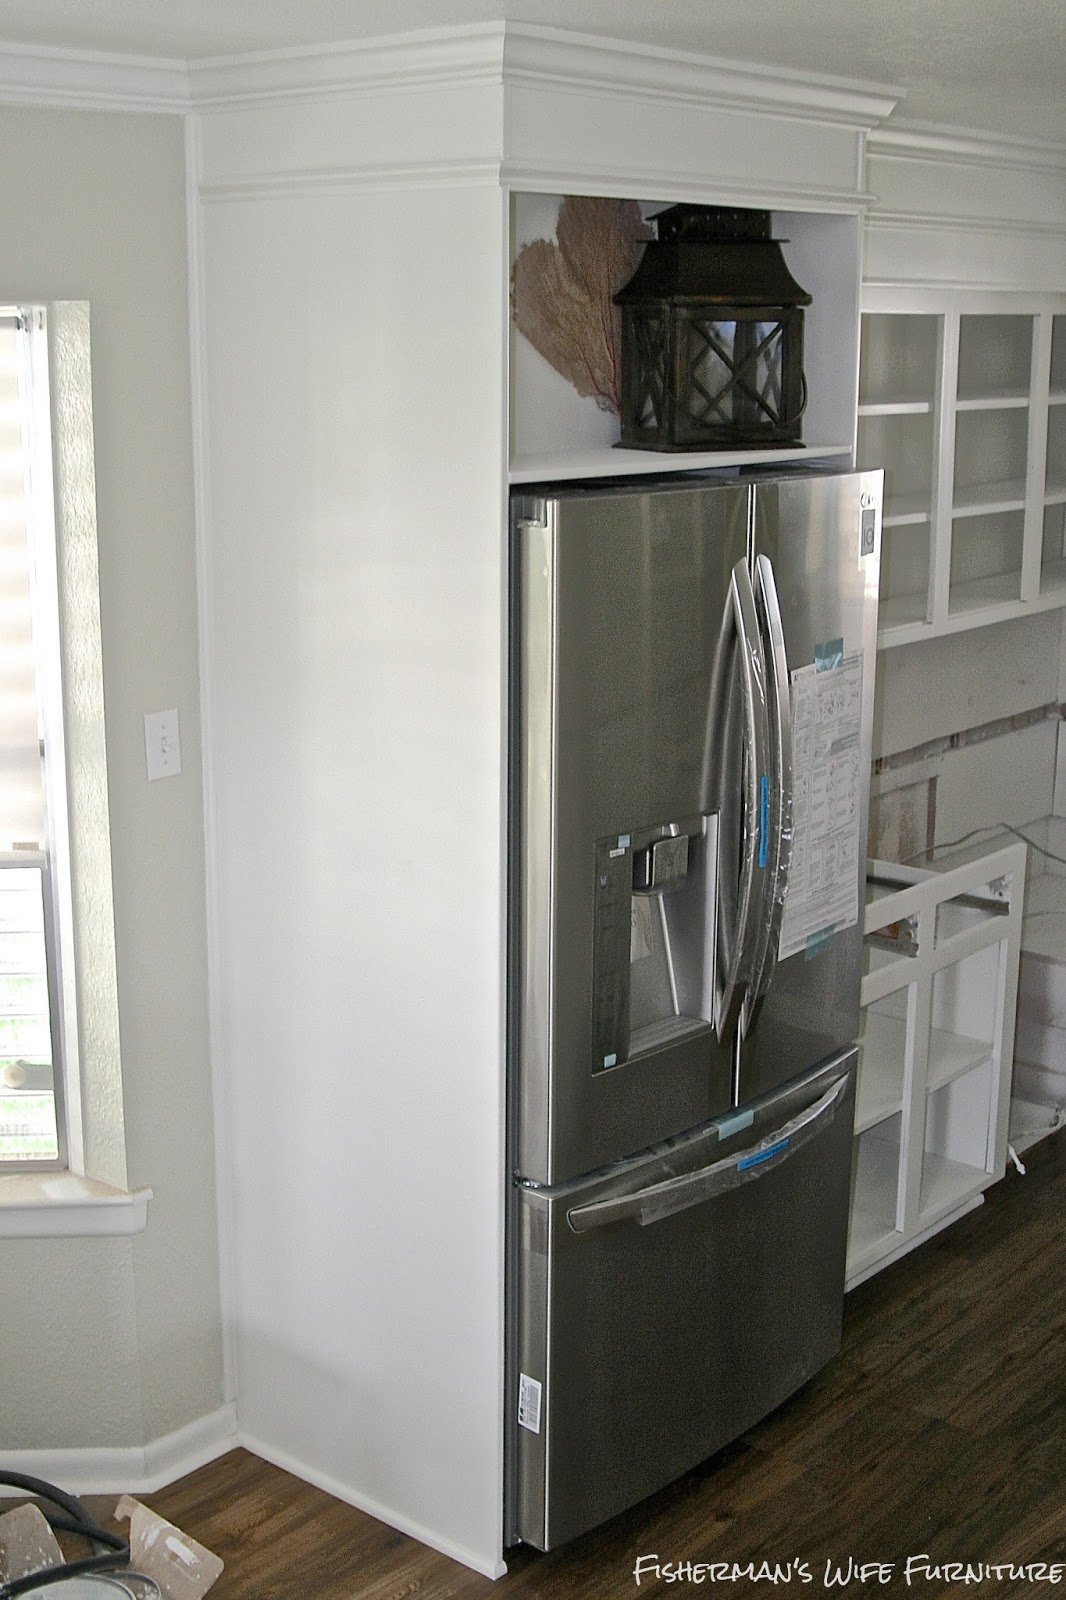
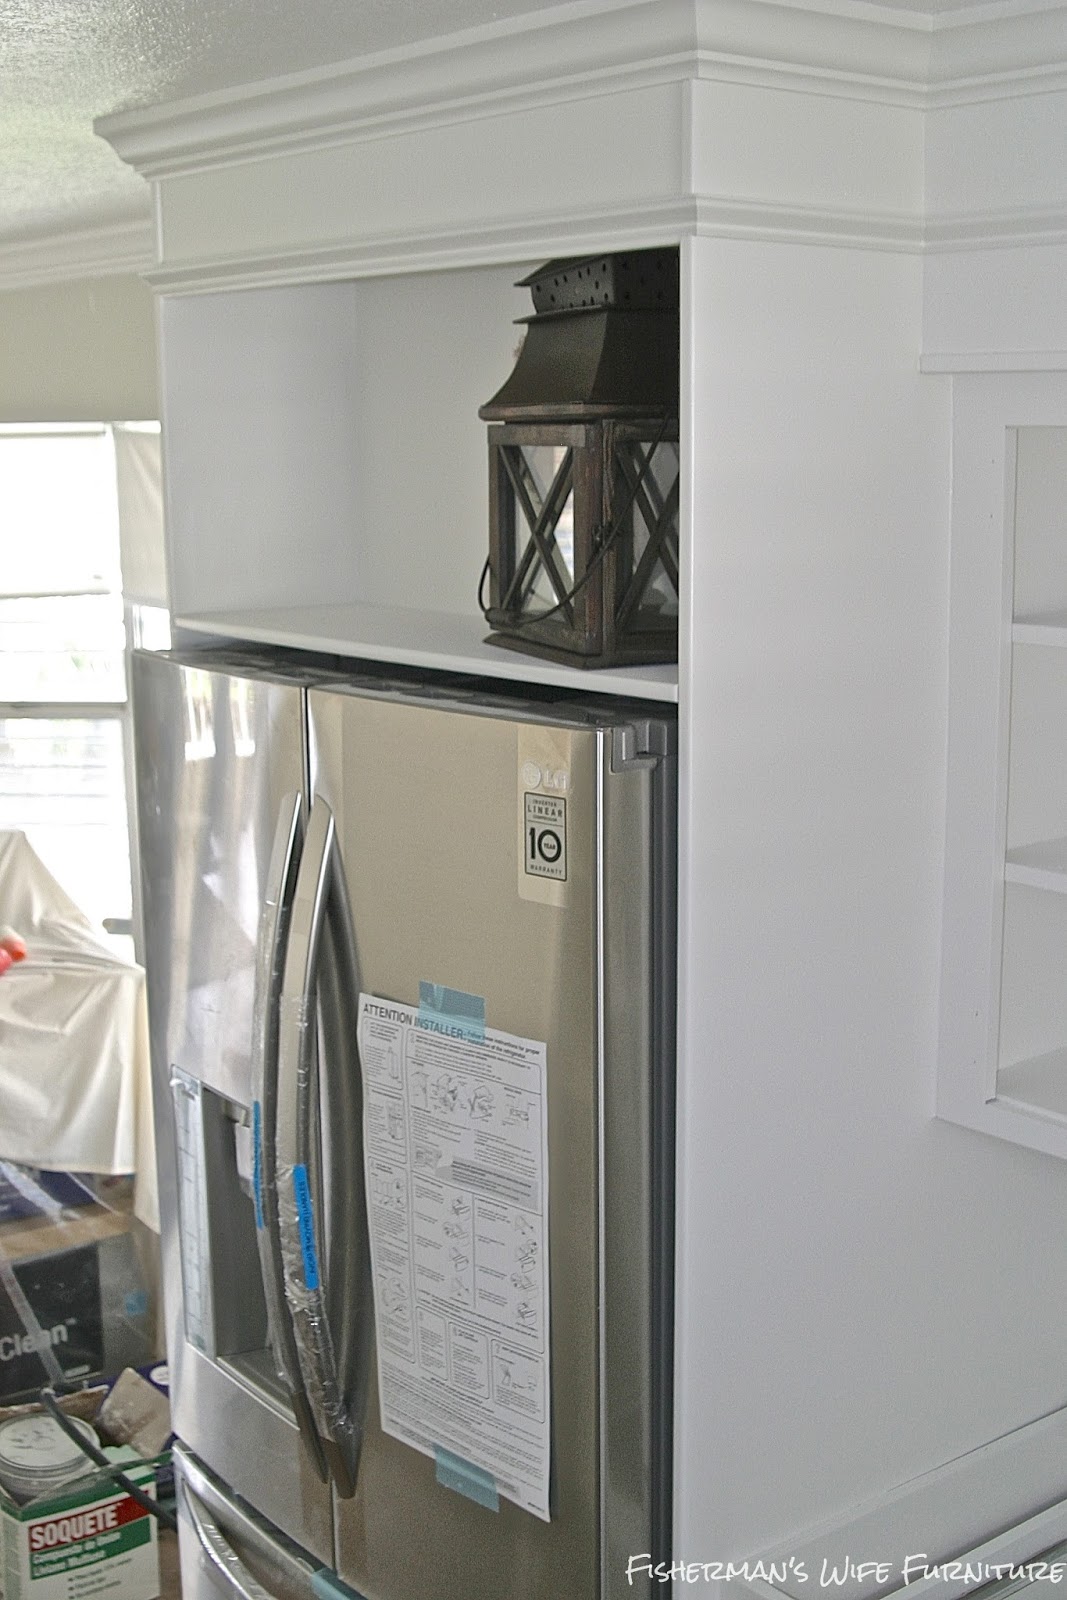
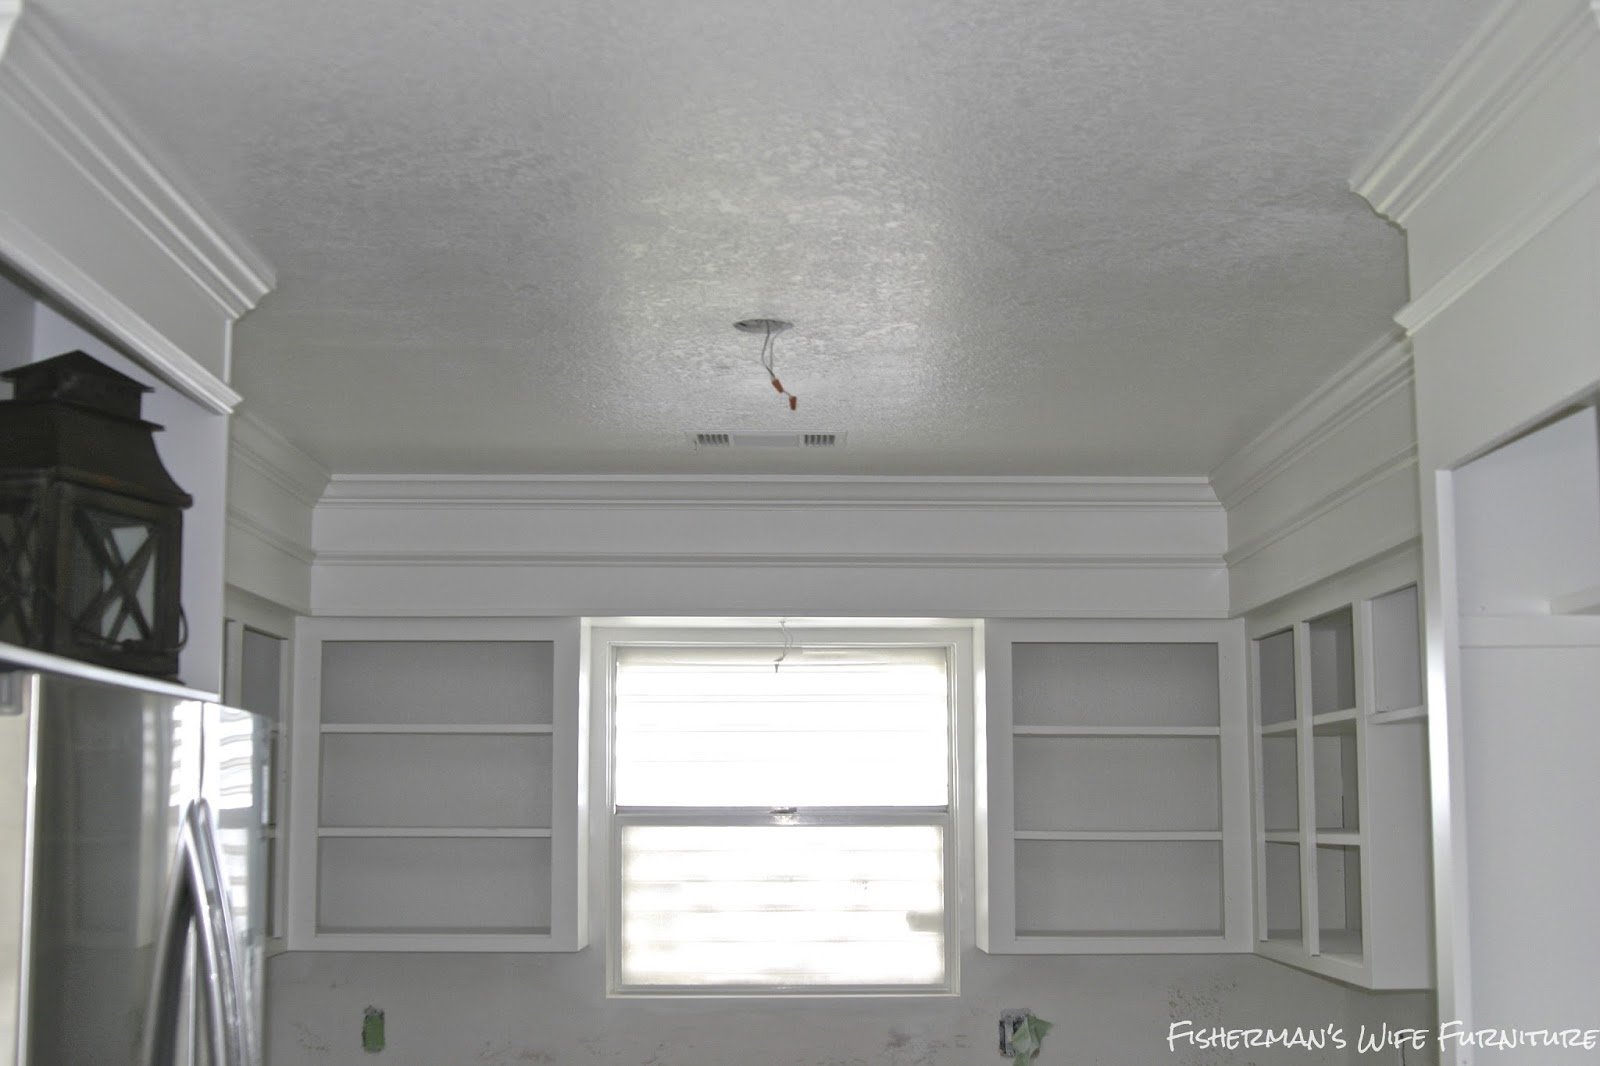
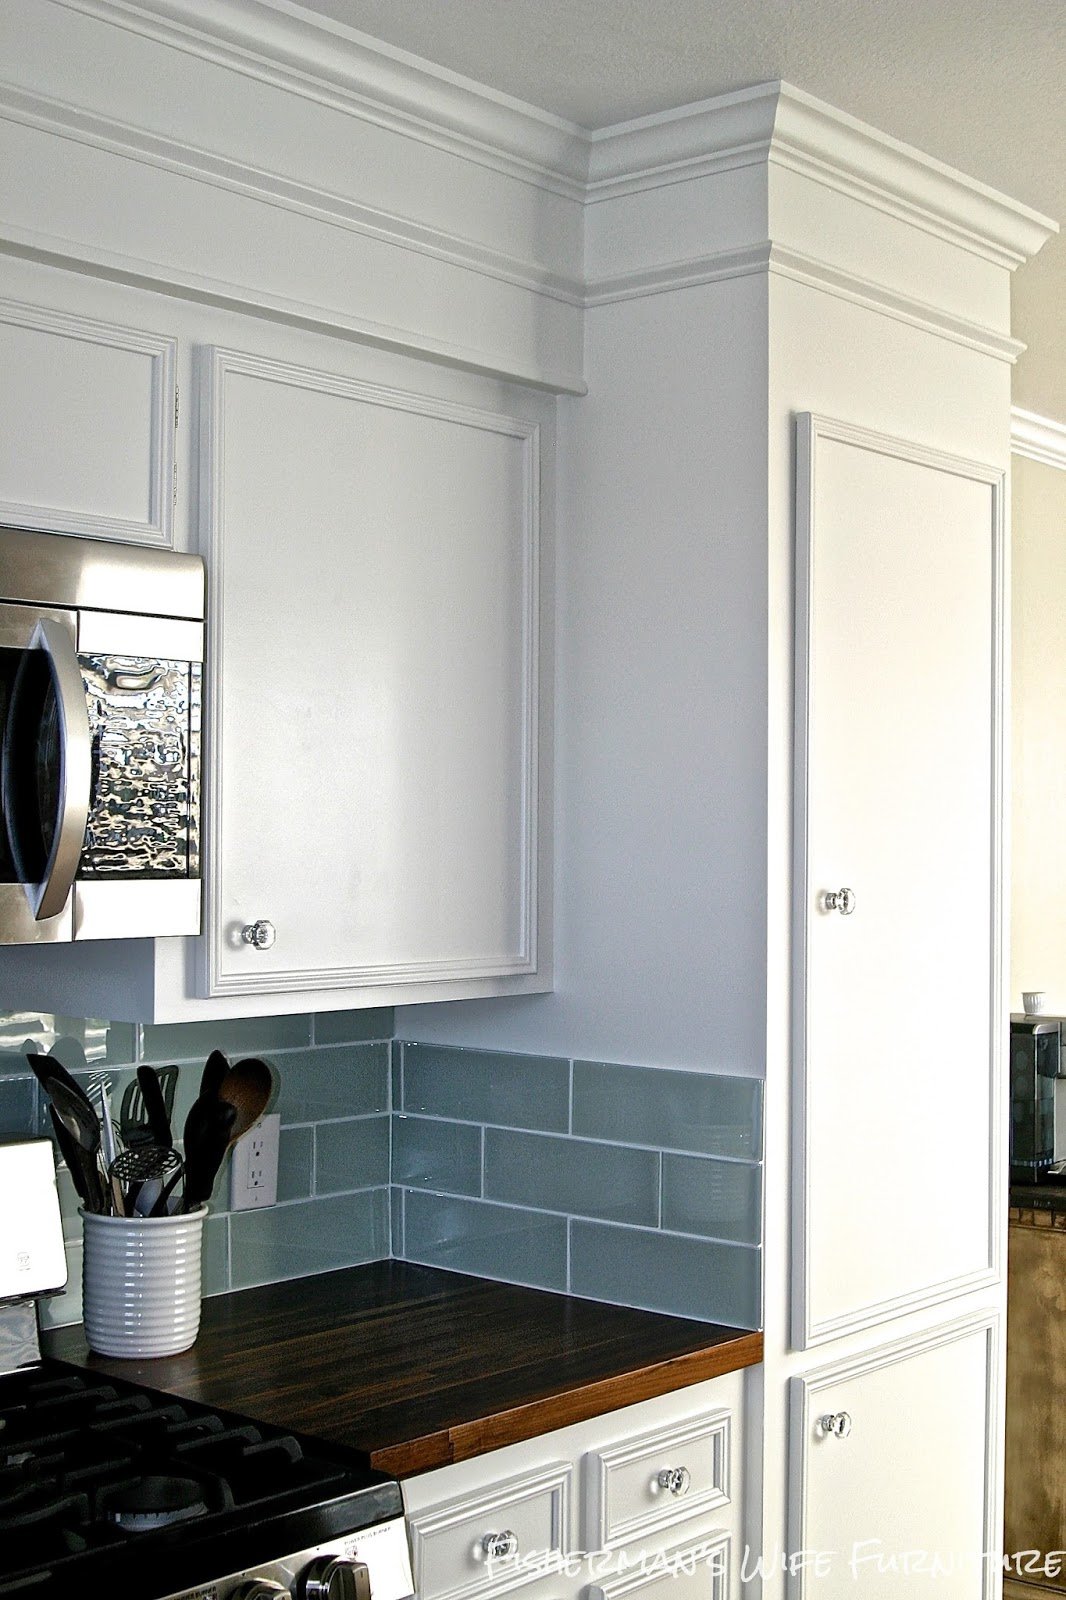
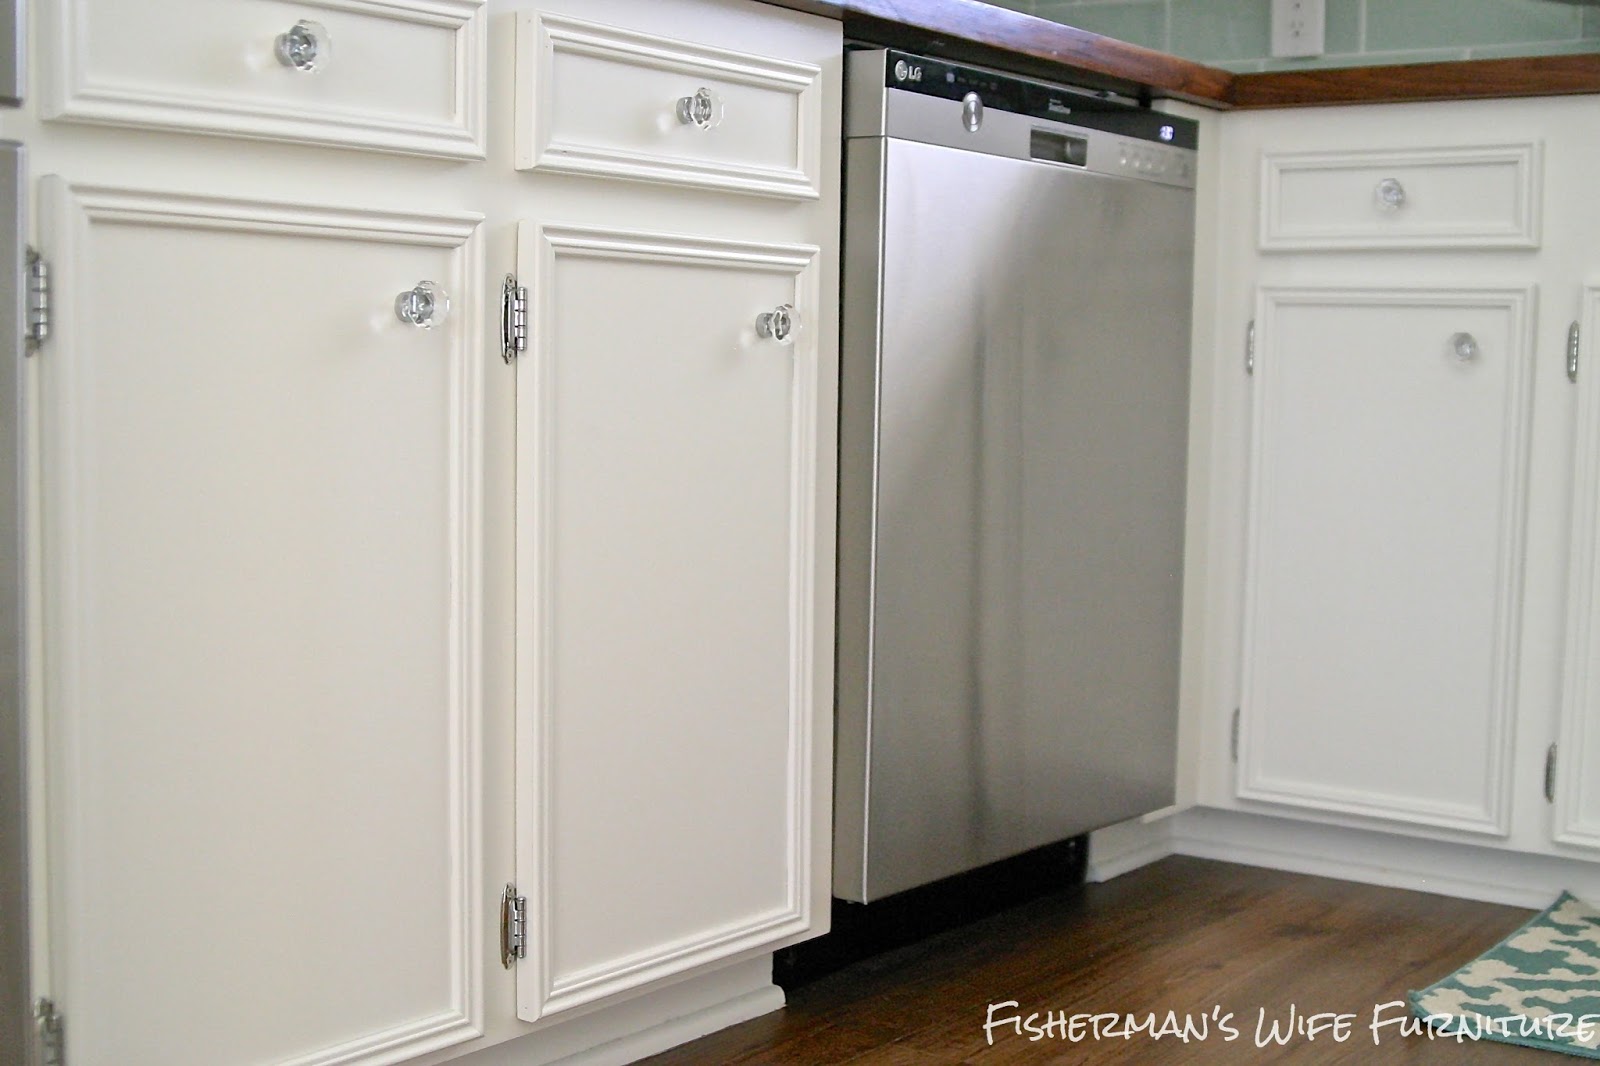
CABINETS. The first thing we did was build a refrigerator enclosure. The custom refrigerator enclosure is attached to the end of the cabinets and has a shelf to hold my cookbooks. I used my Kreg Jig to create pocket holes to secure it to the floor and put supports across the back. To polish it up, I added trim around all the edges, filled all cracks and nail holes then sanded smooth. A counterdepth fridge gave us 6 more precious inches of width at the kitchen’s opening.
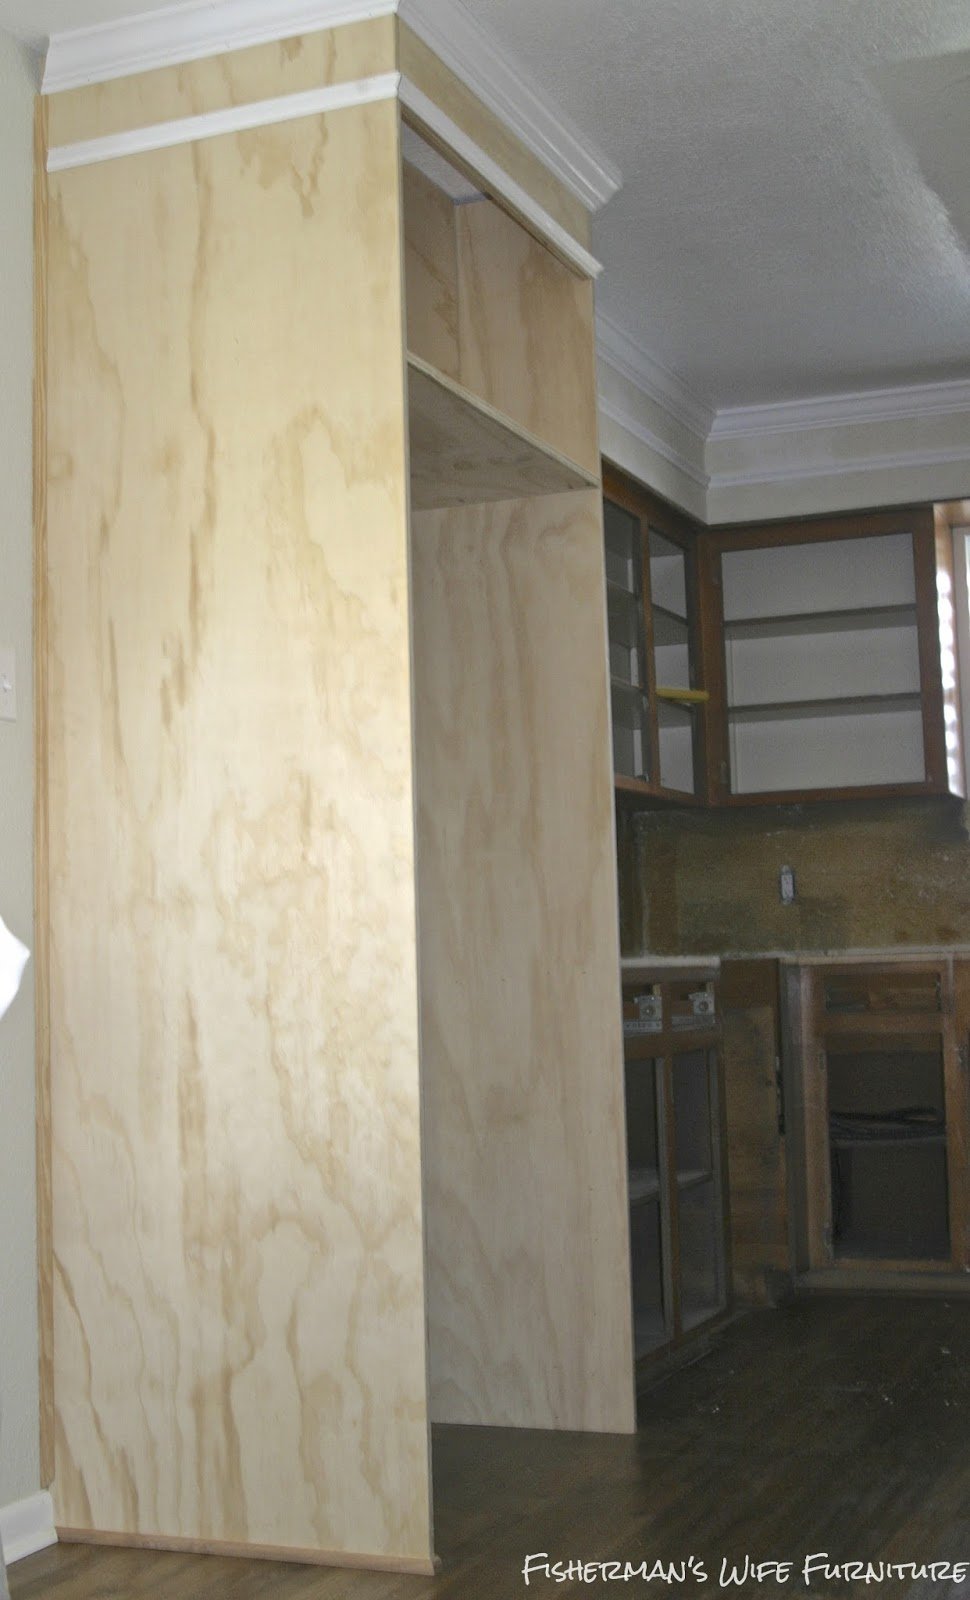
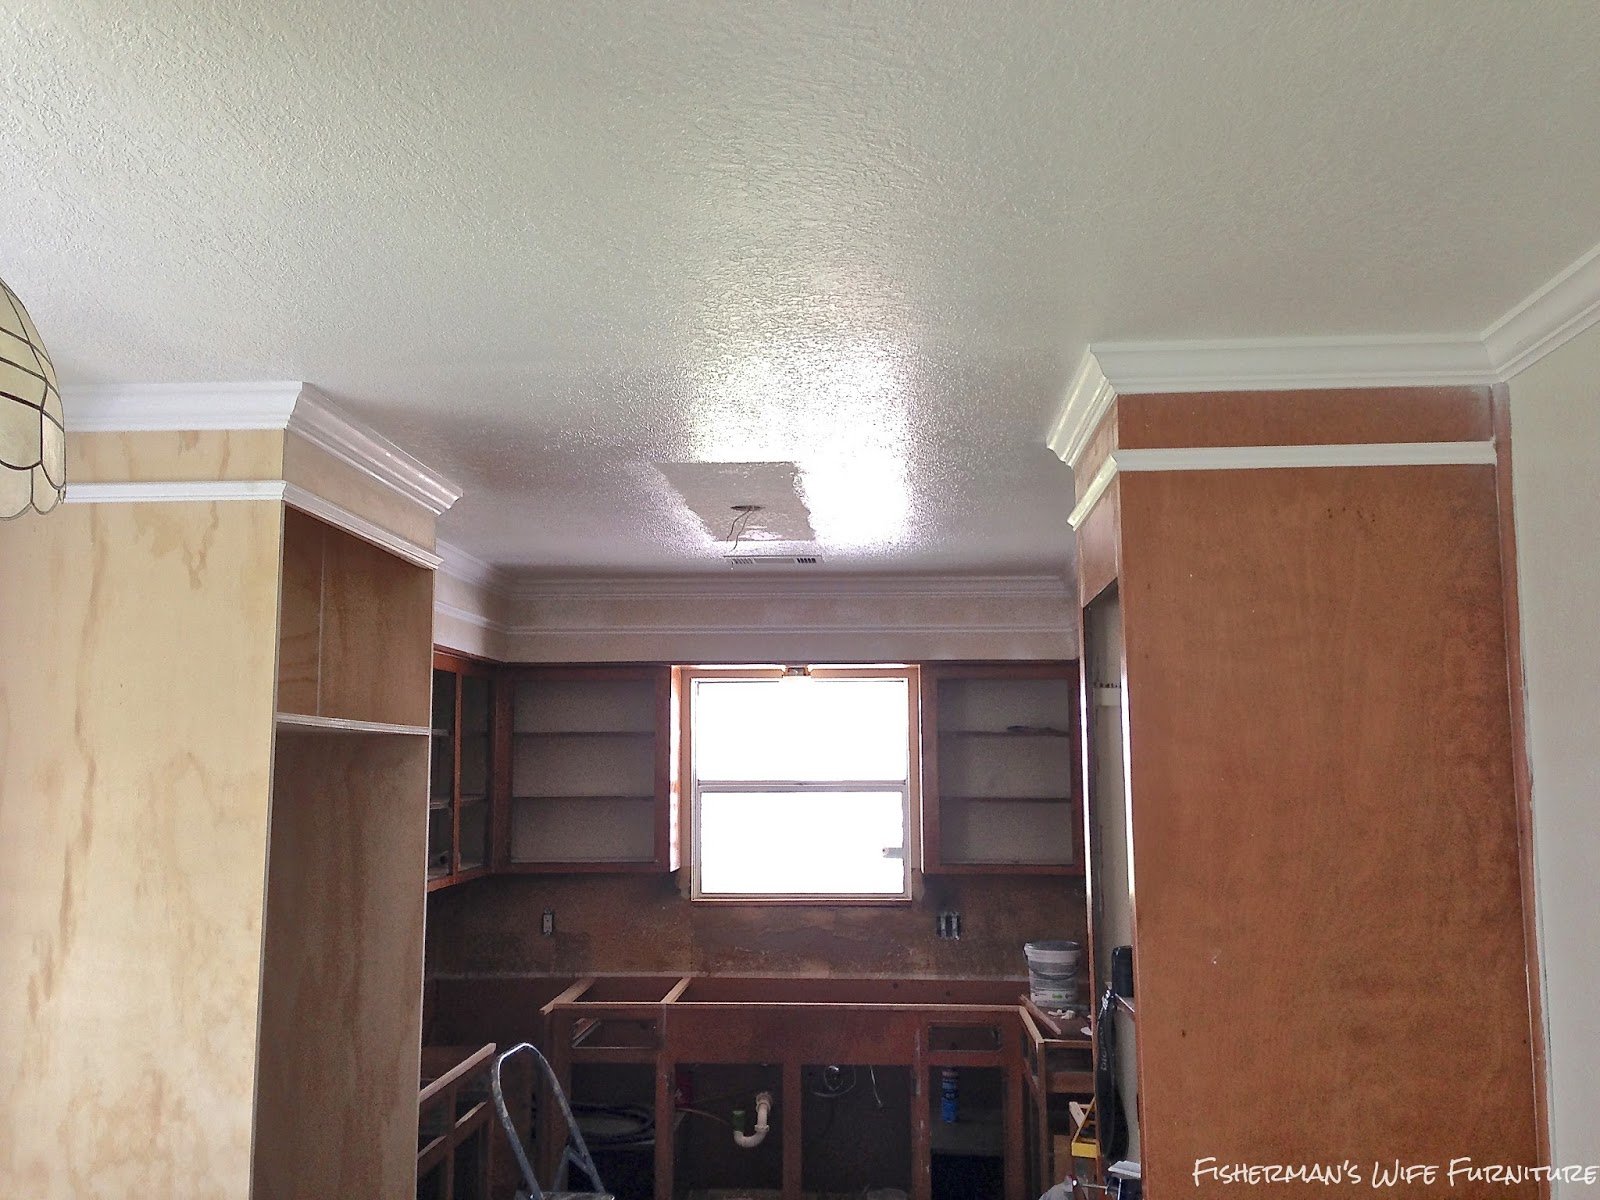
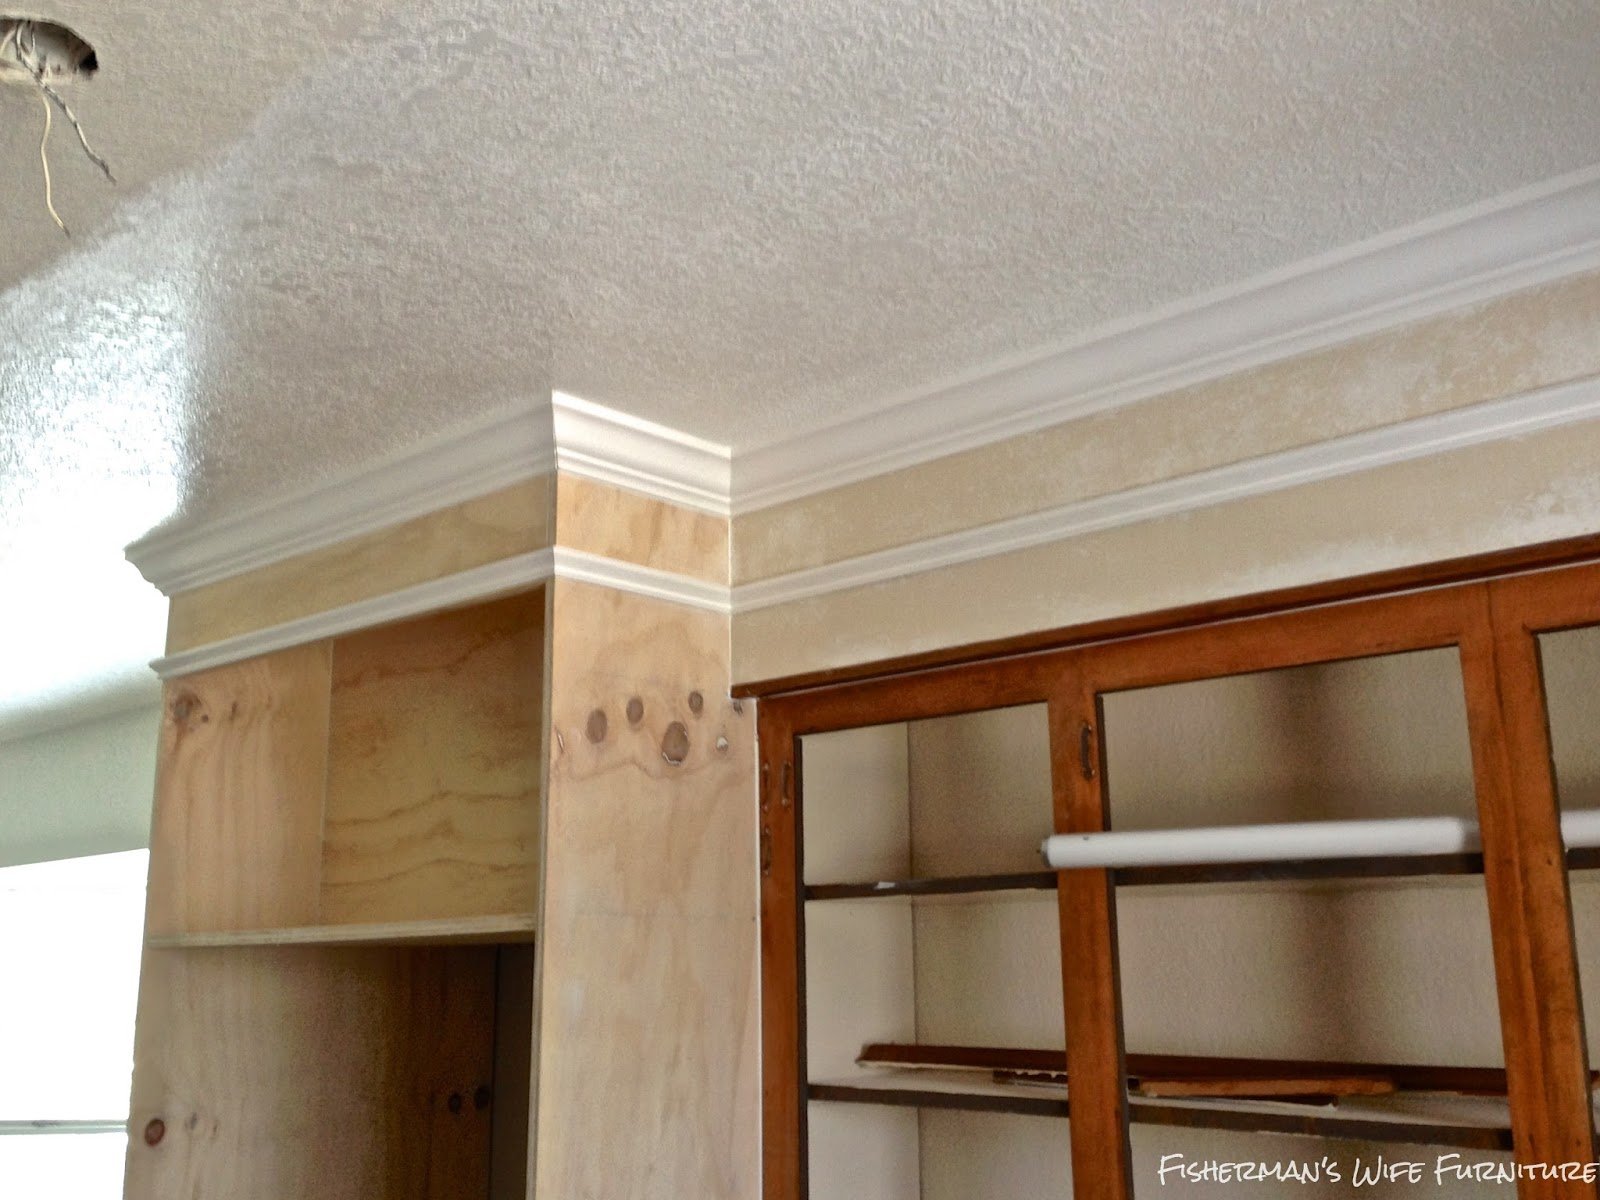
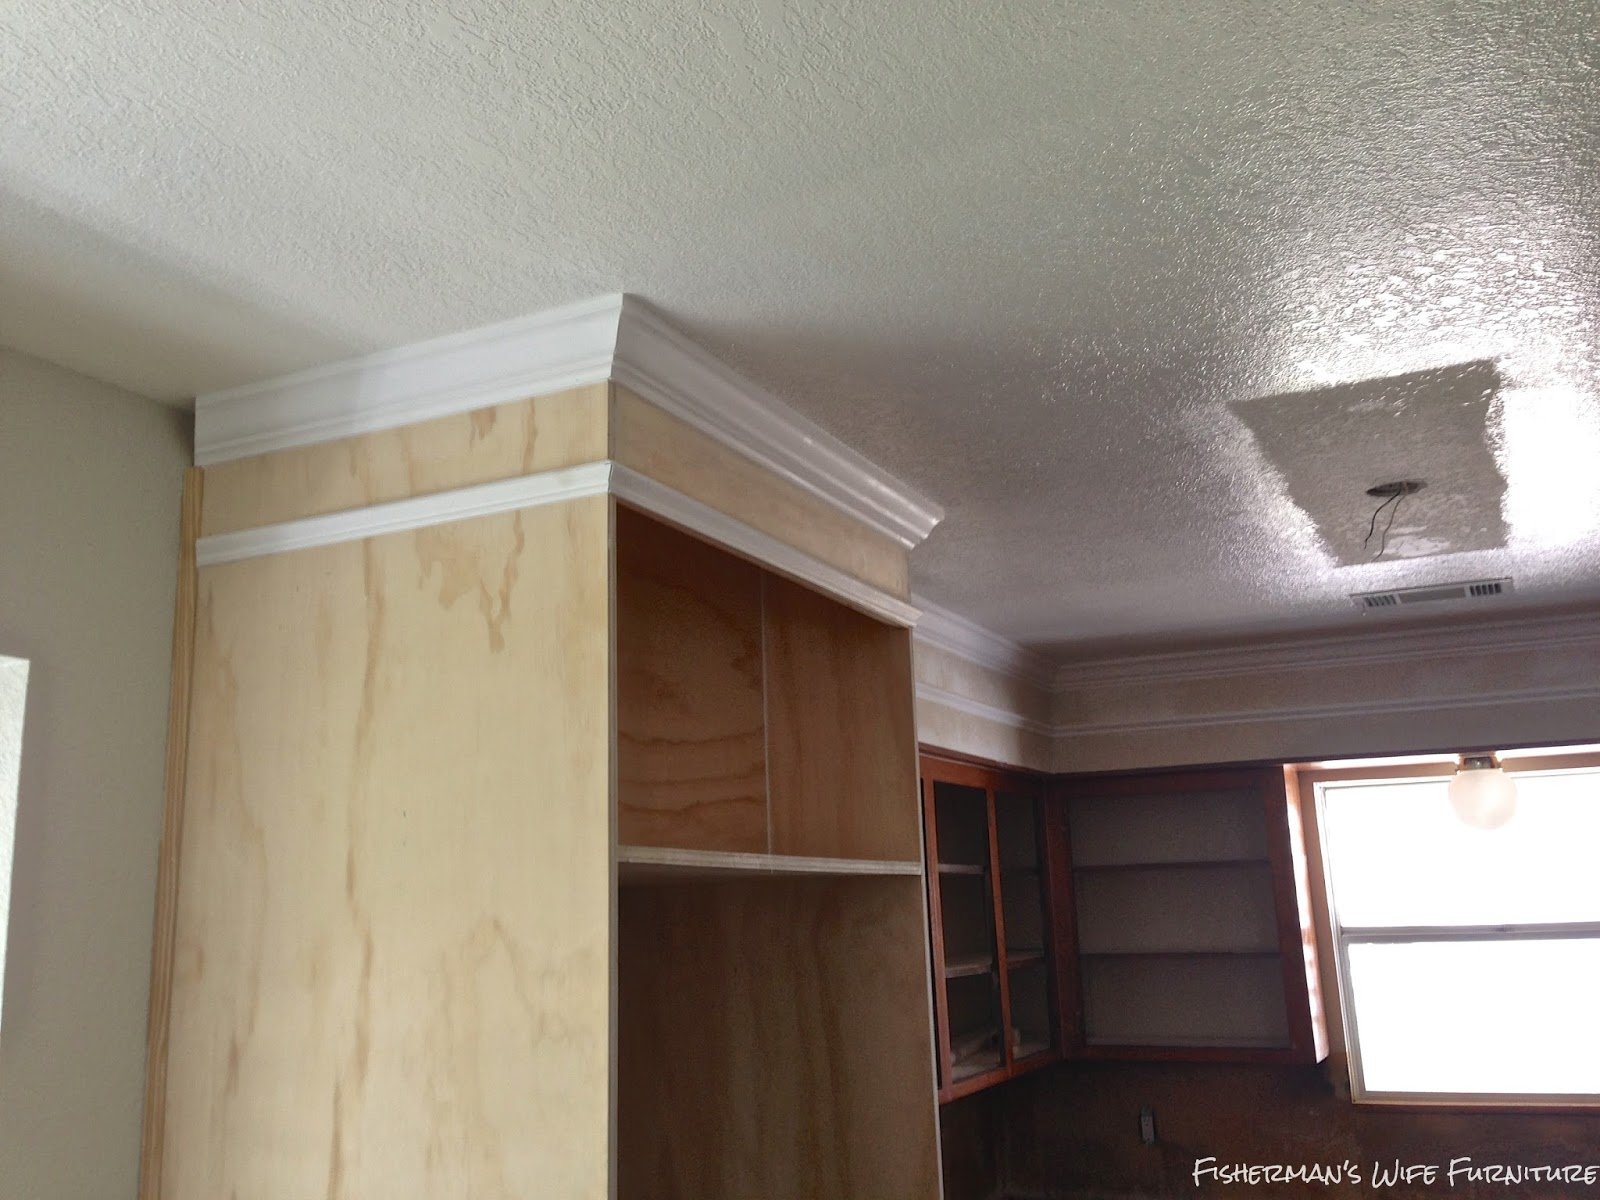
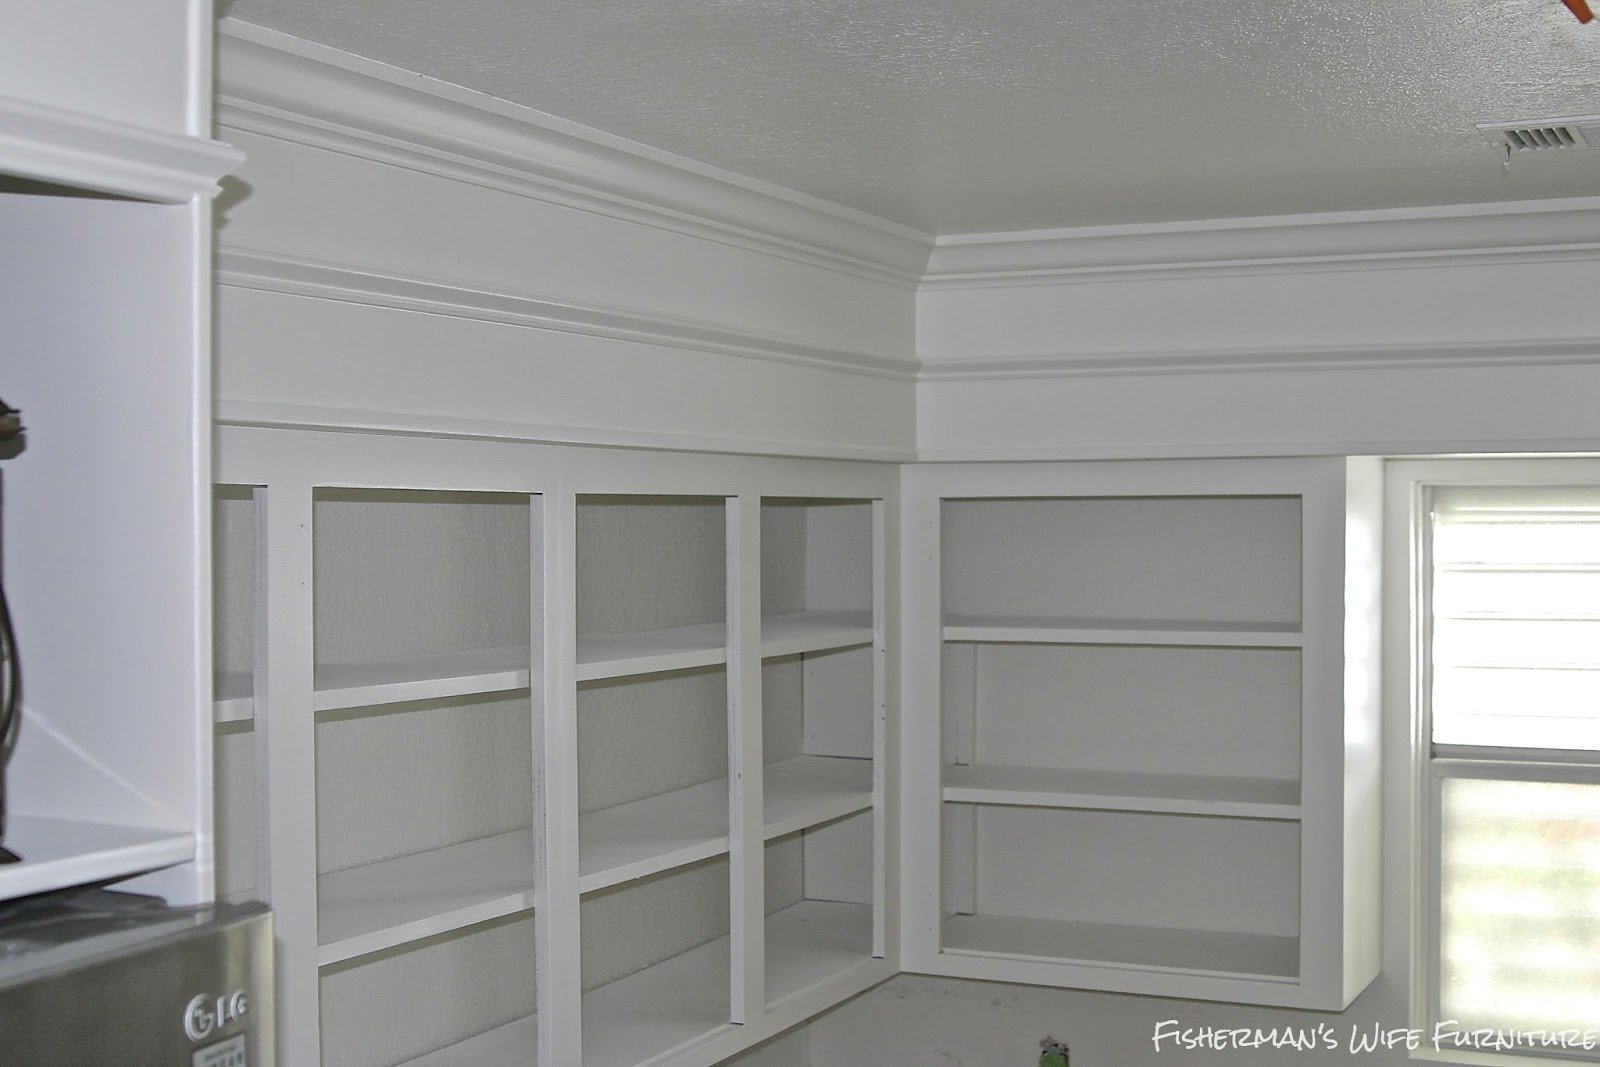
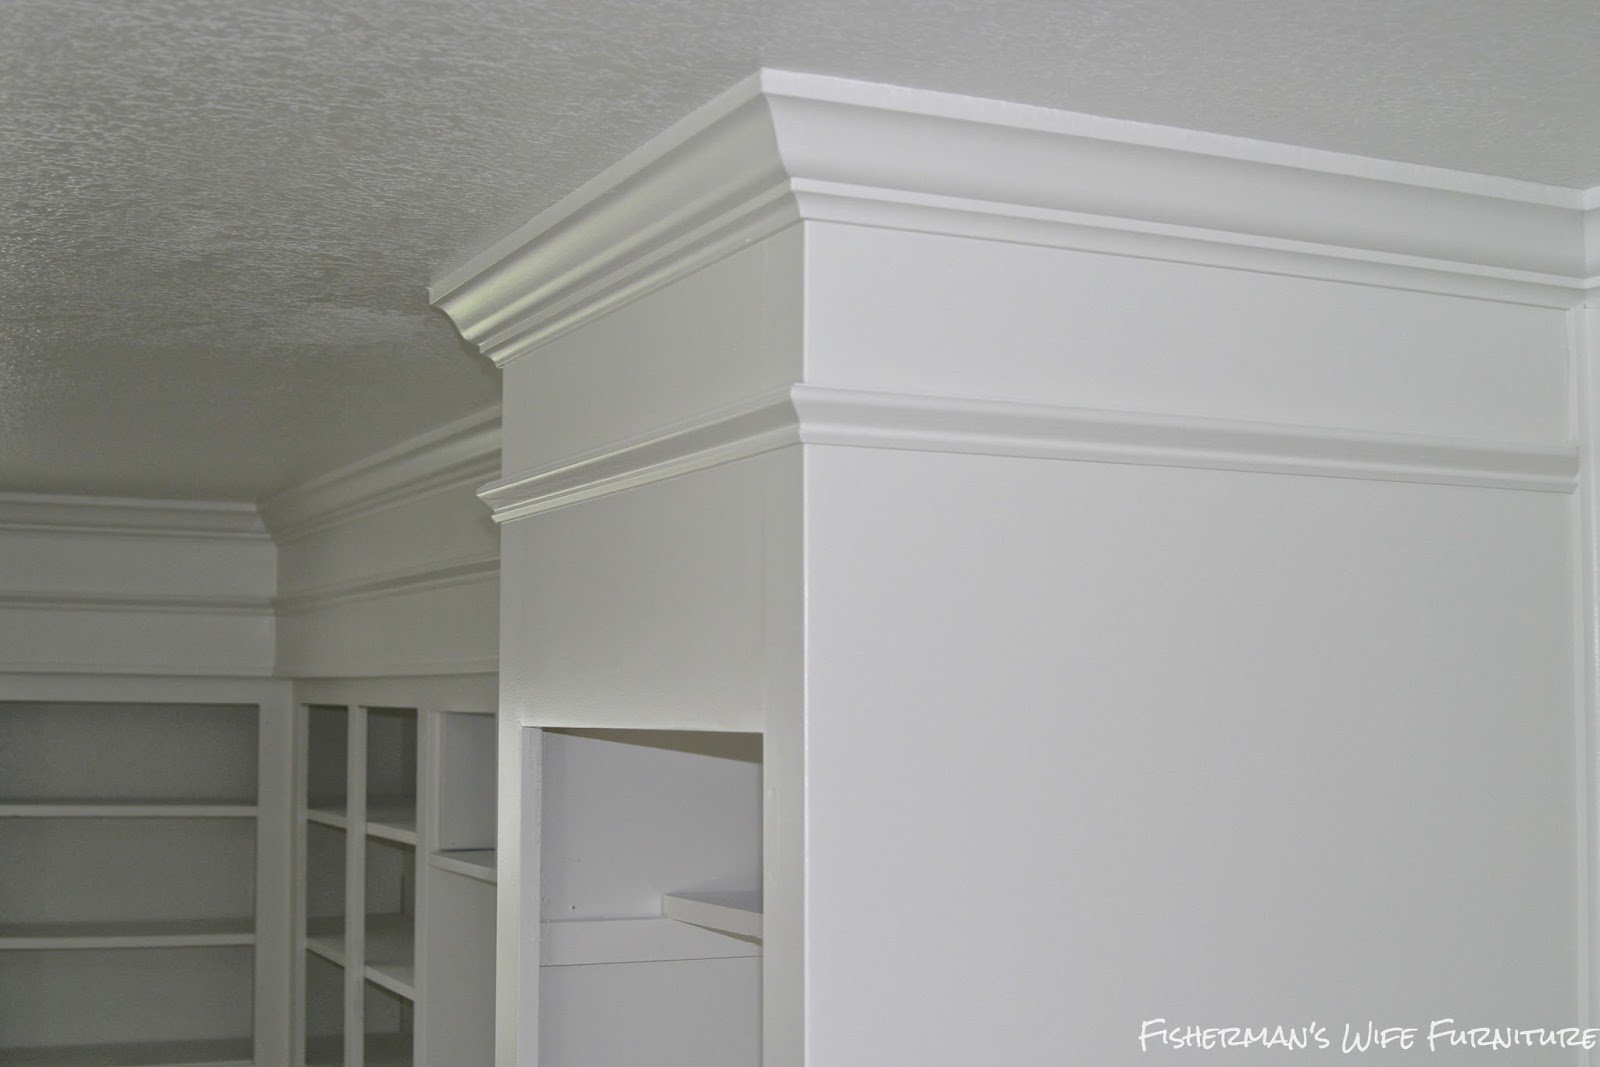
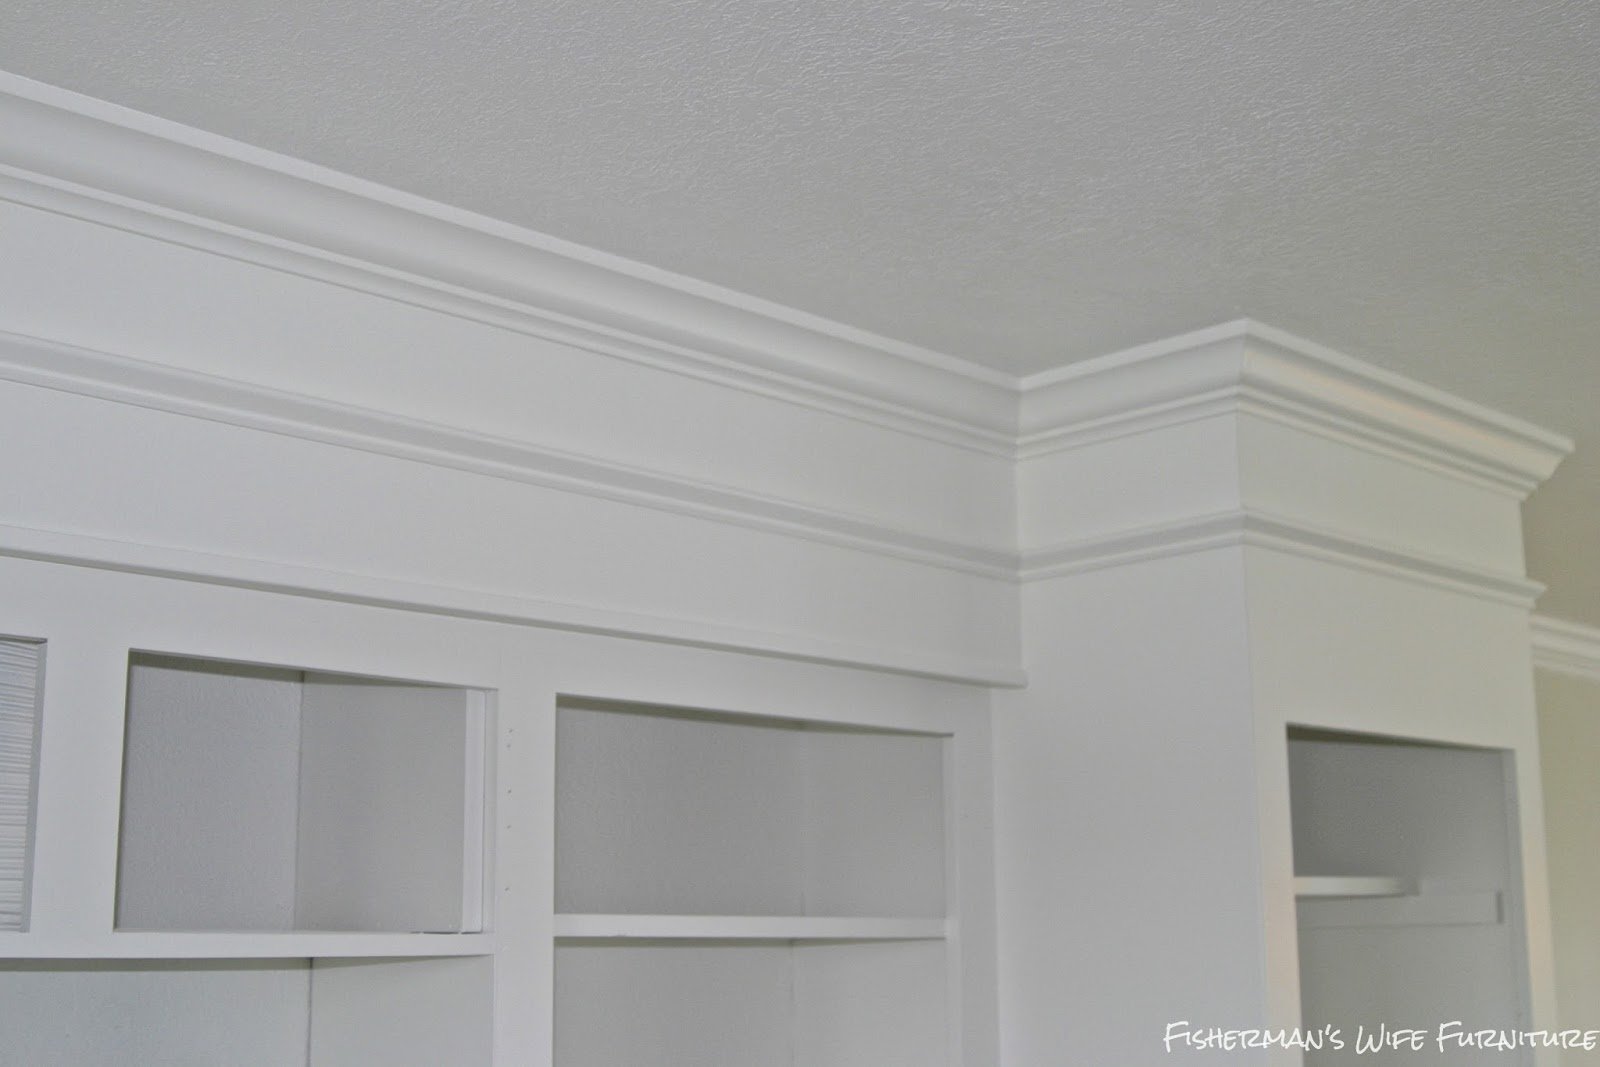
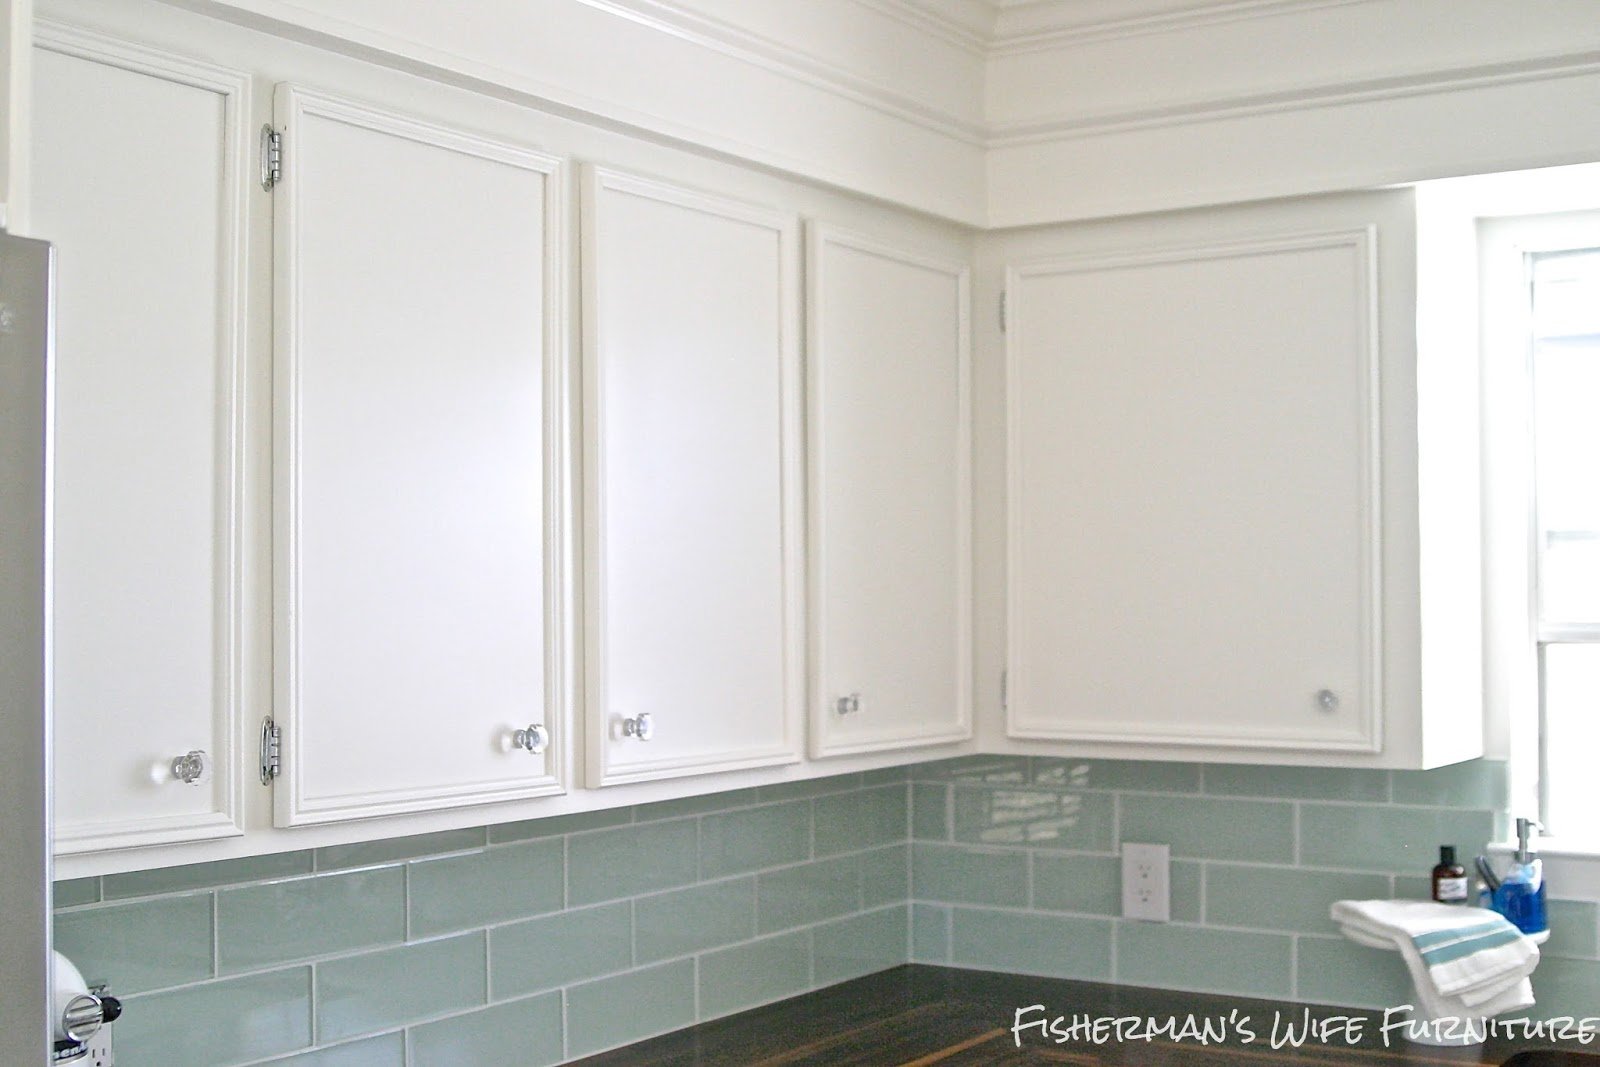
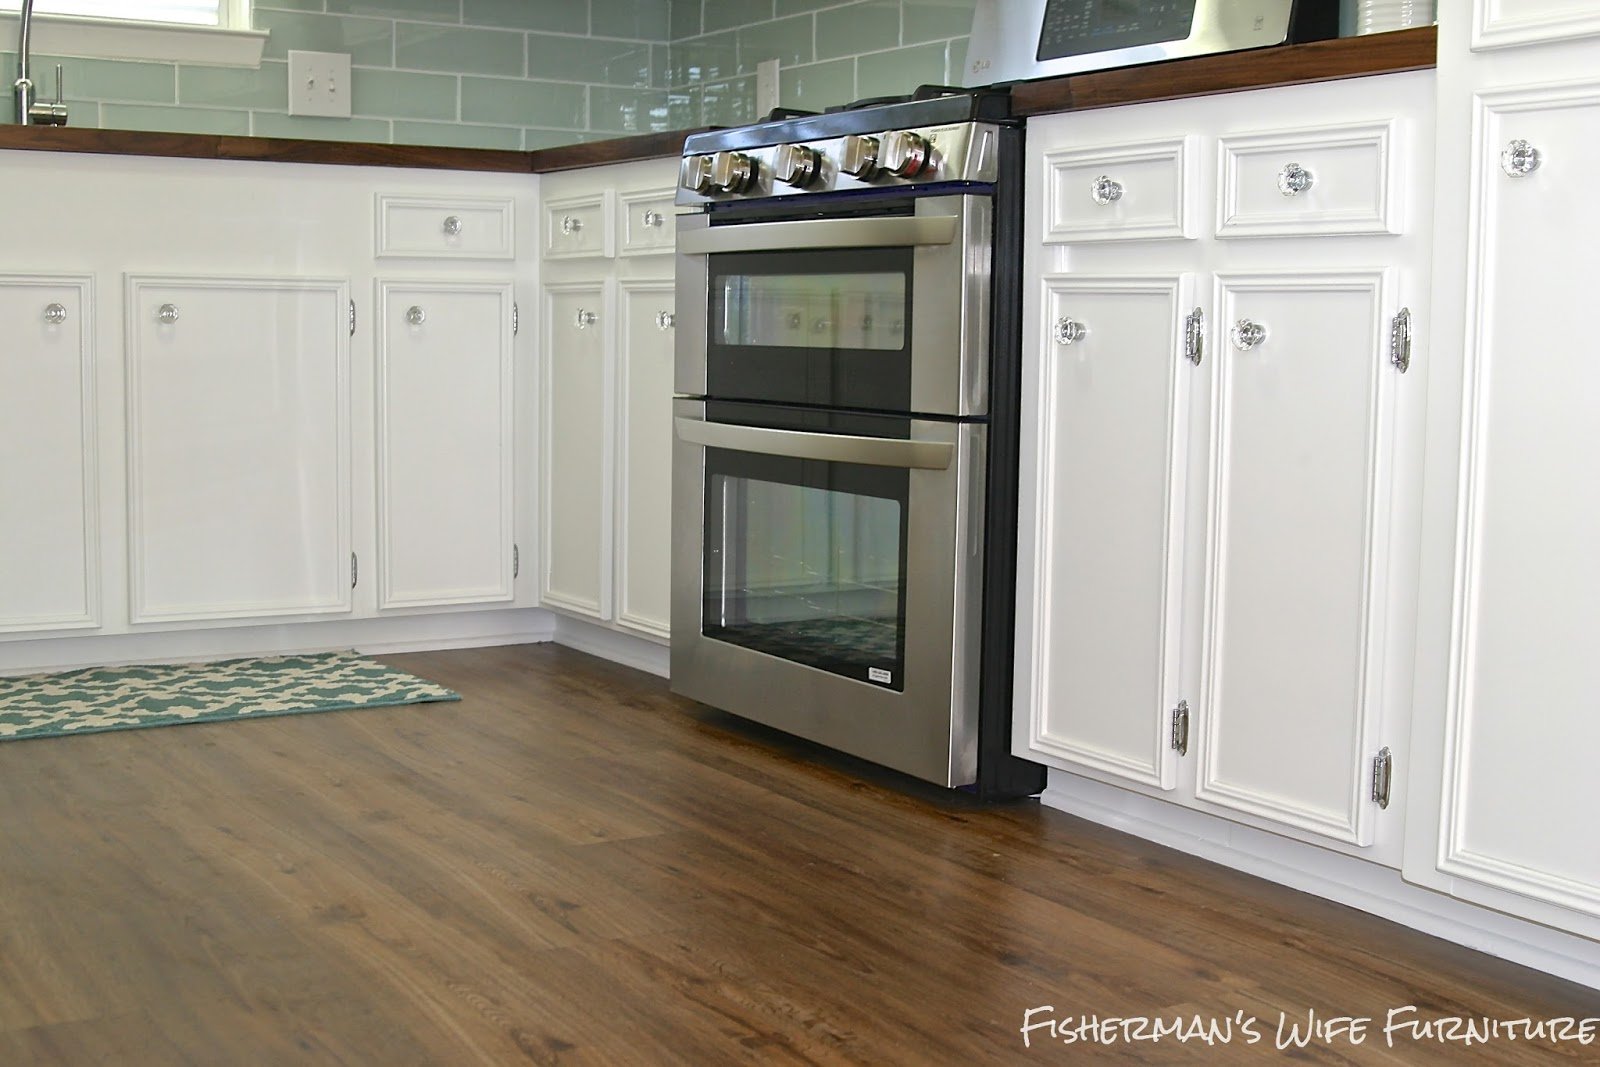
The other custom touch we did was cover the fur down, which is the wall area over the cabinets. I smoothed out the texture by filling it with lightweight compound and sanding it down. It took about 3 rounds of filling and sanding to get things perfectly smooth. Once it was smooth, we added 2 mouldings. A crown moulding along the ceiling and a chair rail in the middle. Adding moulding made a HUGE change in the feel of the room and was not a huge expense. It gives the illusion that the cabinets extend to the ceiling and makes the ceiling feel taller. Moulding can be intimidating but once you get the hang of it, things move quickly and it is well worth the time and effort.
Once the fridge enclosure was built and the mouldings were installed, it was time to paint. I prepped by sanding, filling any scratches, dents and holes, then sanding some more. My primer of choice is Zinsser Shellac Primer and I chose Benjamin Moore’s Waterbone Satin Impervo in White Dove for the cabinet color. I sprayed two coats of primer and three coats of color, sanding between all the coats with 320 and 400 grit. The finish is beautiful and smooth.
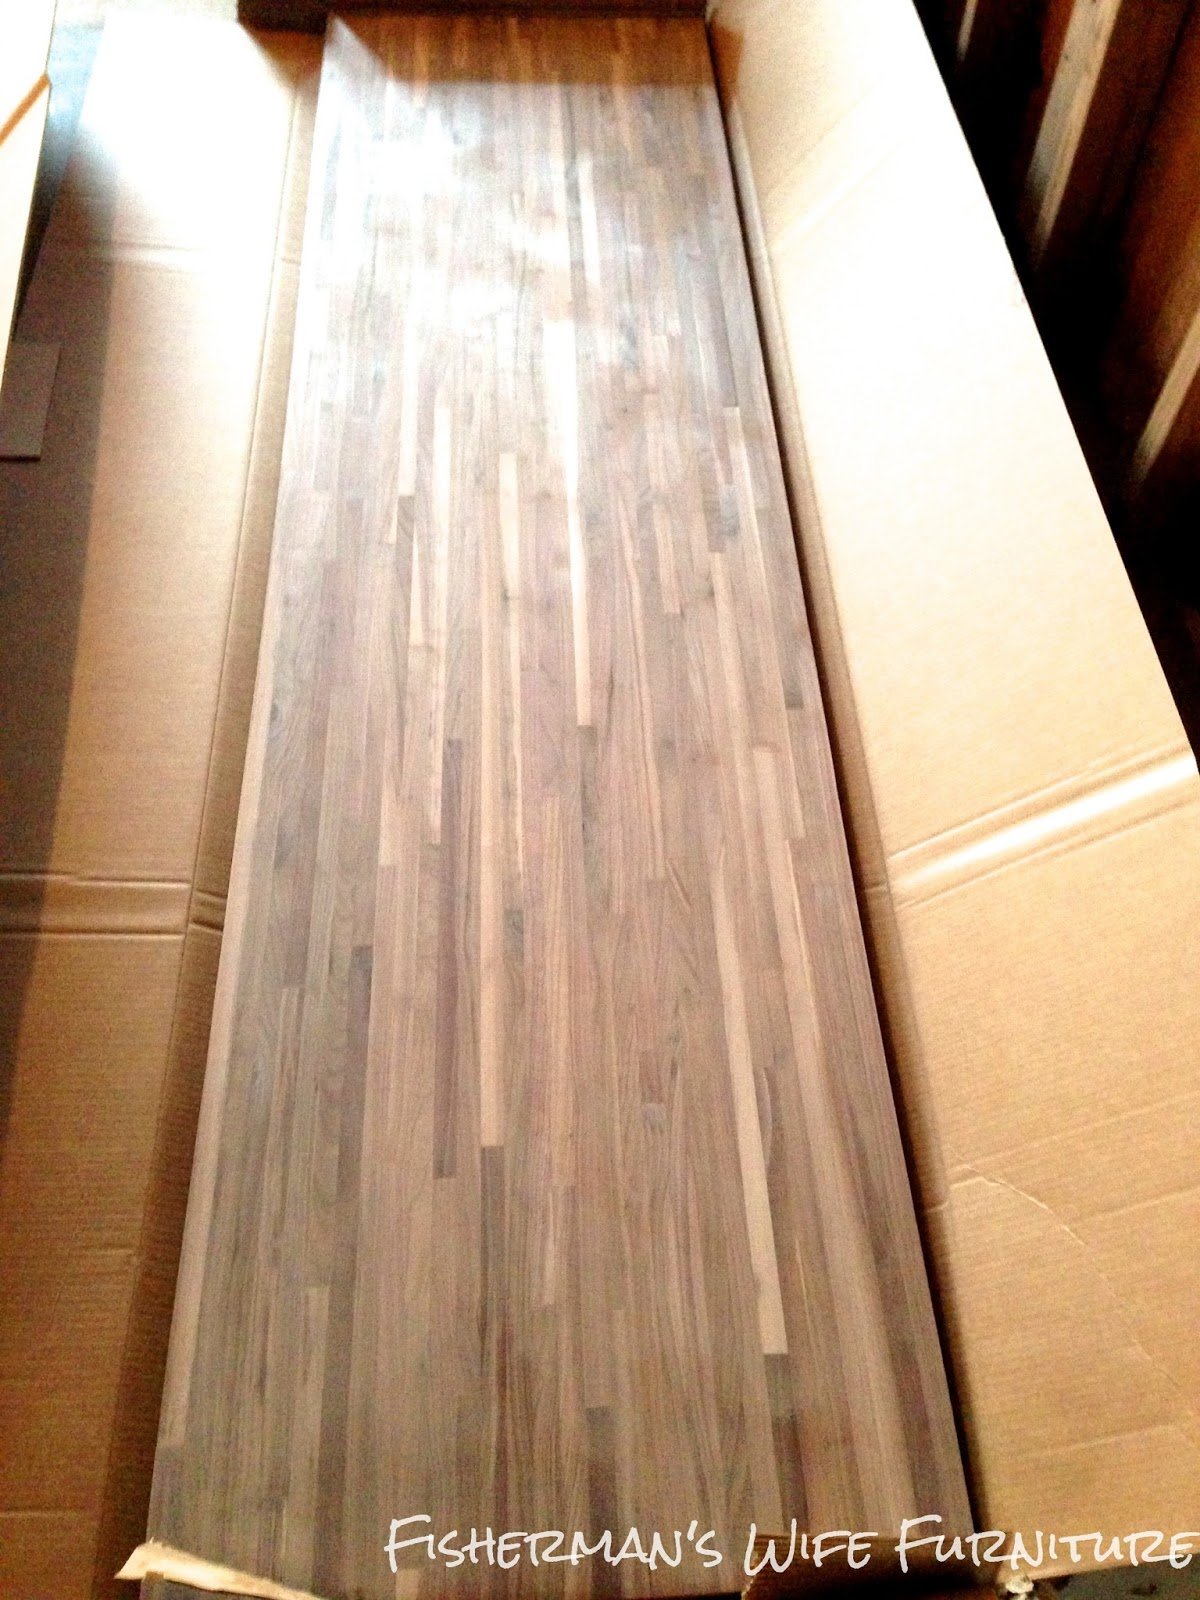
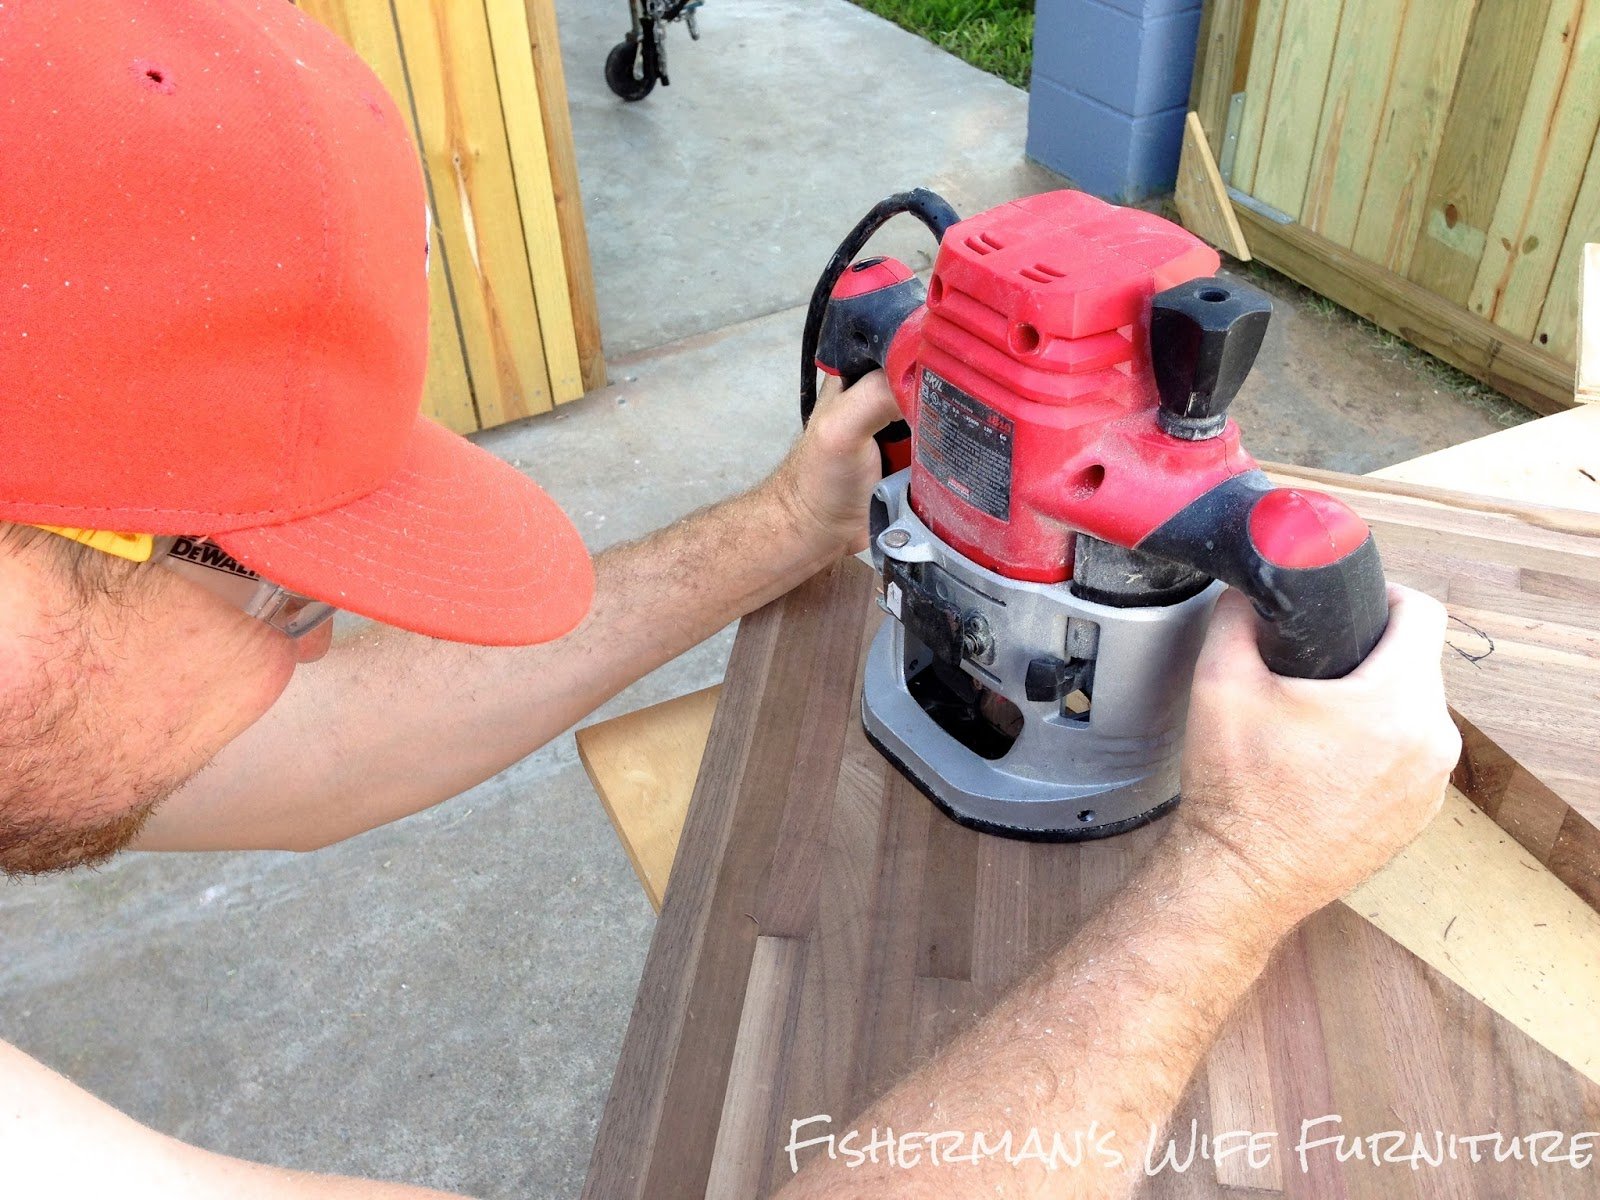
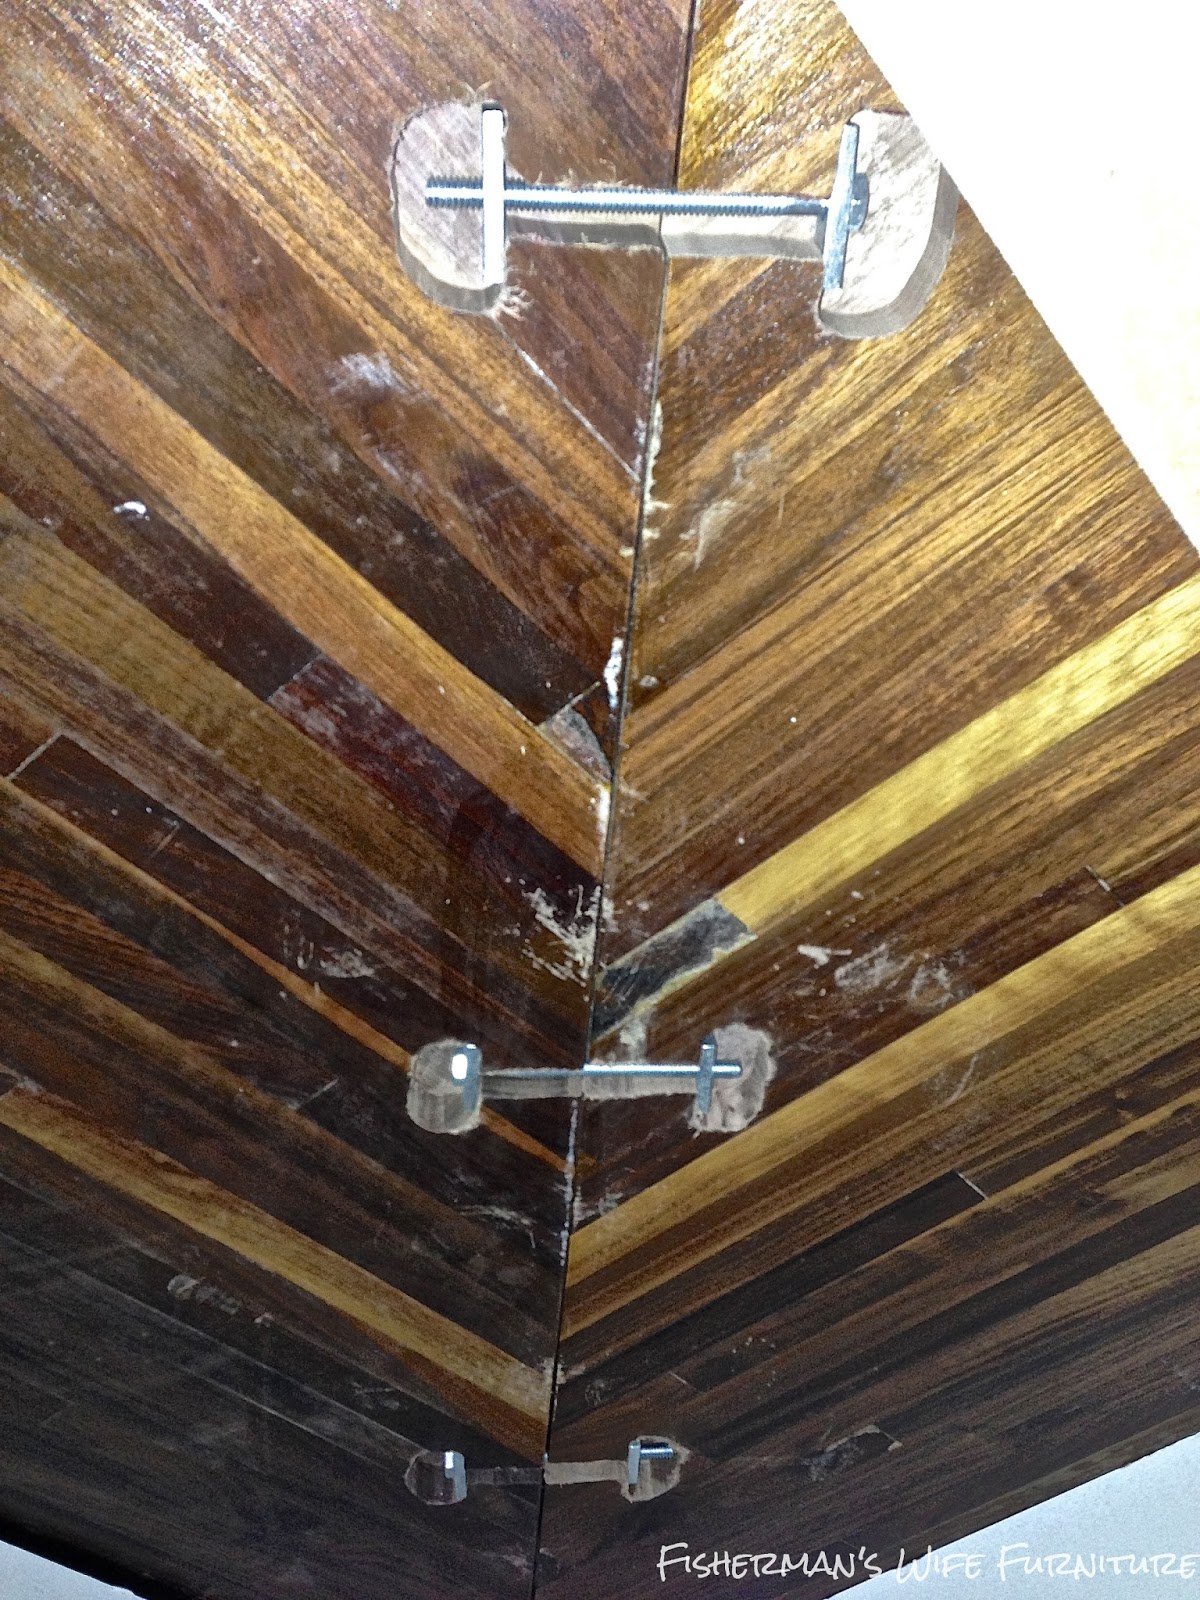
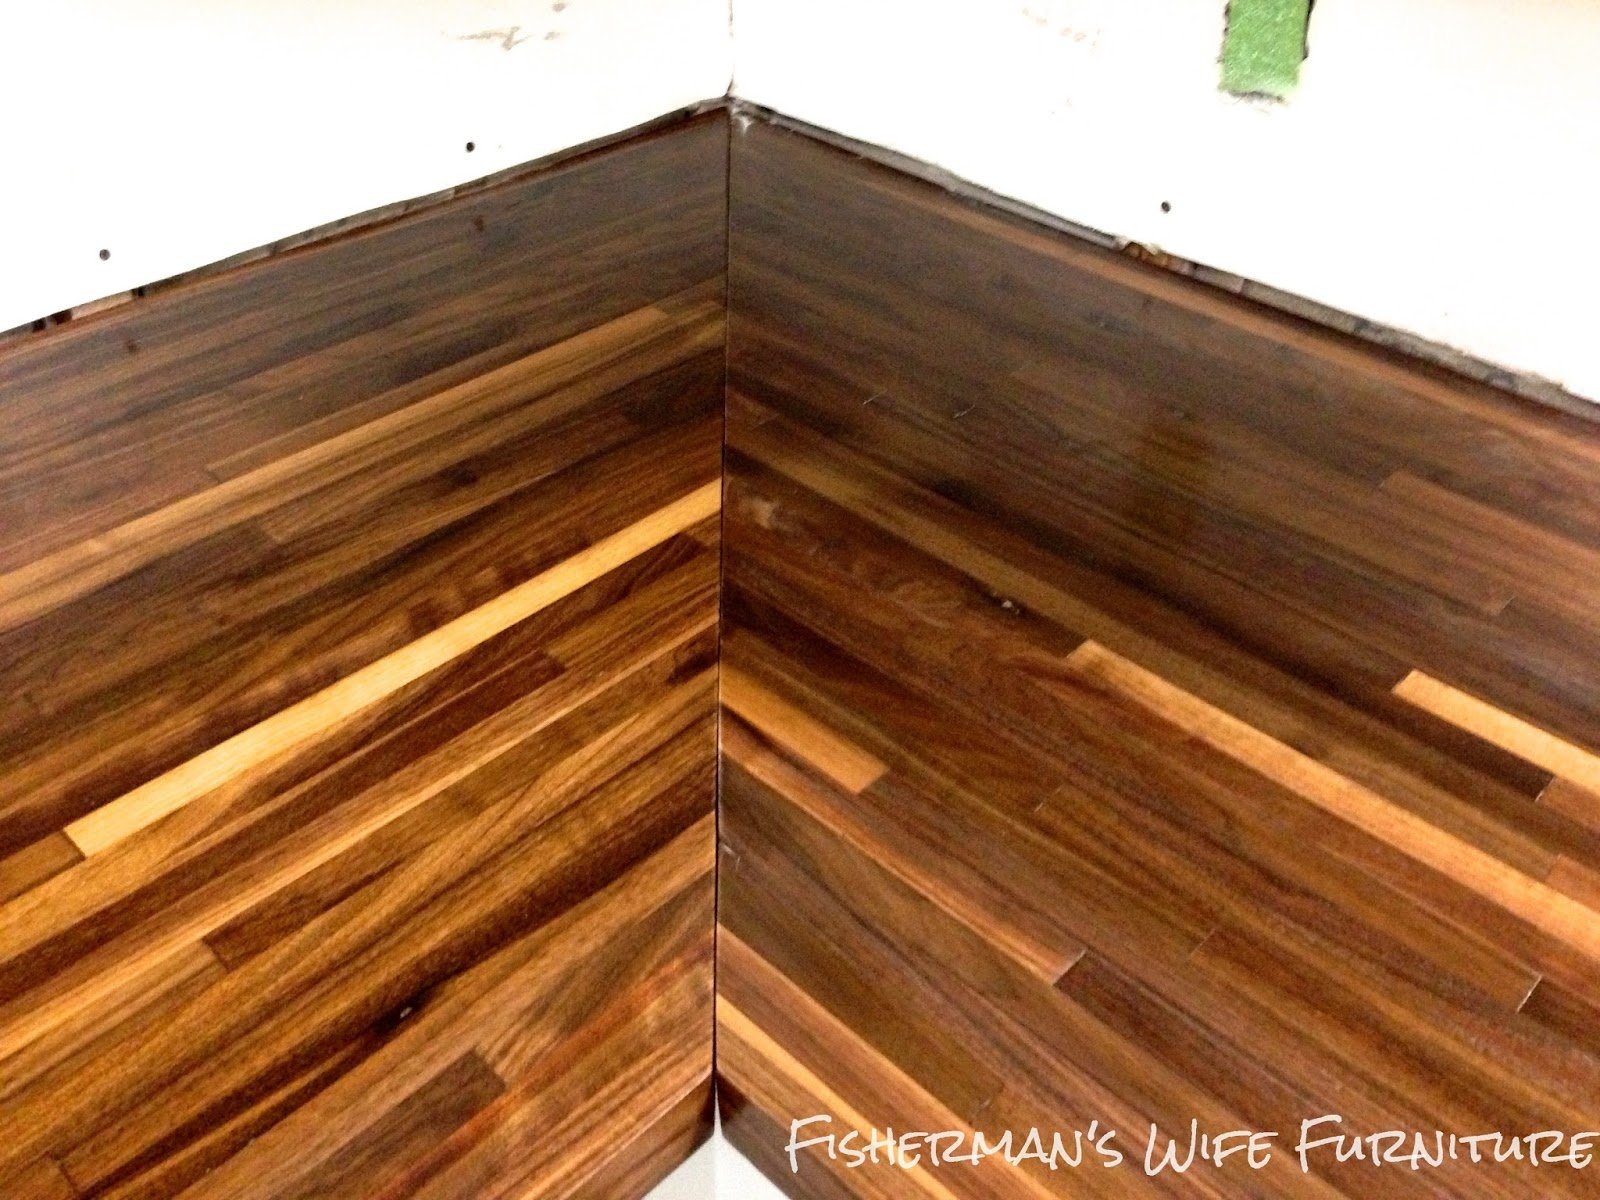
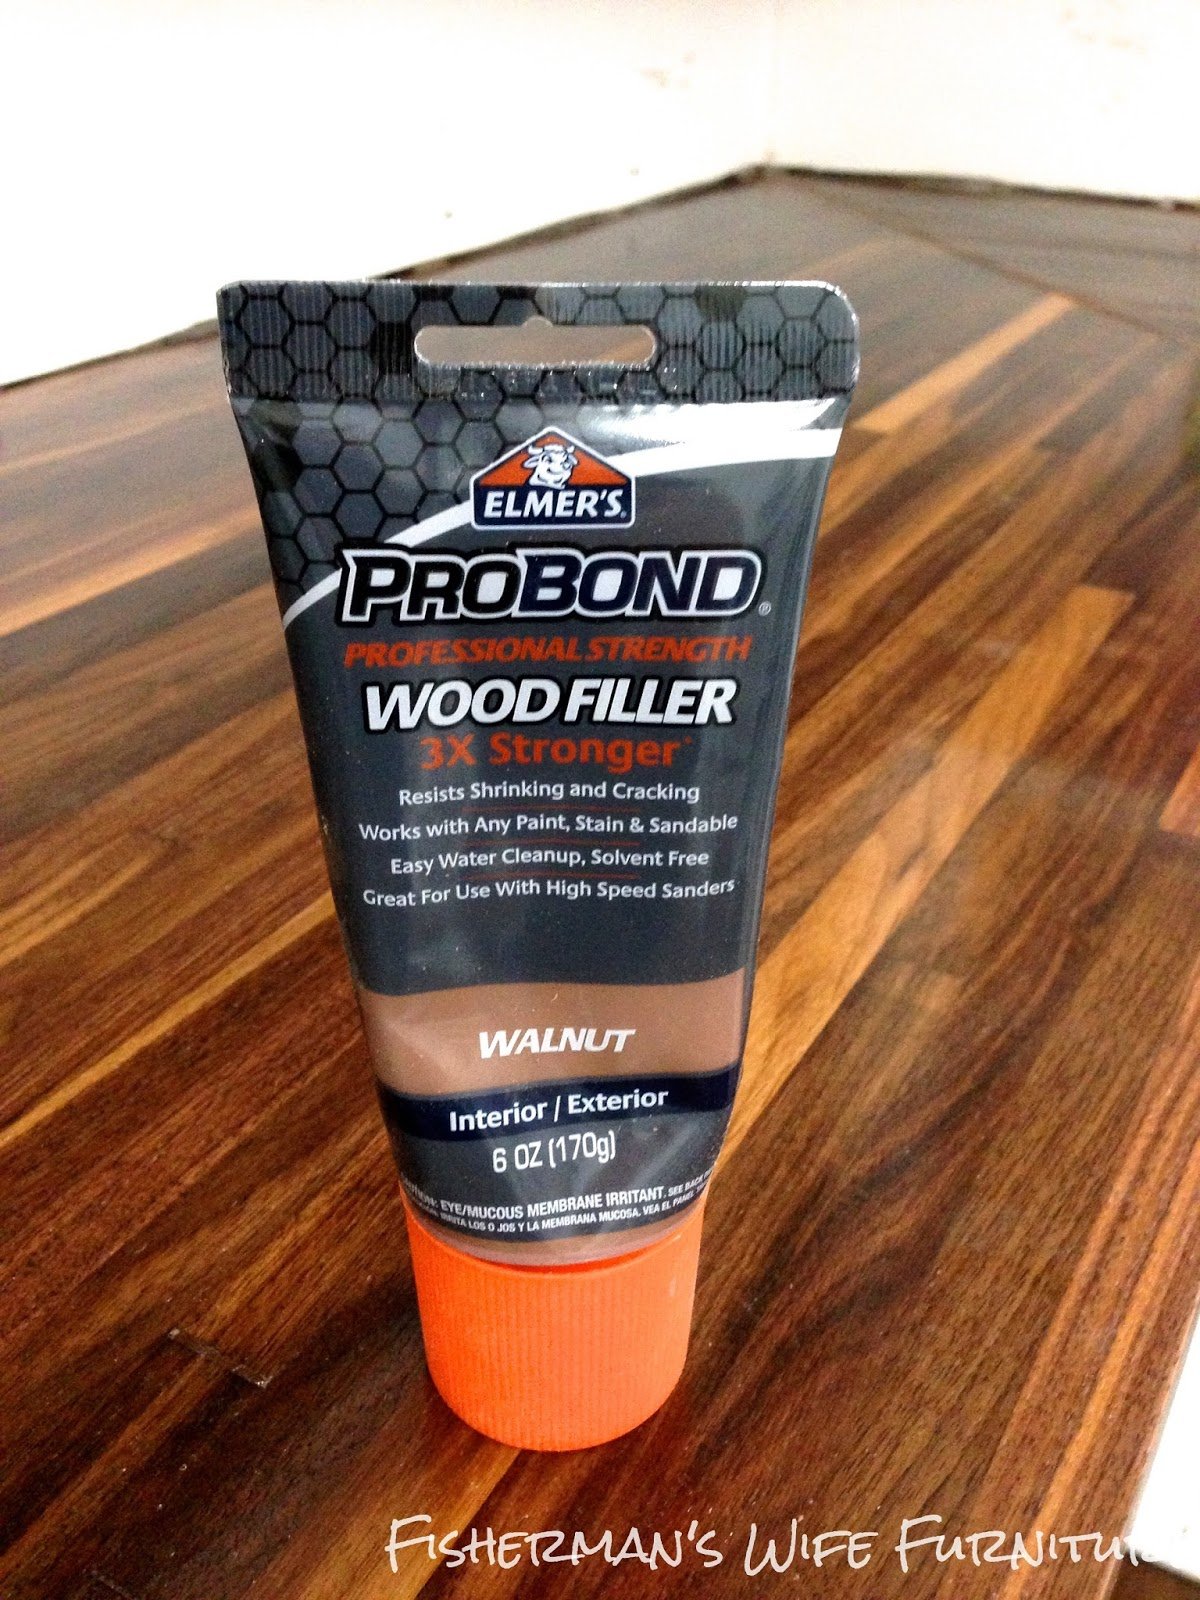
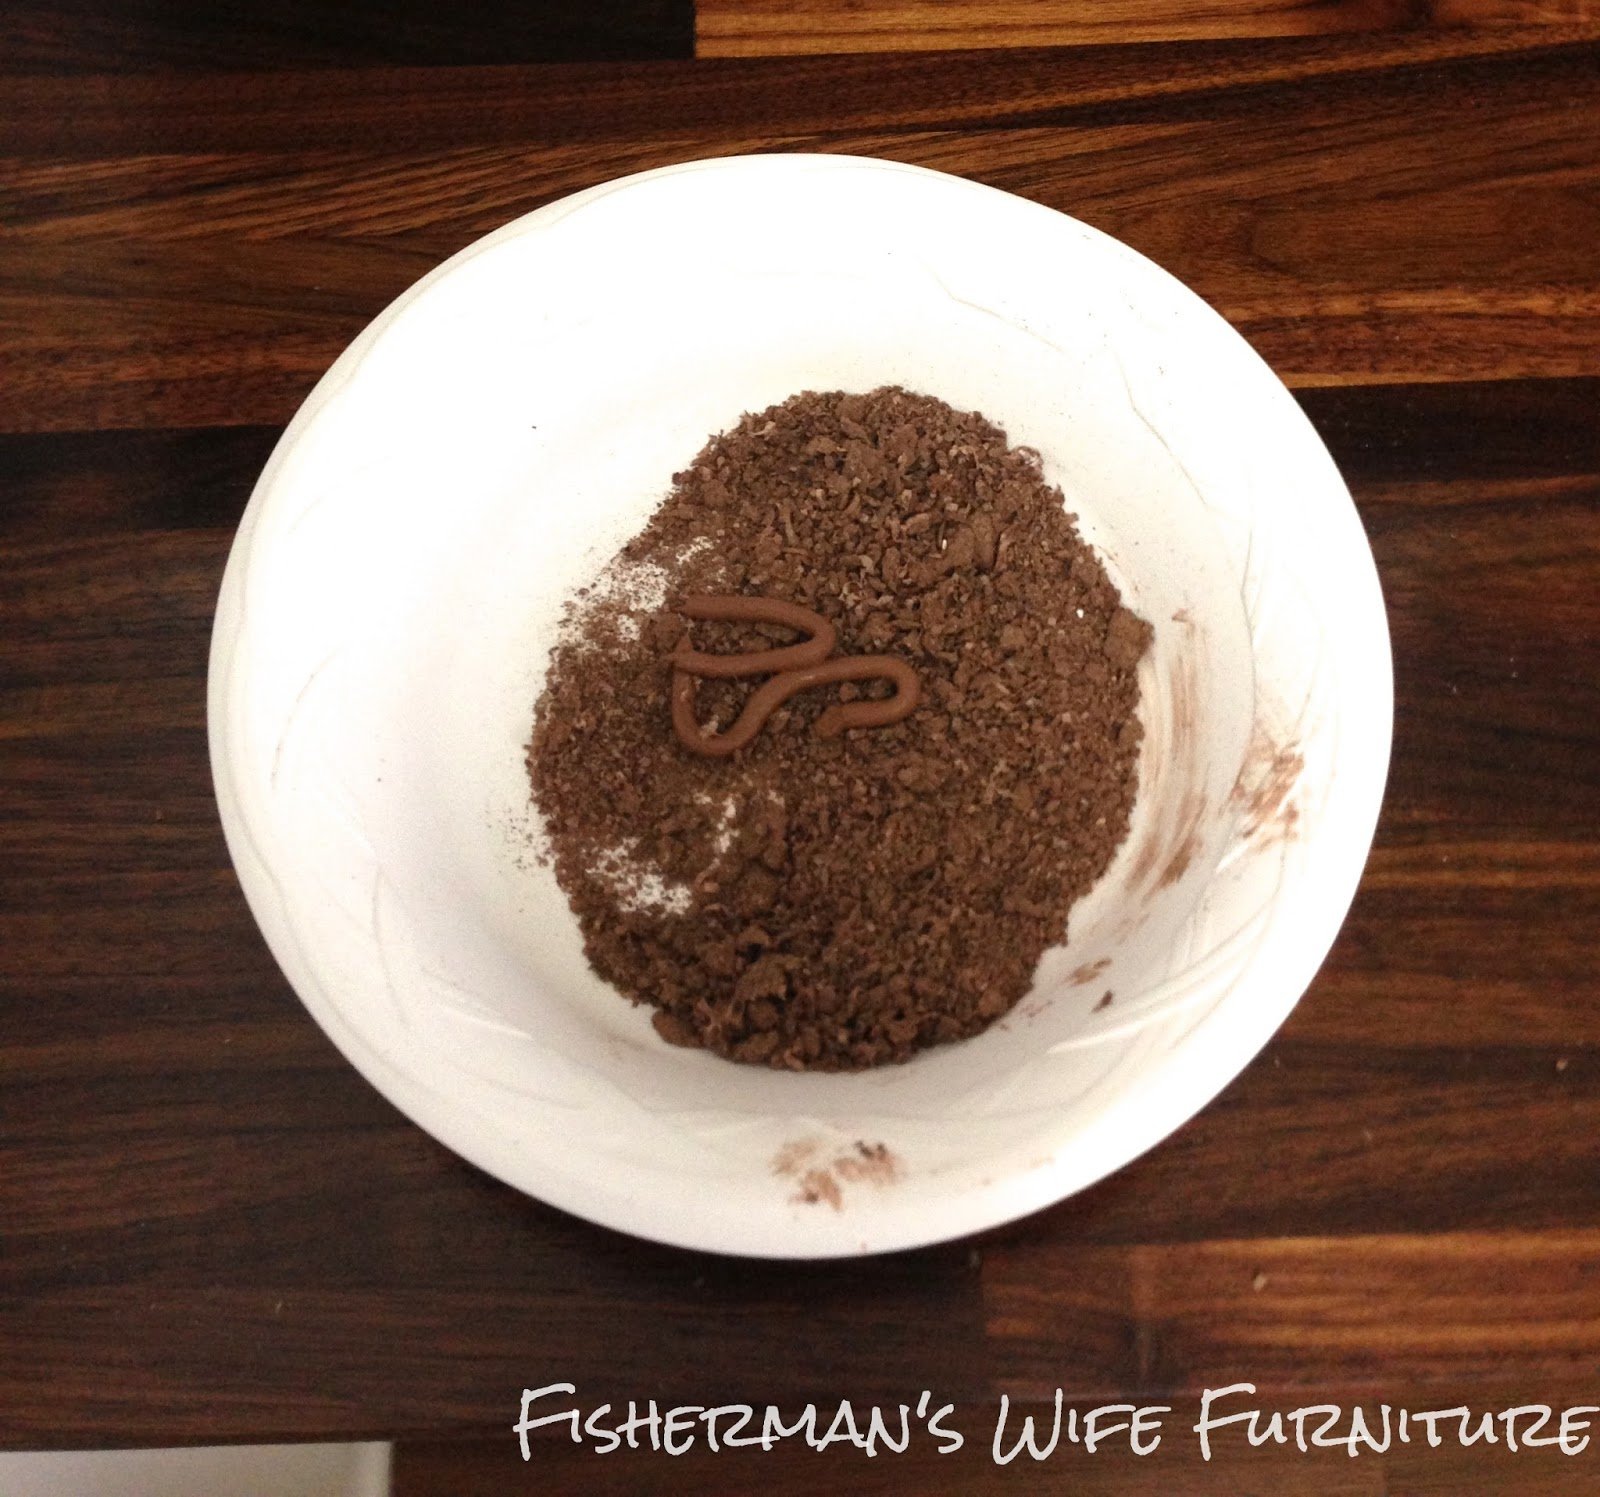
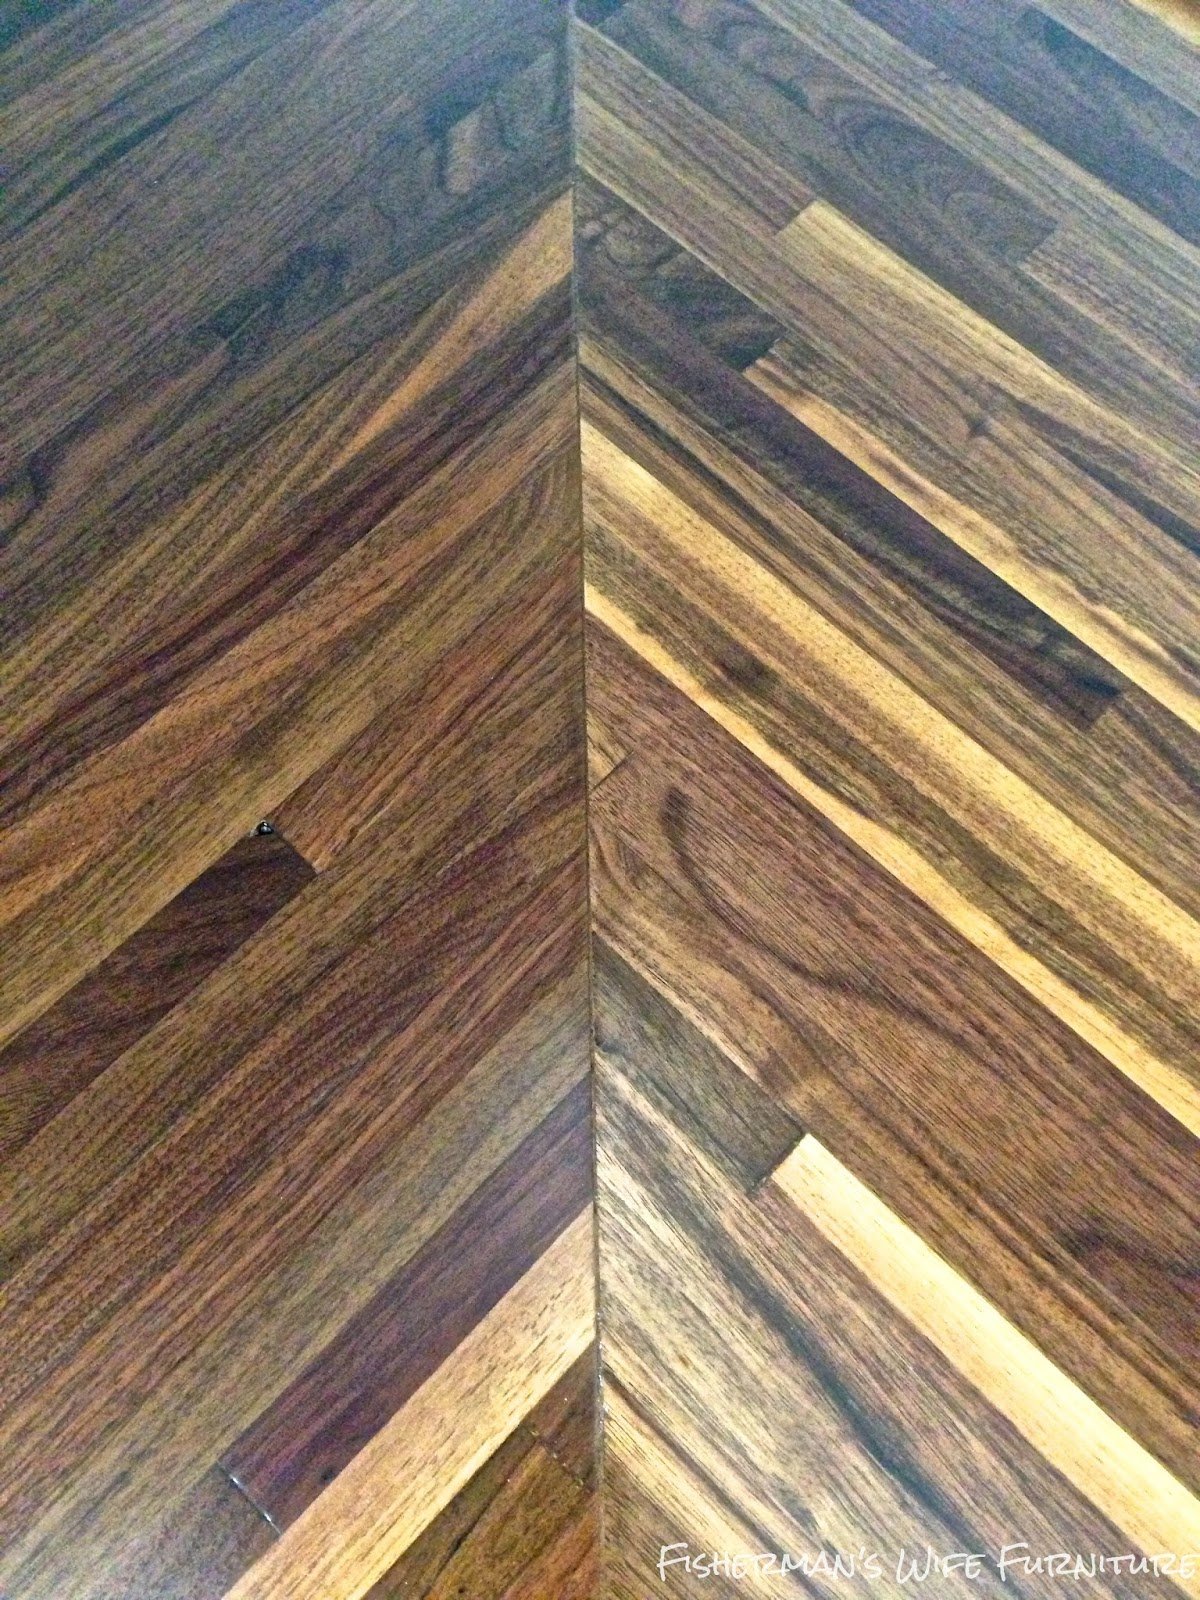
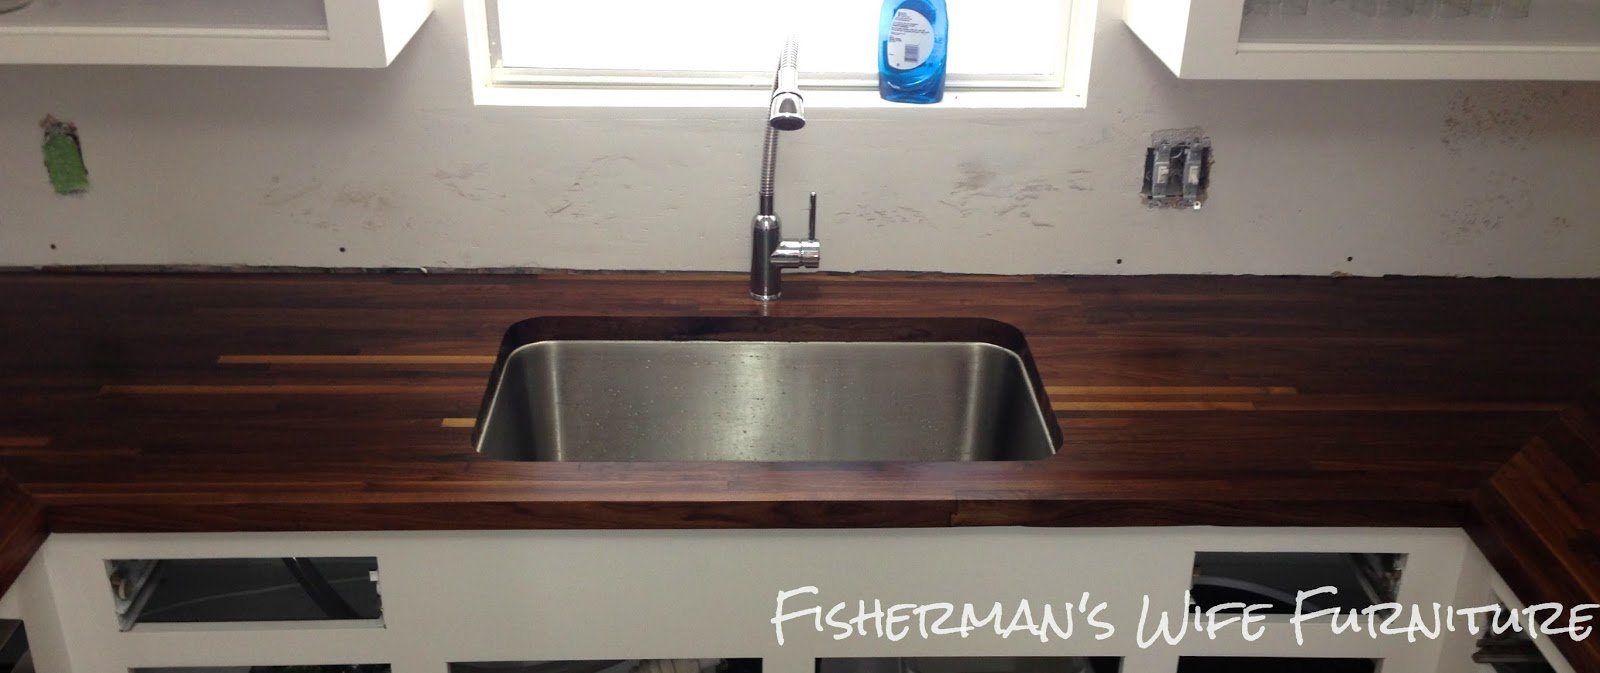
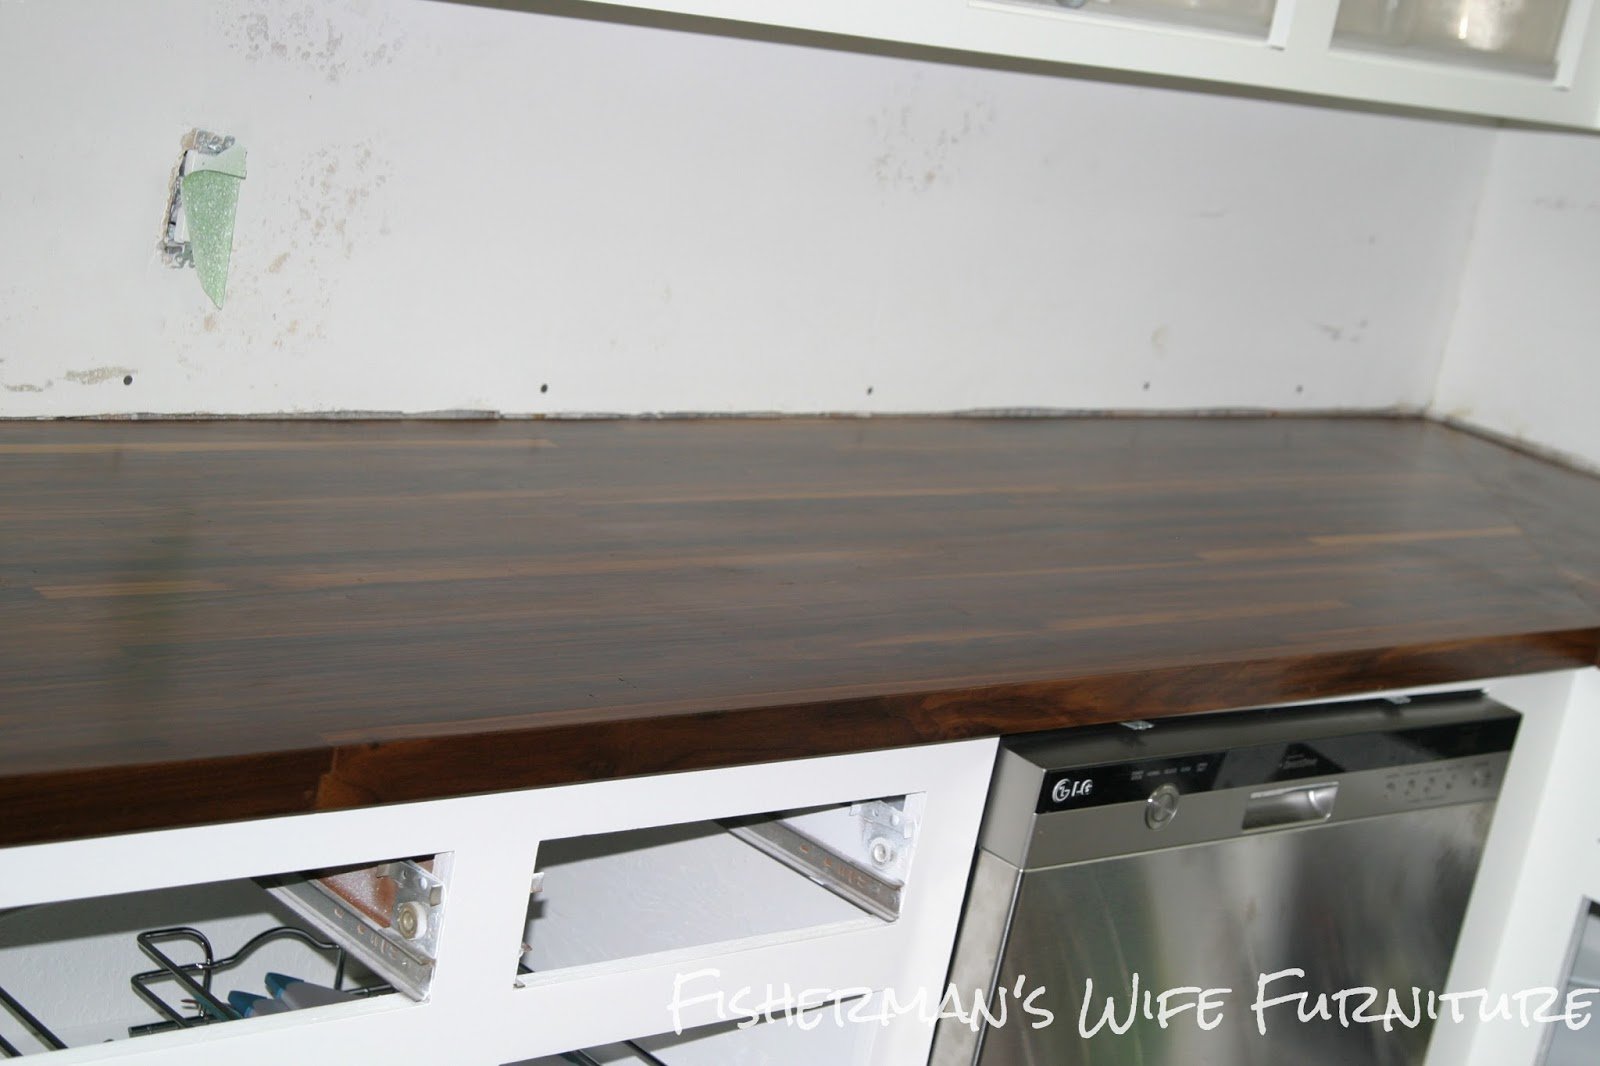
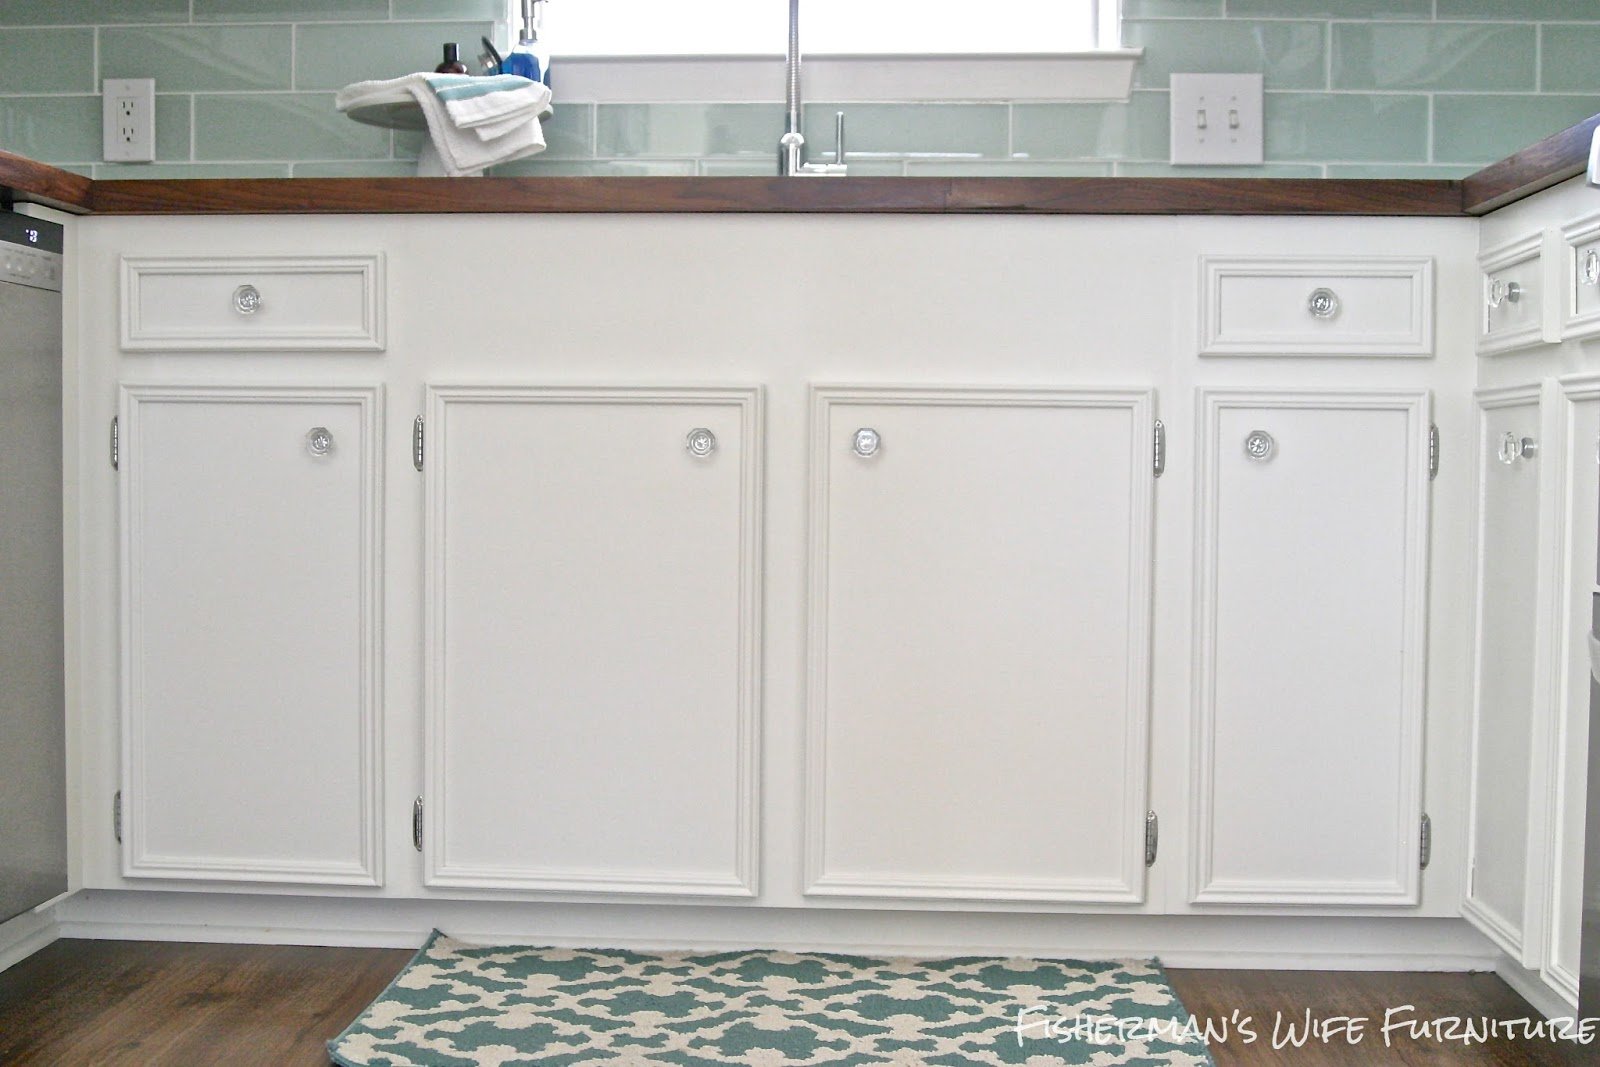
Countertops. Our American Walnut Butcher Block was ordered from Lumber Liquidators. It took about a week to come in and to save on a delivery charge, we picked them up from the store. My husband and I both liked the look of the 45 degree cuts in the corner. We made our measurements and prepped for cuts. This is a measure 10 times cut once kind of situation. Both of us had anxiety and were stressed about this step. Neither one of us wanted to be the one to mess up the cuts so we kept remeasuring. Finally we went for it and cut the butcher block. After making a few adjustments, it was time to install. The joints have 3 wood fasteners to keep things from shifting. I used Elmer’s Walnut puddy and mixed it with some saw dust to make a filler for the joints. I filled the 2 joint cracks and sanded smooth. Once everything was installed and in place, I put 5 coats of Waterlox.
 |
 |
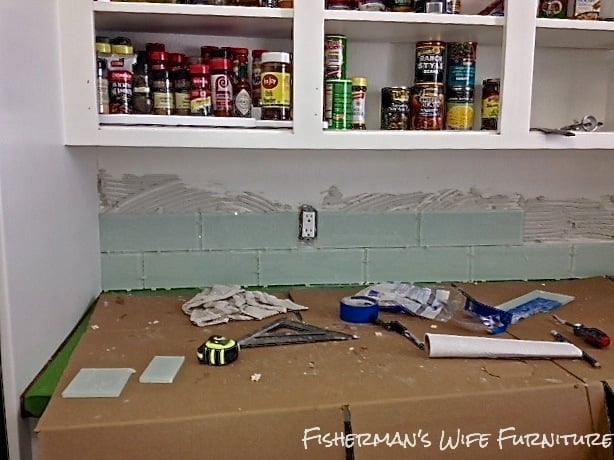
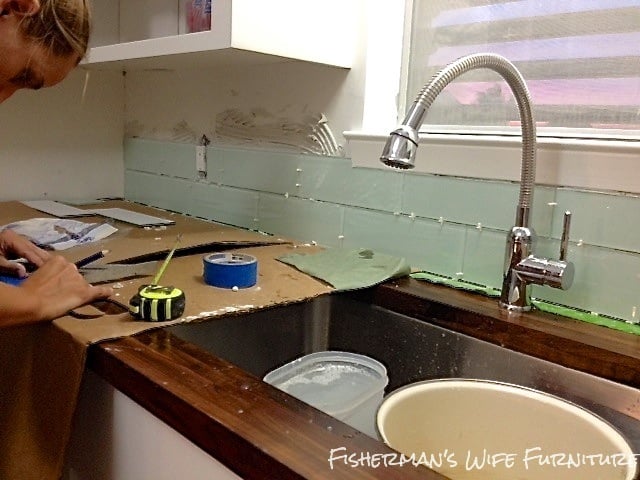
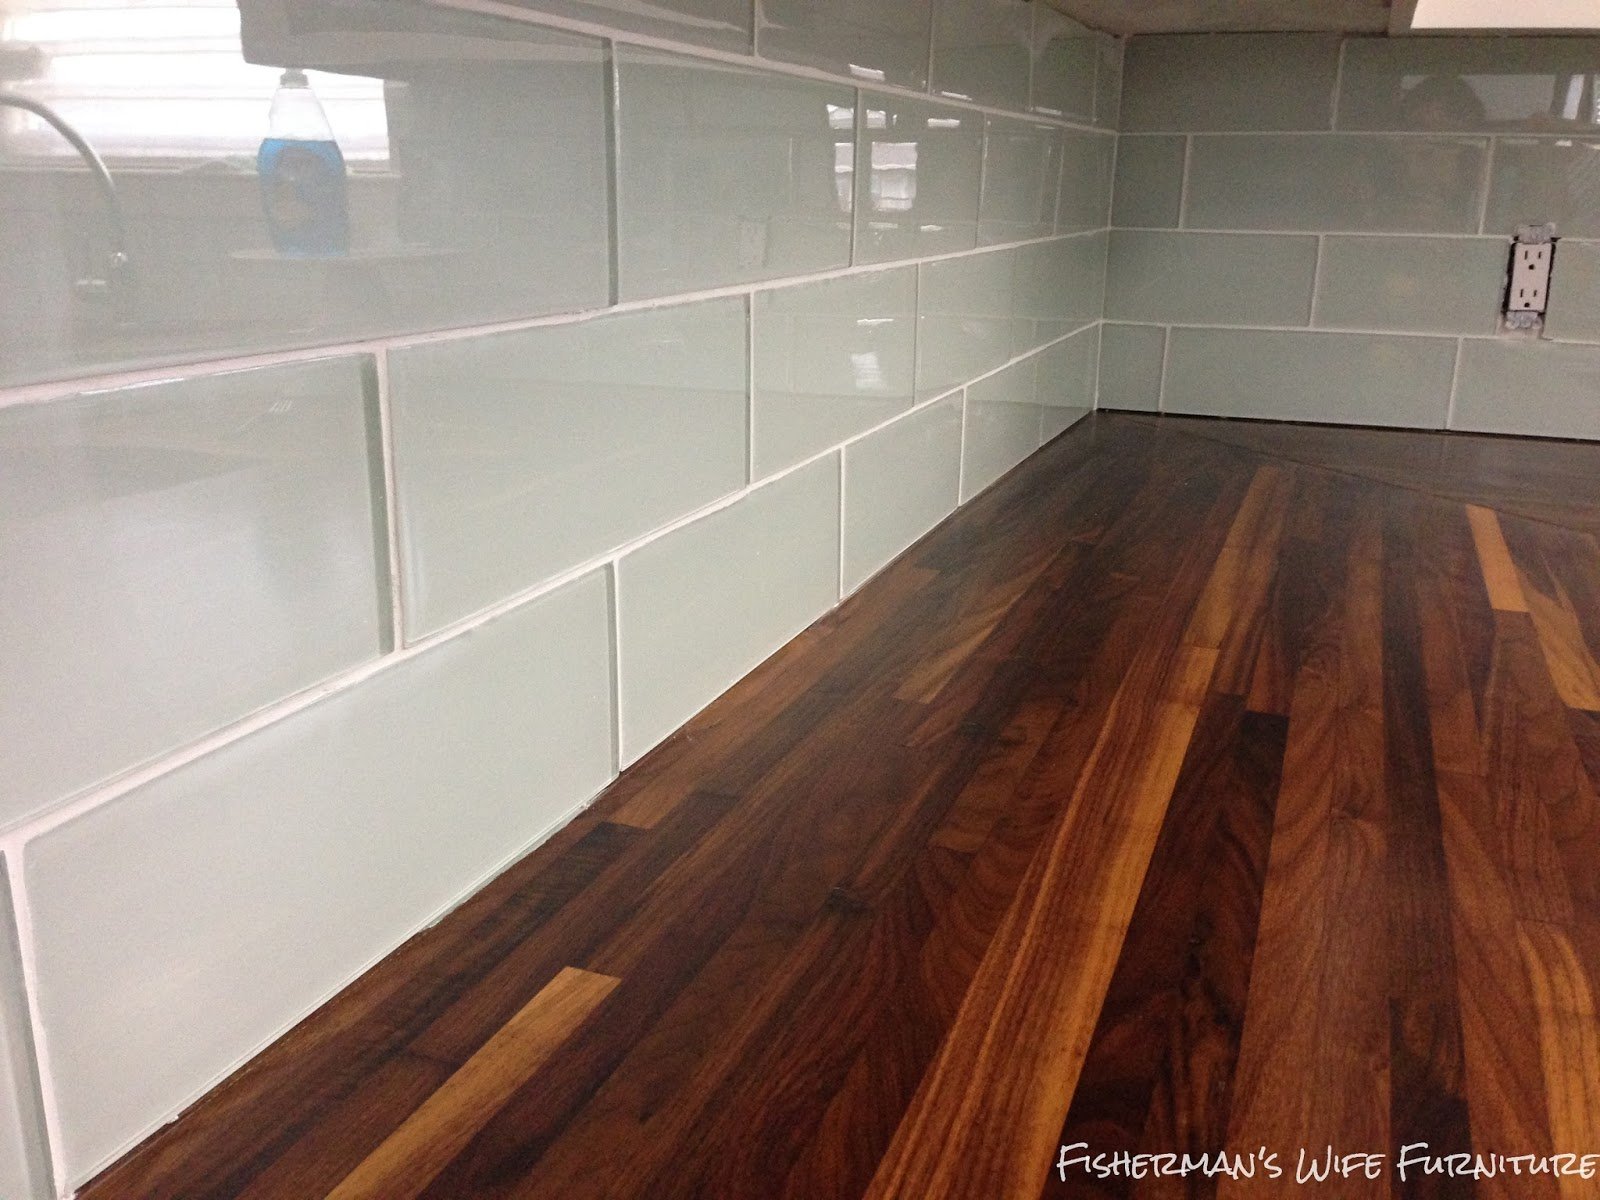
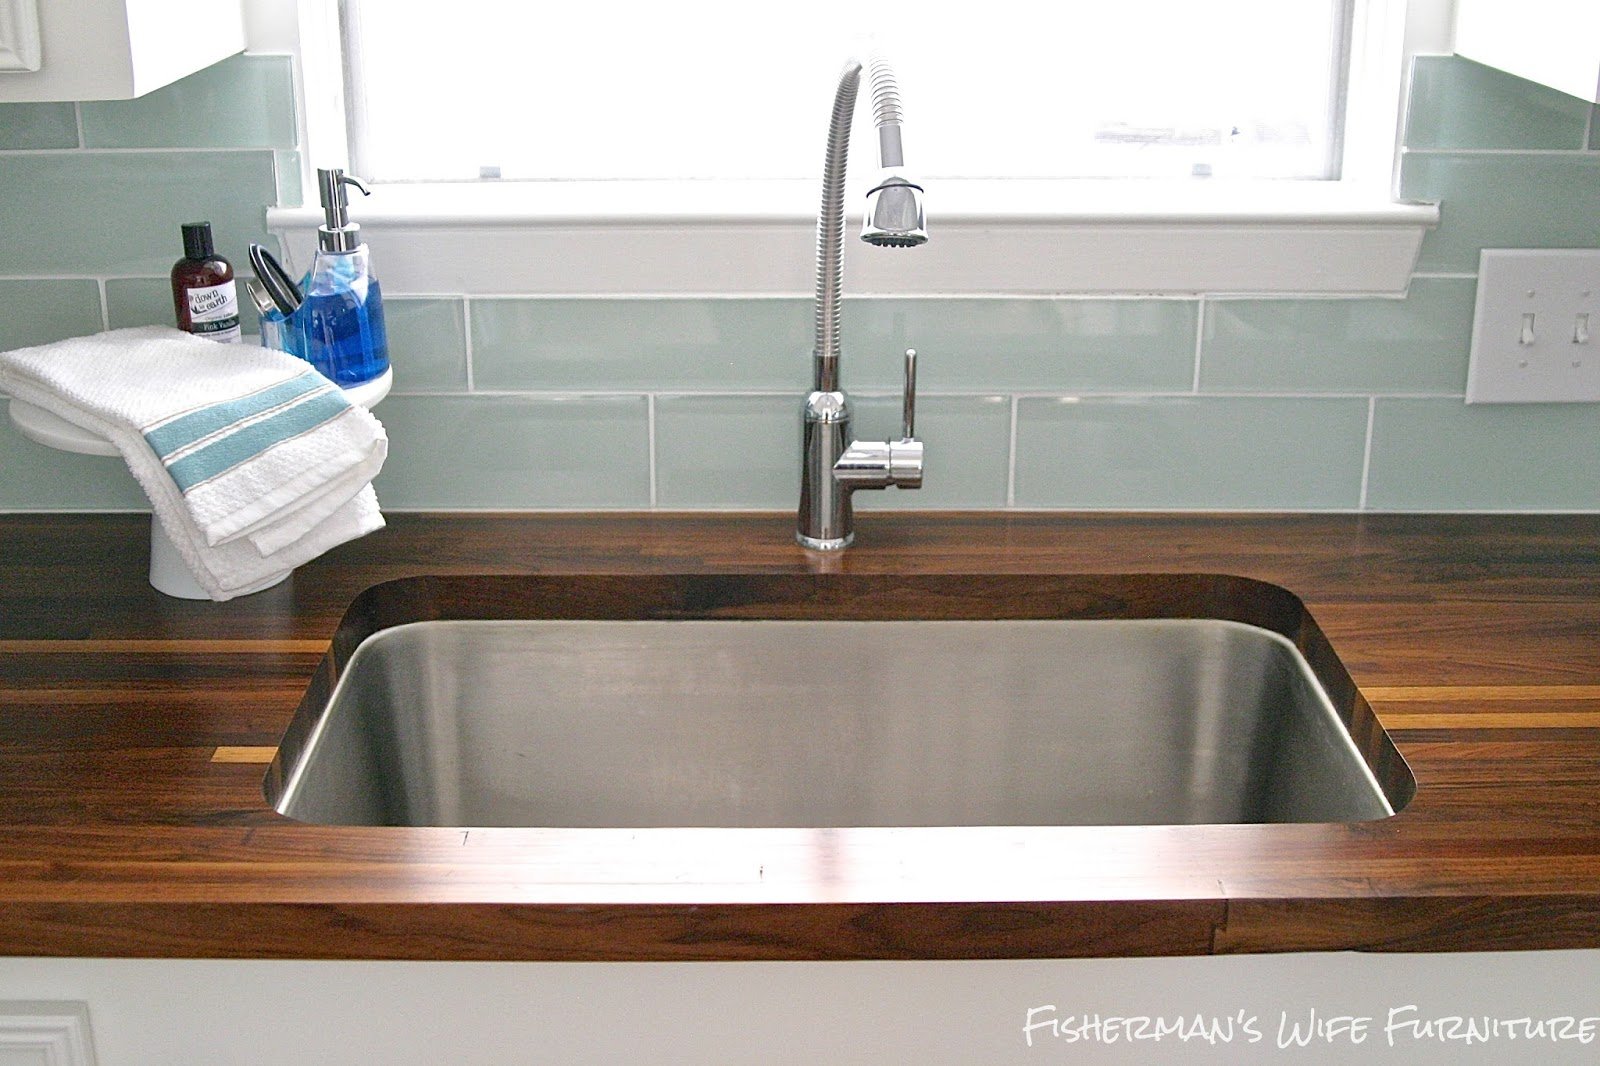
BACKSPLASH. I love subway tile. It has grown in popularity in the past several years which makes me lean towards not using it but I just love it so much and couldn’t find another pattern to replace it. To give it a different look and more modern feel, I decided to use a larger tile. I purchased 4″ x 12″ glass tiles in Natural White so it doesn’t make the kitchen too white. This was my first time to do a backsplash so I had some reservations about it but it was much easier than I thought it would be. And messier. Be sure to protect your countertops and floor. We will be updating both bathrooms in the near future so we decided to buy a $125 wet saw instead of renting one at $50 a day. Buying a saw also gave us the option to use the blade we wanted, not the one that came with the rental. Glass tile MUST be cut with a sharp glass certified blade which are available at your local Home Depot or Lowes.
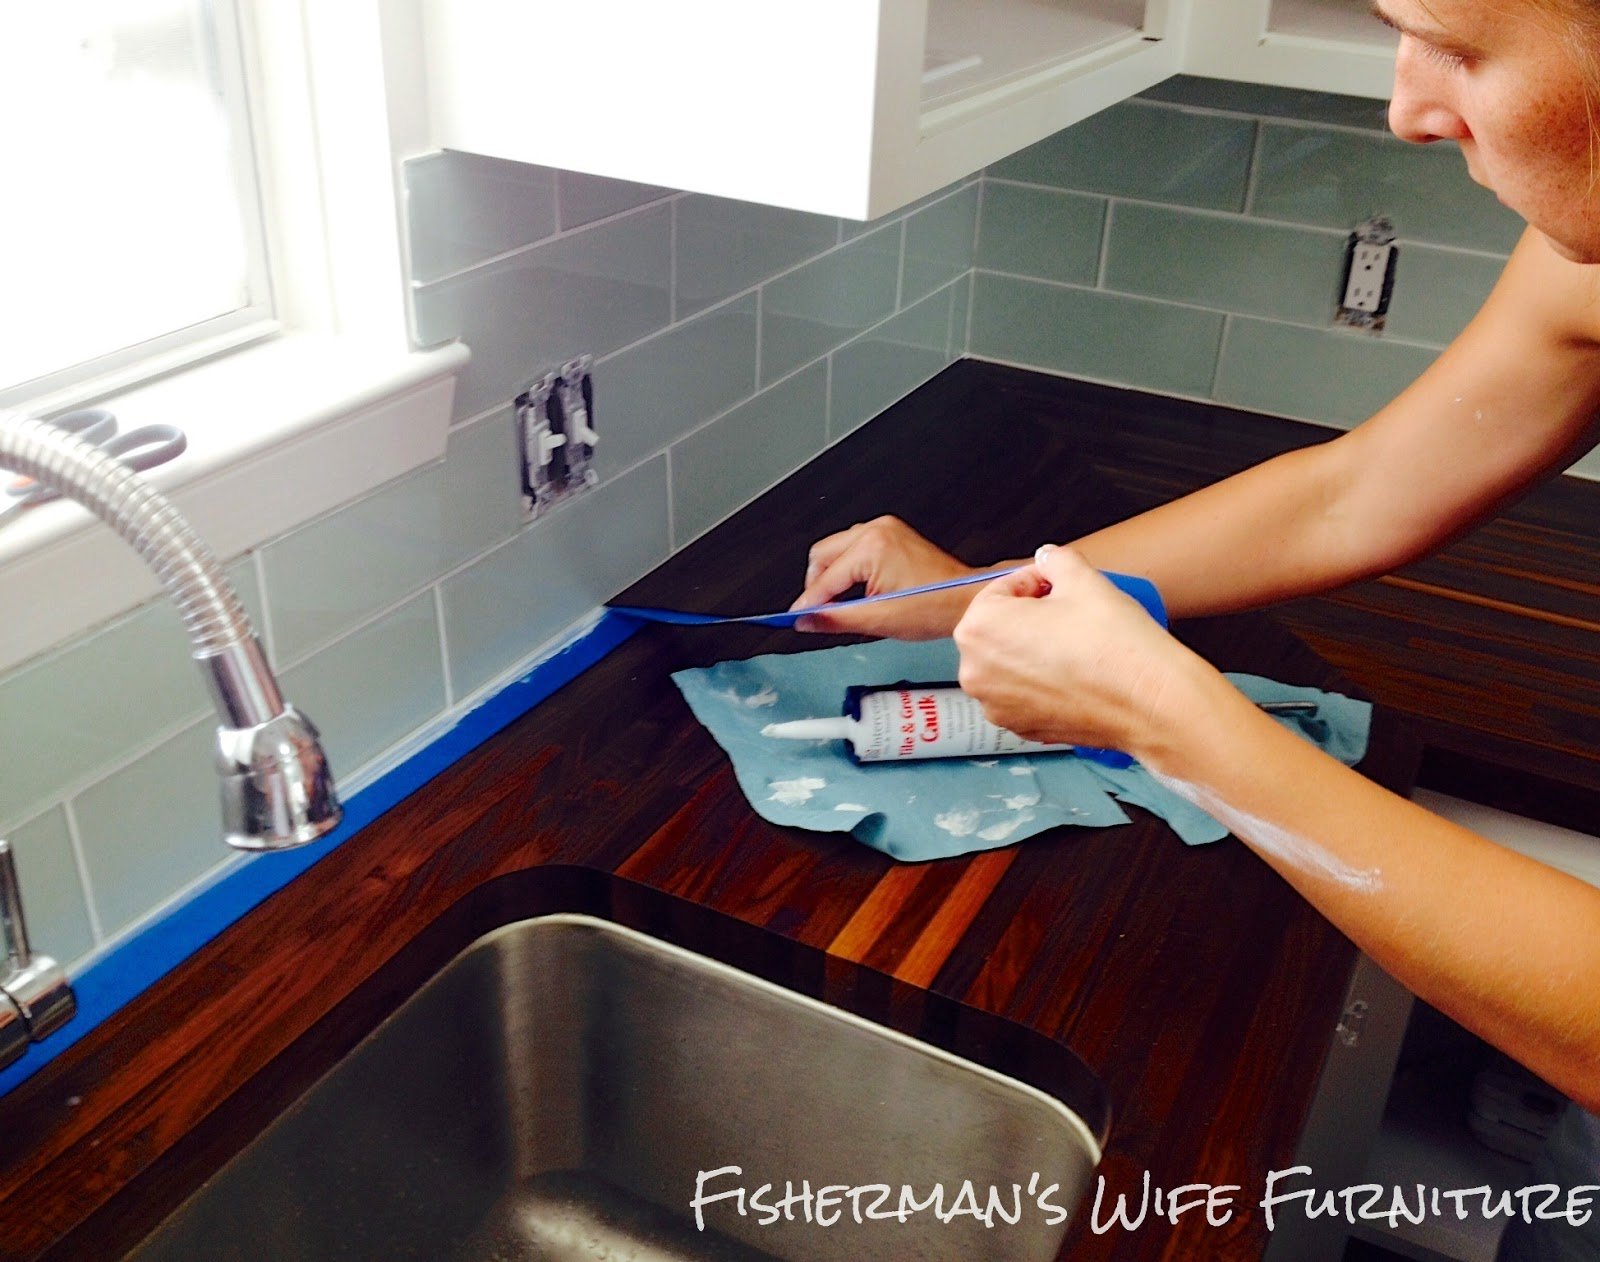
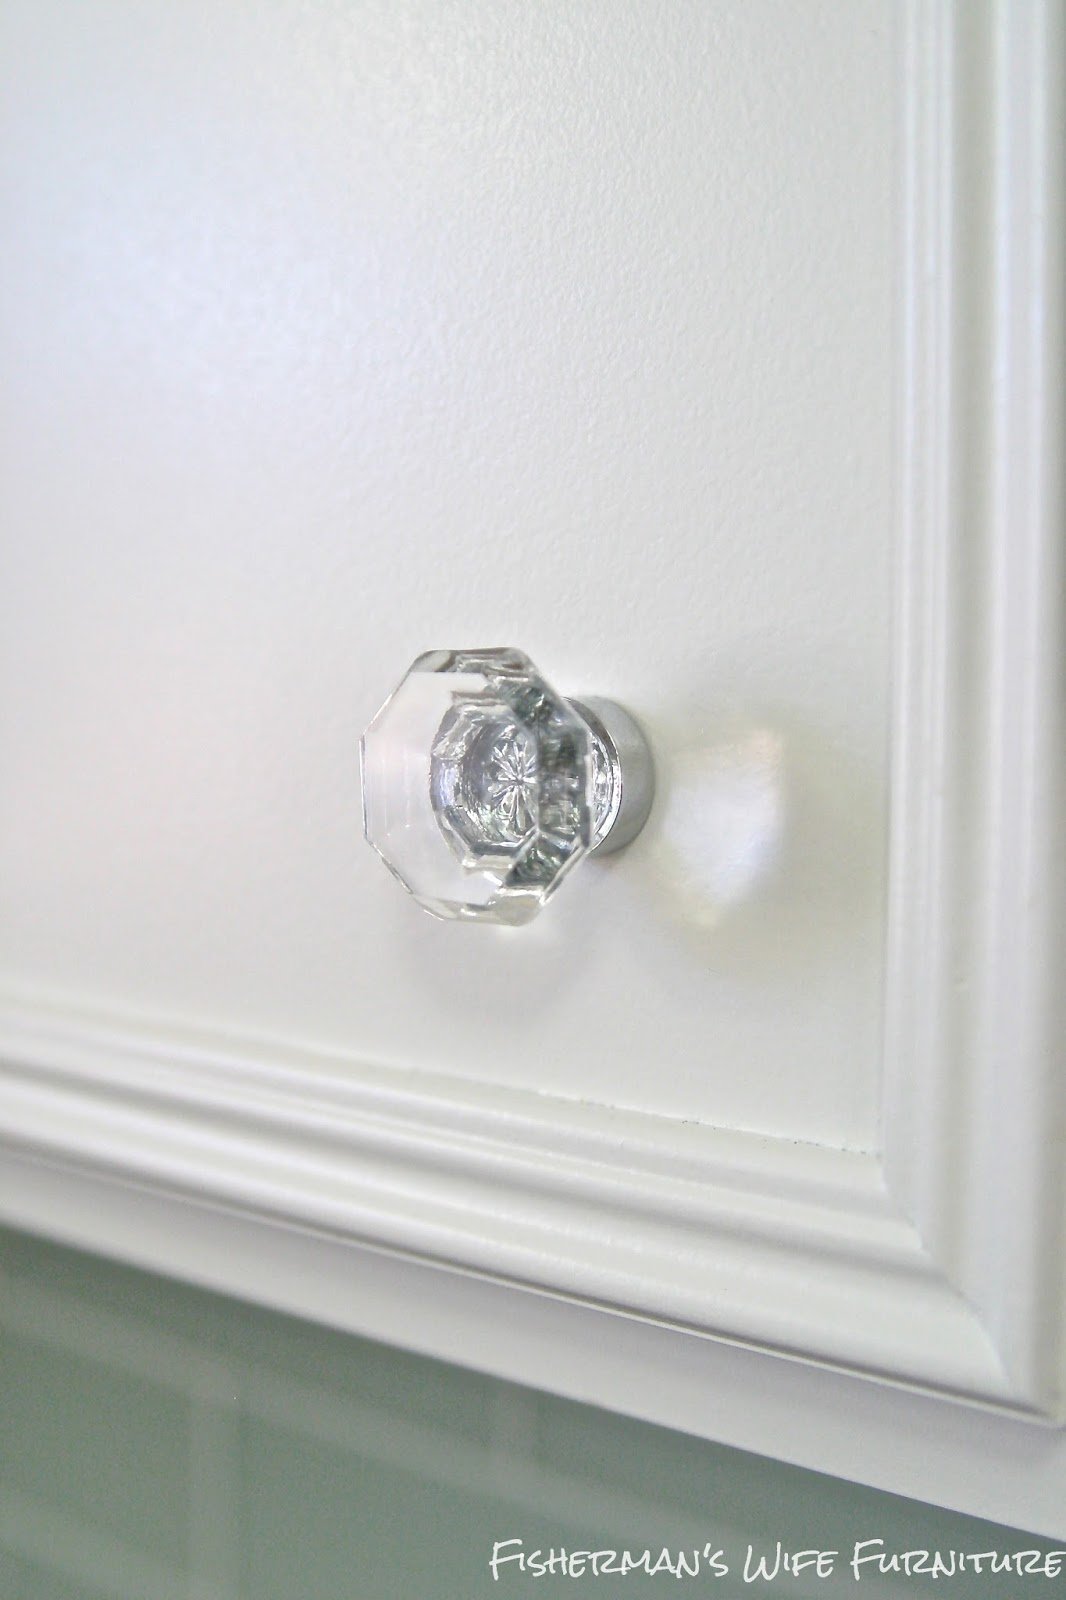
THE DETAILS. The overall design and styling of our home is what I call, Comfortable Coastal Cottage. Yes, I made that up. Its a mix of vintage and traditional, neutral with a pop of color, and most importantly, inviting and comfortable. The wood countertops warmed up the kitchen space but it still needed some character. To bring some vintage into the kitchen, I decided to use glass knobs instead of the harsh contrast of solid chrome. They are beautiful against the white cabinets.
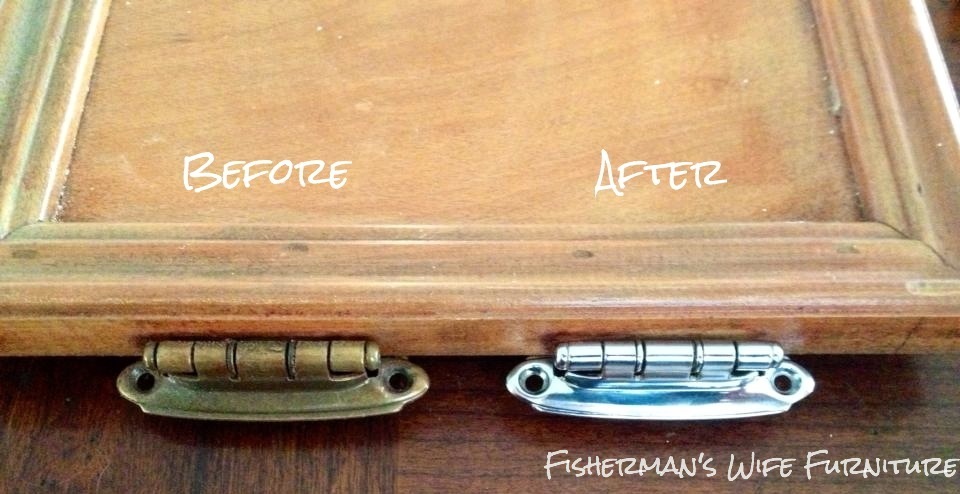
When it came to hinges, we could not find any new ones that lined up correctly. I know from experience that painting hinges is not ideal. The paint chips and rubs off and I can’t have that in my kitchen. Those cabinets are used several times a day so I need something that can handle being opened and closed many times a day. My husband mentioned that we should look into having the original hinges powder coated or chrome plated. After a little research we decided to take the hinges to an auto body shop that specializes in chrome plating. They did an amazing job. Perfect fit and perfect color.

The only thing we did not DIY in this space is the floors. We had the entire house done professionally the first week we had the house while we DIYed the privacy and cattle panel fence. At some point we had to give in and admit we can’t do it all. After lots of discussions we decided on a luxury vinyl plank. I was scared vinyl would look cheap but it has come a long way in recent years and is looking better than ever. It was a great choice and I am so happy with it.
Overall it took about 10 weeks to do the kitchen update. During this time my husband was working full time and I did not take on any client work so I could focus all my time on the house. I did as much during the day by myself and when I was at a stopping point in the kitchen I painted other rooms, unpacked boxes, and tried to get us organized. Not having a functioning kitchen for several weeks forced us to grill everything. There were many mornings our new neighbors were giving me strange looks as I grilled breakfast sausage in my PJs while drinking my coffee. Oh well. We got our dream kitchen on budget and that makes all the hard times worth it.


Products:
Appliances
- LG Counterdpeth Fridge
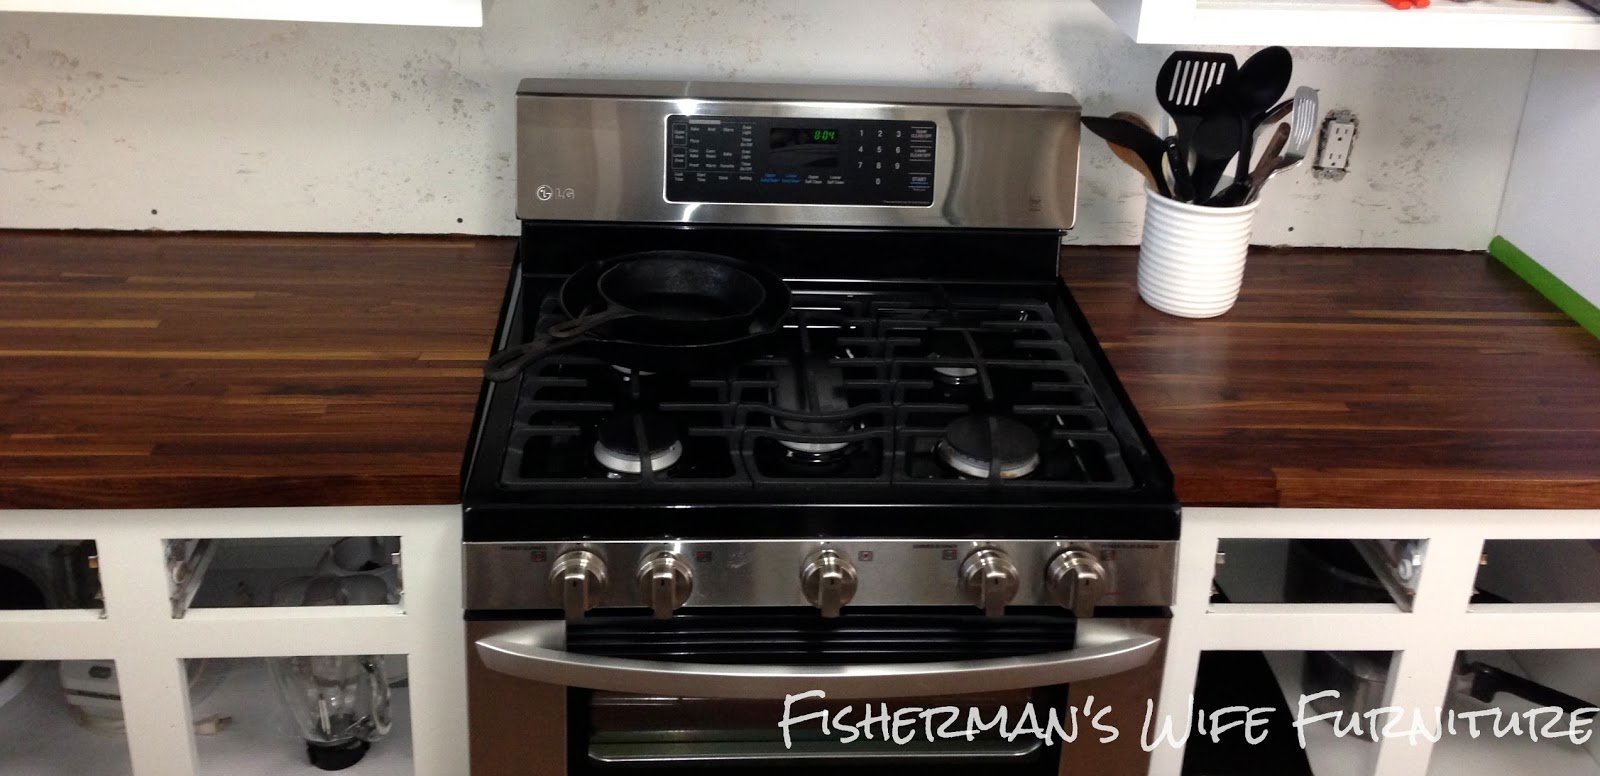
- LG 5 Burner Stove and Double Oven with Convection
- LG Over the Stove Microwave
- LG Dishwasher
Sink & Faucet
- Sink – 30″ Single Basin, 10″ Deep Stainless Steel – Overstock.com
- Faucet – Elkay Pursuit – Amazon.com
Paint
- Zinsser Shellac Primer
- Benjamin Moore Waterbone Impervo Satin in White Dove
Lights
- 8″ & 12″ Retro Style Schoolhouse Light in chrome – DestinationLighting.com
Hinges
- Original hinges, chrome plated at Speed & Sport Chrome Plating in Houston, TX
Glass knobs
- 1 3/8 Octagon knobs with polished chrome base – LookintheAttic.com
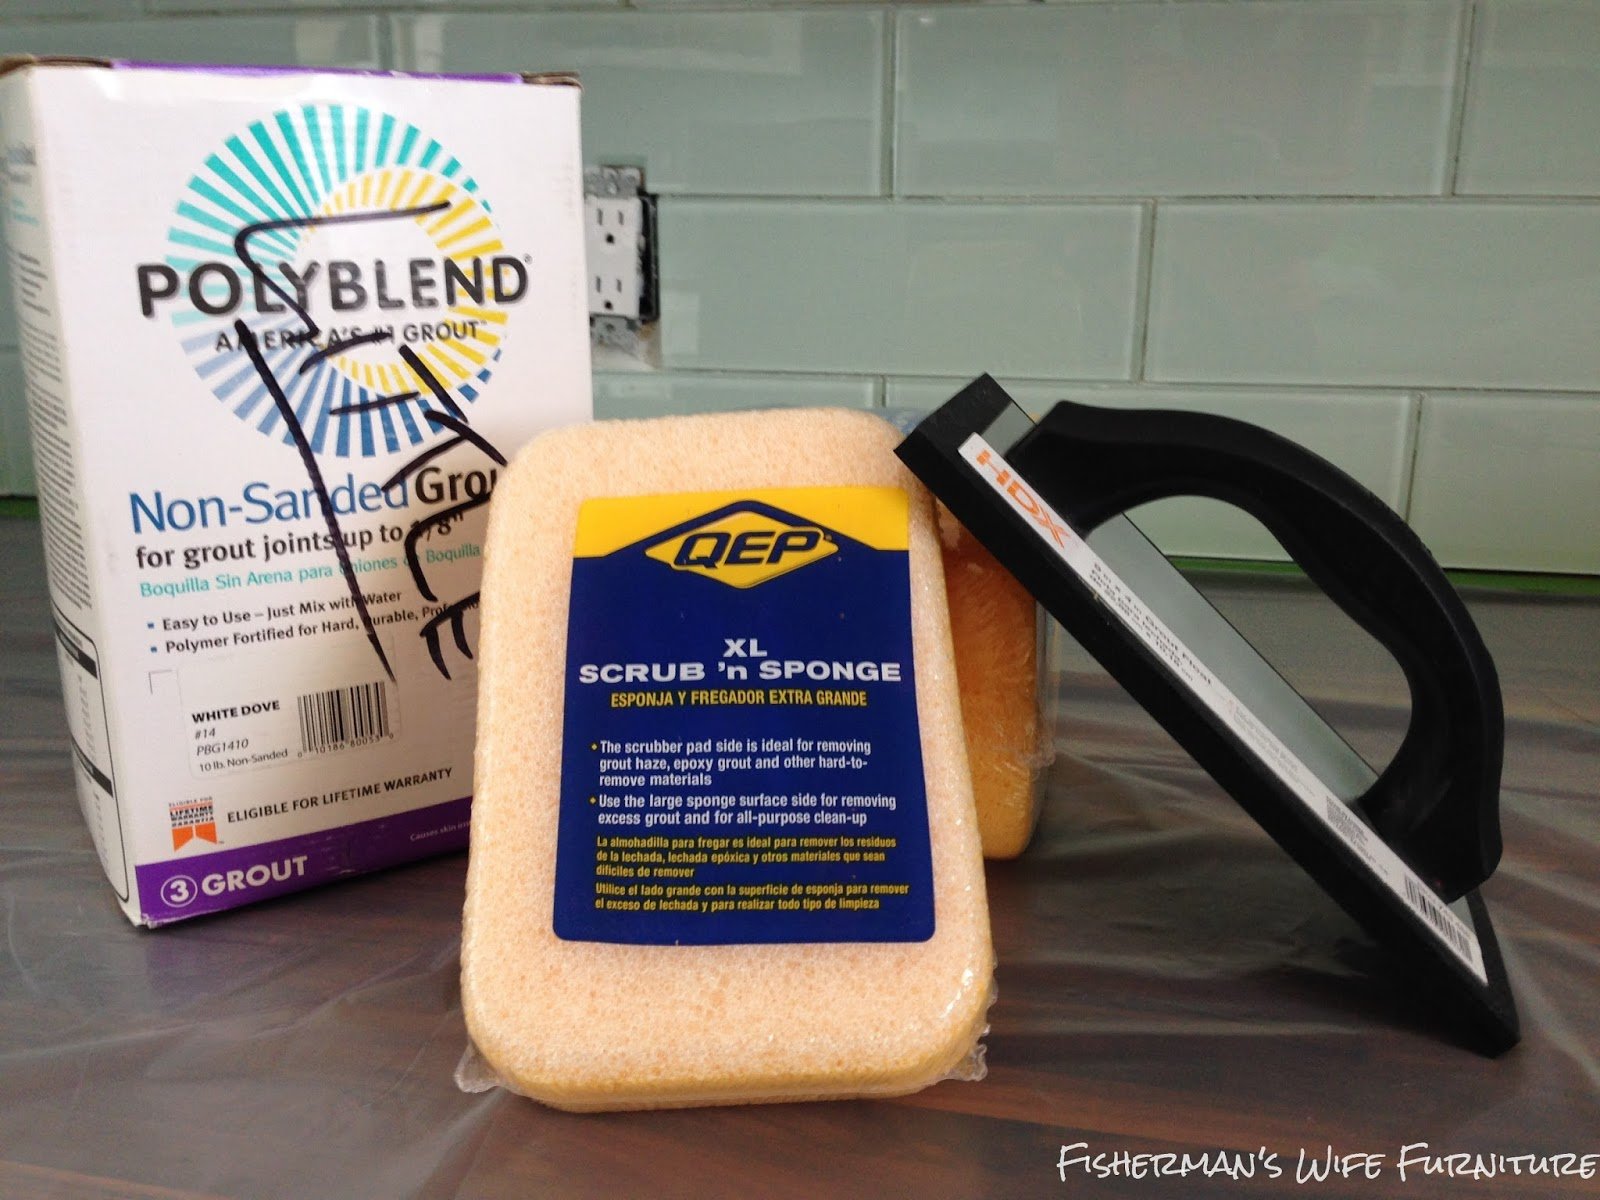
Backsplash
- Tile, thinset, grout all purchased at The Flooring & Design Center in Beaumont, TX
- Tile is manufactured by SOHO Studio and must be purchased through a distributer
- 4×12 polished glass in Natural White
Countertops
- Countertops – American Walnut – Lumber Liquidators
- Waterlox – Waterlox.com or Amazon
Flooring
- Installed by Floors for Living – Friendswood, TX
- Luxury Vinyl Plank – MetroFlor Konecto Engage in Woodland Oak

Amazing work, Kaylor! Way to rock what you’ve got and create a beautiful style of your own!
Head on over to Fisherman’s Wife Furniture to keep up with everything that Kaylor is doing!
UPDATE: See more photos of Kaylor’s kitchen here.
Lorene has been behind the scenes here at Remodelaholic for more than a decade! She believes that planning projects and actually completing them are two different hobbies, but that doesn't stop her from planning at least a dozen projects at any given time. She spends her free time creating memories with her husband and 5 kids, traveling as far as she can afford, and partaking of books in any form available.


Wow, what a fabulous transformation. I love the new kitchen and thanks for all the fabulous details too. Hugs, marty
Really nice job on a budget. I think it looks wonderful!! Where on the Texas coast did you buy? We live right outside of Houston. We head to good ol’ Galveston quite often. 🙂
Thank you. We live in Bayou Vista.
Amazing!!!! I am in the middle of a budget DIY kitchen remodel, and I only hope mine comes out half as good as yours! Just found your blog, but I’ll be back!
Awesome job! I love it! The backsplash and trim along ceiling may be my favorite two things. (and maybe the lights).
-Trish
This kitchen is absolutely amazing! It looks great and I love that it was all done on a budget! 🙂
~Sarah
Great job! I live in the Houston area too, so I appreciate you providing sources. Would you mind sharing how much it cost to have the hardware plated? I honestly have never thought of that and have some furniture that I cannot find updated hardware to fit. We lived without a kitchen for two months while we totally gutted it and rebuilt. I didn’t mind the cooking but doing dishes in the tub was a particular low point.
The hardware was a splurge. It was about $15 a hinge…x 50 hinges. I had to sit down when we got the quote and started repeating the word “no”. But my husband reasoned with me and I gave in. The time we saved not having to fill all the previous holes then measuring for new ones made it worth it. If we did fill the old and drill new, we still weren’t guarenteed perfect alignment so using the old hardware was the best option. I don’t regret the splurge at all.
Kaylor, it all looks fabulous! Best wishes to you and your husband in your new home!
Thanks, Jane! I hope you are doing well and everything is going great at the shop!
Awesome job on the kitchen makeover! We are currently getting bids on a kitchen/laundry room renovation ourselves. We will do the painting and finishing and what we can to cut costs. I typically use BM Satin Impervo oil paint in the White Dove on all my trim but last year used a BM Advance which is a waterborne alkyd on home office built-ins/desks/bookcases in the White Dove and I love how it covered (so far no knicks or chips in a fairly high traffic area!) I would LOVE to use the waterborne on my kitchen cabinets as well but was concerned about the durability in a kitchen area. I know its only been a few months, but do you see any concerns with the durability at this point? I was kind of thinking that even if it did wear that touching up a waterborne alkyd every few years would be easier than the oil touchup because when it chips it leaves a fairly deep uneven place even when touched up. Again, great job!
Hi Penny. It has been about 4 months and the cabinets are doing great. This was my first time to use BM Waterbone Impervo and I love it. I cook almost every meal so our kitchen is used a lot and we spend a lot of time in that area. So far everything is still looking good…even the cabinet hiding the trash can. Let me know if you have anymore questions?
Thank you for your response. Glad to hear that it’s holding up well!
Hi! Love the step by step for the fridge built in, can I ask how you ventilated it though? I dont see any openings in the back or side?
Hi Jace. We did not make a vent. I did some research and we decided not to. The fridge is not pushed all the way to the wall and there is a 1″ gap around the sides and top, and a 2″ gap underneath. I have pulled it out and checked to see how hot it gets and it wasn’t hot at all. So far, not creating vent hasn’t been a problem.
Thanks for reading.
Great work! Beautiful and you did a great job of telling the story.
For the fridge surround – are the walls 3/4″ plywood?
Thanks,
James
Yes, James. It is 3/4 plywood. If I could go back and do something different, I would buy a higher grade of plywood. Our’s had several knots and blemishes that I had to fill and fix which was time consuming.
Thanks for reading!
WOW!! Simply gorgeous. Everything is fabulous, but the tile is amazing!! Love it.
LOVE! keep trying to talk my husband into doing this but he says with white it will look dirty all the time!! Any fixes or comments? Is it true will look dirty more often than not? Our cabinets are similar color to your before-
Hi, Cathy. I get this question a lot and it is a common concern. 🙂 I don’t think my cabinets have ever looked dirty. Here is my take on light cabinets. All cabinets get dirty. ALL. No matter of color. Will light colored cabinets hide it as well? No, but they aren’t dirtier than any other color. No matter what color you go with, cabinet fronts need to be cleaned, often. Just because you can’t see the dirt, doesn’t mean its not there. I wipe my cabinets with a soap and water wash cloth or a Lysol wipe regularly but I did that even when I had darker cabinets so I knew I could handle white. Good luck making a decision.
Looks awesome!! Love the crispness of the white cabinets against the walnut countertops! I’m ready for you to come to my house now! lol
You did a fantastic job! I absolutely love every detail. The only question I have is why you chose not to use a farm sink. I love the way the sink looks the way it is, with the counter wrapping around it. But, I can picture a farm sink and think it would also look amazing. Was it because you didn’t want to cut the counter (or couldn’t)? Was it cost? Or, is it simply preference? I was just curious. The glass knobs, subway tile, chrome hinges, that gorgeous counter, paint color, appliances……all of it is just stunning!
Hi, Lisa. Thanks for the compliments. To be honest, a farmhouse/apron front sink was never an option I considered for this house. I went with a more classic and traditional style. Farmhouse/apron sinks are pretty but that is not the look I wanted in my waterfront cottage kitchen. Also, yes, cutting into the cabinets complicated things. I wanted a super deep sink, mine is 11″ deep, and I couldn’t do that with a farmhouse sink and our cabinet design. If this was our country cottage, I would have considered an apron front. 🙂
Hi!
I absolutely love everything you’ve done; I do, however, have one question, and please excuse me if it’s too personal. How much did you end up spending on the butch block counter top? We’re looking into it, and it tends to run on the high end. I’m tempted to splurge because I love it so much. It so much warmer and more inviting than granite, quartz, or plain-ol’ laminate.
Thanks so much! Again, great job.
Sam
Hi, Sam.
The butcher block and the Waterlox products to seal it cost around $1400. There are some butcher block suppliers that are much more expensive. We ordered our’s from Lumber Liquidators. Ikea also has more affordable butcher block but they have fewer options on wood type and length. I hope that helps.
Thanks!
Thanks for the info, Kaylor!
what a gorgeous kitchen! well thought out, practical and stunning all at the same time.
I’m so glad I ran into your blog — I love everything you did.
First — we have the very same problem with kitchen cabinet hinges — cannot find anything that
matches the original ones and I know they are from the 70’s. I ended up painting them — and
you know the paint has worn off where they open and close… Now 10 plus years later we
are needing to replace some damaged granite counters and want to change the kitchen sink to a single
basin such as yours. With those changes — I am seriously thinking of painting our old
oak cabinets white and have our kitchen cabinet hinges chromed like yours. Thanks
for the info on this.
I have a question on your wood counters… do you actually chop food directly on the wood?
And, if so — does it damage it? Can you post a photo of what your counters look like today?
My kitchen gets heavy use — so I’m wondering about upkeep, etc.
Thank you.
Mary
Hi Mary. Getting your original hinges chromed is not cheap but worth it because of the time you save not having to fill and sand old ones and drilling new ones. Plus you know they fit and work well. No, I do not use my counter for cutting. Here is a link to my DIY Butcher Block tutorial. https://www.brianandkaylor.com/diy-butcher-block-countertops/ At the bottom I have a 2 year update on how our countertops are doing and I have a link to a review Remodelaholic did with several bloggers that have butcher block. There is lots of info in both posts. Good Luck!
Thanks for the info, Kaylor!
Do you find that the cabinets painted white have held up well with minimal staining to the paint? This redesign is gorgeous and has definitely given me tons of inspiration for my own remodel!
Love your cabinets. What brand of paint sprayer did you use? And did you have to thin the paint? I am thinking of spraying my kitchen cabinets so any advice would be helpful. thanks
The best tutorial on a kitchen remodel ever, seriously. Your detailed instructions, photos and the products you used are fantastic. Just beautiful. I have some questions. I once used Zinser primer and it was a disaster it dried up to quick. Did you used a thinner? Also did you used high gloss for the walls and cabinets? You used an under mount sink how did that go? It seems you and your husband are professional remodelers how difficult is a project like this for an average home DIY? Di you do all of your home in vinyl flooring? Finally did you used a sprayer to paint walls and cabinets and if so what type? Hey thanks a million. I have similar fur boxes over our cabinets and it looks so ugly, you made yours look so beautiful.
Hi Ramon. Thank you for your kind words. I used the Zinsser Shelac and it is already thin enough to be sprayed so no thinner was required. All of our paint finishes are in satin. Both satin and eggshell have a semi-matte look that are still easy to clean. I love high gloss pieces but it wouldn’t work well in our casual home. The undermount sink has been great. I hate having to clean around drop ins so an undermount was a must for us. Installation wasn’t bad at all and after 3 years it is still holding up great. As for us being professional remodelers…thank you. We are just a couple trying to make an out dated house our beautiful home on a budget. This house is by far our hardest home makeover. We have done a few small projects before but most things in this home were new to us. There was tons of research, watching YouTube videos and reading blog posts by others that had done this before us. It was scary and hard at times but anyone can do it. Just prepare yourself and have faith! Yes, all of our home has the vinyl flooring. We updated our master bathroom last year and extended the flooring into there ourselves and it will also be put in the guest bath when we do that makeover later this year. We love it and highly recommend it to everyone. I do use a sprayer for most things. Walls are sometimes easier to brush instead of spray because there is less taping and covering things for overspray. I will say the sprayer makes painting a ceiling easier. Good luck on your update. Sorry it took so long to respond. 🙂