Ribbon Wall Treatment
Submitted by design megillah
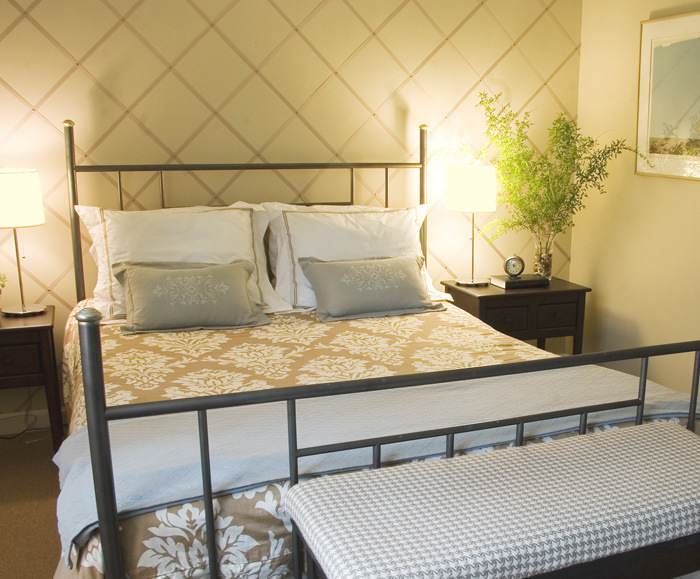
Since the bed in a master bedroom has the leading role, the wall behind that bed is the supporting actor.
Here is a super easy, inexpensive way to enhance that wall using nothing but grosgrain ribbon and thumbtacks. I must admit it took a while, but because there’s no mess or chemical smell, it can be done over a period of days while still sleeping in the room.
The first step was to draw light pencil lines to form the pattern. I used a level and ruler to do this. Next, I started from the top of the wall and ran the ribbon down to the floor, using a bit of double backed tape to hold things in place before I was able to criscross and insert a thumbtack. I did a diamond pattern but squares would also work.

I didn’t want my thumbtacks the silver color they came in, so I pushed them into a piece of styrofoam and spraypainted them in a bronze color.
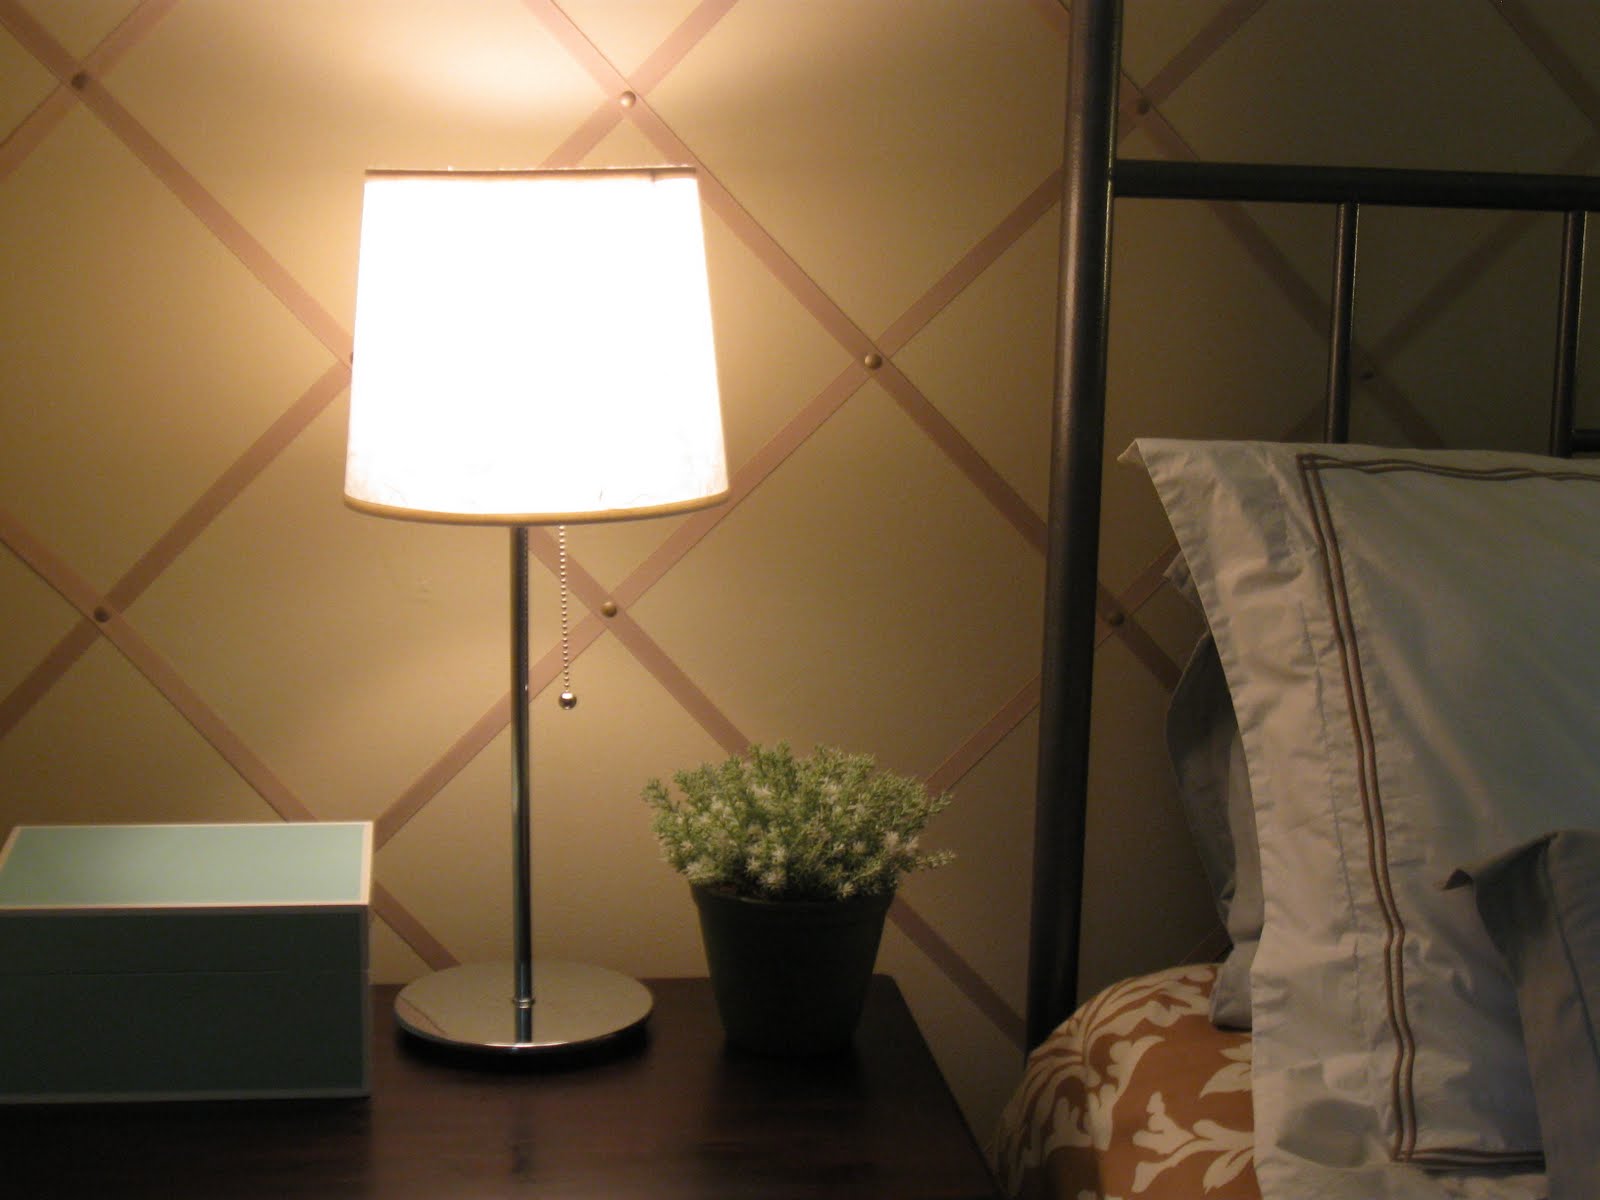
The paint color is Cappuccino from Restoration Hardware.
Cassity Kmetzsch started Remodelaholic after graduating from Utah State University with a degree in Interior Design. Remodelaholic is the place to share her love for knocking out walls, and building everything back up again to not only add function but beauty to her home. Together with her husband Justin, they have remodeled 6 homes and are working on a seventh. She is a mother of four amazing girls. Making a house a home is her favorite hobby.


LOVE this!!! So pretty and what a unique way to make a focal point out of that wall but without being a distraction from the bed. Plus I love how the diamond pattern echoes the look of the duvet. Gorgeous!
I think this is AMAZING! Great job! (and I’m in love with the duvet).
What an awesome idea… absolutely love it!!!! I’ve “pinned” this on Pinterest.
What an awesome idea… absolutely love it!!!! I’ve “pinned” this on Pinterest.
I just shouted “yes!” out loud! The perfect solution for me, a renter. I can out holes in the walls, but no paint and it drives me batty! Thank you so, so much for sharing!
I love how the diamond pattern mimicks the pattern on the spread. Looks easy to do – great idea about the double sided tape!
wow what a great idea! i bet this was time consuming but not as tedious as a stensil what a great idea!
I really, really love it! My walls are super textured (house is 120 years old, and the thick, chunky texture covers all the cracks from more than a century of settling, I think), and I’m excited because this is something that could work even on textured walls!
Such soothing neutrals and a creative wall treatment!!!
This is beautiful! I’m linking it to my Ribbon Crafts article at Squidoo. Thanks! https://www.squidoo.com/ribbon-crafts
Very good idea! I think it’s a nice counterpoint to all the stenciling I’ve been seeing everywhere. Also a good idea for renters (obviously you’d have to substitute the tacks for glue or tape).
Great idea! Looks beautiful.
Looks gorgeous! But there’s no way my kids (or, lets face it, my husband) would leave it alone 😉
That is so funny(the husband part)! But very true!
I really like this idea. Great for apartment dwellers!
That is a great point Stephanie!
Love the ribbon wall treatment in the bedroom. I would really like to know a bit more about the project so I can get an idea of amount of supplies. Question 1 is….what was the size of the bedroom wall? 2…How many yards of ribbon did it take? 3…..How large are the squares? And last how do you know where to start the ribbon? I just love this idea for my bedroom. Thanks.