How to Install a Shiplap Wall + Rustic Home Office Makeover
Not everyone has or needs a home office, but in this day and age of telecommuting, working from home, and the full suite of technology that every family has, a home office is becoming more and more necessary. But even if you’re working hard, your home office doesn’t need to look like workhorse room — in fact, it’s typically more productive to have a space that you love to work in! It made a huge difference when we organized our office space, and our guest today took her office from “fine” to chic and rustic with a DIY shiplap wall:


 |
 |
 |
Here’s Jill with all the details of her beautiful rustic office!

DIY Shiplap Wall and Rustic Home Office Makeover
by Jill of Jillify It!
Hi everyone! My name is Jill and I blog over at Jillify It! I’m married to my high-school sweetheart and have two teenage daughters. I am passionate about all things decor, DIY and design. DIYing with my husband is hands down one of my favorite things to do! I am currently the writer for the Room Renovations column of Everything Home Magazine and have a lot of fun with my @jillykay instagram feed.

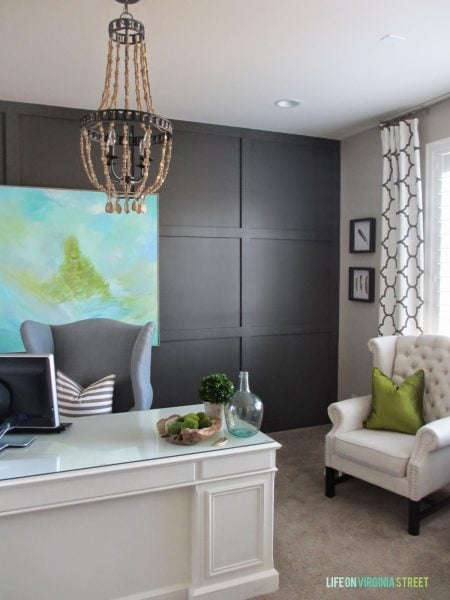
I am so excited that I get to share my home office project here! My office wasn’t bad before (pictured above), but I had a vision in my head that I wanted to come to life. We all have rooms and visions like this, right? I kept the same paint color, Sherwin Williams Mindful Gray, on the remaining walls and put up shiplap on the focal wall behind my desk.

My amazing and very handy hubby put up the shiplap. I am a very awesome woodworking assistant, though! We used maple plywood underlayment from Lowes. You can use many types and cuts of wood, but we wanted to see how this worked! They were nice enough to cut it into 5 and a half inch strips for us. That saved us a TON of work! We started with a thin piece of molding at the top since the ceilings in this room are angled. We marked the studs in the wall and penciled in lines so we would know where to put the nails. We used very random placement with the longer boards and filled in with the shorter boards.
A good old nickel was used as a spacer. Can’t get any fancier than that… That’s how we roll around here!

Sherwin Williams Antique White was used for the shiplap wall. I went with this color because it is the same color as the trim in the rest of the house. Deciding to leave the nail holes at the last minute was the best decision ever! I LOVE the rustic look of the holes.

I am so thrilled with how this project turned out! We put the shiplap up in a day, start to finish and it completely changed the room. This may be my new favorite room in our home!
Something was still missing when we finished the shiplap wall and brought the new furniture in. It was the floors. The room definitely needed new hardwood floors! After looking for quite some time, we finally found the perfect floors for our home. We went with a handscraped hickory with a dark stain. My husband installed the hardwood flooring and it really transformed the entire room. I just thought I loved this room. I REALLY love this room now!


The wall to the left of the office entrance holds a massive bookcase storage unit. Once a very dark brown stained wood, and now a bright white beauty. I grabbed my trusty paintbrush and a few quarts of Annie Sloan Chalk Paint in the color Pure White and went to work! Love how clean and bright it is now. This was a huge painting project, but all the hard work paid off in the end.

The simple shelves on each side of the the faux stag mount make the wall. I fell in love with them when I saw them and knew they would be perfect addition to the shiplap wall.


From start to finish, this was a fun project to work on with my husband! The total cost for the shiplap wall was under $200, including paint. Plans are in the works for more shiplap to be installed in other areas of our home! Thanks for following along for the details of this project and look for more DIY projects at Jillify It!

———————————–
Jill, thank you so much for sharing!! Love the character you’ve given your office.
Remodelaholics, hop over to Jillify It or @jillykay on Instagram to see more from Jill, like her amazing outdoor fireplace!

Lorene has been behind the scenes here at Remodelaholic for more than a decade! She believes that planning projects and actually completing them are two different hobbies, but that doesn't stop her from planning at least a dozen projects at any given time. She spends her free time creating memories with her husband and 5 kids, traveling as far as she can afford, and partaking of books in any form available.


Thank you so much for sharing my home office on your amazing site! I love working in there every day!
Thanks so much for sharing, Jill!! We love it!!
Hi Jill! This room is beautiful and I LOVE the floors. Can you be more specific on the brand and color name of the hickory floors? Im in the process of building a house and they are exactly what Ive looked for! Thank you, Tracy
Will you share the brand and name of the wood flooring? I love it!
So in love with this office Jill!! It’s such a great space and somewhere I wouldn’t mind working everyday 🙂
I agree!
Thank you, Daraka!
I follow Jill’s feed and she always has amazing and beautiful posts and even if I don’t have Brandon as my handy helper, she makes everything seem “doable”. Thanks for the ideas on how to shiplap a wall! Love it!!
Thank you so much for your sweet words! Brandon is a pretty amazing guy!
Office turned out great Jill! Love the hardwood floors and shiplap!
Thank you so much, Shawn!
Beautiful! Obviously there isn’t just one talented person here! You and Brandon make such a great team. Of course we knew that years ago! Love you both and I’m so very proud of you!
Aww, thank you so much! We do make a pretty great team! Love you!
This is absolutely beautiful!
Thank you so much! I really love working in there each day!
Love the new office. What brand of flooring did u use?
Thank you! We used handscraped hickory from Regal Hardwoods!
Jill… I love the transformation of your office! Lovely place to work. So impressed with your and Brandon’s skills.
Thank you so much, Vicki!
The interior is very classy! I like it!
Can you tell me the thickness of the maple underlayment?? Please
Looks beautiful! BUT just to clarify, that is not shiplap. Shiplap overlaps.
But I still love it!
Looks great! Where did you find the shelf brackets? They are exactly what I’ve been looking for!
This looks great! I’m working on a similar project now, and I would love to know what brand the flooring is?
Hi! It looks beautiful!!! Can you tell me which finish did you use for the paint? Was it matte finish?
Thanks!
Hi Jill! What a beautiful office! You may have even inspired me to use chalkpaint on my current cabinet ???? We are just getting ready to shiplap our powder room wall. Thank you for sharing how you put up your shiplap. Did you use 1/2″ or 3/4″ underlayment. Is it necessary to paint the wall under the shiplap the same color as the shiplap? Thanks for your help!
Pleas please tell me where you got this deer head. I have been looking all over and this one is a gem.
I love the ship lap wall. What kind of wood did you use for this?
Hello,
Would you share the floor brand ? And name ? Its so beautiful!
Thank you
Where did you get your desk and chair?
Do you think I could use some liind of insulation under the shiplap? I have an old house and thought it might insulate the wall a bit..