How To Create a Mood Board for Your Space
Hello everyone! I’m Sarah from Just The Bees Knees here to share another inspiring mood board with you! Last month I talked about my latest color crush and walked you through the process of creating a color scheme from an inspiring image and how to translate that into your a color scheme for your home. Today, I’m going to be sharing another great behind the scenes look of how designers go through the process of putting together a mood board, and talk about why its so important to do before designing your space! But instead of just creating a fictional mood board, I thought I would walk you through my thought process when creating a mood board for a real space, and that space just happens to be… my bedroom.

How to Create a Mood Board
My bedroom has been on my list of spaces to decorate since we moved into our current home, which was about *ahem* 6 years ago. Shameful, I know. It was just one of those rooms that kept being put on the back burner , and I just lacked direction on what to do with the space.
Creating a mood board is SUCH a great tool for those of you that feel the same way and have no idea where to start. Designers have been using this same process for years, gathering samples and putting them together for presentation to the client. Now with the evolution of the digital age, this tool is available to everyone, and is such a great tool for those who can’t always afford to hire a designer, or want to tackle the project on their own.
Creating a mood board will give you a better sense of how the finished space will look, as well as give you a clear direction of what pieces you may need to buy to create a well balanced space. It’s also a great time saver as you can try the pieces out in your virtual room without committing to buying them first! Can I get an Amen for that?!
Step 1: What stays, what goes
One of the first steps in redecorating any room is to figure out what stays, what goes, and what you need to buy. Then make a list! For my bedroom, I have a dark reddish brown maple craftsman style bedroom set we had custom made about 10 years ago that I’m still in love with, so all the pieces are staying. I also bought a duvet and shams from Pottery Barn in navy & white that serves as my jumping point for this space. What I need to buy is lamps, curtains, a chair, a bench or stools, possibly a rug, and some accessories. You can actually take a tour of my entire bedroom and see all the before pics here!
Step 2: Research
The next thing to do is research! Find images that inspire you. Surf Pinterest and your favorite blogs for photographs that speak to you, then compile them together and create a color scheme (like we talked about last week!) I knew I wanted Navy to be the main color in my room, so I typed in Navy Bedroom in my search bar on Pinterest, and these are some of the images I found that inspired me. (sources linked below)

I love the deep navy walls paired with crisp white trim and warm woods in these spaces.
 Navy is perfectly paired with warm golds in this photo.
Here you see the navy and golds paired beautifully with this artfully displayed bookcase. Now I know for sure I must add touches of gold and brass to my space!
 This teen boys bedroom by the Hunted Interior is the perfect balance of dark walls, warm woods and soft texture. Even though I’m sharing my room with my husband and I have to keep him happy too, this space is too masculine for our bedroom. However, I do love the cozy warm feeling it evokes. A few extra feminine touches would soften it up!
 I definitely want to add a cozy little reading nook to our bedroom, and this little corner is perfection!
image sources: 1 / 2 / 3 / 4 / 5 / 6
Now that we have our list of wants and must haves, plus a pile of inspirational photos, lets get to work on creating our mood board!
Step 3: Making the Mood Board
For e-design, I tend to create my client mood boards in Photoshop, but Olioboard is a fabulous tool that everyone can use, and its super simple! I’m not going to show you a tutorial on how to use the features, (its seriously so easy its almost self explanatory) but I am going to show you how to use it to build a mood board by walking you through my thought process on how I make choices, both for myself and when working with clients.
First thing I did was add in the items that are for certain going to be used in this space. That would be images of the furniture, bedding and lamps that I plan on buying. You can either upload images of items you have that are not in the Olioboard data base like I did for the bedding and the lamps, or you can search for items with a similar quality. This isn’t my exact furniture, but it is very similar in color and style, so I chose it for reference purposes.

Now its time to start building your room! The fun part! I know I want a large mirror to hang above the bed, so I browsed through the mirrors and pulled a few I liked into my mood board.

Here’s 3 different choices that caught my eye. Although I love them all, I like the simple round captains mirror the best against the boxiness of the furniture, so I kept that one and deleted the rest. I added curtains and nightstands, then decided I would like to try a bench or pouf at the foot of my bed, so I repeated the process by pulling in a few options for those.

Although I love the natural texture of the jute wrapped bench, I can see that it’s too matchy-matchy for my bedroom. I narrow it down to the striped bench and the small x-bench, then try them out for size! Let’s compare the two.

Although I was really leaning towards the striped bench, after I added in a few more elements I realized I liked how the 2 x-benches broke up the linear feel of the furniture. Lets see how it looks if I add an over dyed rug to the space.

Love it! We’re getting there! You can even add painted walls and flooring to your space to see how it all ties together.

I’m even more convinced I want navy walls now! For presentation purposes and to keep things looking neat and clean, I made the painted wall a bit smaller, then sat back and analyzed what the room was missing. I felt it needed a bit more texture and a touch of the gold sparkle I loved so much in the inspirational photos, so I added some woven baskets, gold curtain rods and frames.
This post contains some affiliate links for your convenience. Click here to read our full disclosure policy.

Scroll below for the mood board sources, if items become out of stock we will try to replace it with similar items.

And here’s the finished mood board! Now I may not purchase exactly everything as is on this board, but it gives me direction. By mixing the elements that I knew I wanted with pieces from the Olioboard database, I have a better idea of what to look for when shopping, and what fabrics and patterns coordinate best in the space. For example, these x-benches might be way out of my price range, but now I can surf the web, shop at Home Goods or browse Craigslist with a more defined idea of which pieces will work and which ones won’t. Once you finished your mood board, I highly recommend save it as an image, then you can print it out, or create a pin board for your space and add it to that, along with your inspirational images and links to pieces you find online. Then as long as you have your phone with you, you will have your mood board with you as well!
I really hope this helps inspire you to create a mood board for your next decorating project! Thanks again to Cassity and the Remodelaholic team for having me today! If you want some more mood board inspiration, hop over to my gallery for some great examples, or checkout my favorites below.
See ya next month!
xo Sarah


More home decorating tips:
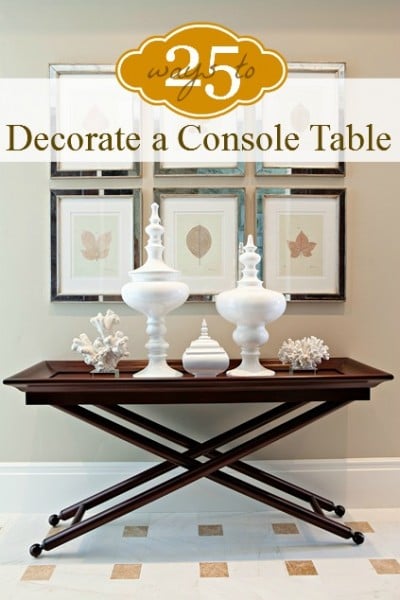
How to decorate a console table: 25 ideas


Thank you for this–it’s always something I’ve wanted to do. I’m curious, does Olioboard have some feature for keeping size proportional? Or is it mostly eyeballing? For instance with the mirrors in your tutorial, are the dimensions all the same? Or do you need to keep those things in mind when picking images before starting?
Unfortunatley, Oliobaords images are not to scale, therefore it would be more of an eyeballing thing! The mood board would definitely be more for guidance in what pieces to look for. For instance, if you really love the look of the rounded mirrors, you would then figure out what size you would need depending on where you would put them in your space, then use that as a guideline when shopping or choosing items for your mood board. Hope that helps!!
Love this tool. I usually use photoshop, but this tool looks much easier and cleaner. Thanks for the tutorial
This is exactly what I needed! Having no design experience, I’ve always wondered how people pull off such beautifully coordinated rooms. I knew mood boards played a part but had no idea where to start with making one. I’m so excited to have found this incredibly helpful post!
Oh my goodness! I love you for sharing this tool! No more hours spent in photoshop = awesome!