High Style, Low Cost Laundry Room Makeover
Raise your hand if your laundry room is your favorite spot in your house!
Hmm… not a whole lot of hands out there… But, that’s what we’re here for, to help you make even the laundry room beautiful, on a budget! Our guest today has a fabulous low-cost laundry room makeover to share with you. Less than $100 to create this beauty from a basic builder-grade laundry room:


And now, here’s the lovely and talented Tasha to show you how she made over her laundry room in just a few days, by herself, for under $100.
This post contains some affiliate links for your convenience. Click here to read our full disclosure policy.
High Style, Low Cost Laundry Room Makeover
by Tasha of Designer Trapped in a Lawyer’s Body
Hello fellow Remodelaholics! I am thrilled to be here and in good company with readers who love DIY remodels as much as I do. I still cannot quite believe that I have the honor of guest posting on one of my favorite blogs! I have found so much inspiration from Cassity. Today, I hope you may draw a little inspiration from me. 
I am Tasha, from Designer Trapped in a Lawyer’s Body, a lifestyle blog that focuses on thrifty DIY renovations and interior decorating projects. You may have seen how I transformed basic Ikea furniture into custom furniture, my DIY Washi Tape Wall Decals or my Tasteful Princess Room Reveal {for my 3-year-old twin daughters} on Pinterest. As the name of my blog gives away, I am a lawyer by day, and I love what I do. But what feeds my soul is creativity and nothing gets my creative juices flowing more than a good remodel, especially when I have to stick to a budget. My high style, low cost DIY laundry room remodel is a perfect example of that. Check it out. 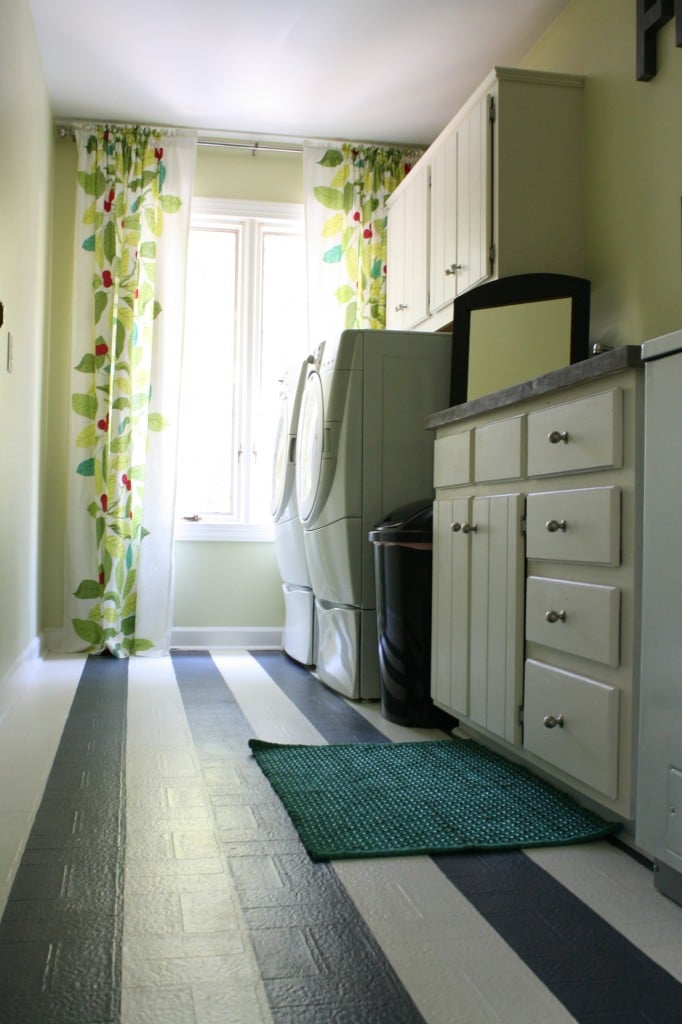
My husband and I purchased a tragically outdated home just over a year ago. EVERY SINGLE ROOM needs to be renovated, which means we really need to be budget conscious along the way. One such room was our tragic laundry room.

YUCK. Can you tell that we took no pride in this room whatsoever?! I mean, the blinds were crooked. We never bothered to straighten them. We just got in and out of the room as quickly as possible… and shut the door behind us.
When I started itching to renovate our laundry room, my husband did not share my enthusiasm. He was reasonably satisfied that we could just keep the door shut and ignore it until we had a bit more money to renovate it down the road. But, I convinced him I could make it fabulous without spending much money. He was skeptical.
I started by “shopping” in my own house. The jumping off point for the room was the curtains, which we had previously used in our dining room, but that had been stored in a chest for way too long. I LOVE the curtains, which I purchased at Ikea. The curtains provided my color palate. Fortunately, I had almost a whole gallon of lovely light green paint on hand that worked perfectly with the curtains.
One Saturday, while my husband was working {he’s a firefighter}, I got busy. I knew if I could get most of the work done before he got home, he would be totally blown away. Bear in mind I was home alone with my sweet twin girls that day as you read this post 🙂 I mention that only as proof that even busy, working parents can accomplish this type of renovation!
The Renovation Timeline
Day 1
Painting the Walls and Cabinets
I started out the morning by removing all the cabinet doors and hardware and priming the cabinets with water based Kilz primer that I already had on hand. I also removed the unfortunate blinds 🙂 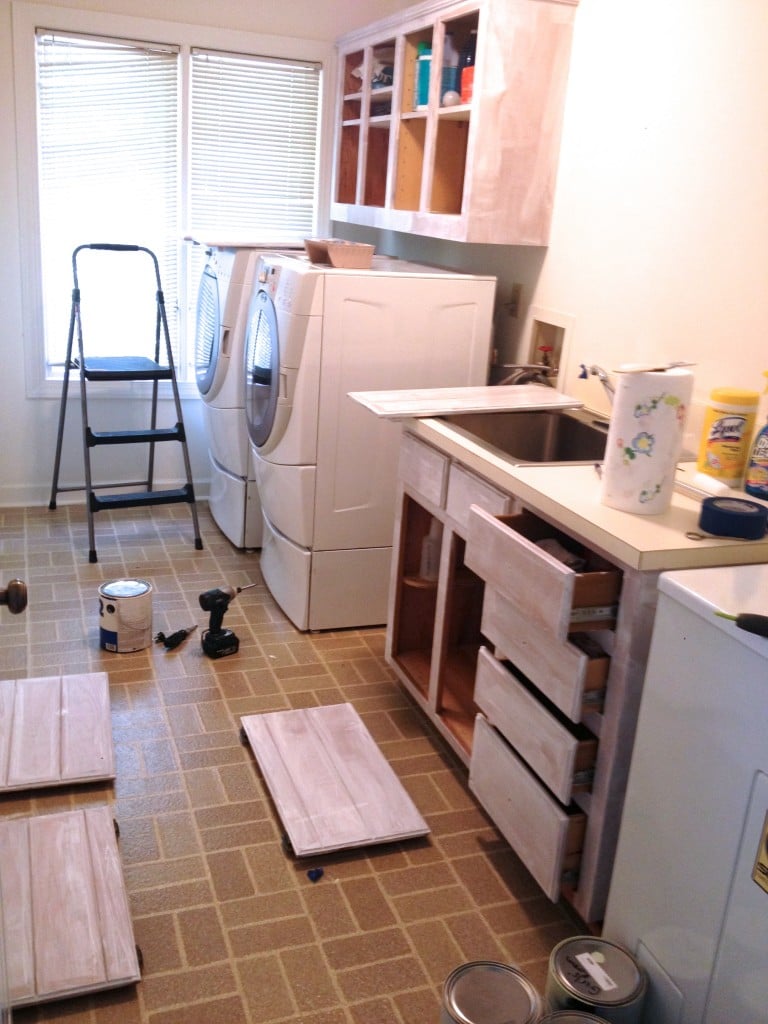 The primer dried very quickly, so later that morning, I painted the cabinets. I used an antique white paint that was leftover from some other project, so my out of pocket cost for paint was $0. {Note that I did not take care to keep paint off the floor, since I would be painting it later}.
  That afternoon when I put my girls down for their nap, I painted the walls. I used the leftover paint from their nursery. It is a lovely light green color called Soothing Aloe by Valspar. Again, $0 out of pocket. I was off to a good start!
  After painting the walls, I had time to put another coat of paint on all the cabinets and doors while my girls were still napping. I am a FAST painter. It comes with years of practice 🙂
Painting the Floors
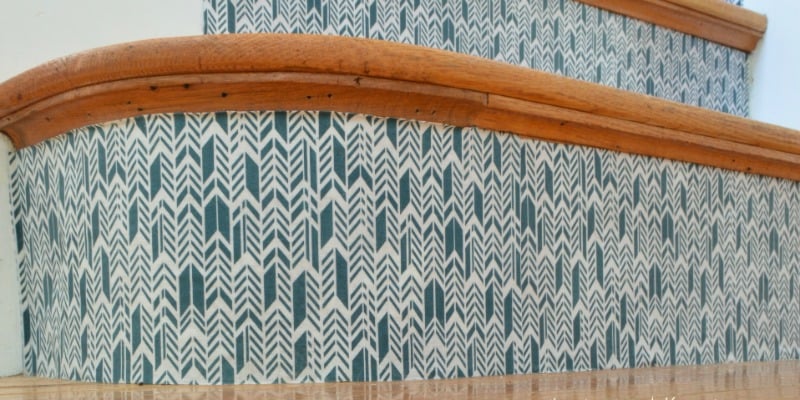
That night, after my girls went to bed, I began to tackle those UGLY linoleum floors. With paint. Yep, you can paint linoleum floors! I had seen the laundry room makeover by Kelly at A View Along the Way and fell in love with her painted linoleum floors, so I gave it a shot. Here’s how I did it:
1) Selected the pattern and colors to use- I opted for a thick striped pattern. Instead of going with start black and stark white, I wanted a softer look, so I used an antique white and charcoal grey. I purchased 1 quart of each color at Lowe’s, which was plenty and cost a total of $30. BE SURE to purchase porch floor paint if you want to paint your floors. It is durable and is intended for foot traffic.
2) Cleared and cleaned the floor area– I was lucky that our laundry room was large enough to scoot the washer and dryer in and out of position to clean and paint the floor underneath it. But, if you are not so lucky, you will have to move those bad boys somewhere else for a few days. After you clear the floor, you need to clean the floor. Make sure it is clear of dust and dirt. Some people recommend using TSP {a heavy duty cleaner}, but I did not have any on hand, so I used my normal floor cleaner {Mrs. Myer’s} and it worked just fine.
3) Primed the floor- Once again, I used the water based Kilz primer that I had on hand to prime the entire floor. I poured it directly on the floor and used a small paint roller to spread it. I only used one coat of primer and that worked just fine. It took about 10 minutes. I did it around 9pm that night and let it dry overnight. 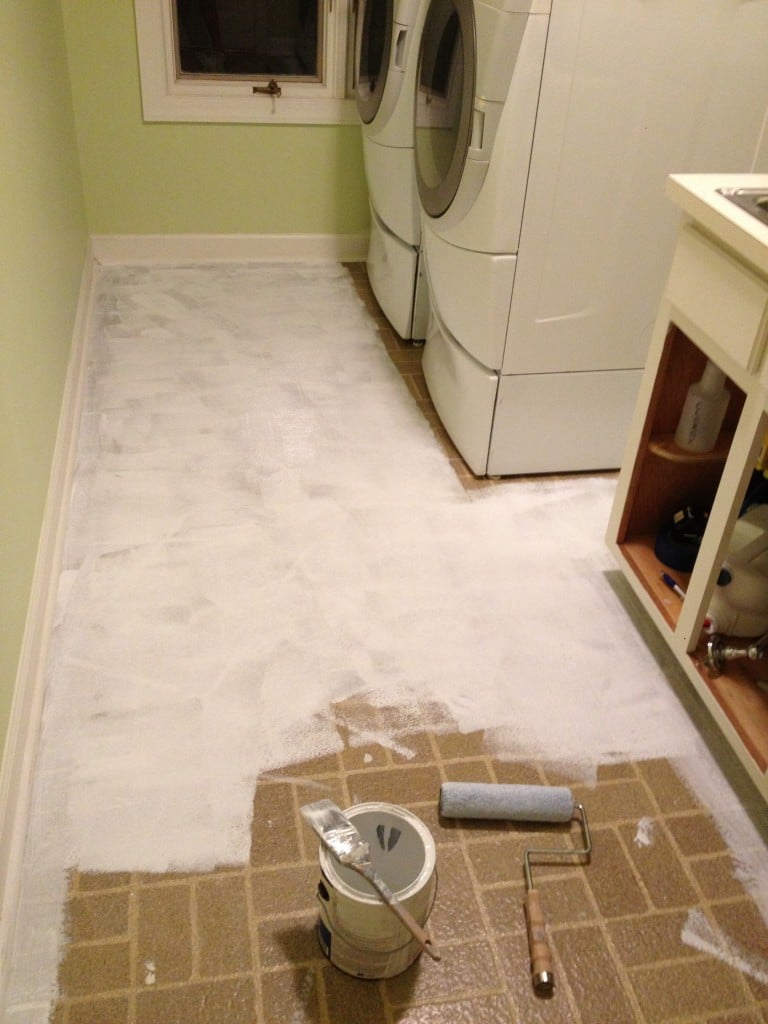
Day 2
I am not going to lie, I was TIRED the next day, but when my husband got home, he was pleasantly surprised with my progress, so I got a second wind. I forged forward with painting the floors:
4) Painted the floor stripes- THIS was the fun part. I began by painting the entire floor with the antique white color, which I considered my “base” color. I applied TWO coats of the base color. Painting a floor is MUCH faster and easier than painting walls, in my opinion. Each coat took no more than 10 minutes. Fortunately, this paint dries pretty quickly, but I did use a large box fan to speed the process along. After the first coat dried, I took advantage of the dry floor to hang the curtains and my husband rehung the cabinet doors and re-attached the hardware. Then, I put the second coat of the base color on the floor and let it dry overnight.
Day 3
After work and getting the girls to bed on Day 3, I taped off my stripes using regular blue painter’s tape. I used the existing brick pattern of the old floor to determine the width of my stripes, which eliminated the need to measure. Note that my floor had some definite texture to it, so I knew bleeding would happen, but I just rolled with it. I knew it would be an easy fix later. However, if you absolutely want to avoid bleeding, follow this step additional step: After taping your floors, add one more coat of your base color over the entire floor–paint OVER the tape. That will seal the crisp lines and prevent any bleeding. Trust me, it works on textured surfaces.
After I finished taping, I painted the stripes with my dark grey color. Again, I applied two coats of the grey color. 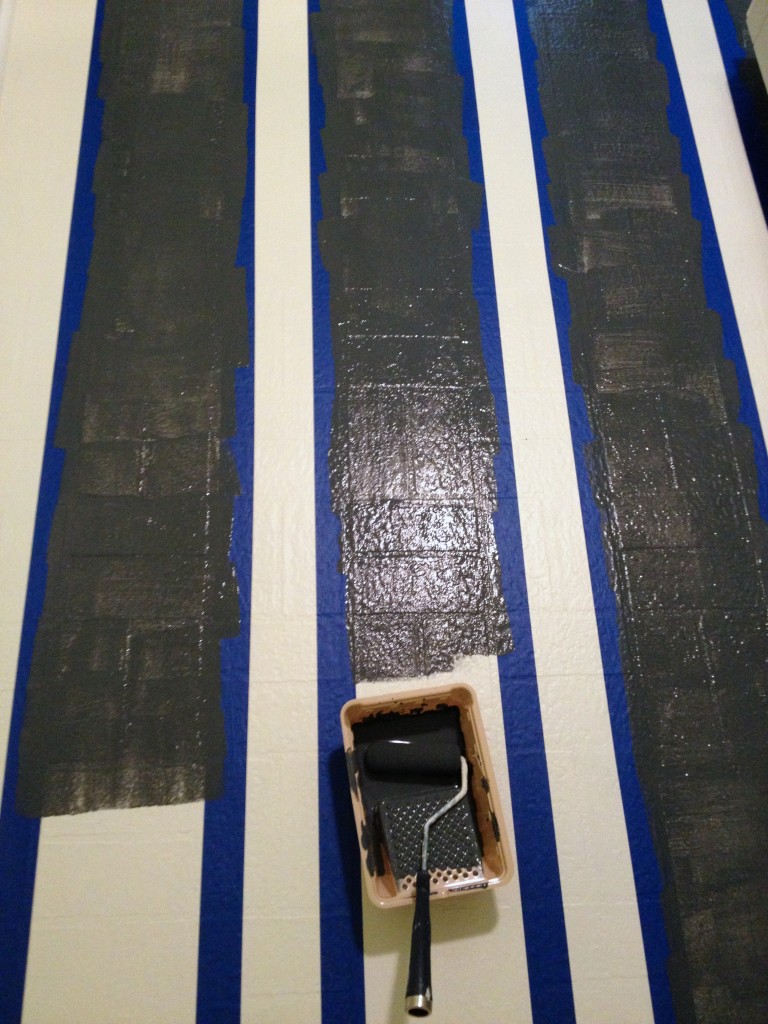 After my stripes were dry, I removed the tape. To fix the minor bleeding that had occurred, I grabbed an angled paint brush and use it to “cut in” along the stripes to make them nice and crisp. It sounds tedious, but this step took me less than 15 minutes.
I know painting the floor sounds like a lot of steps {and it is}, but each step takes no more than 10 to 20 minutes. All of the steps combined took me less than 2 hours {excluding drying time}. The end result is G.O.R.G.E.O.U.S! 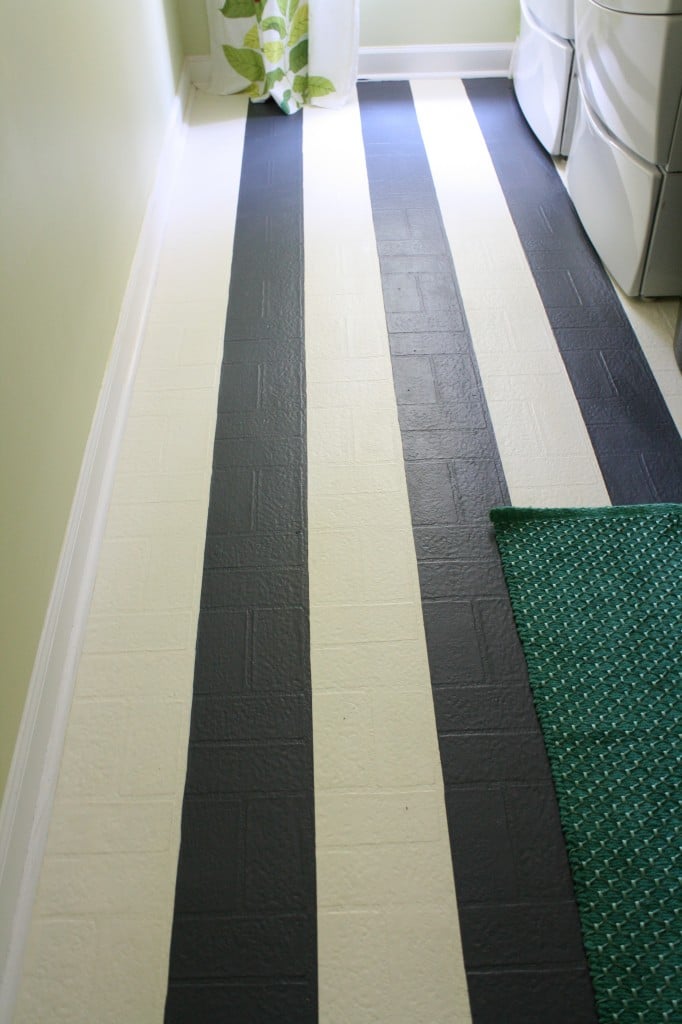 But I wasn’t done yet!
Days 4-7 {but only a 15 to 30 minutes per day!}
DIY Concrete Countertop
I created a beautiful DIY concrete countertop by covering the ugly laminate countertop in Ardex Feather Finish, which I also had left over from another project. This product is amazing and it is a totally doable DIY job! Following the directions on the bag, I mixed the concrete and applied one thin coat of the concrete with a wide, metal drywall knife every night for three nights, sanding lightly in between coats. Each coat took only 15 minutes or so. I let each coat dry overnight. After sanding the final coat, I applied a basic concrete sealer, that we also had leftover from another project. Since I had these products on hand, my out-of-pocket cost was $0. As a point of reference, a 10 pound bag of Ardex Feather Finish costs $15 to $20, depending on where you purchase it. This project required about 1/10 of the bag {or 1 pound}. 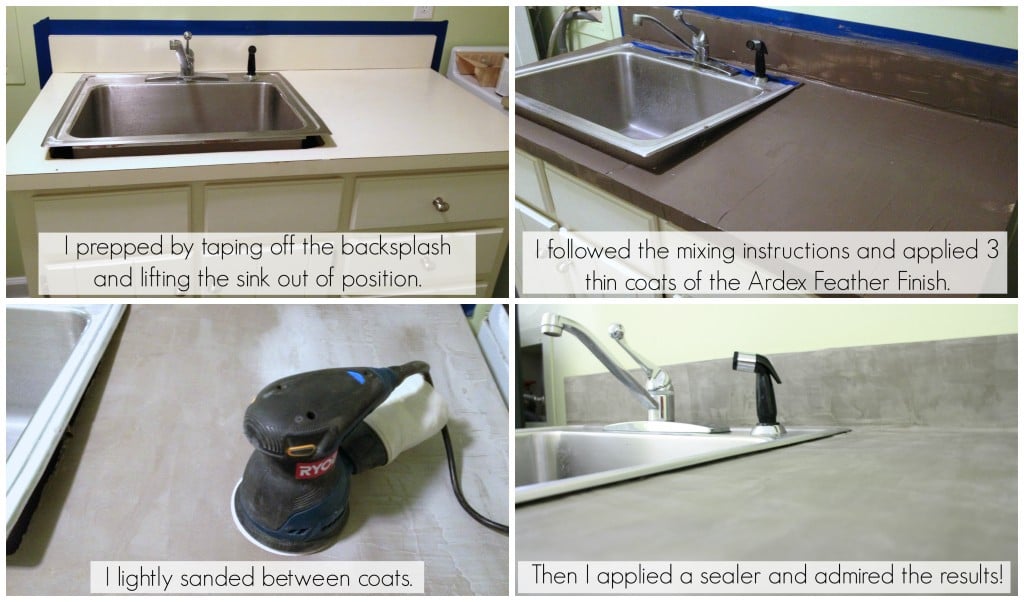
The Decorative Details
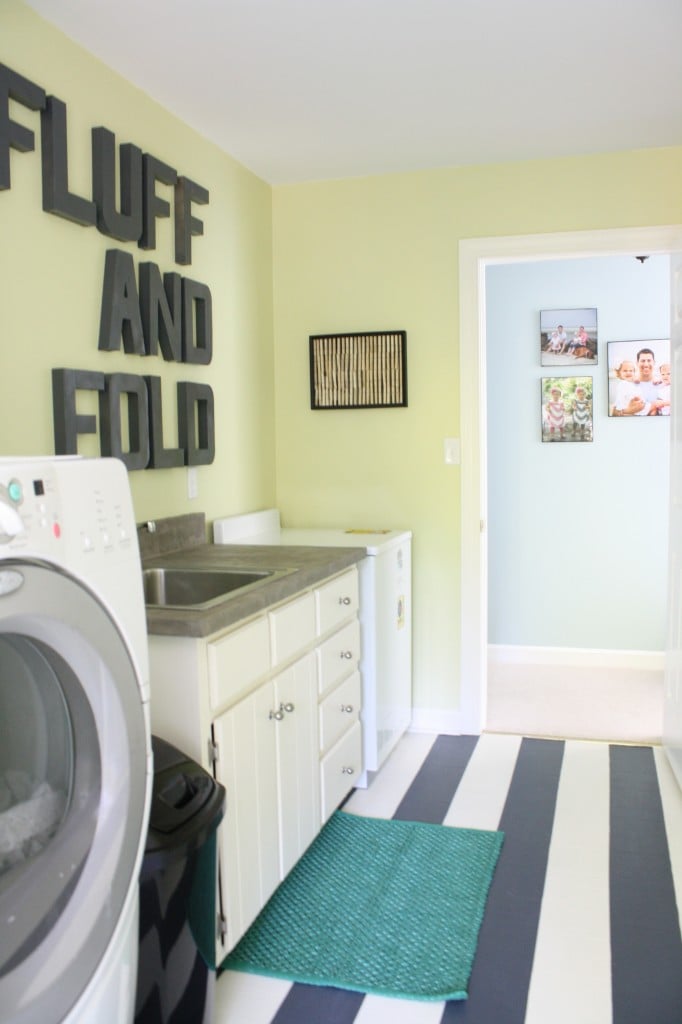
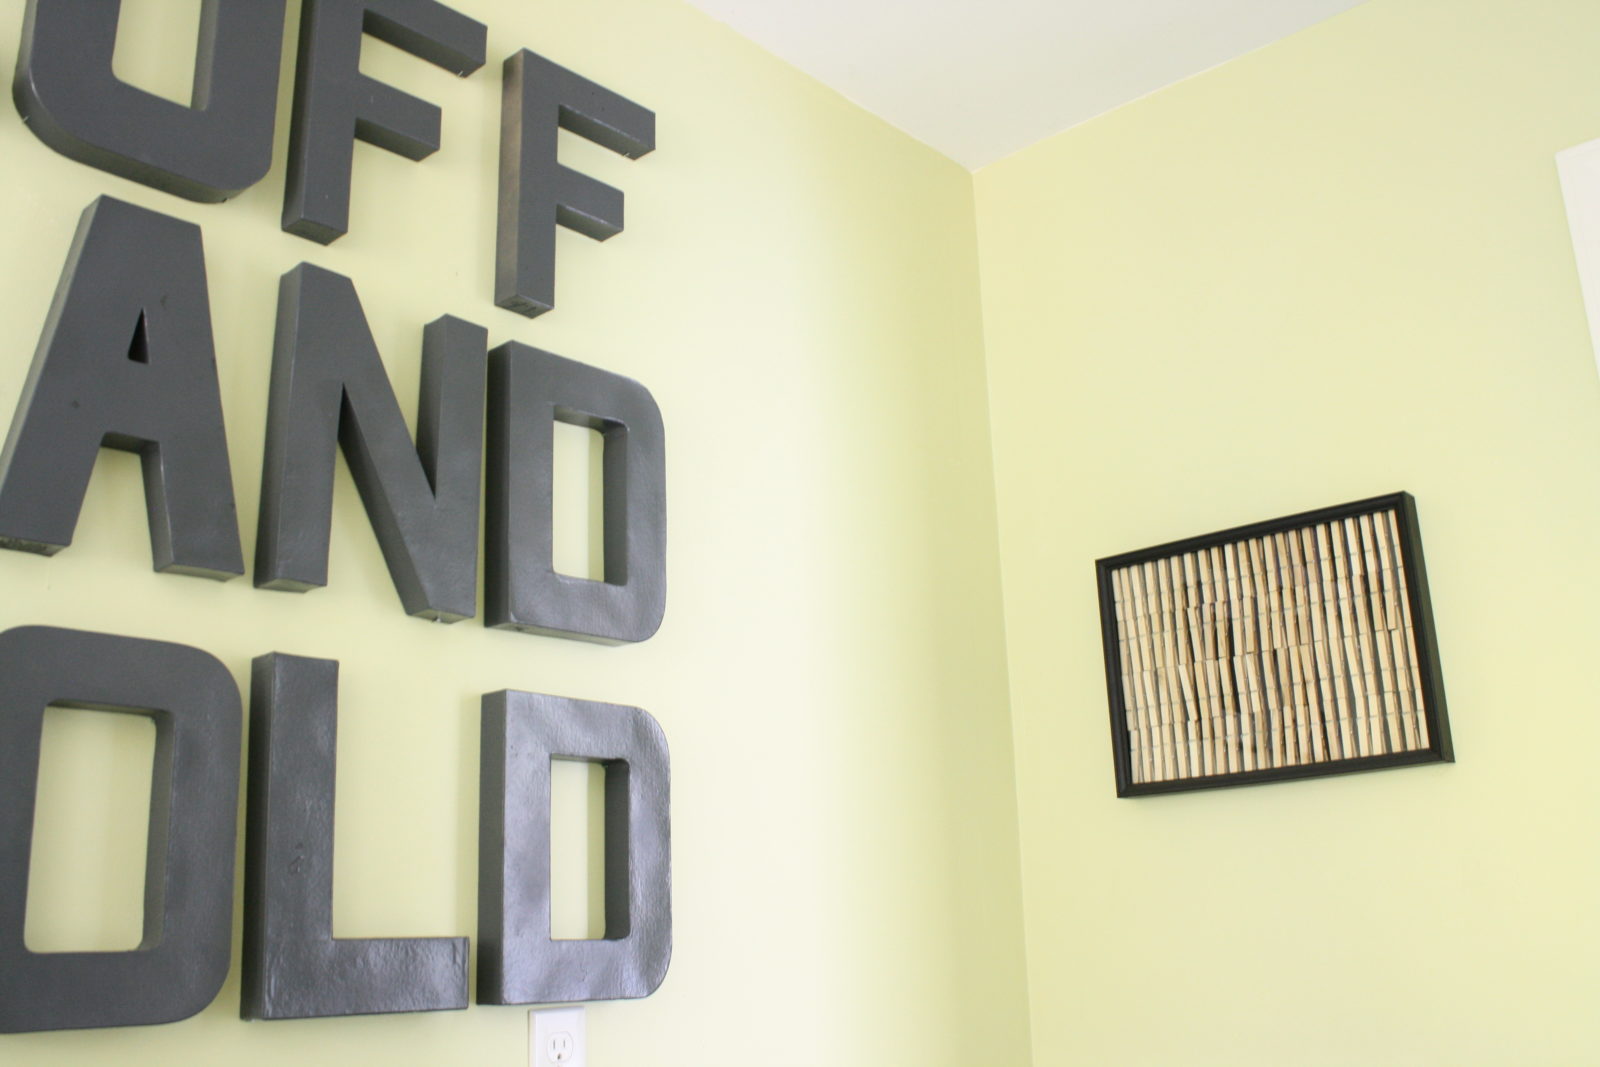
When I was not working on the countertop, I was busy adding decorative details. I hung the FLUFF AND FOLD paper mache letters, which I love. I ordered the letters online from Consumer Crafts and purchased some grey spray paint at Lowe’s Home Improvement to paint them with. The total cost of the letters + the spray paint = $35.
I also added the small rug from Pier One to the floor in front of the sink. It is the same gorgeous teal color that is found in some of the leaves on the Ikea curtains. I purchased it with a gift card that I had received from a family member, so my out of pocket cost was $0.00 {the retail price was $19.00}.
I also found an old, shabby shadow box that was in my attic to make some laundry art. I simply spray painted it black and used a hot glue gun to to glue on $6 worth of clothes pins. I hung it by the door. 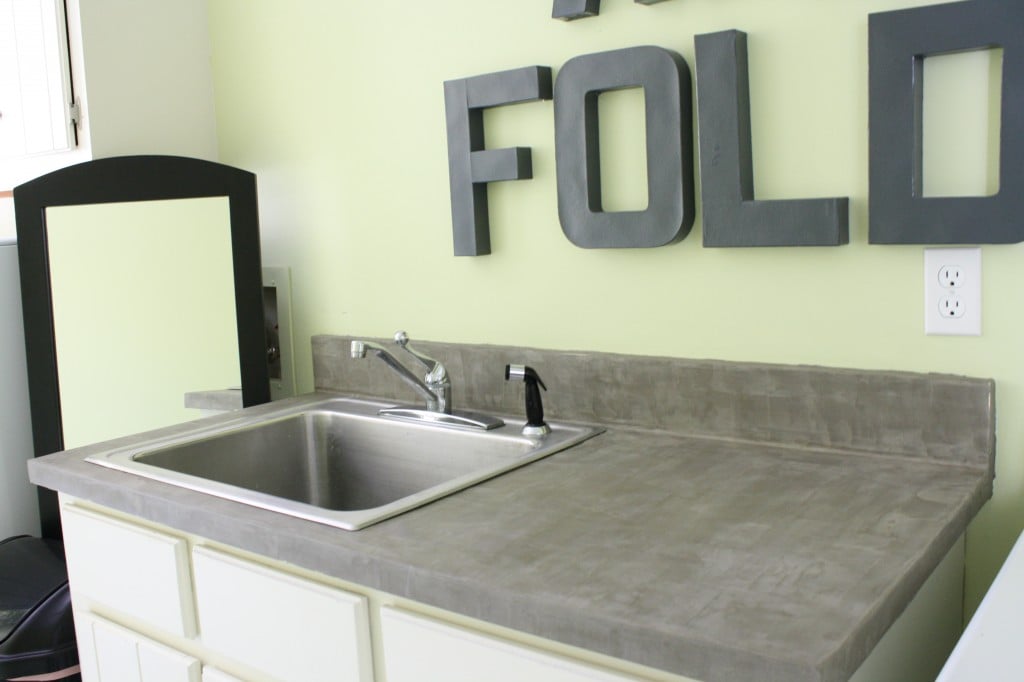

I hung the GORGEOUS Ikea curtains. I love them and since I already had them, they cost me $0. 
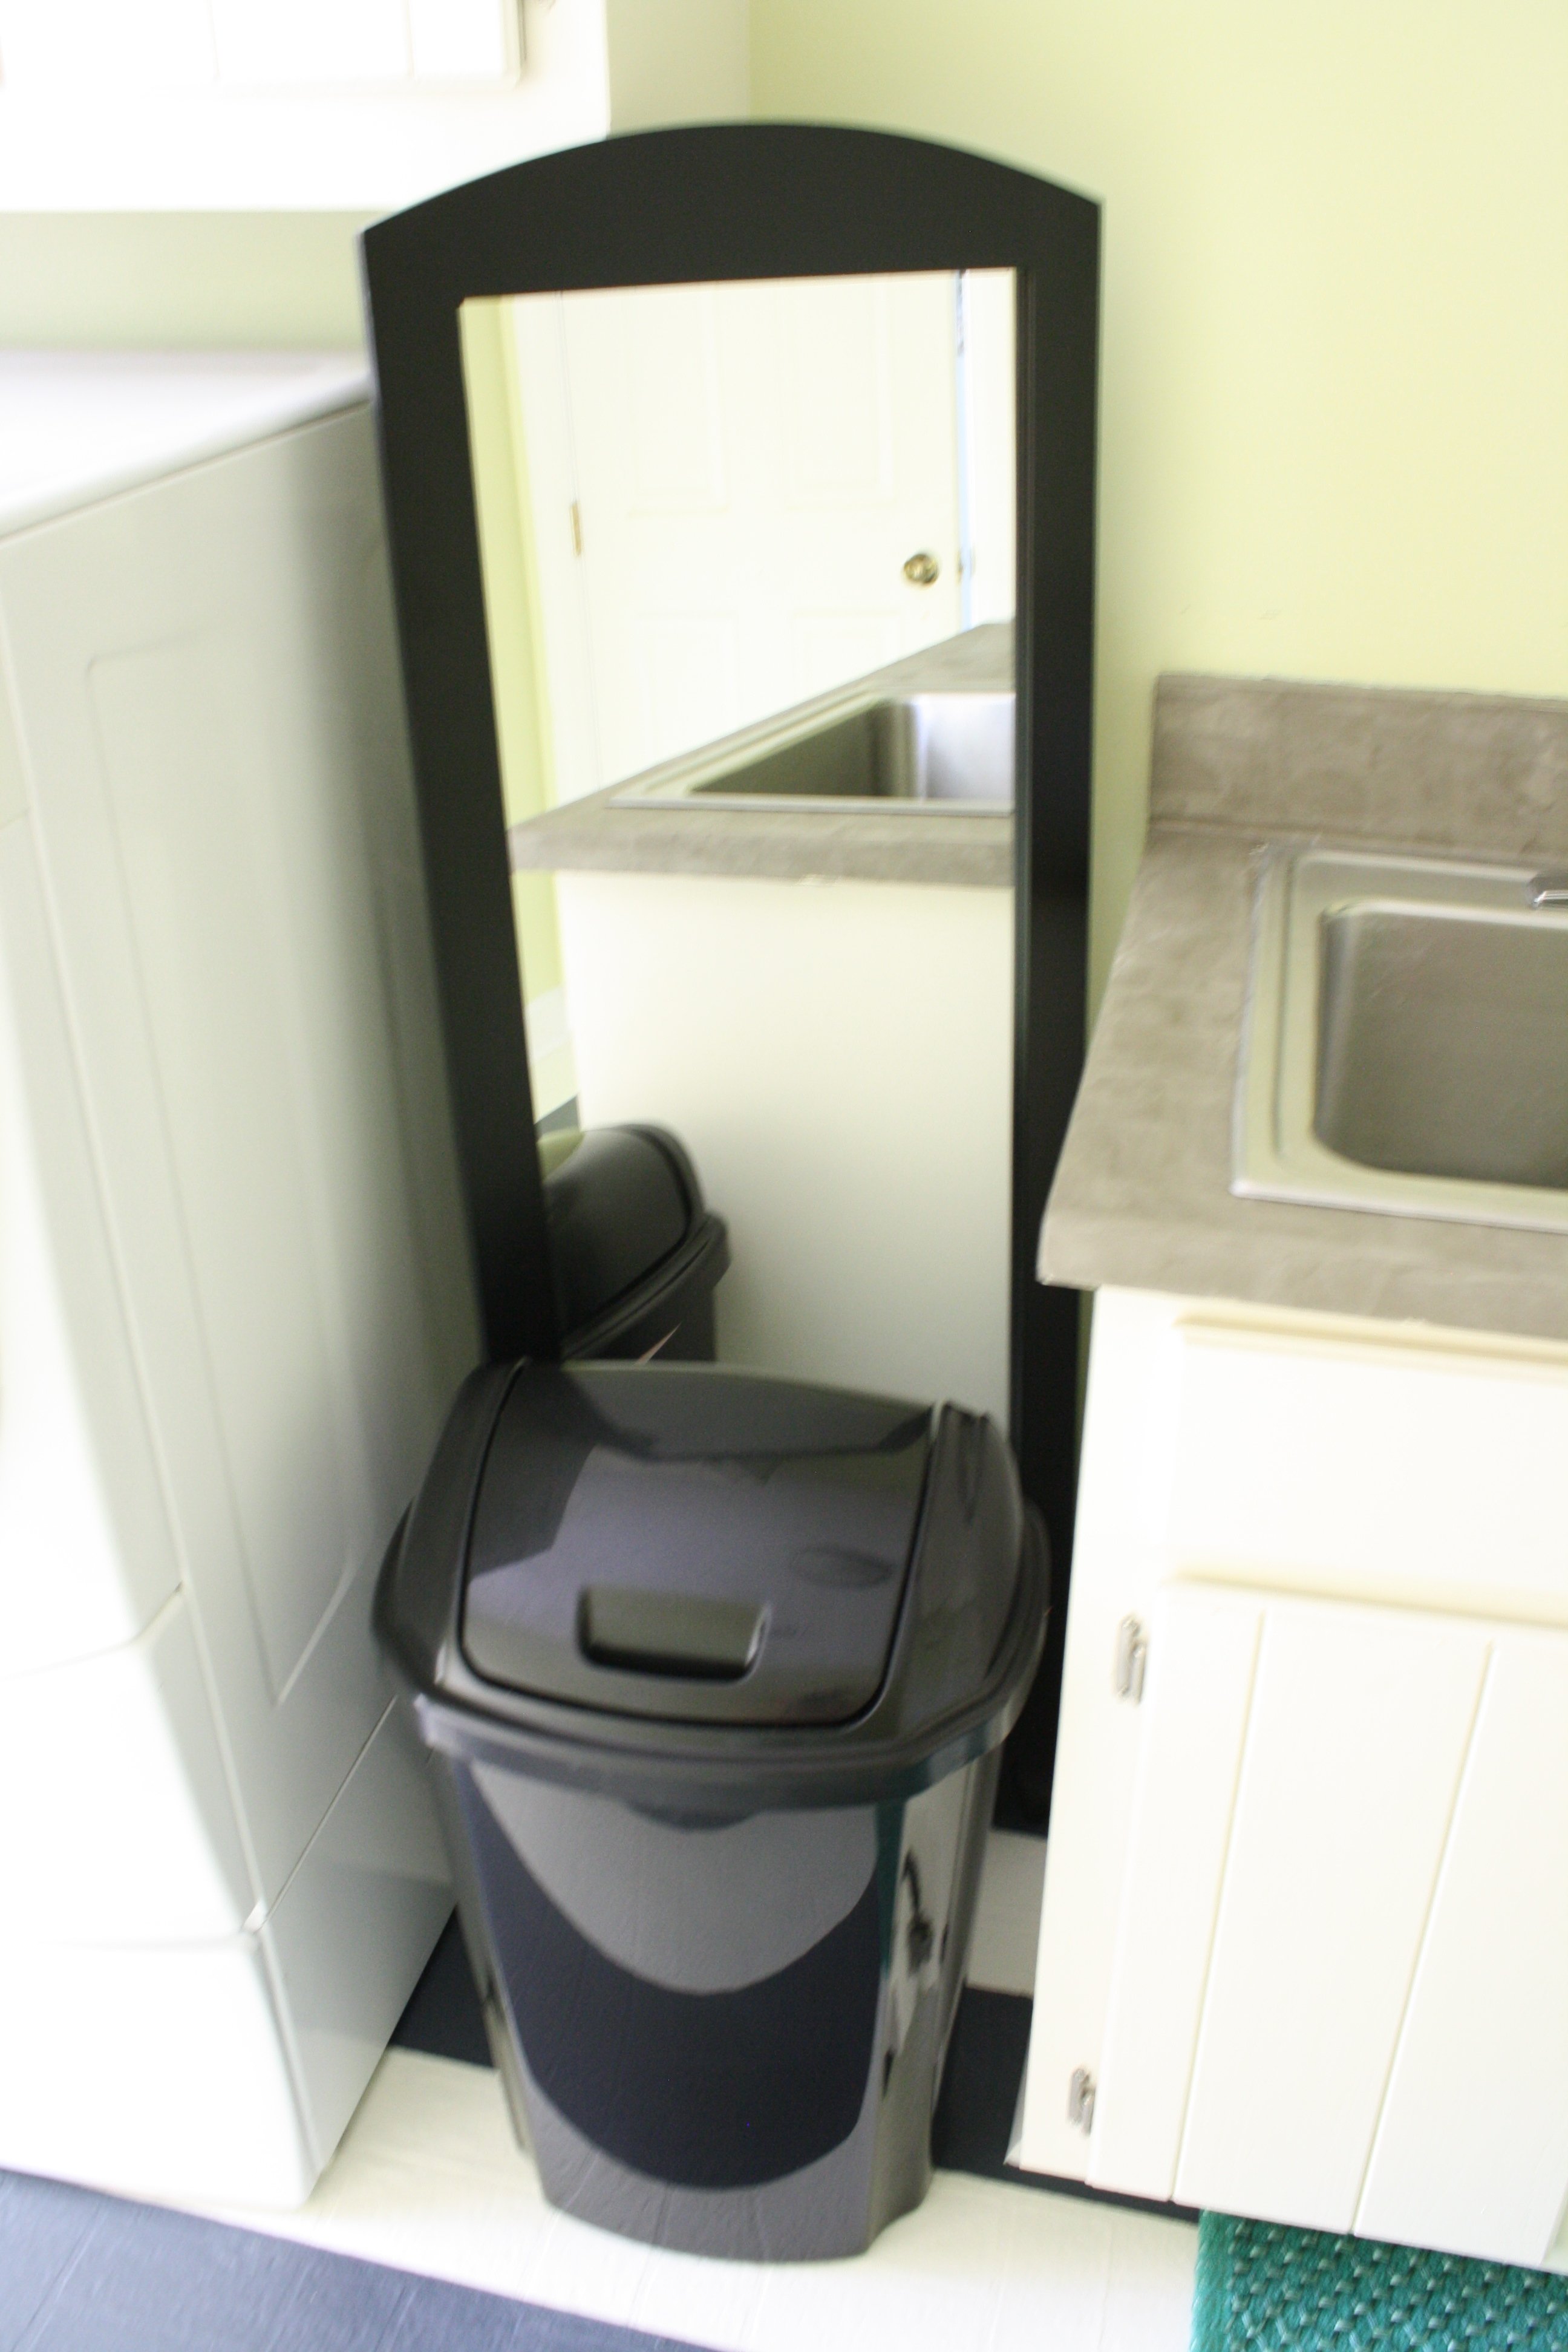
Finally, I cleverly positioned a tall, floor mirror to hide all the ugly plumbing connections {see below}. I already owned the mirror, which was given to me as a gift, and it was being stored in another room. I was glad to finally be able to use it. Another $0 out of pocket accessory. 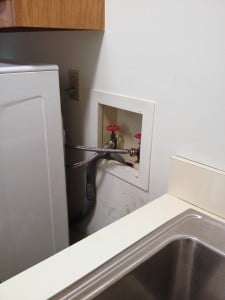
 Now, let’s do a quick review of the cost and time frame of this project:
COST
- Leftover primer, wall and cabinet paint- $0
- Old curtains- $0
- Leftover Ardex Feather Finish concrete- $0
- 2 quarts of porch floor paint- $30
- FLUFF and FOLD letters and spray paint- $35
- Clothes pins for shadow box art- $6
- Old shadow box and leftover black spray paint- $0
- Accent rug- $0 out of pocket
TOTAL OUT OF POCKET COST = $71.00
TIME SPENT ON PROJECT
I would say that the renovation took me a total of 12 hours, and I did all the work by myself, with the exception of putting new hinges on the doors and rehanging them {which my husband did}. So, we are talking maybe a total of 13 man hours. I think it’s the best 13 hours I have ever spent on a remodel. I am just GIDDY over the beauty of this room. We NEVER leave the door shut anymore and doing the loads of laundry generated by our precious twin girls seems a little less tedious 🙂
Now that’s what I call a high style, low cost renovation! I hope you can draw some inspiration from it!

———————————————————
LOVE it, Tasha! The painted floor, the cement countertops — and using what you had on hand already! A perfect budget makeover.
Remodelaholics, be sure that you go visit Tasha over at Designer Trapped in a Lawyer’s Body to see more of her amazing creativity and style!
Lorene has been behind the scenes here at Remodelaholic for more than a decade! She believes that planning projects and actually completing them are two different hobbies, but that doesn't stop her from planning at least a dozen projects at any given time. She spends her free time creating memories with her husband and 5 kids, traveling as far as she can afford, and partaking of books in any form available.


Wow, I absolutely love it! Great job. I can’t wait to get started on redoing our laundry room.
Definitely come share pics at the link party when you finish!
Thank you, Desaree! I am glad you are inspired to renovate your own laundry room. I would love to see how it turns out!
I recently completed a similar job for a client out in the suburbs of Chicago. There was a very unusual way the basement was laid out, so I was able to take the extra space and create them a laundry room just like this. I’ll see if I can dig up some of the photos for comparing.
I love the redo (so many great ideas!) and I have a question about the cement counters. I like the look of cement counters in the kitchen but they seem like a pain in the neck to install. Would this product work in our high traffic kitchen, or would we be resealing them constantly? We have super ugly laminate that is begging to be redone, but no money in the budget for things like that. If this is a viable option I might be able to convince my husband! Any advice would be appreciated,thanks!
Hi there! I think this is definitely a viable option for a kitchen. In fact, I think many people have used Ardex Feather Finish over existing kitchen countertops with success. That said, I am afraid I can’t answer your question about how often it would need to be sealed. I can tell you that we had a poured concrete countertop in our old house (before I knew about Ardex Feather Finish) and we only sealed it after it was installed. We lived with it for 2 years after installation before moving and never had to seal it again. We have not had to re-seal our laundry room countertop, but it does not get a whole lot of use. Sorry I can’t be of more help! Perhaps if you google “Ardex Feather Finish kitchen countertop” you’ll be able to find a blogger who has used it for that application and may be able to answer your question. Thanks for taking the time to comment!
You did a great job on this room! Thank you for the great time breakdown AND the reassurance that even busy moms can do a full makeover. Now I want to go paint something in my house!
Yes! Tasha did a great job with making it work with her busy mom schedule. Get out the paint! 🙂
Thank you so much! That really is one of the main reasons I started blogging–to show people that you really can make your home beautiful on a budget and amidst a very busy schedule. I agree with Cassity–break out the paint! Thanks so much for taking the time to comment! 🙂 Tasha
I am SO thrilled to be guest posting today! Thanks so much, Cassity! I am without power due to the ice storm, but will do my best to respond to any questions that the Remodelaholics out there may have!
Thanks so much for being our guest, Tasha! Hope you make it out of the ice safe and sound — stay warm!
Hi Cassity! Thank you! We are still without power, so the twins and I are hanging out at my office for a bit today (my husband is on shift), which is why I have internet right now! I’m so happy to be able to pop in to respond to some comments!
AMAZING! This is truly one of the best (and least expensive) makeovers I’ve ever seen! Awesome job!
Thanks, Angela! Tasha did a great job!
Thank you, sweet Angela! So happy you stopped by to read my guest post!
Oh how fun, I love this makeover, it is amazing. Hugs, Marty
Thanks, Marty!
Thank you so much, Marty! You are so sweet. I hope you are well!
I love your laundry room especially the Fluff and Fold letters.
Thanks, Crystal! That’s one of my favorite parts, too. Tasha did a great job!
Thank you, Crystal! I think that is still one of my favorite touches as well 🙂
I would love to know how the countertops hold up and if you would recommend it for in a kitchen? LOVE the makeover! Very inspiring! 🙂
Hi, Onita! Deeana (another commenter) had the same question and I did my best to answer it. Please check out my response to her. I hope that will help! The short version is that I feel like it would work well in a kitchen, but since I have not tried that application, I can’t be sure. Thanks for commenting!
Also curiois how the concrete holds up to watet etc.
Hi Karyn! The countertop in our laundry room is holding up very well to water. Obviously, we don’t use that sink as often as our kitchen sink, but that is the sink we use to wash out stained clothing, paintbrushes, etc. and we have not had any problems with wiping water right off the countertop. I think as long as it is properly sealed, they will withstand water fabulously! Thanks for commenting!
Wow, I absolutely love it! I love the “fluff and fold” on the wall too, how cute!
Thanks, Jessica! Tasha is awesome, right?
Thank you so much, Jessica! I’m so glad you like it!
Ooooh!!! This makes my heart SO HAPPY!!! Whyyyy am I renting???
LOL! Thank you, Alena! I remember feeling the same way before I purchased my first house! Think of it this way…while you are renting collect as many fabulous ideas as you can so that when you buy a house you will be ready to hit the ground running. It’s just giving you time to mentally file away awesome ideas for the future 🙂 Thanks so much for taking the time to comment.
Love your laundry room!!!:-) Ummmm…just curious…how long the paint will last on the floor and surprised that you were able to paint the floor being that the linoleum is glossy…
I’ve been wanting to do the same for mine and was afraid it would take lots of work. I researched it a bit and one couple had to sand it lightly and prime it first… So, I’m still hesitant to do it…your way sounds too good to be true! Lol Should you seal it???
Hi Mel! I am sure sanding it beforehand would offer even more adhesion, but we did not do that. We just primed it with Kilz first and that offered plenty of adhesion for the porch and floor paint. That stuff is designed for excellent adhesion. If it were in our kitchen, I would have added a few coats of poly on top, but since our laundry room does not get a tremendous amount of foot traffic, we did not seal it and it is holding up perfectly. Not a scratch on it!
Did you seal the floor after painting?
I am currently getting ready to do the ardex feather finish on my kitchen counters and have been wondering how to do it around my sink. I am fairly handy but have never worked with plumbing so fully removing the sink is not something I’m comfortable with. How did you lift the sink without actually removing it?