Easy Floating Bedside Shelf Tutorial
A great piece of bedside furniture needs just two things: a space for a few small things (like a book, a glass of water, glasses) and some form of lighting. Oh, and it has to fit in the space, mesh with the style of the room, and, hopefully, not break the bank. Simple, right? 😉
Since bedside space is at a premium in most households, finding a great bedside storage and lighting solution can be a feat. Even small lamps often have large bases, so what are you to do when you just need more space on your bedside table? Well, think like our guest, Barb, did: look up. Barb built a pair of easy floating bedside shelves to hold her reading lamps:

Here are a few of our favorite small-space friendly bedside ideas, and scroll down to learn how Barb built and installed her floating bedside shelves:
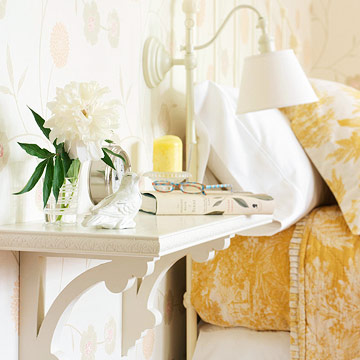 Easy Bedside Floating Shelf | Better Homes and Gardens
 Industrial Floating Shelf with Light | Dirty Bils Interiors via Cool Material
 Old Drawer to Bedside Shelf with Light | via Design Sponge
Inspired? Now learn from our guest, Barb, because I know you want a floating bedside shelf of your own now!
Easy Floating Bedside Shelf Tutorial
by Barb of Turtles and Tails
Hi, I’m Barb from Turtles and Tails, and I blog about DIY, home decor, crafting,…and my dogs. Always the dogs. A big thank you goes out to Cassity for having me guest blog on Remodelaholic today. My husband and I work together on most projects – he handles the power tools, while I do the sanding, patching, staining, and painting. It’s a good partnership and most projects end up being a combination of both of our ideas.
Some of my favourite projects are our outdoor fold-down bar, a streamlined sofa table (with built-in electrical outlets!), and the always tasteful “poop factory” dog costume for Halloween. I’d love to spend more of my time building and refinishing furniture, but that darned day job keeps getting in the way.
Today I’m going to show you the floating bedside shelves that we made for our master bedroom. This was a special project for me because it was the first time I cut the shelves myself. With the sliding mitre saw. I’ll admit that it took me longer to figure out how to unlock the saw arm than it did to cut two pieces of wood, but I did it!
Our bedside tables are a little crowded with books, lamps, water bottles, alarm clocks – the usual paraphernalia. No bedside styling or tweaking in my house, we just don’t have room for it. We could have installed wall sconces, but since these lamps are less than a year old, and we happen to like them, that wouldn’t be fiscally responsible, would it? (Can you tell I’m an accountant?)
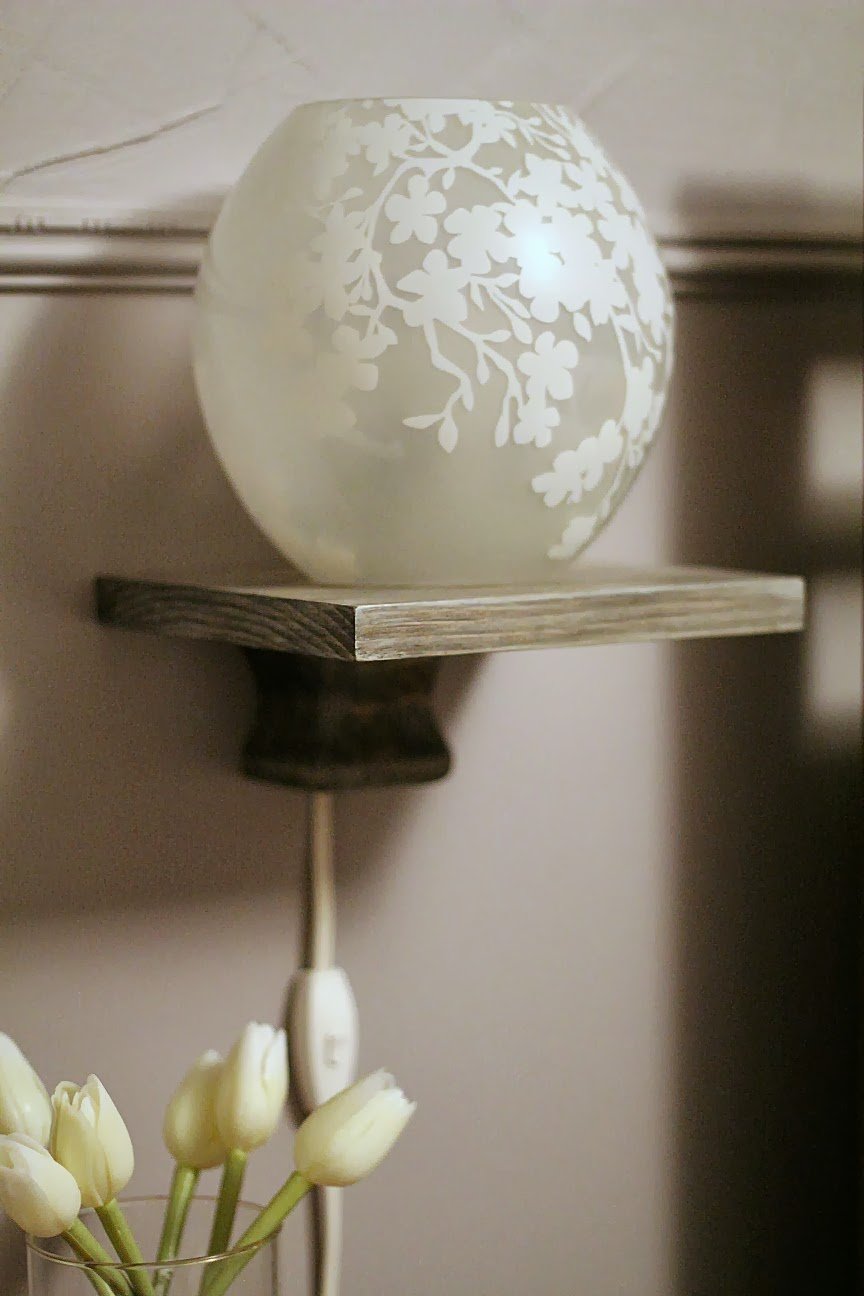
I had the idea to get the lamps up off the tabletops by putting them on floating shelves. Now ideally I would have liked streamlined, 100% floating shelves, but with the shelf depth we needed it wasn’t really possible. Not if we wanted them to stay on the wall. So I gave in to having a (small) support underneath. We looked on-line, and wandered around the stores, but all of the shelf supports we found were either huge (over 8″ in each direction) or made of something other than wood. I wanted the support to blend with the shelf, so it had to be stainable and paintable.

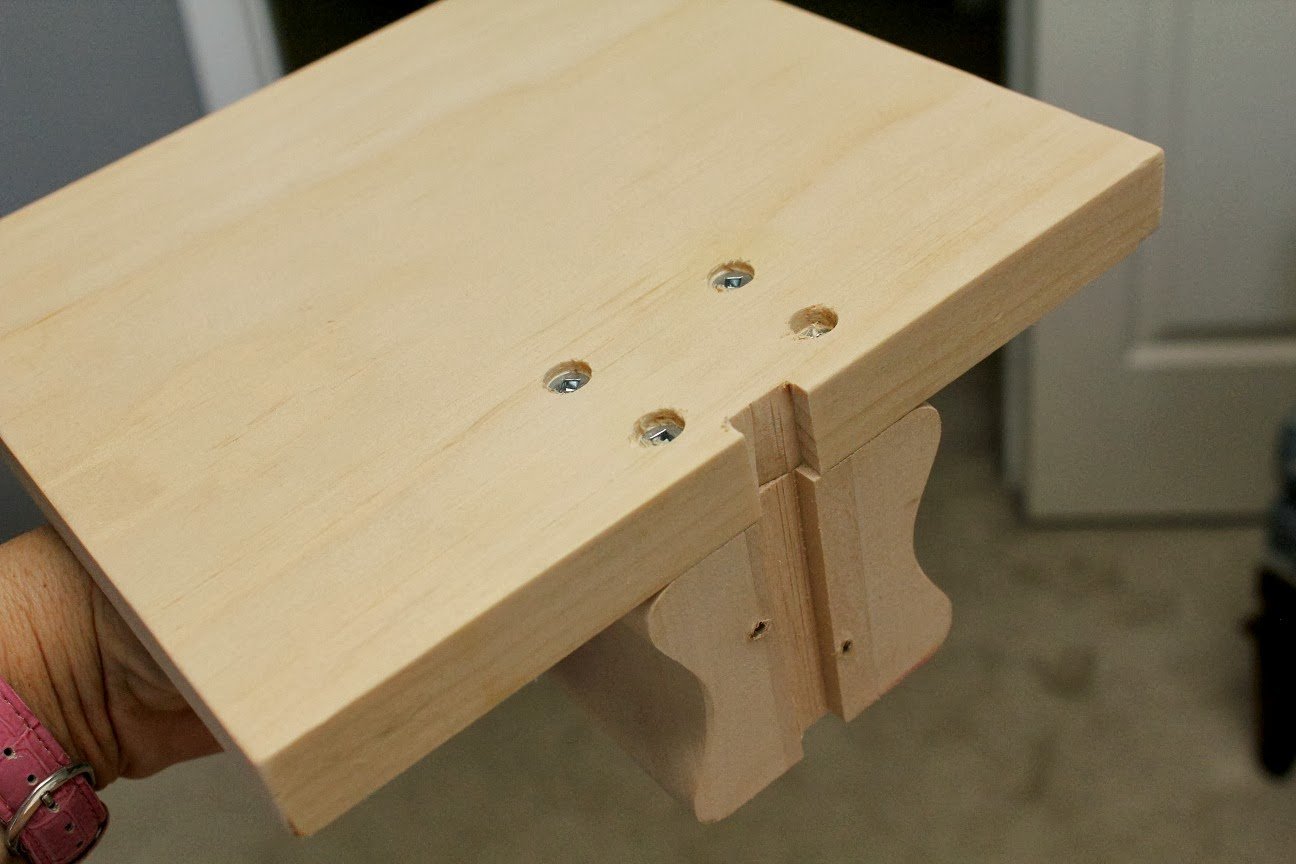
We eventually found ourselves in the moulding aisle and saw some short, squatty table legs – or bun feet as they’re called. Do you know how much fun I had saying “bun foot” over and over again? I bet you do. We grabbed two small boards from another aisle and tried out all the different styles – round, oval, tube-shaped – and eventually settled on the square one. The plan was to cut off the back of each foot to make it flush with the wall and attach it to the shelf above. And remove the top screw of course.

Here are the supplies needed. Two 7″ x 7″ pieces of one inch pine board, some screws, and two bun feet. We used a spare board that we already had and leftover paint and stain. The bun feet were $10 each, so it was a pretty inexpensive project.

Tom did the scary support cutting (no way were my hands getting that close to the saw blade), and then attached the board and the foot to each other with wood screws. He drilled two offset holes in each support so that it could be mounted directly to the wall. He also cut a channel down the back of each piece so that the lamp cord could fit through and be centered, rather than have it hang off the side of the shelf. This gave us extra reassurance that the lamp wouldn’t fall off.
I puttied and sanded the top screw holes (the other ones would have to wait until after the shelf was mounted to the wall), and then stained and painted the shelves. I used the same paint-on-top-of-stain technique that I did on the nightstands, trying to match the grey barnboard colour as closely as possible. I’m afraid I didn’t take any pictures of the process, but if you’d like instructions on how to achieve this finish, I’ll direct you here and here.
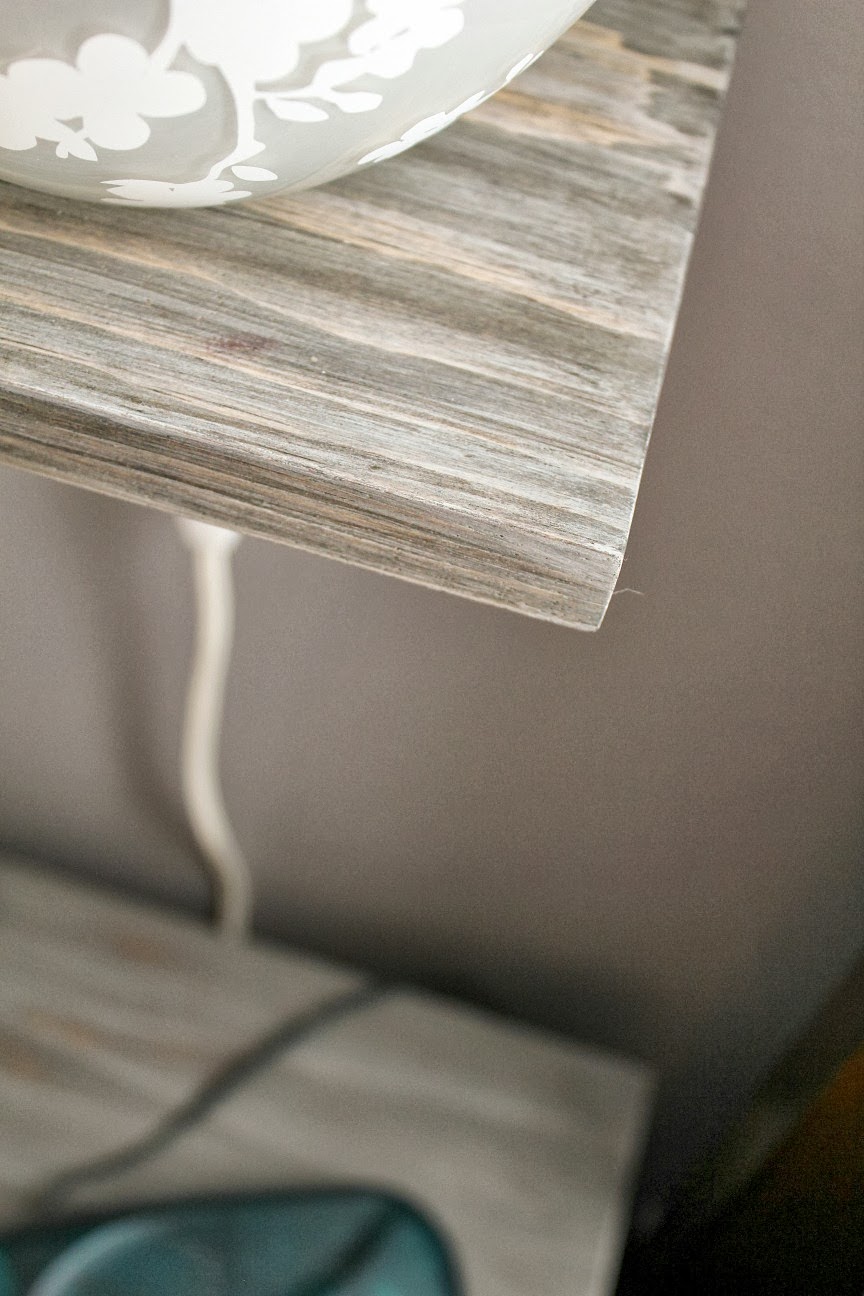
I held the lamp and cord in place while Tom mounted the shelf to the wall. Luckily he hit studs both times so we didn’t have to use anchors, and the shelves are just as secure. The lamps aren’t that heavy anyway so I don’t think there’s any danger. Once it was in place, I puttied and sanded the holes, and then carefully matched the stain and paint to get it to blend with the rest of the support.

The lamp has an on/off switch on the cord, and it hangs at the perfect height when you’re lying in bed. No more digging behind the nightstand in the dark, trying to find the switch and knocking everything all over the place!


Lorene has been behind the scenes here at Remodelaholic for more than a decade! She believes that planning projects and actually completing them are two different hobbies, but that doesn't stop her from planning at least a dozen projects at any given time. She spends her free time creating memories with her husband and 5 kids, traveling as far as she can afford, and partaking of books in any form available.


My life goal is to remove all the end tables from my house replacing them with floating shelves. nice accent here; nice tutorial. thanks for sharing.