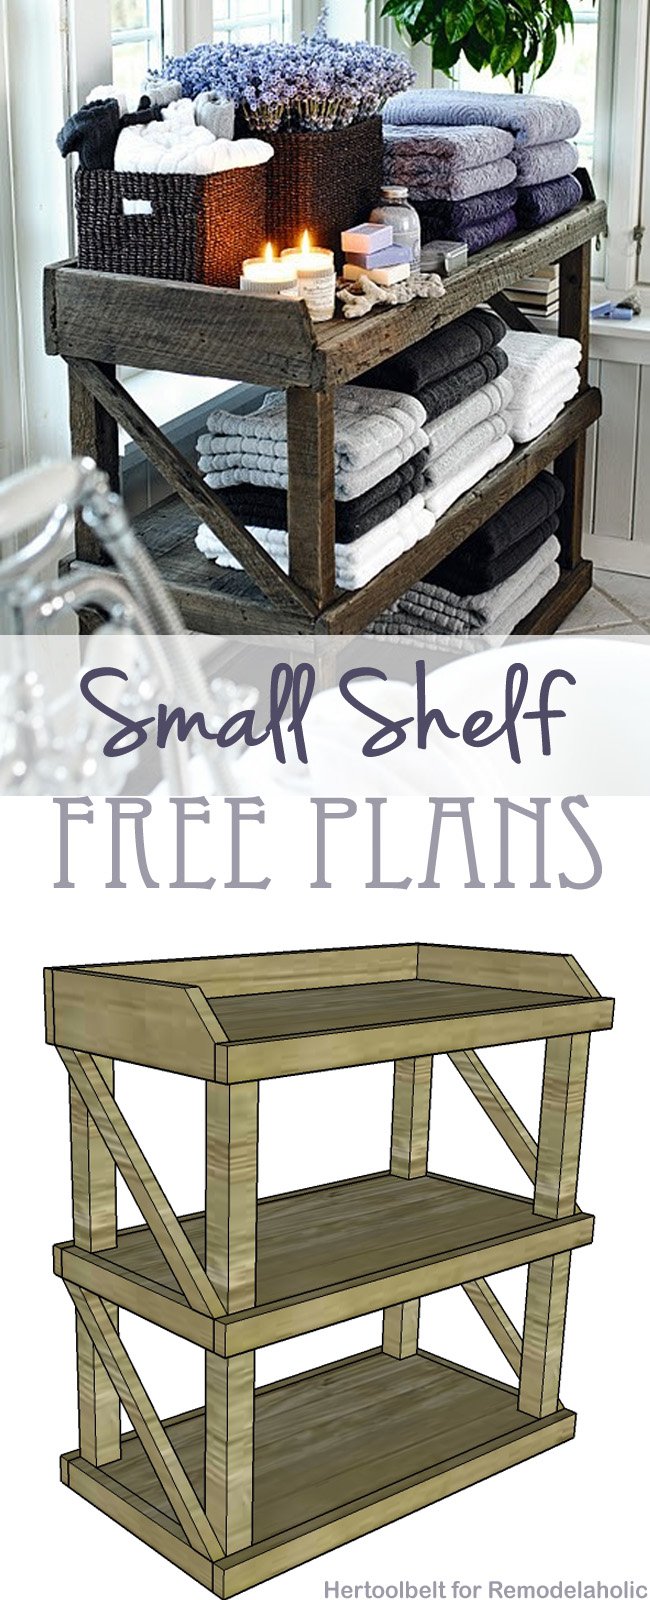
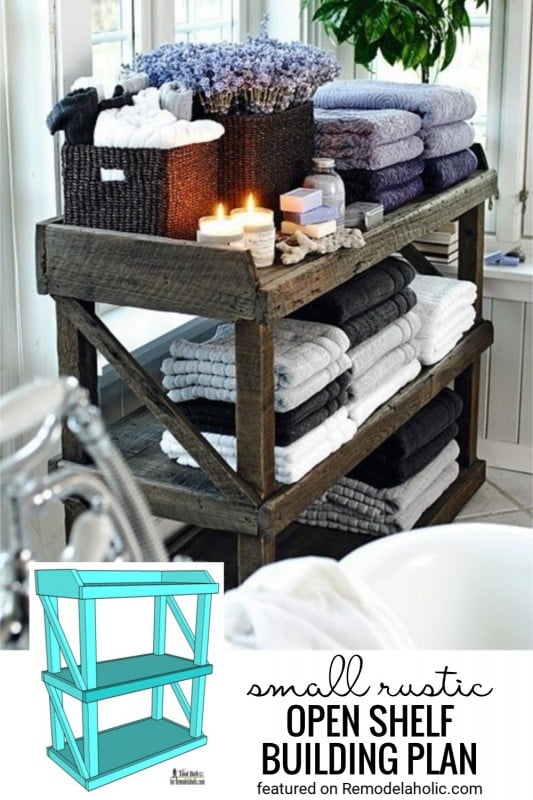
DIY Small Open Shelf Building Plan
Hi, it’s Amy from Hertoolbelt, back again with another fun build project. If you missed last week’s Rotating Shoe Rack check it out here. I am always on the look out for great bathroom storage solutions. I love this small rustic tub side storage shelf as seen on Shelterness. Even if you don’t have room for a shelf in your bathroom, it would be great as a bookshelf in a child’s room or on top of a dresser.

How to Build a Small Open Shelf
Click Here to Get a Free Printable Version of this Building Plan
These plans are designed for wood readily available at the hardware store. If you are building with reclaimed lumber, adjust the plans according to your lumber sizes. Here are a few tips for working with reclaimed lumber.
Finished shelf dimensions: 30.5″H x 25.5″W x 13.5″D
Materials Needed:
(approximate lumber cost is $27)
- 2 – 2″ x 2″ x 8′ (actual 1 1/2″ x 1 1/2″)
- 2 – 1″ x 4″ x 8′ (actual 3/4″ x 3 1/2″ furring strip)
- 1 – 3/4″ x 2′ x 4′ plywood
- 8 – 1 1/2″ pocket hole screws
- 1 1/2″ minimum length brad nails
- wood glue
Cut List:
| Letter | Quantity | Width | Thickness | Length | Material |
| A | 4 | 1 1/2″ | 1 1/2″ | 27 3/4″ | Pine 2×2 |
| B | 2 | 12″ | 3/4″ | 24″ | Plywood |
| C | 5 | 1 1/2″ | 3/4″ | 25 1/2″ | Pine 1×4 |
| D | 4 | 1 1/2″ | 3/4″ | 12″ | Pine 1×4 |
| E | 4 | 1 1/8″ | 3/4″ | 17 1/2″ | Pine 1×4 |
| F | 2 | 3 1/2″ | 3/4″ | 12″ | Pine 1×4 |
| G | 1 | 3 1/2″ | 3/4″ | 25 1/2″ | Pine 1×4 |
| H | 1 | 12″ | 3/4″ | 24″ | Plywood |

Step 1:
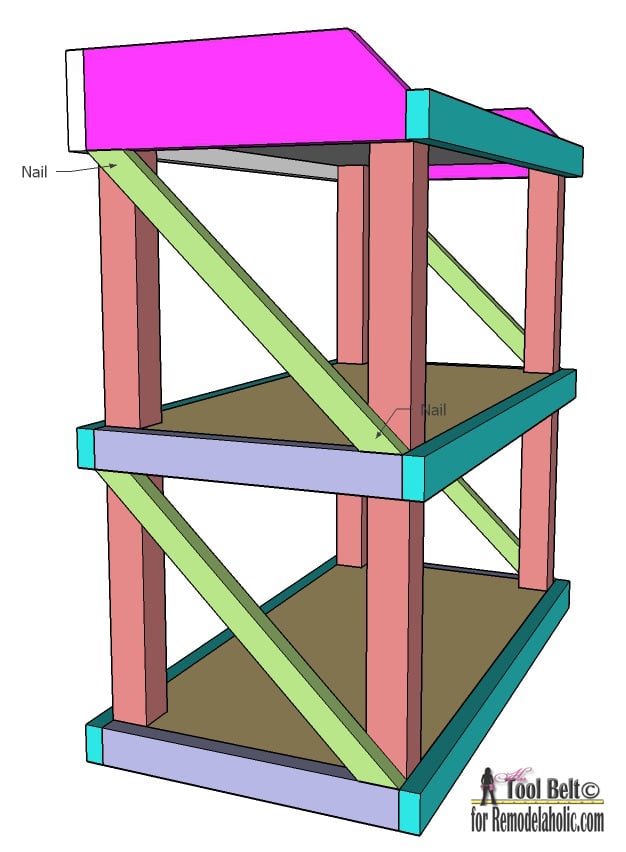
Cut the 2×2’s into 4 pieces that are 27 3/4″ long (A).
Step 2:
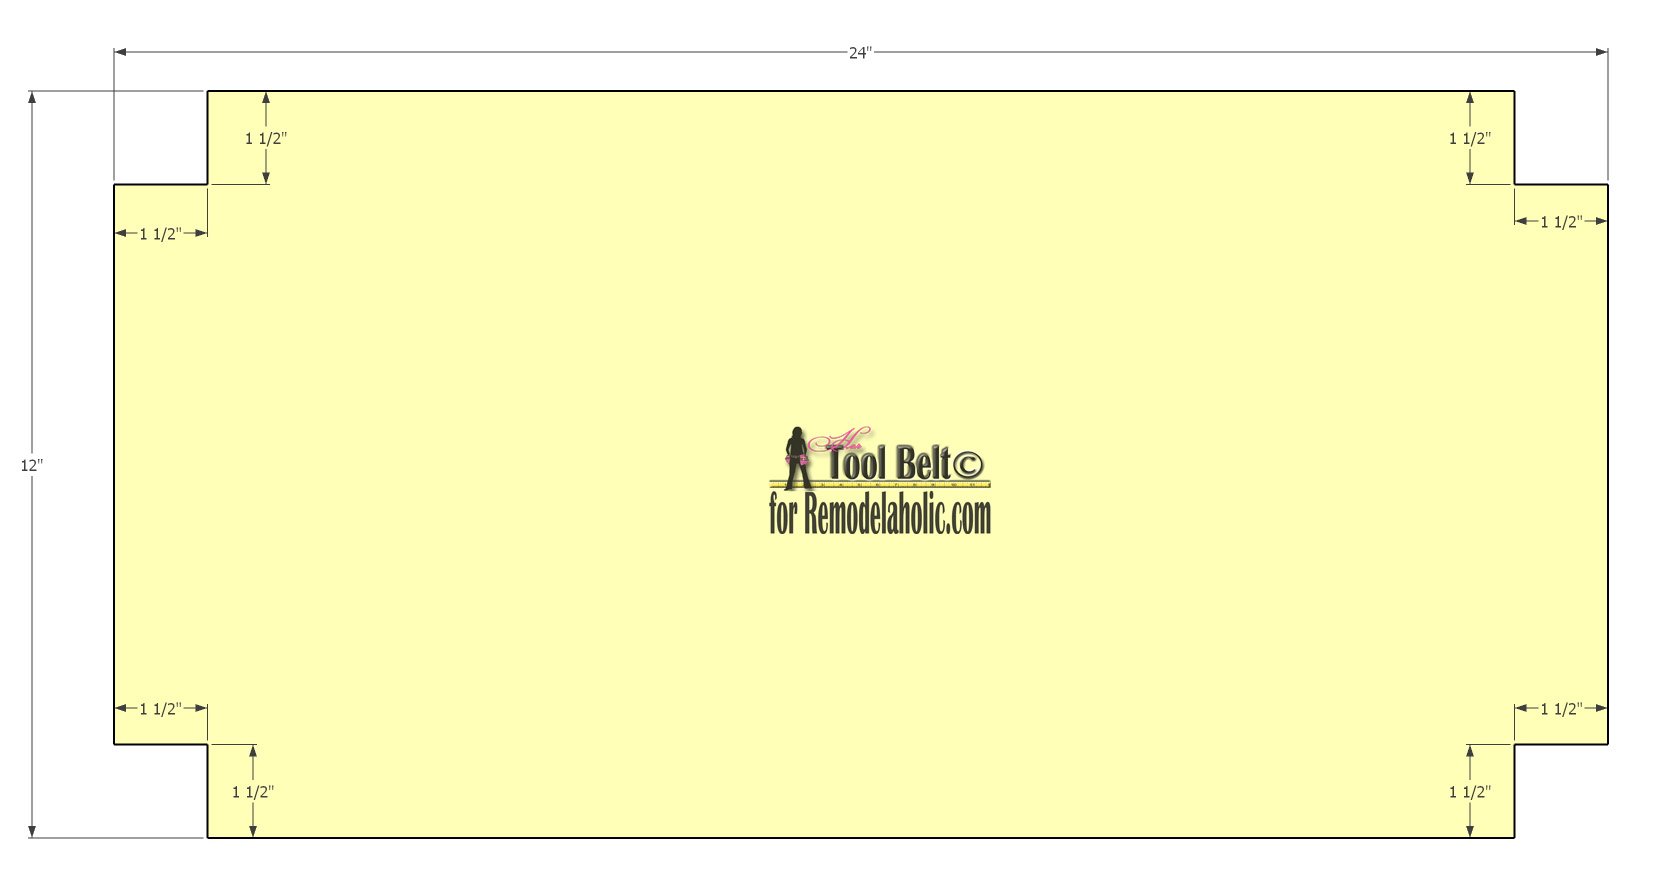
Cut the plywood into 3 pieces that are 12″ x 24″. See plywood cut diagram below:

On 2 of the 12″ x 24″ plywood pieces, cut the corners out 1 1/2″ x 1 1/2″ for the legs, these are (B).
Step 3:
Mark the 4 legs (A), measuring from the bottom at 3/4″ and 14 1/4″. These marks will be the bottom of the plywood shelves.
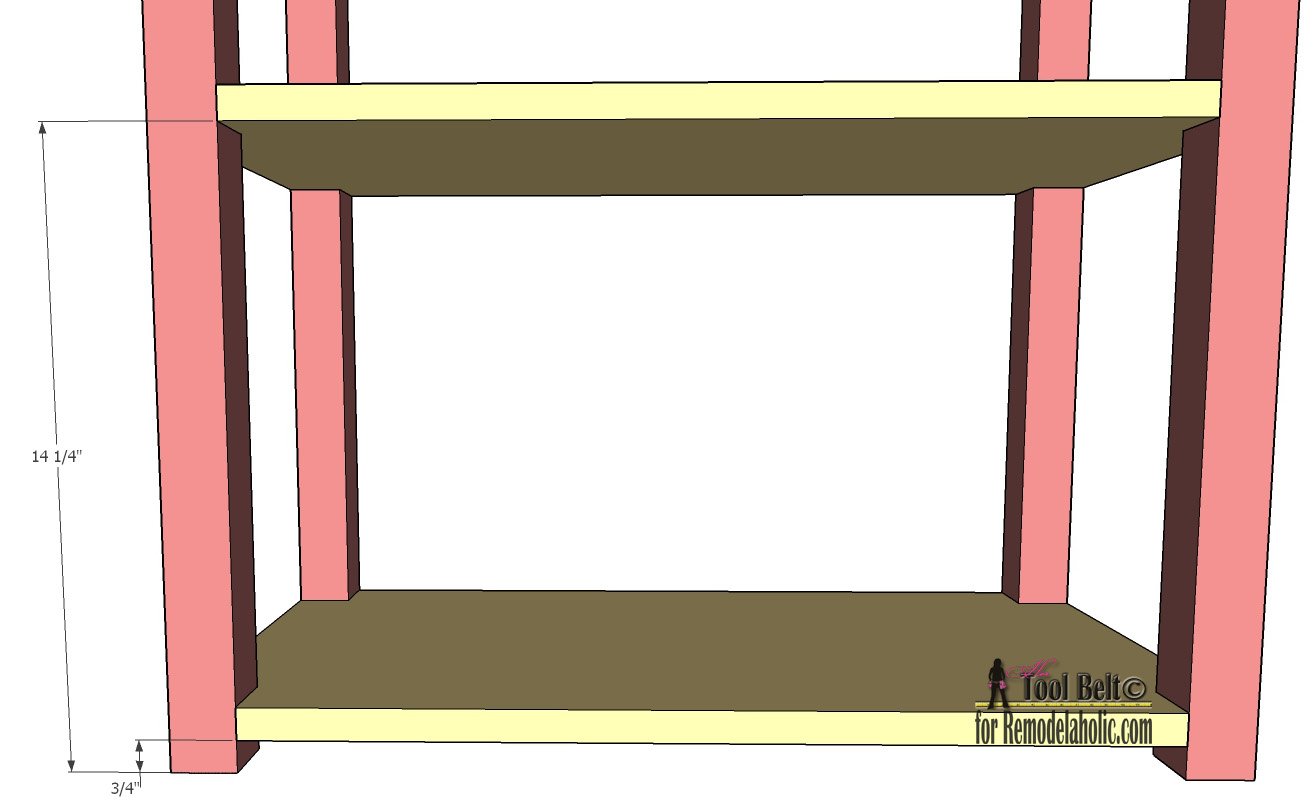
Use a pocket hole jig (Kreg) and drill a pocket hole in each corner to attach the legs. Use 1 1/2″ pocket hole screws and wood glue to attach the plywood shelves to the legs, add more screws as necessary.

Step 4:
Attach the top shelf (H) to the top of the legs with wood glue and brad nails.

Step 5:
Rip one of the 1×4’s into 1 1/2″ wide x 8′ long pieces. Cut letters C & D trim pieces. From the other 1×4, cut letters F & G.
To make the diagonal cut on the F’s, on one end measure up 1 1/2″ and 10″ over. Cut the remaining diagonal corner off.

Step 6:
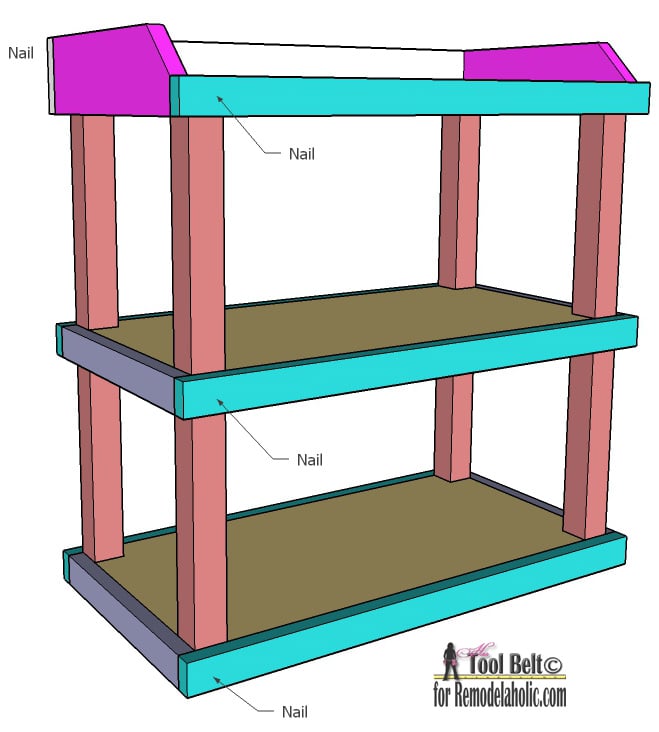
Glue and nail the side trim pieces D & F onto the shelf and legs. Make the top of D flush with the shelf.
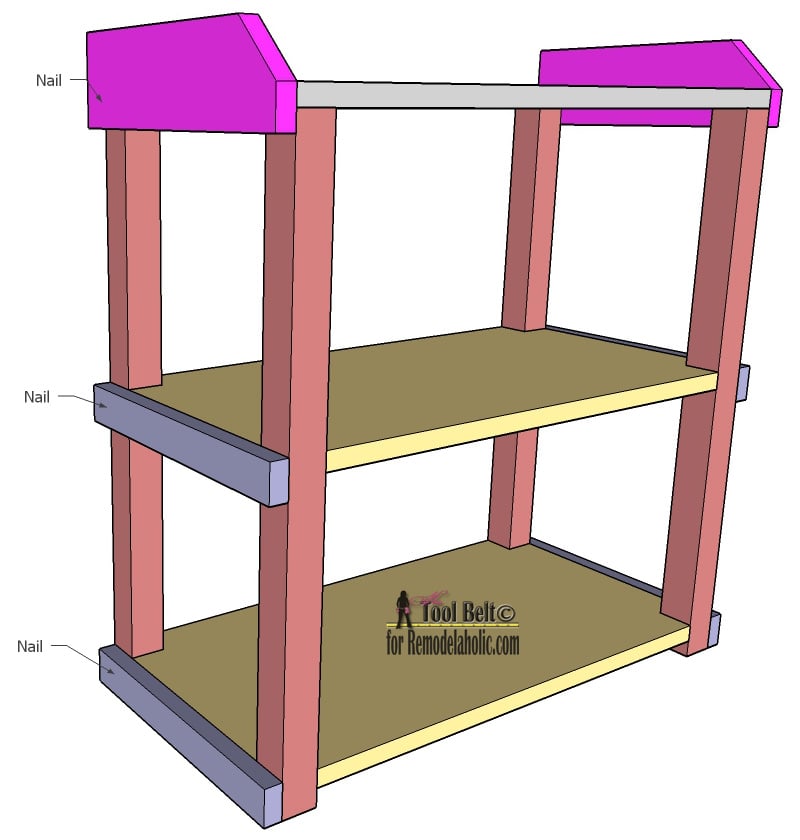
Glue and nail the trim pieces C & G onto the legs and shelf, lining up with the previously installed trim pieces.
Step 7:
Rip the remaining 1×4’s into 1 1/8″ widths and cut 4 x ~17 1/2″ long. On one end, cut a 49 deg angle. From the end, measure down 15 15/16″ and cut a parallel angle of 49 deg. These are the diagonal trim pieces (E).

Glue and nail the diagonal trim pieces onto the shelf.
Allow the glue to dry, and you’re done building!
Step 8:
To finish the small shelf, fill the nail holes with wood filler. After the filler is dry, lightly sand the wood until smooth. If staining, apply wood conditioner and stain as directed. If painting, prime and paint with your favorite color.
 |
 |
For more build plans check out Hertoolbelt:
 |
 |
 |
Curvy Side Table // Scroll Console Table // Crate Coffee Table
——————————————————————————–
Need more shelving ideas? Read our post about 25 DIY shelves, and try out these shelf building plans:Cabinet Door Storage Bins
 Built-In Bookshelves and Corner Bookshelves
 Rustic Wall Storage Bins
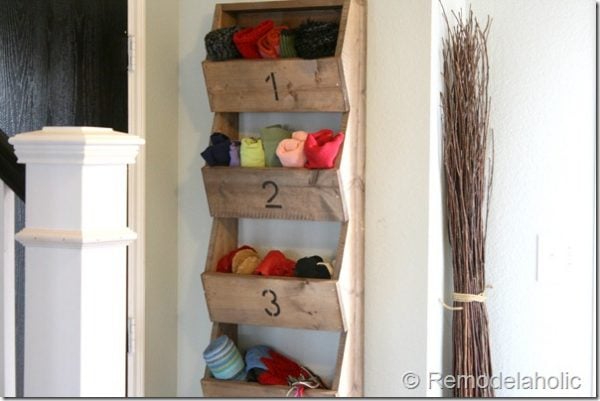
Amy is the tool lover at Hertoolbelt. On Hertoolbelt, Amy shares DIY furniture plans, handyman tutorials, and craft patterns. She has three pint sized 'helpers' that help fix things around the house and build fun projects.


Would you recommend using wood from pallets for this project?
Yes, you can definitely use pallet wood for this project. However pallet slats are typically 1/2″ thick, and the plan calls for 3/4″ thick material. Make adjustments as necessary. I bet it will turn out awesome.
can you tell me what stain you used? I want the exact same color…. Looks great.
Hi Kathy, the photo was just our inspiration for the building plan, so I don’t know the exact stain color. Sorry!
Hi Amy,
Thanks for the plans! I’d love to know what program you use to create your building plans. I’m in need of an easy to use program.
Thanks so much!
Jenise
Hi Jenise,
It’s called Sketch-Up.
Thanks Amy! I’ll check it out!
What drain and or technique did you use to finish this. I built a dining room table and this is the finish I would like to achieve.
Hi Tess,
The finished image is just our inspiration image, not our build of the shelf — but I bet that the DIY stain that Lauren used here would give you a similar finish: https://www.remodelaholic.com/diy-industrial-locker-basket-mail-organizer/
Thanks!
Hello! I’m currently building this using the printable version (and having fun!) and noticed that the length measurement for the D boards is listed as 17 1/2″ but should be 12″. Just wanted to let you know.
I went to printout the plans but it say they have been relocated. Is there a new link?
Hi Tina,
Sorry about that! We are updating and improving plans so we’ll have that fixed soon. Thanks for your interest!