DIY Master Bedroom Wood Coffered Ceiling

Submitted By Our Small-Town Idaho Life
See how Andrew and Rachel accomplished this task with their 7 steps below.
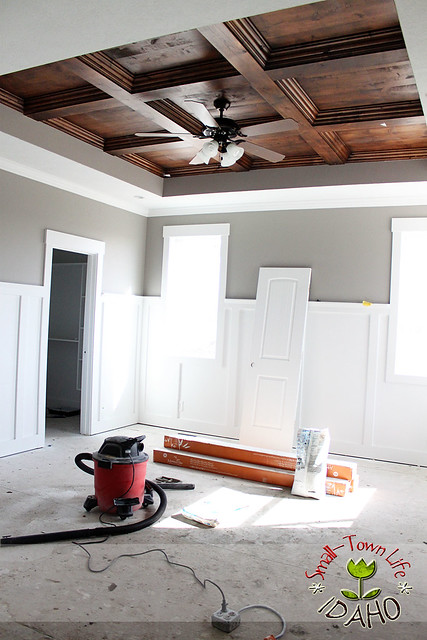

Here is the master bedroommany moons ago. Our coffered ceiling started with simple drywall.
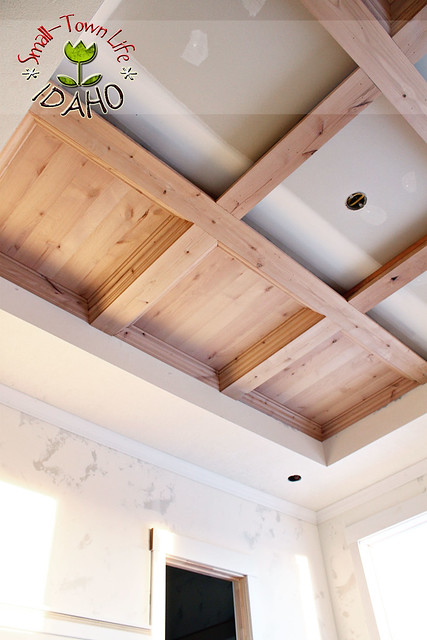
1.) Andrew first took 2×4’sand created a grid pattern.
2.) Next, he took four-quarter knotty alderand nailed it over top of the 2×4’s in the same grid pattern.
3.) Then using quarter-inch alder, he filled in all of the grids.
4.) To give it a finished look, Andrew wrapped each grid in crown.
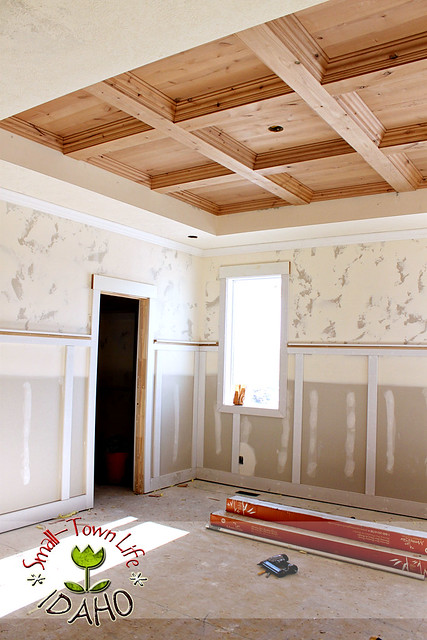
5.) Then he used a maple-to-alder spray stain and a coat of lacquer.
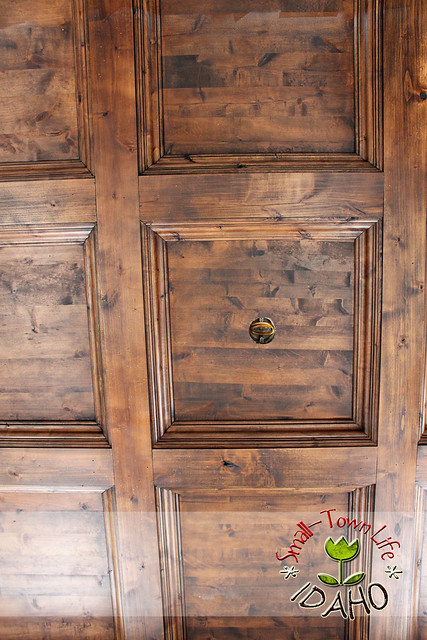
6.) Next, he used a water-based rusty old glaze that was wiped on and off. This is what caused the knots and grain patterns to pop.
7.) After letting it dry for 30 minutes, it was lacquered one more time.
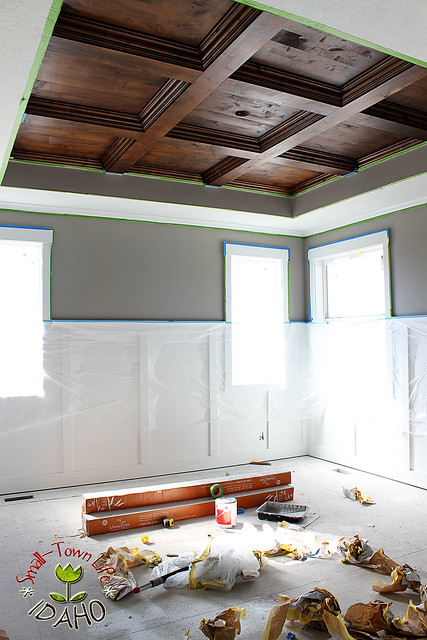
It was gorgeous, but it looked shockingly stark against the white walls. I was anxious to get everything taped and painted. If you notice, we painted the walls AND inside the coffer itself with the SW Pussy willow color.
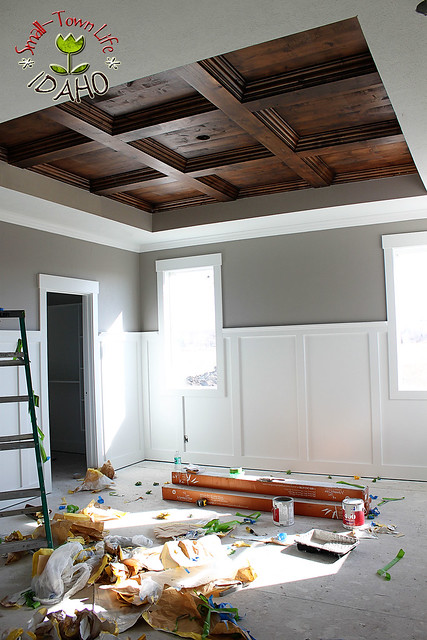
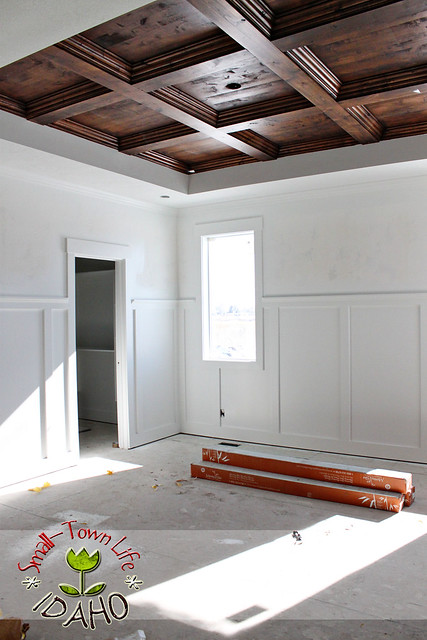
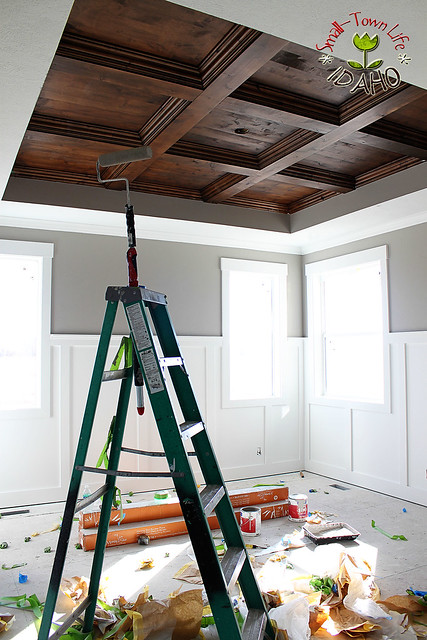
Here it is with the tape and plastic removed (and on the floor). It all looks more complete and gradual this way.
Second perspective.
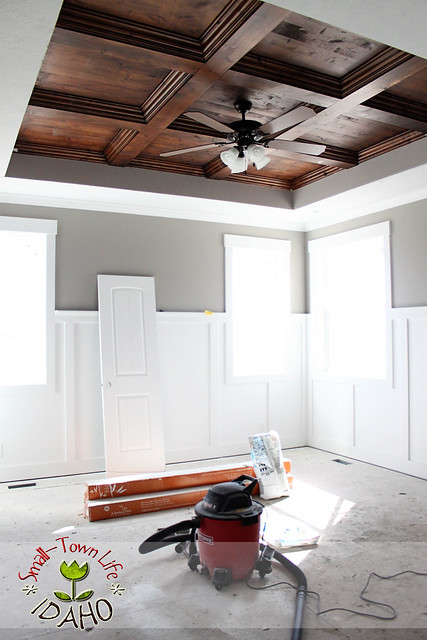
And finally, here it is finished with the ceiling fan in the center and the can lights installed along the outside edges of the coffer. This room is just waiting for carpet and vent covers!
I am the husband of the amazing Cassity of Remodelaholic. I love to problem solve and to design and build things inside and outside the house to make life better. I am a professional Landscape Architect by trade and love the outdoors.


I love the way white is integrated with bold, dark hues. While some people consider white as boring when it comes to paint choices, this post will surely give them a change of heart. (Thanks for giving another blog to check out, too.)
This is gorgeous. My neck hurts just thinking about doing all of this, but it would be worth it!
WONDERFUL!!!
Oh wow!! Congrats on your DIY Rachel and Andrew. It is stunning!
I’m speechless – This is seriously gorgeous!! I’ll have to check out her blog. Thanks for sharing:)
OMG!!! A-M-A-Z-I-N-G!!!!!!! Missi
Beautiful!!
Absolutely stunning, and what a unique idea for the bedroom the best place to lay down and admire the ceiling 🙂
What a wonderful alternative to a traditional white, flat ceiling. I love the knots that show through.
It looks beyond AMAZING!! I would love a more detailed tutorial. The explanation was very brief!
Love this. I was looking for something like this for my Kitchen we are getting ready to remodel. 🙂 Thank you for posting
I love the look of the knotted alder. gives the room such a warm feeling. Much nicer than just your normal pressure treated.
Wow, that is gorgeous. Coffered ceilings create such a high end look. Beautiful!
It is incredible! And to think a home in Idaho has a ceiling like that? 😉 May I ask what it cost? We are building and I want to do something like this to my Dining room and Master. What would you change? This is exactly what I love. The trendy will come and go, but something like this has been and will be in style for hundreds of years. Julia
Love this!! Their whole room looks fantastic!
How can I end a coffered ceiling where the ceiling does not end at a wall, but an open stairway? My ceilings are 8ft high. I am looking at installing a 3 1/4″ coffer…but by the stairs it would lower the ceiling to where head clearance is minimal…I am 6’4″ tall and I would come awfully close to hitting my head on it. What options do I have at the stairs? Thanks.
This is so amazingly gorgeous!
It’s just beyond amazing really – you 2 are incredible!!!
How gorgeous
XOX
I love this, thank you for the step by step. What I want to know is how much it costs to do this. I am totally going to make the husband do this in our master!
I love this! It brings so much character to the room, I like your choice of paint color too. Thanks for sharing, well done!
Thanks for the comment, Amber!