Build a Farmhouse Table For Under $100
Farmhouse style is in! On top of the fact that this style of furniture is gorgeous and adds so much character to a room, I think so many of us love the feel that the farmhouse furniture brings into our home, of the “farmhouse” mentality — gathering the family together, working hard, building things with our own two hands. It’s both a lovely call back to simpler times and a lovely home style! When our guest shared this farmhouse table at the Remodelaholics Anonymous party, I jumped at the chance to have her share it here with you:

Farmhouse isn’t just for the kitchen table though… You can bring the farm-inspired furniture into every room of your home with DIY plans such as…
our very own farmhouse-inspired computer desk for two (which would also make a great console table!)

a gorgeous farmhouse bedside table, made by Shanty 2 Chic following Ana White’s plans,

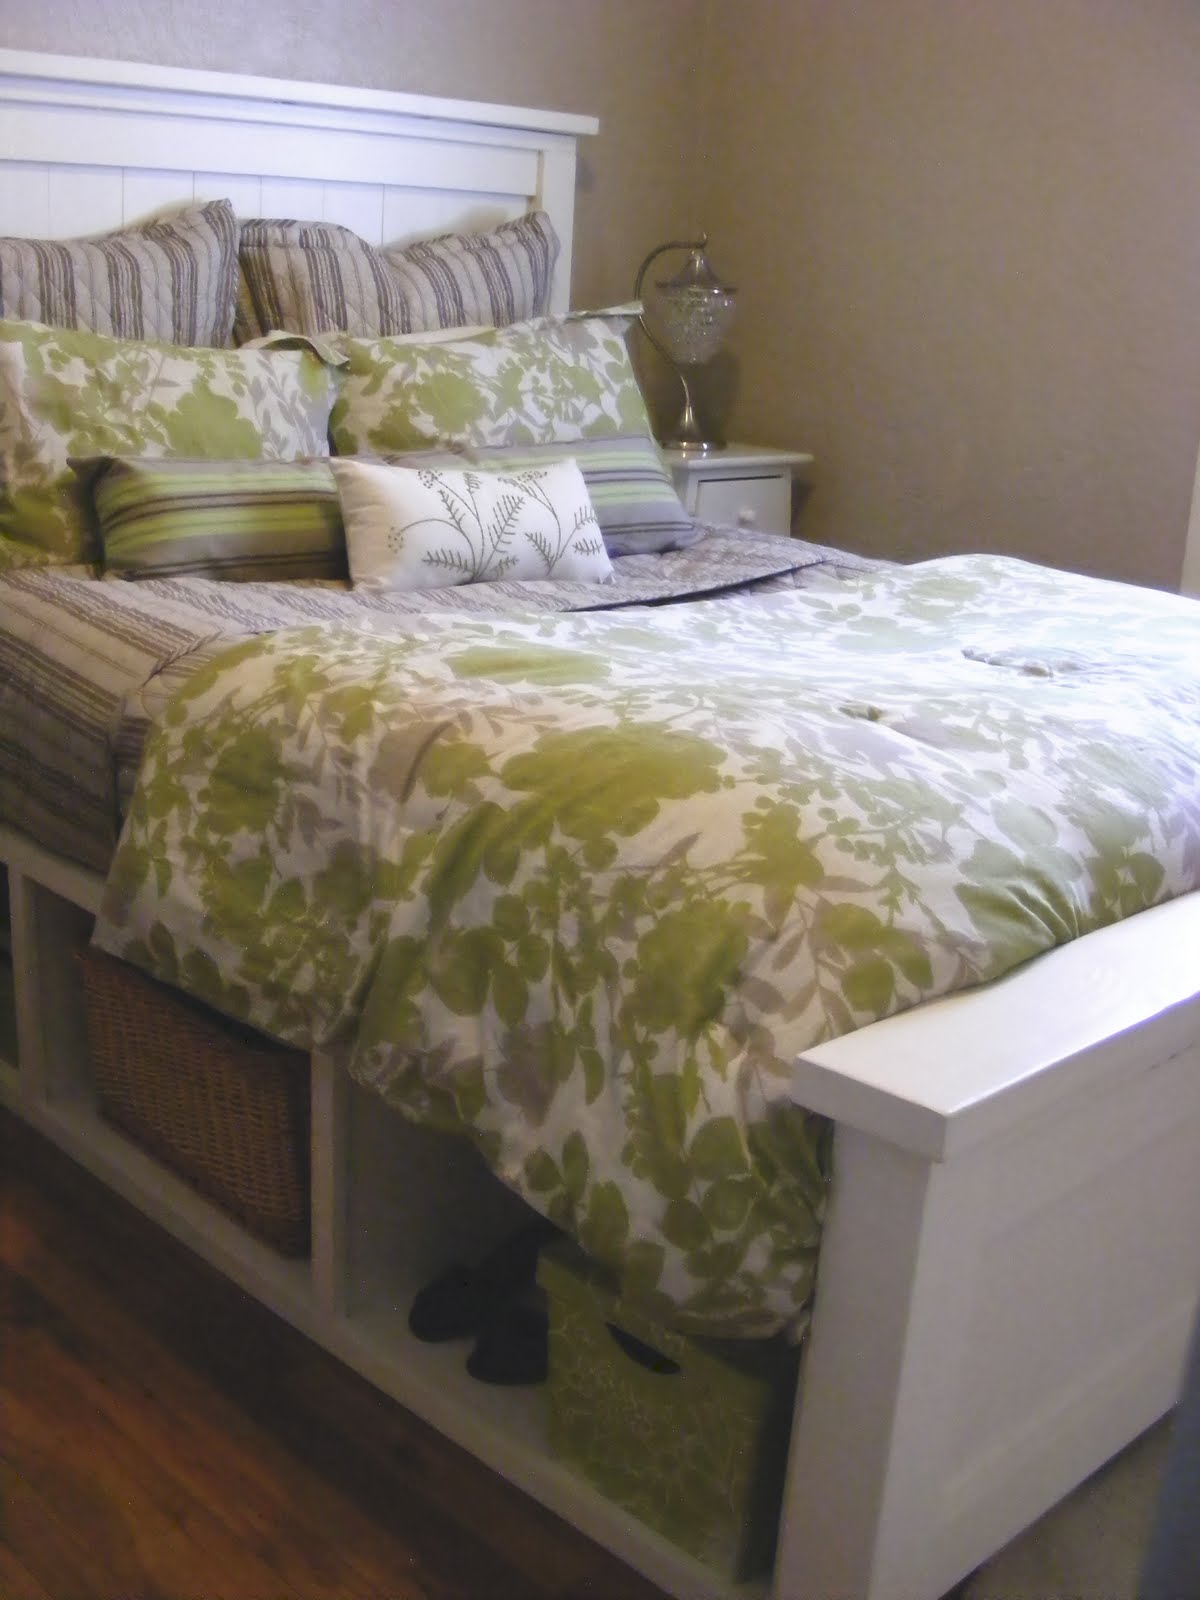
an awesome farmhouse bed with storage (and more than is visible!) by Birds and Soap
and even the littlest tenants can sleep in style with a farmhouse doll bed (plans by Ana White).

Or, you can remake an exiting piece of furniture to have some farmhouse style with a rustic look and stencil, like The Shabby Creek Cottage did.

Ah, farmhouse. So lovely, and such a great DIY! You can save hundreds of dollars over a purchased farmhouse table just by making your own. And here’s our guest Karin to show you how she did just that.
DIY Farmhouse Table for Under $100
by Karin of Art Is Beauty

Hello Everyone! My name is Karin from ART IS BEAUTY. I am a Mom of 4 amazing yet BUSY BUSY kids and the wife of 20 years to an amazing (in the fact that when I finally beg him to do big projects like this he only pretends to protest because he knows it useless) Man. 🙂
My whole life I have loved painting and anything artistic and projects. I love to see how using my brain and my hands I can change nothing
into something. Some of my favorite projects over the years have been the Fenner Nature Center dresser that we did for an auction to benefit the center. You can see that HERE. And one of my favorite paintings was “all my days.” It’s an oil painting “self portrait in tree form”. You can see that HERE.
So that explains a bit about me…Let’s get started showing you the Latest project.

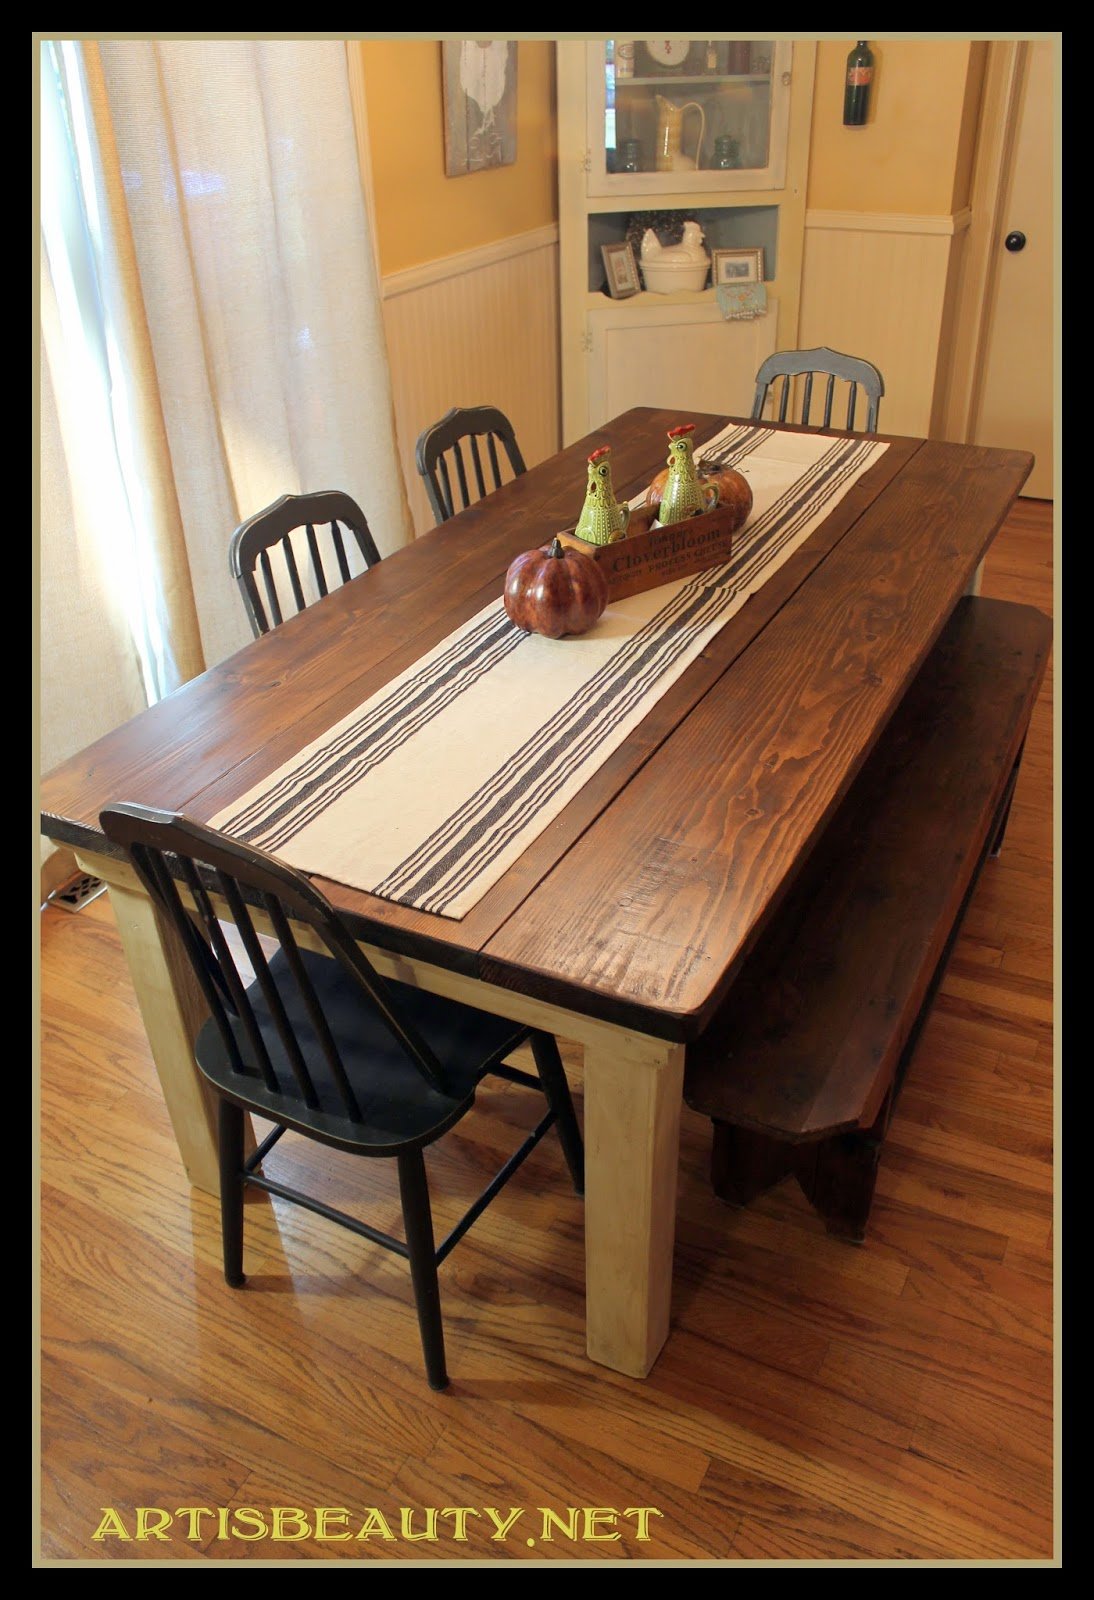
I have been dreaming of having a Farm House table forever.
You know to build memories around and for your kids to get all sticky LOL!
But you have seen the prices of those things…WHEW… NO WAY! I knew the hubby and I could build one.
He had built me an outdoor patio farm house table from neighbors old deck wood they were throwing away and I had built one from pallets so we kinda had an idea and would just figure it as we went.
One of the biggest issues we had to deal with was the antique bench that needed to fit between the legs. We knew the legs had to be far enough apart to fit the bench and trying to do the measurements from home just wasn’t cutting it (since lumber is never actually 2×4..its about 1 3/4 x 2 3/4, so you can see why trying to calculate before hand was difficult). We just took our measurements to Lowes and laid it out right there on the floor and figured out what pieces we needed from there.

Here was what we came up with at Lowe’s for our wood and screws supply list.
So as we laid all the pieces out we figured out how wide our legs had to be apart to fit the bench and could go from there to fit the table around the legs. Here was our supply list…
- 4 2×10
- 2 1x4x6
- 2 1x4x4
- 3 2x3x8
- 2 1x2x8
- 1 1x2x6
- 2 4x4x8 FIR..for the legs
- The total cost of the wood was $77.26 + tax
- 1 box 2 1/2 screws
- 1 box 1 1/4 screws
Then it was time for building.
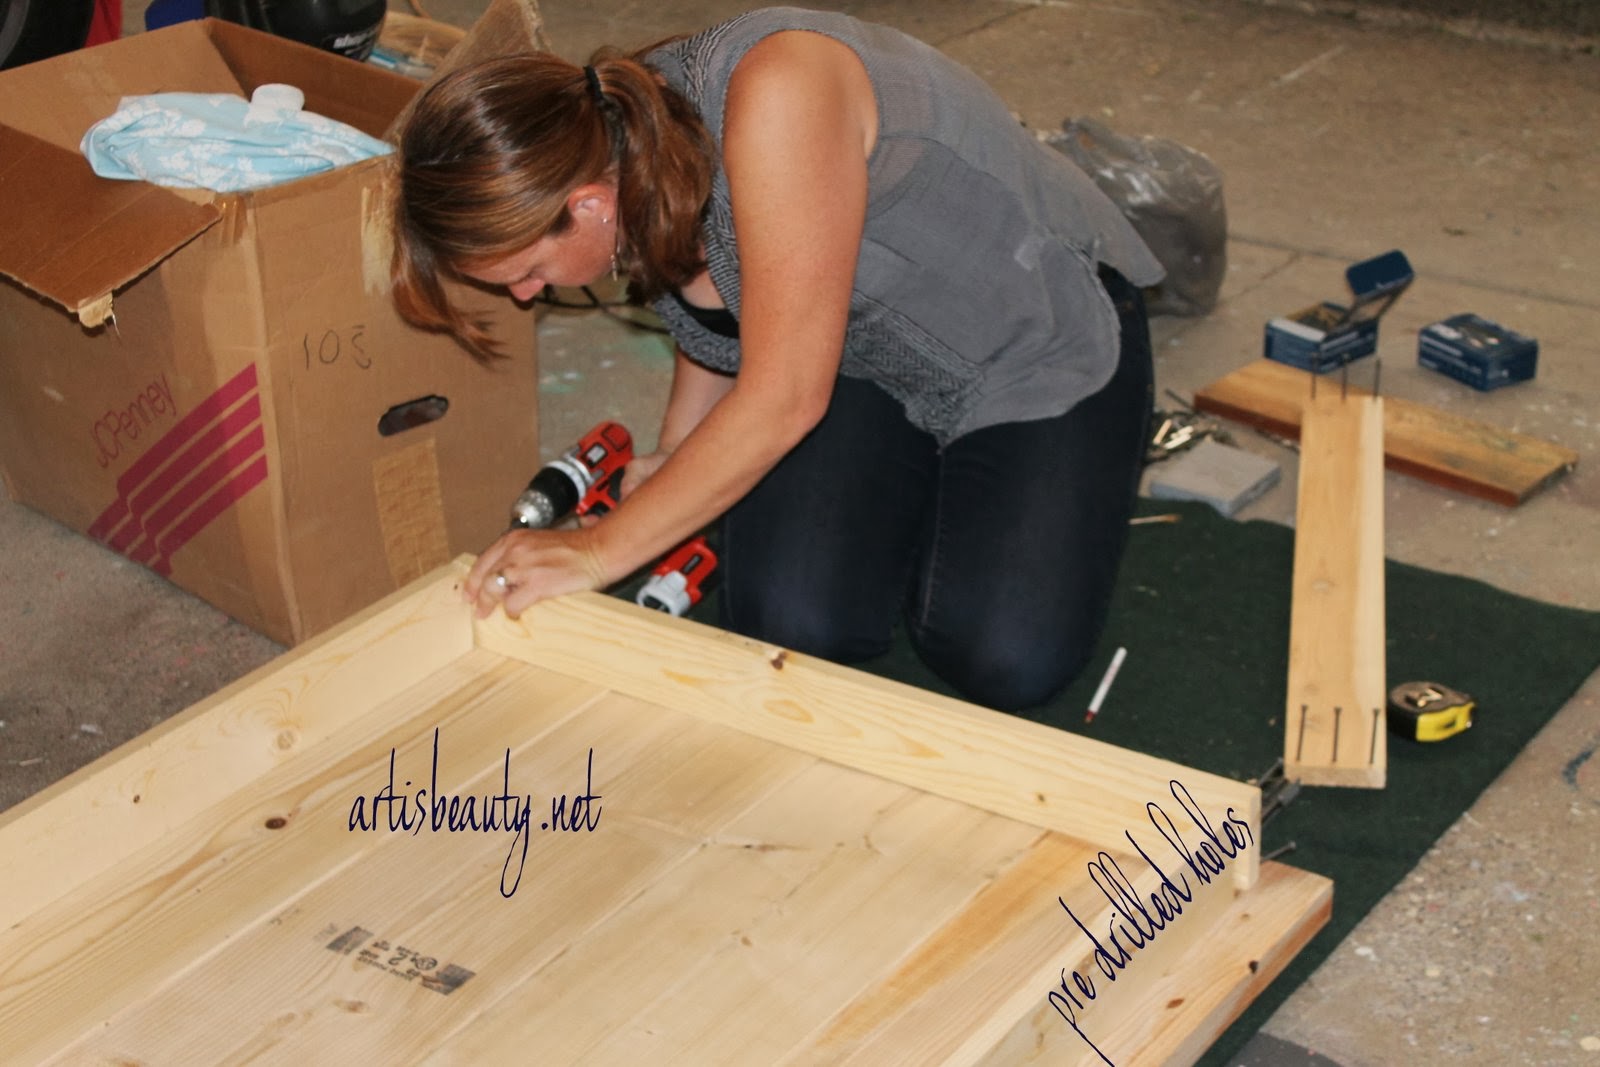
Once you decide on what size table you want the first thing you need to do is to decide what size the skirt needs to be. Its the rectangular box that you build for the base of your table. We knew we wanted around a 2 inch overhang so we built the box 2 inches smaller than the actually table top. We pre drilled the holes on the ends and used 3 screws for each corner to secure the framing.

Once the skirt is built you will need to put the braces for the supports in which you will screw your top boards to.
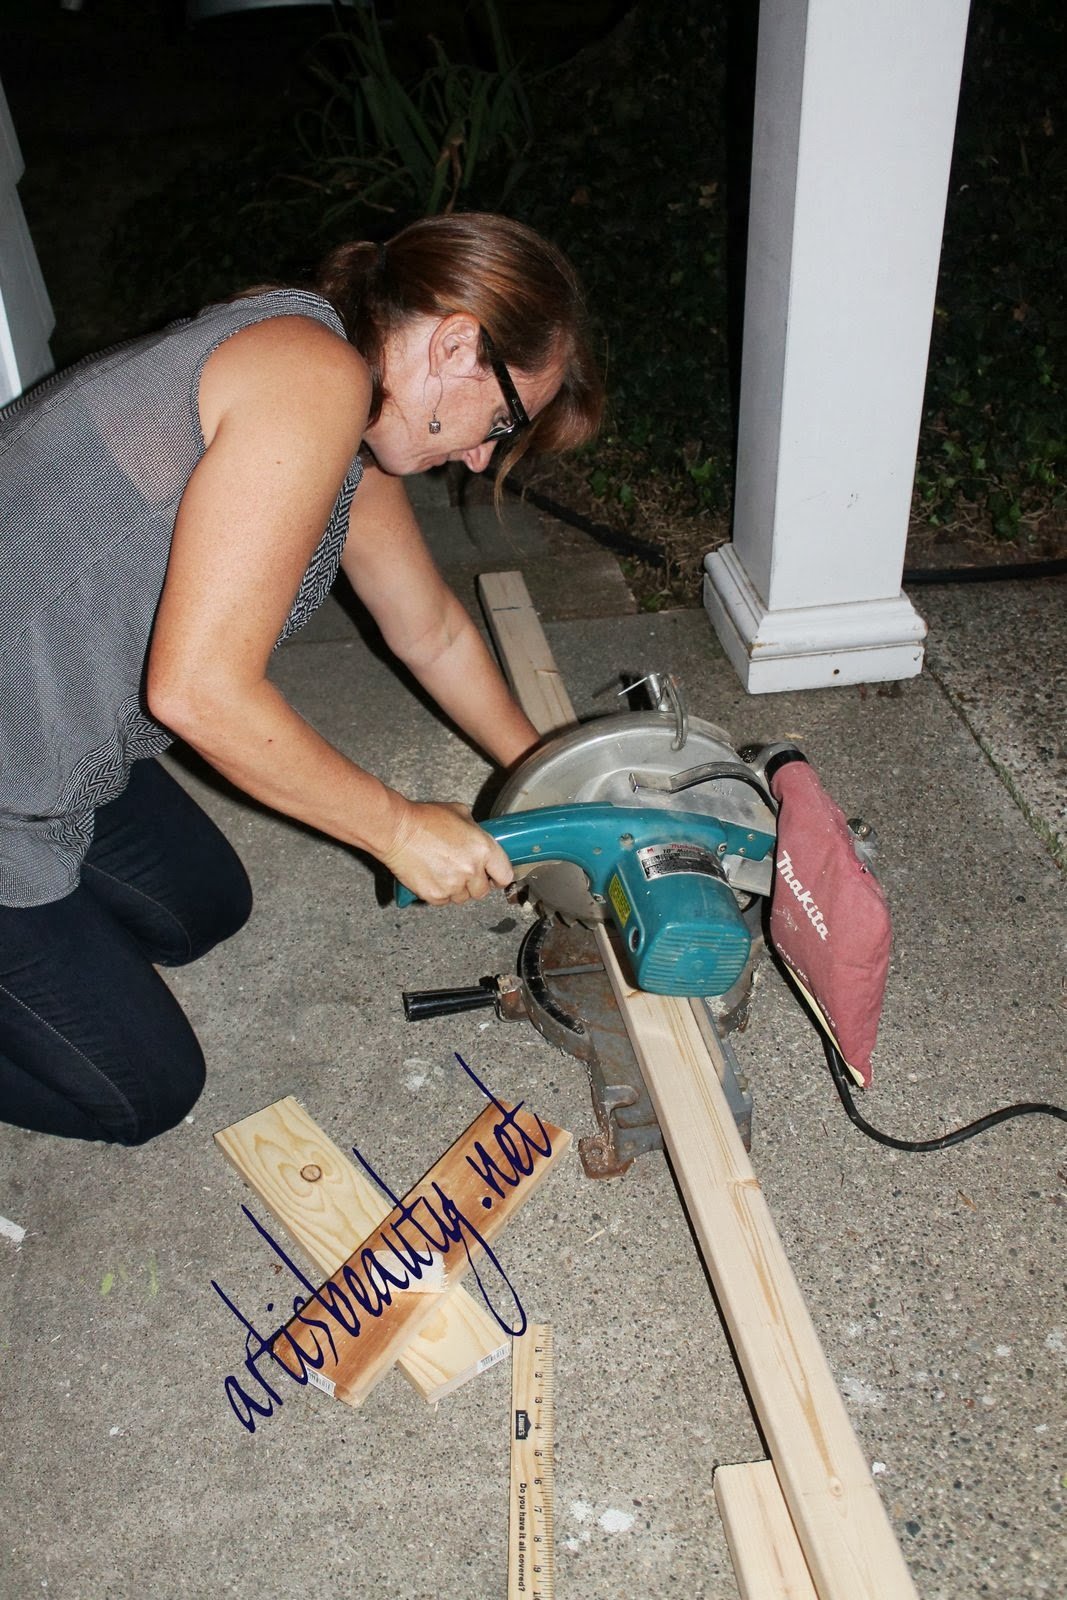
we cut all our brace boards the same size seeing as this would also ensure that our table was SQUARE.

Once all the supports were cut we used 2 screws to attach them to the skirt. Make sure your support braces are even and level with what will be your table top. If you put the braces HIGHER than where your top will be your boards won’t be sitting on your frame.
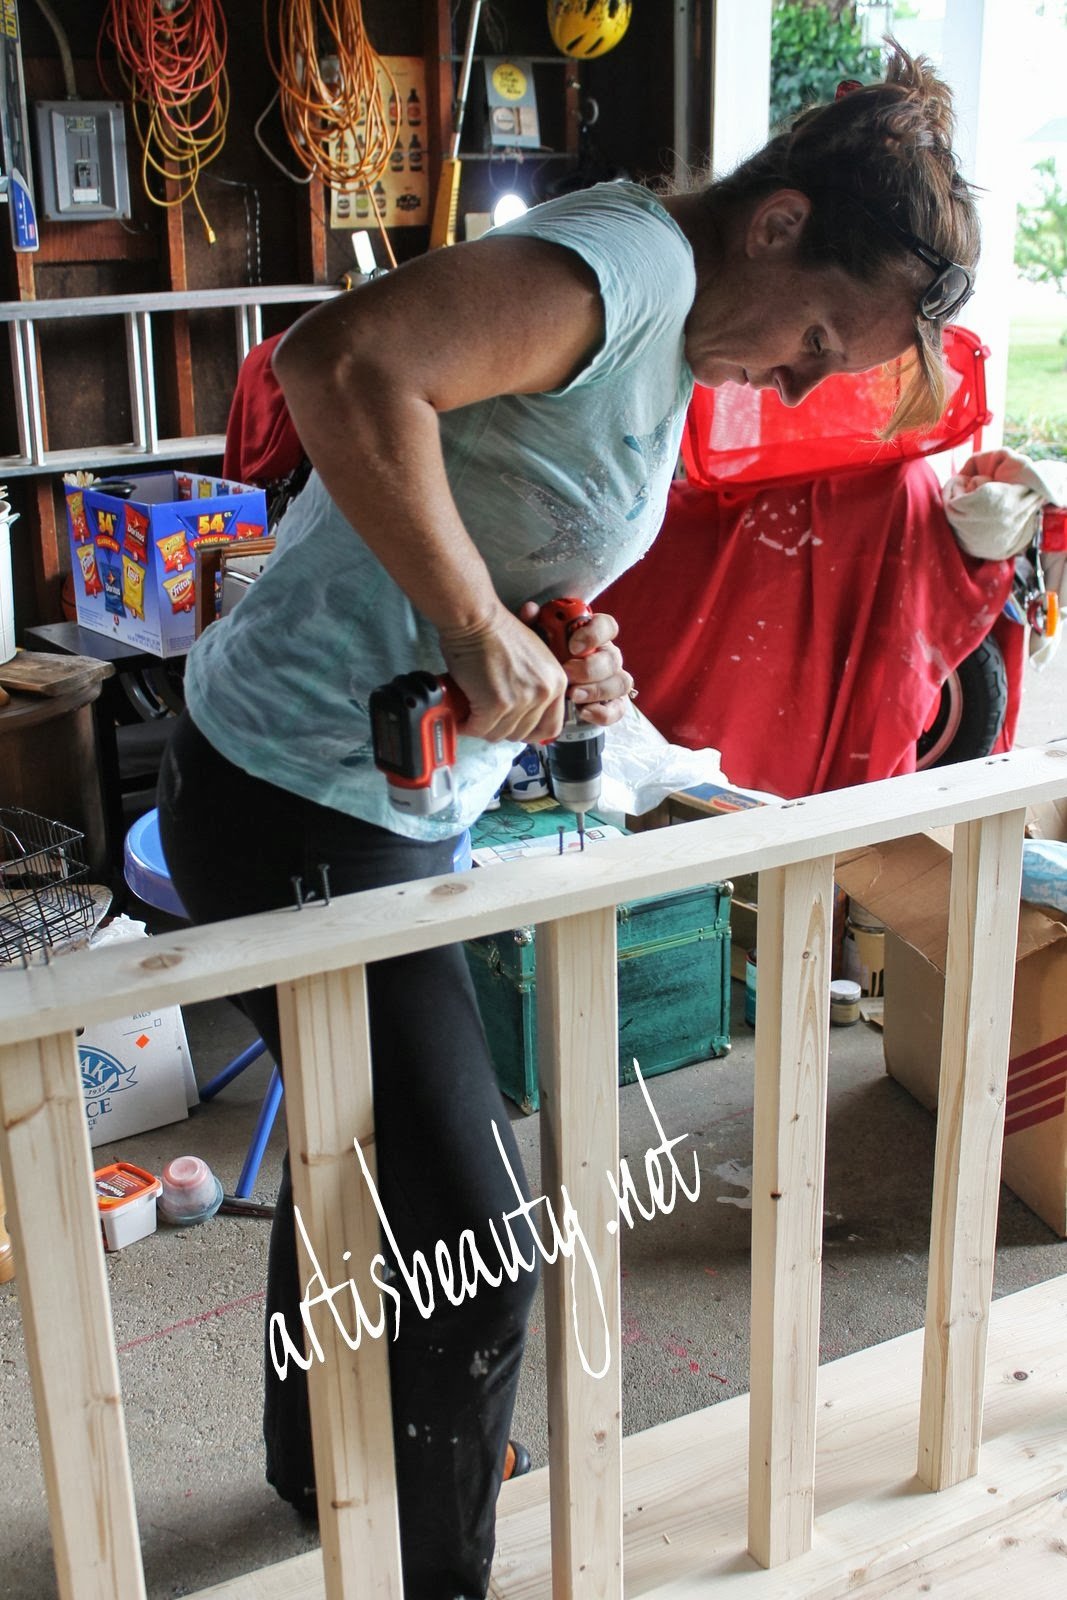
Here I am putting the final screws in to support the frame.

Now that the skirt and frame are done we attached the legs. We used Gorilla glue on the bottom of the legs and then we used 3 long screws on each outside corner.
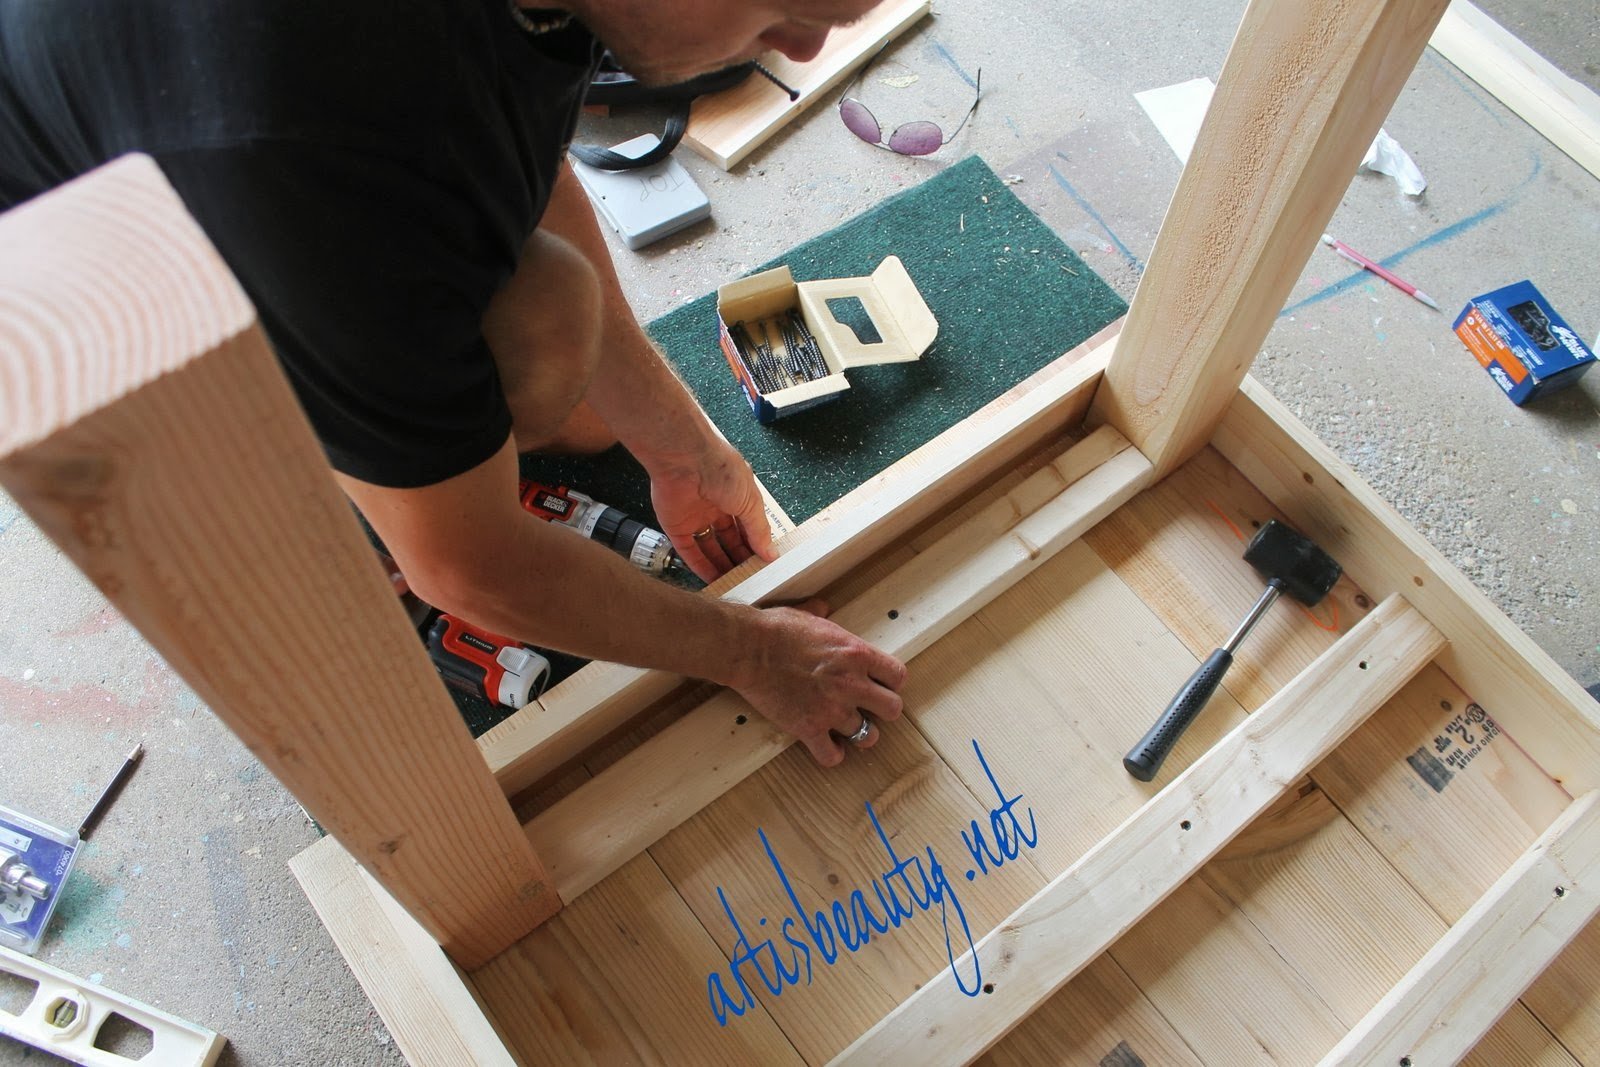
Once the legs were screwed in we then put support braces between the legs. We did this not only to help support the legs but to also be able to screw the end of the table top in closer to the edge.
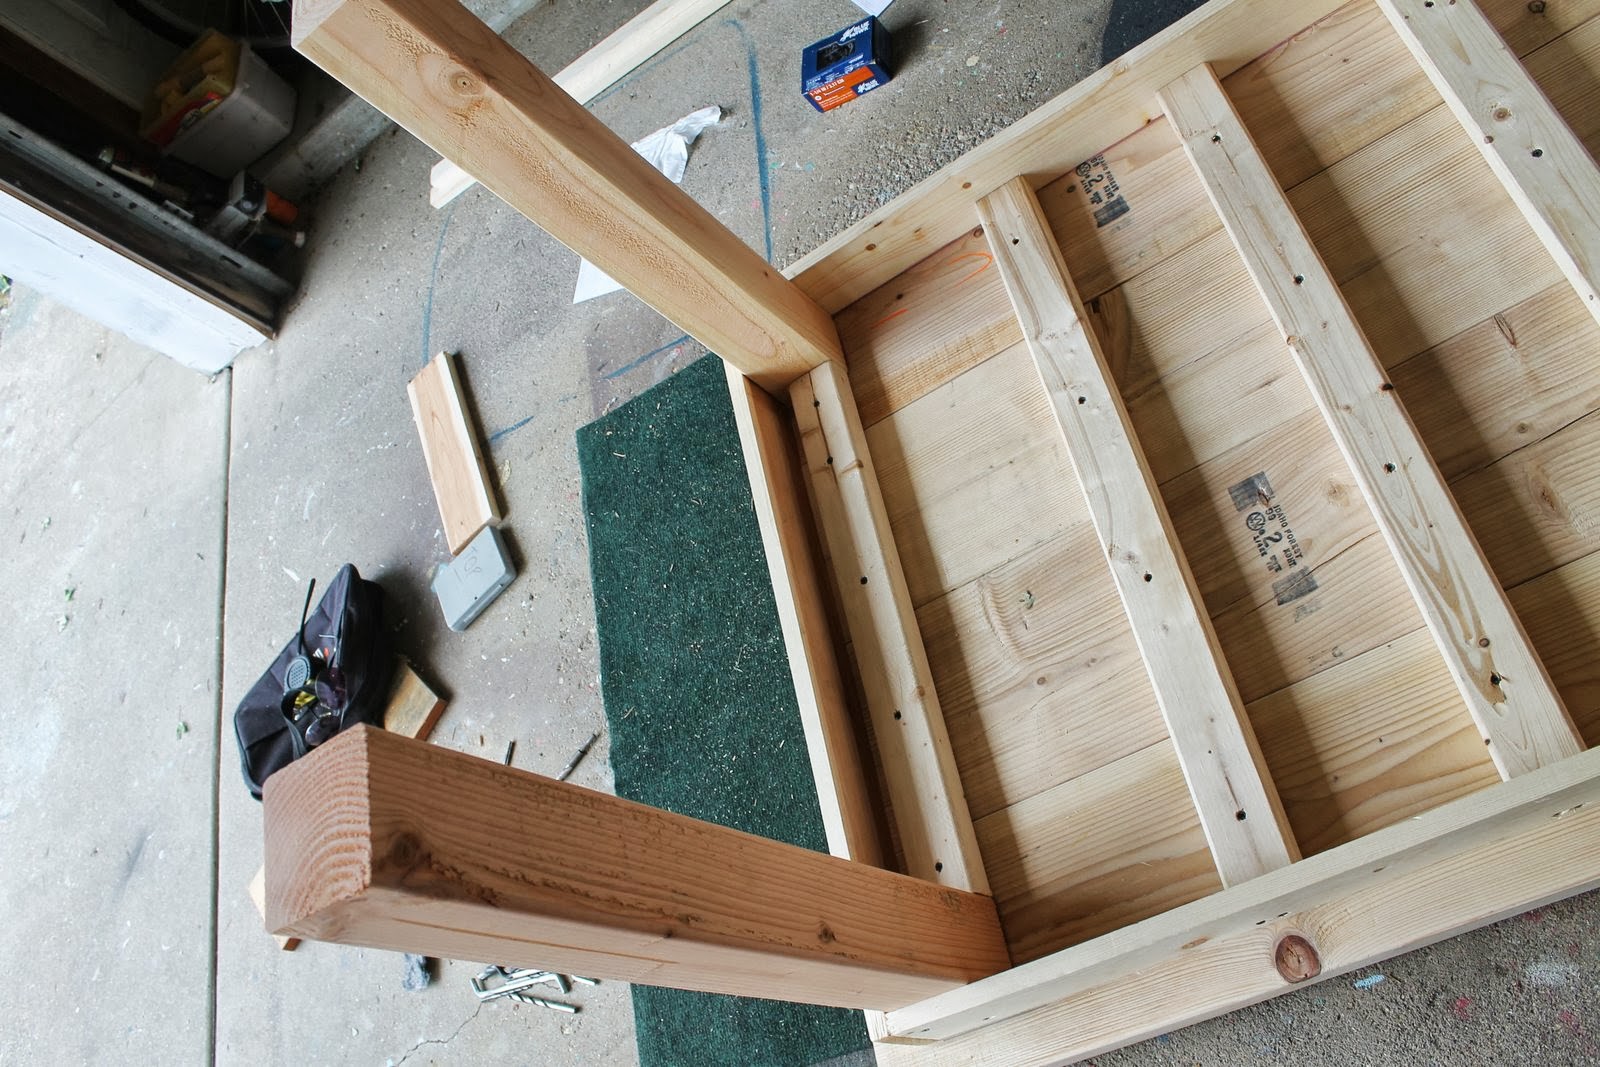
After that you can see we cut our top boards of our table the size that we wanted. Made sure they were all even and from underneath used the support braces and screwed the braces to the top boards
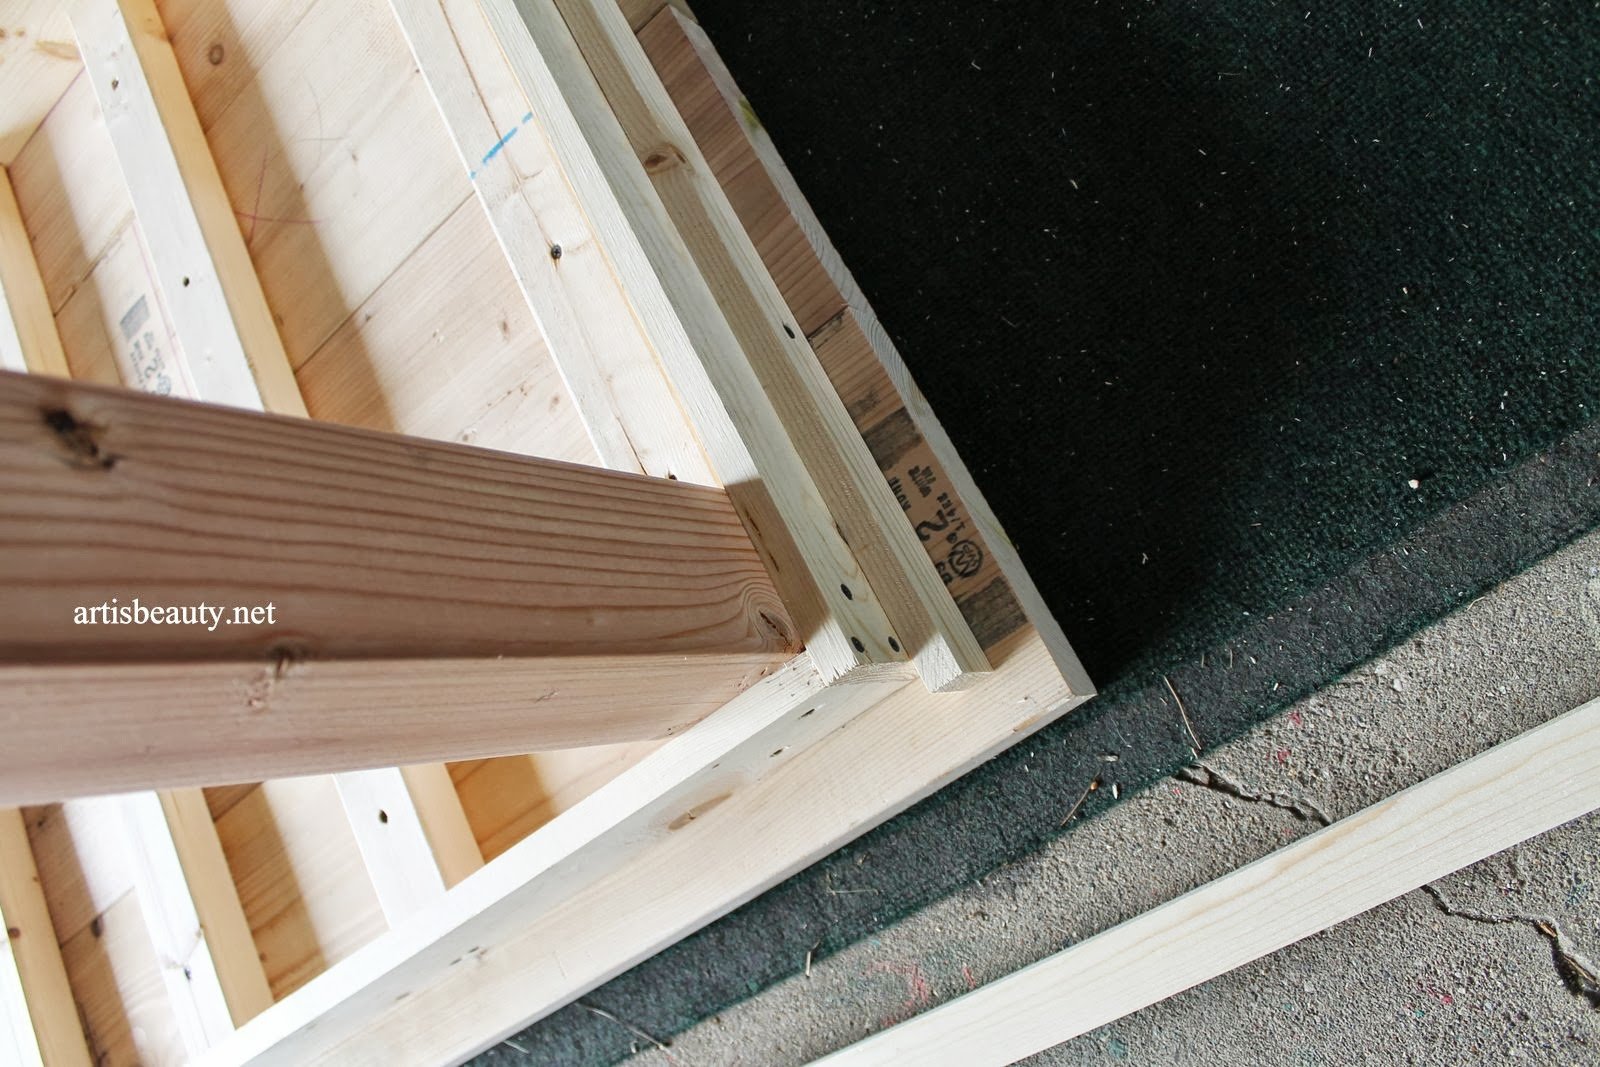
We decided in the store when we were working out the plan that we knew there would be lots of screws showing and we could putty them or we could add a little more detail and add another smaller decorative skirt around the outside.
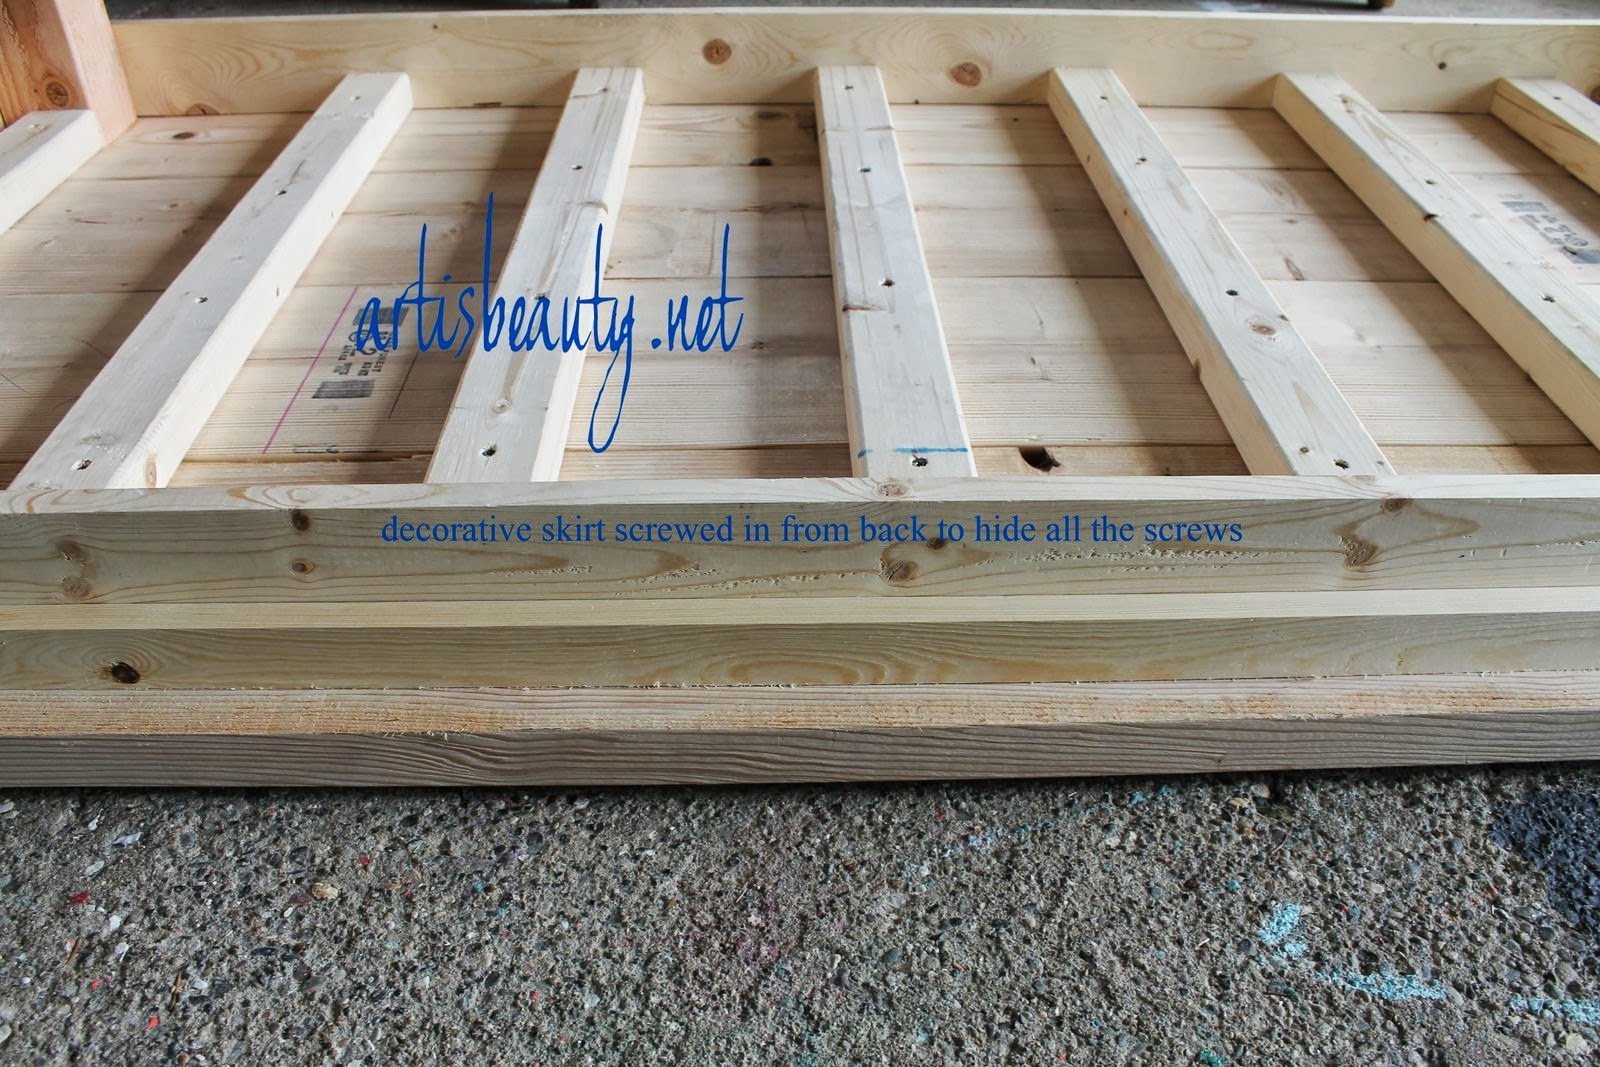
We did this by using the 1x2s and framing around the outside and screwing them in from the back, hiding almost all the screws.


Now it was time for the real fun. I used a chain to beat up the top NEW pine boards and give it some character.

Then I pulled out my belt sander and rounded down all the rough and square edges giving it a very worn old look.

See those marks..those are from the chain. Isn’t that fun.

Once all the prep work was done it was time to stain and paint. Now normally I do not Pre-Stain my wood, because I am dealing with old wood that has been stained before. But this top was BRAND SPANKIN new PINE and that stuff can get blotchy. It soaks up stain like sand soaks up water in the dessert. So I made sure to wipe on the pre-stain. It only takes about 5 minutes after you put it on before you can start staining.

I stained the top in Provincial and gave it a good couple coats of Poly when that was dry. Being sure to lightly sand between coats and use a tact cloth to wipe it down before apply the next layer of poly.

I painted the legs with 2 different colors CeCe Caldwells paint and then waxed and buffed them and she was ready to come on in the house.
Time: took about 2 days. The biggest time is waiting for the Poly to dry. Luckily the week we built this was perfect weather..not to hot and not too cold.
Cost was under $100.


Lorene has been behind the scenes here at Remodelaholic for more than a decade! She believes that planning projects and actually completing them are two different hobbies, but that doesn't stop her from planning at least a dozen projects at any given time. She spends her free time creating memories with her husband and 5 kids, traveling as far as she can afford, and partaking of books in any form available.


Thank you , Thank you , Thank you, so much for sharing my farmhouse table.
Karin
ART IS BEAUTY
You are very welcome! 🙂
Karin, I love your table! Where can we find directions on how to make? Thanks for your time!
Hi Stacey! All the instructions for making Karin’s table are featured in the post above^^ Thanks!
Karin, will three chairs fit on each side of the table made the way you described? Thanks so much Karin Collins
Looks great! I especially like the price tag…now you have me wondering if I need a new table. =)
Hello , I plan on making this table for my kids as a childs activity table in their playroom. what would you suggest the height of the legs be?
I wold suggest you find the chairs your children are going to use and have them sit in it. then measure the height from the floor to how high you want the table making sure you leave enough room for their legs.
Beautiful table!! Amazing job!!
How long is your table? I have been looking for a table like this and have been wanting to build one but had no idea where to start. Thank you for sharing your table and plans.
Great job! Where did you find the 4×4’s? Seems all I can find at Home Depot and Lowes are pressure treated.
They do sell them at Home Depot, I have purchased them there before. You might need to ask a lumber associate.
Looks good! I plan on building one for my family also, here is my question …
Without supports between the 4×4 legs (cross bracing etc) do you find the table to be ‘wobbly’ at all?
I built this table this week, and believe me, the table is not wobbly. I was worried about that too, but I’m happy to say that it feels very sturdy.
Thanks for the feedback, Brad! We would love to see pictures! https://www.remodelaholic.com/share-brag-post/
Thanks for the feedback, Brad! We’d love to see pictures of your table. https://www.remodelaholic.com/share-brag-post/
Hello! I love this design, what are the final dimensions?
Hello, I really love you site, great ideas everywhere I click.
Can you please share the dimensions of this table? I was thinking about making one which seats 8 ppl.
Thank you!
We are thrilled that you love our site. Thanks for coming!
So, am I going to get how many ppl this table seats? I’d like to build one for 8 ppl. Thank you!
I made my table 7.5′ long, and am able to very easily seat 8 people.
I really love your farm shelter and diy tips. It inspires me to start my spring cleaning early this year. Our livestock area needs some serious TLC…My wife has been on me to assemble a run in shed and make some other improvements at our farm. With your expert tips and inspiration, my task should go much smoother. Thanks for all your help and advice!
Beautiful. You did a GREAT job. Very helpful. So happy I stumbled on your site. Thank You.
Karin,
Thank you for the plans! My wife sent this to me last night and I built the table today! Just got stain, paint, and finish now. My only suggestion would be that while I figured it out, it might be helpful to note which lumber you used for which parts. I was totally clear at first what was used for the skirt versus the joists.
Thanks again!
can you tell me what size boards you attached the legs to? and the size of the board you attached to that board (the trim piece)?
thanks!
Karin – love the table. How many coats of Provincial did you apply? Thx.
I LOVE this table! We’ll be building it for our vintage furniture rental company. One question: how is the table to attached to the skirt? Vertical screws through the skirt?
Love your table. Where did you find the 2x10x8 ft. boards? I have checked the big box stores and they only have it in Fir. Thanks. Irene
Did you use Kilm dried lumber? If not do the 2x10s shrink? Do you have to worry about expanding in high humidity?
Building furniture is a new venture for me and I plan to build this farm table for my wife. Will you please clarify for me the 2×3 wood is used to secure the table top and the 1×4 is what the legs are secured to? Also, do you have a plan for the bench that I see with the table?
Thanks so much for sharing this design!
David Thomas
What shade of stain did u use? Love this!