Wall Decor Frame Collage: Guest
Abbi at This Is Life As We Live It decided she needed to make some changes. See what she wanted to change.
I’ve been feeling for quite some time that despite the warm color, our living room is too cold. I like the pieces in it, but there are too many blocks of color and not enough texture. In my search throughout the universe of blogs for inspiration, I found that I’m drawn to vintage design rather than the stark and planned nature of modern lines. That was my taste not too long ago, but now I want layered and collected and homey.
& who doesn’t like a little change now and then? So, here we go…

The before is nice enough, but boring…right? We’ve got high ceilings to take advantage of and while the mirror reflected a lot of light, it was always a little weird to watch yourself…watch TV.
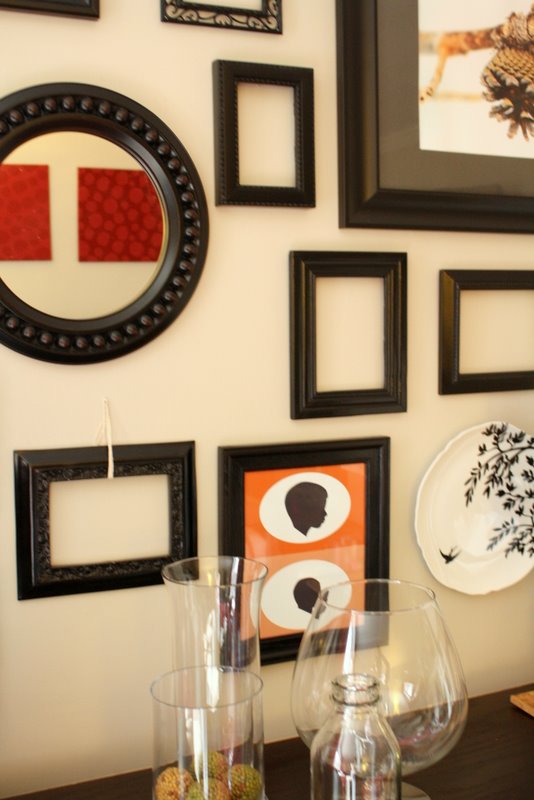
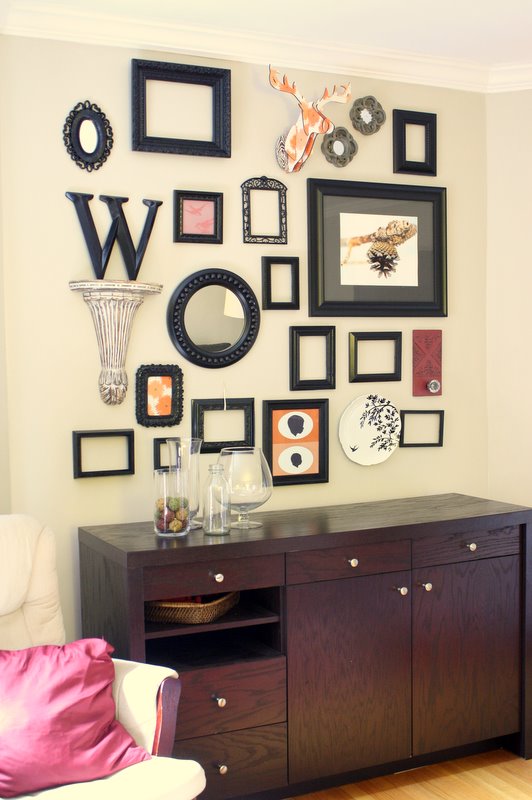
The whole collage started with that beautiful pine cone print. We received it from a obviously very talented friend as a Christmas gift. I’ve been wondering since then just where were we going to hang it. After that, I turned to garage sales and thrift stores. It also doesn’t hurt to have a very resourceful mother-in-law. I didn’t care about material or color, I just wanted it to be interesting. They were all going to get painted anyway.
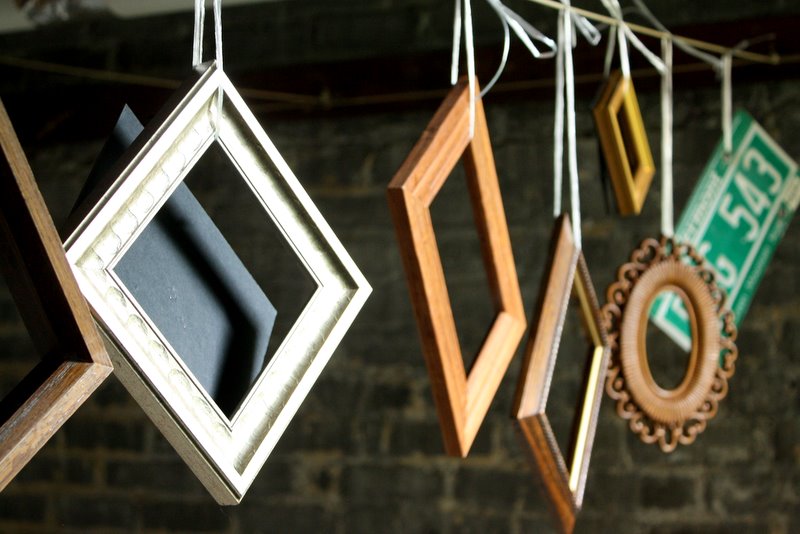
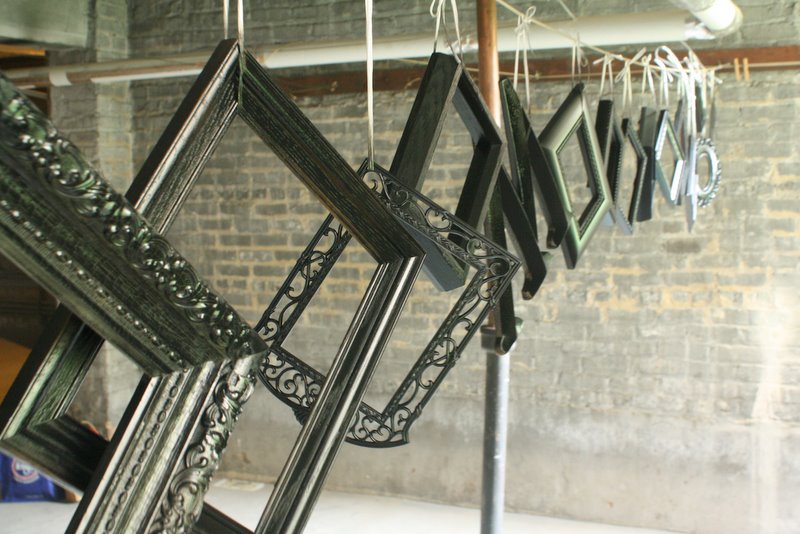
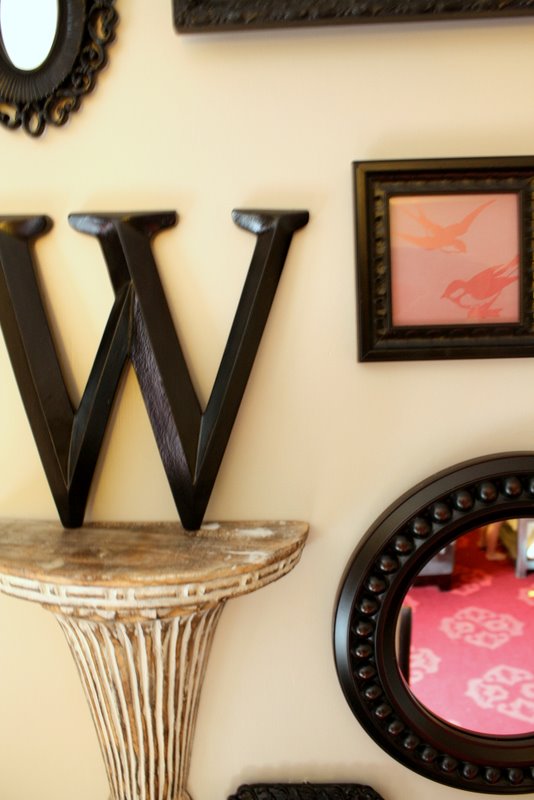
Black to unify the pieces.
I managed to collect all the pieces for this project in a matter of about a month. …yes, this is about as good as it gets for my “collecting over time”. I’m a woman of instant gratification here.
Next, I layed it out and marked where all my nails and screws should go. The paper would serve as my template. The picture was invaluable as well since there was no way I was remembering where I wanted everything to be. Prepare yourself for the most randomly organized collage you might ever see…

Tape up the template, nails and screws into the wall, hang up the pieces…and…I was done. Well, after a lot of tweaking and creating 3 pieces of art to go into a some of the frames…I was done.
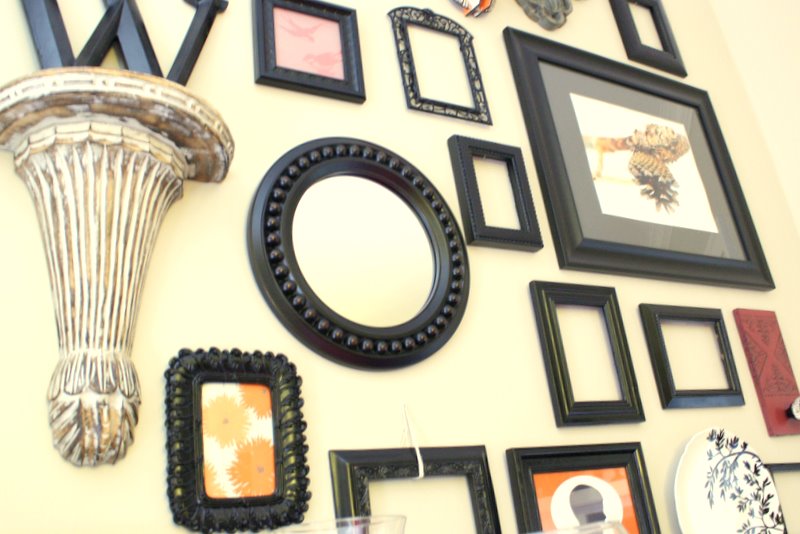
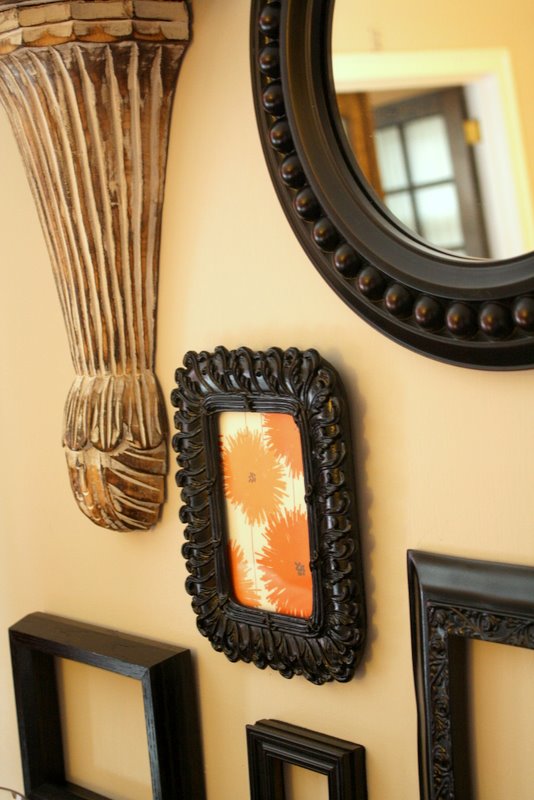
I think I can safely say that I’ve added a satisfactory amount of texture to this room. This is a wall that will be able to evolve over time. & I couldn’t be happier with the end result.
I like the change!
It’s a fun way to collage all those unused frames.
What are your thoughts?
It’s a fun way to collage all those unused frames.
What are your thoughts?
Cassity Kmetzsch started Remodelaholic after graduating from Utah State University with a degree in Interior Design. Remodelaholic is the place to share her love for knocking out walls, and building everything back up again to not only add function but beauty to her home. Together with her husband Justin, they have remodeled 6 homes and are working on a seventh. She is a mother of four amazing girls. Making a house a home is her favorite hobby.


>I really like it! I decorate like this myself – my walls are stuffed! I hate plain walls!
>It's very nice, but I'm more of a less is more kind of decorator. However, I do appreciate what others do in their homes, and looks great in the process.
On another note, I just discovered your paper mosaic art tutorial, and I LOVE that! The colors are perfect as well, and I'm thinking I may need to do one of those in similar colors for my dining room that I'm ashamed to say, still has naked walls from when I repainted 2 years ago!
>I love how this wall turned out!! It looks great! Black frames look so good on a wall. I like the idea of using the paper as your template for getting everything up on the wall. I know you are thrilled with your end results. Very pretty! Love & blessings from NC!
>it looks soooo much better (and in saying that, if you had shown me the before picture – I would have loved that anyway). i love the way you painted all your existing frames the one colour too. much fresher look = congrats!! (-:
>OHH I LOVE this salon style wall…gorgeous! The frames totally unify it!
>I like it…more inviting and warm to the wall space. Great job!~
>I LOVE this idea! Deciding what to put on my walls is always my biggest challenge in a room, and this looks perfect for the scatterbrain part of me 🙂
>Looks great! I am feeling very inspired!