Spell it out! Pillow Tutorial; Guest
Well, here is the other fabulous tutorial from (remember the last one?) Heather at Straight Stitches has an awesome pillow tutorial that I had to share.
Sometimes I make things more complicated than they have to be, and then genius strikes and saves me a lot of effort! I love when that happens. Well, I love when it happens early in the process. 😉
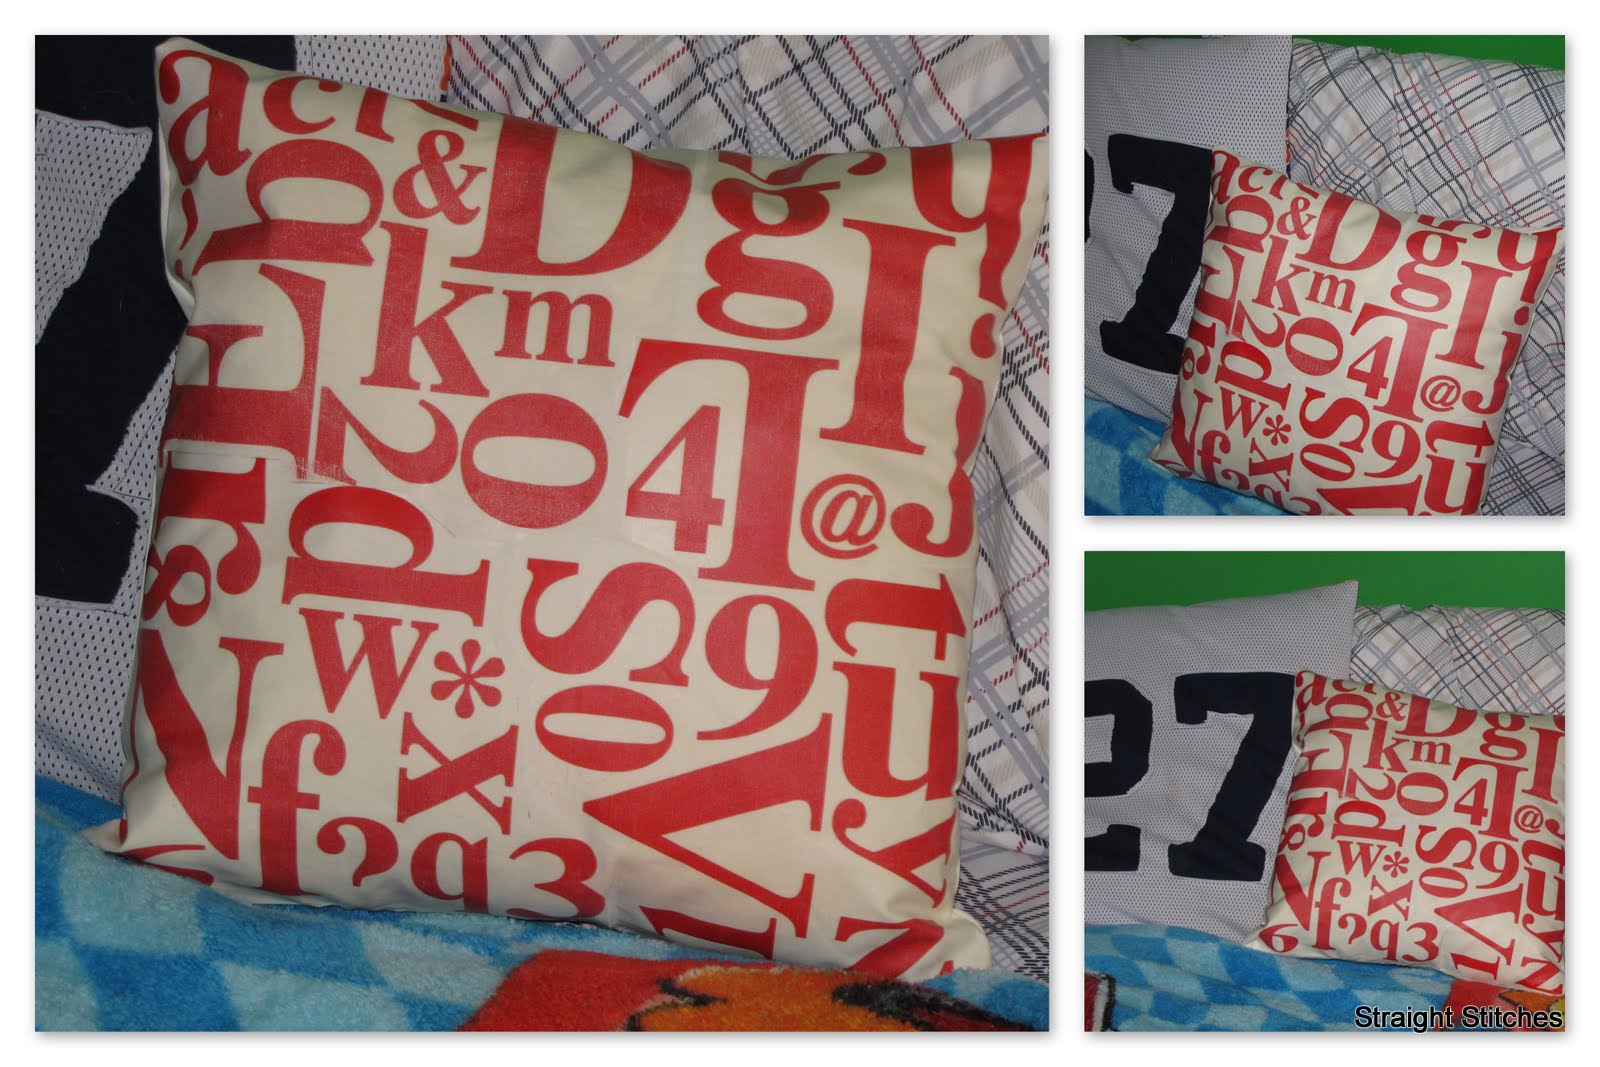
So I love that all these letters and typography stuff is popular now, what’s even cooler is that Devlin wants to move out the Red Sox stuff in his room {his father is heartbroken}, but Dev has told me he wants an ABC room! Yay….because I love the possibilities that this brings, so today in about 3 hours I whipped up a really cute pillow!
Also please let me know if you like the collage effect. I’m trying it out and don’t know if I like it or not. I look forward to hearing from you!
Supplies I used:
- fabric transfer paper
- iron
- fabric
- pillow form
What I did:
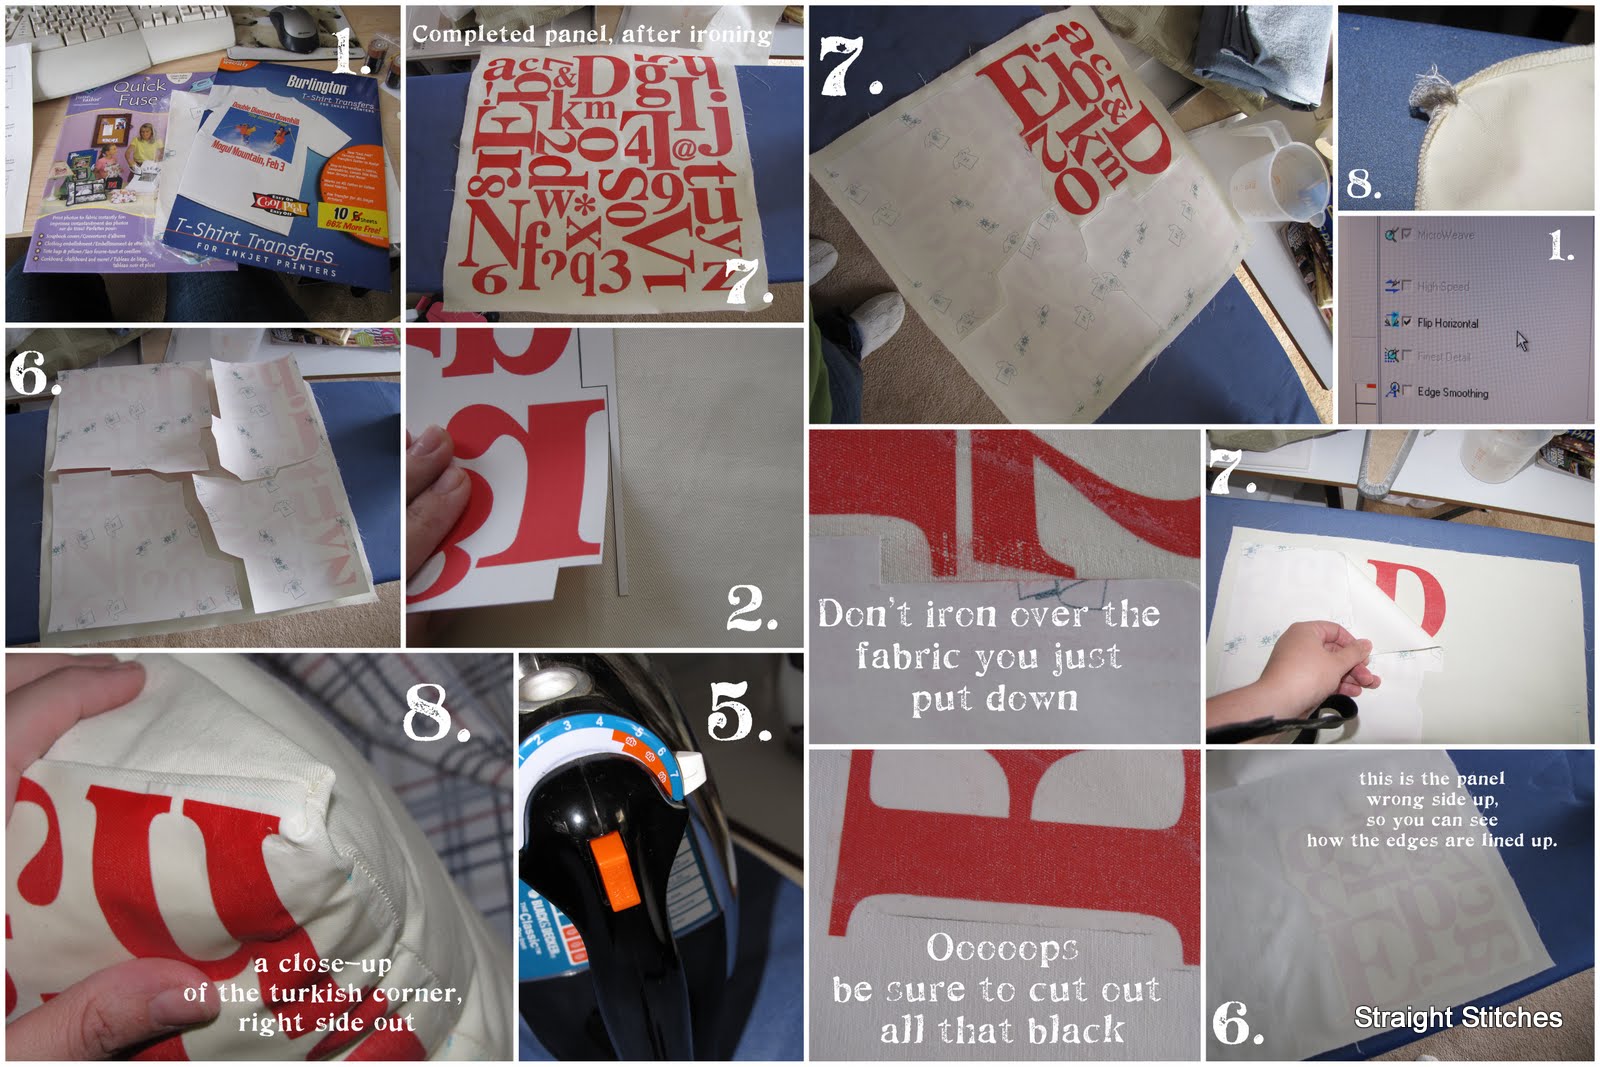
- I created an image in Photoshop. I made the image 16″ square at 72 dpi with a 1/8″ margin, because I didn’t need anything to high quality for the transfer. This took me about an hour to do. I laid out the alphabet, numbers 1-0 and some symbols in a fairly random pattern. I made sure to capitalize all of the letters in Dev’s name, while the rest of the letters were lowercase. Its a good thing that there are no repeats! After I finished the image, I broke it up in to workable sections for letter sized paper, and saved each section in its own file. I made sure to line up each corner of the pillow image with a corner of the paper. After loading the fabric paper I adjust my printer settings to flip the image horizontally or mirrored.
- Cut out each image inside your cutting lines. Be sure not to leave any black lines because they will transfer when you iron the image. Also be sure to keep two factory edges so that you can use this as a guide later for placement.
- Make sure your fabric is washed and ironed. Do not use fabric softener on your fabric. Cut your fabric to 1″ larger than your pillow form. Usually I cut my fabric to the exact size of my pillow so it looks more fluffy, but being as this is going in a 4 year-old’s room…some play is not a bad thing.
- After you cut your fabric, take a ruler ( I like a big 2 foot ruler) and make a line 5/8″ in from the edge of each side on one fabric panel.
- Set your iron to the setting indicated on your fabric transfer paper. For my brand it was linen or 7. Make sure the steam is off (Oops, at least it didn’t mess it up).
- Line up your images in each corner of the pillow, using your guide lines from the previous step as a guide. Iron each piece separately, but move in a cris-cross pattern. First do one corner then do the opposite corner, then an adjacent corner and then the last corner. Be sure to ensure that your edges are fully adhered and keep even pressure over all of your images. I didn’t do this, and wish I did.
- Take a small break while you’re waiting for the panel to cool off. Check Facebook, grab a cup of tea, check on your sleeping baby. 🙂 After it’s cool, gently peel off the backing while holding the fabric down. Peel slowly and do not re-iron the image unless you place the backing on top of it. As I found out the image will melt, then smear. Oh well…I know for next time.
- Next just sew up your pillow as you would normally with 1/2″ seams. This will leave you with 1/8″ border all the way around your image. I did my corners a little different than normal. I flattened my corners with the seams matching (as best as possible, because you’re doing this by feel) and the sewed the corner on the bias. This is called a turkish corner. You can also achieve this effect by securing a rubber band around the corner to create a gathered looking instead of the pleated look. I like the sewn look, personally.
- Turn the pillow right side out and then stuff that form inside. Hand-stitch the opening closed and enjoy!
Cassity Kmetzsch started Remodelaholic after graduating from Utah State University with a degree in Interior Design. Remodelaholic is the place to share her love for knocking out walls, and building everything back up again to not only add function but beauty to her home. Together with her husband Justin, they have remodeled 6 homes and are working on a seventh. She is a mother of four amazing girls. Making a house a home is her favorite hobby.


>Love it! I love jumbled letters / numbers.
>I like this! I was thinking about doing this when we redo our living room. Thanks for the tutorial, it will save me some work!
>I love the pillows…and I think it was a great idea!~
>I love, love, LOVE this idea! I'm digging on numbers as of late and these pillows are so cute! Thanks for the tutorial!
>I want to make this. So cute. Great tutorial!