How to DIY a Suspended Vertical Garden
Quick note: in case you haven’t seen it yet, we are doing an AWESOME giveaway where TEN winners will each win an area rug of their choice. It ends soon, so head over and enter right now!
I’m no gardener.
Heather, back here visiting from The Heathered Nest today. I’m sure most of you Remodelaholics have super green thumbs. Sadly, I don’t share that skill. But although I’m not great at tending a garden, I AM quite skilled at eating all the things that come out of a garden. Big fan of ALLLLLL the edible things.
Know what else I’m a fan of? Pinterest.

Sometimes, I like to peruse Pinterest WHILE eating. The other day, while I was eating lunch (i.e. polishing off the last row in the Oreo sleeve) I noticed something. Pinterest looks like it’s in bloom. I’m telling you, right now, Pinterest is LOADED with images of all things that flower, grow in the dirt, and require a green thumb to care for. It’s completely inspiring, yet horrifying for someone like me whose thumbs are black (and that’s not just because of the Oreo dust).
Thankfully, we do have some skill here at The Heathered Nest. We looked at all that edible garden glory on Pinterest, and it’s inspired us to build something. A DIY vertical garden, to be exact. And if you’re the type with a green thumb, but don’t know the difference between a hammer and a nail, maybe we can work out a trade. How bout some fresh herbs from your new vertical garden in exchange for this little DIY tutorial? Deal?

DIY Suspended Vertical Garden
This post may contains some affiliate links. Please see our full privacy policy and disclosure here.
supplies
- (2) 4x4x10 pressure treated posts
- (4) bags Quikrete
- Line Level
- wire
- S hooks or carabiners
- baskets or buckets (we used these 2.5 quart metal pails, approx 7″ diameter, 5″ high)
- drill
- Turnbuckle
- screw cups
- galvanized screws
- 1/2″ galvanized pipe
- (2) 3/4″ galvanized pipe stands
- lagbolts to bolt to deck
- scrap 2×4 or other lumber to brace posts
how to create a suspended vertical garden
We built a vertical garden with 4×4 posts, some pipe and galvanized wire that is attached to our deck. There are many ways this structure could be modified to adapt to your specific needs, i.e. standing atop a deck, or, standing in your yard. We’ll walk you through the basics of what we did, and try to make suggestions for modifications as we go.
1.) Create a plan.

Determine the width and height that you want your vertical garden to be. Ours is about 7′ tall by 6′ wide.
2.) Dig 2 holes, at least 24″ deep and 12″ round for your posts.
Grab your shovel and/or post hole digger and get to work. If you’re building on top of an existing structure, you get to skip this part (lucky!) This is the most labor intensive part of this project. And if you’re not going to attach this structure to the side of a deck, similar to what we did, you’ll want those post holes to be even bigger (the appropriate size of your holes will really depend on the desired height yours will be as well…consult the Quikrete bag and other sources to be sure your specific plan is on target).
3.) Place posts in holes, brace and plumb.

You’ll now want to stand your posts in the holes and brace them with scrap lumber so that they can stand upright (plumb) while your concrete is setting. Above you can see how we used a scrap 1×4 to brace our post in an upright position, and used the level to make sure we were keeping the post in a perfectly vertical position. Make sure that you brace your post in TWO directions…you need to make sure your post is plumb from both side-to-side and front-to-back.
4.) Set concrete in the post holes.

It’s now time to set the posts, using your concrete. We used Quikrete. Follow the instructions on whatever brand you go with as far as determining how much you’ll need, and getting the concrete to set appropriately.
5.) Wait until concrete is completely set before moving on.
Gardening, NOR patience are my strong suits. But you’ll have to wait as long as is required per your concrete instructions to allow your posts to completely set, and the concrete to cure. We’ll be putting some stress and tension on these posts as we rig up our wire system, so you don’t want to move forward before the concrete can hold up to the task.
6.) Install the lag bolts.

If you’ll be attaching your garden to an existing deck, like ours is, you’ll want to complete this step. If not, you can move to the next step. We used two lag bolts on each post to help anchor the posts to the deck. The more anchored and secure the posts, the less likely your wire system will over-stress your posts.

7.) At top of structure, install a cross brace between posts.
Full disclosure here…we installed the wires first, but it actually bent the posts in too far and we could not get the wires tight…so we installed this 1/2″ galvanized pipe at the top to keep the posts in place. You don’t necessarily need to use pipe for the cross brace. If you wanted to use another 4×4, you could do that instead.

Use 3/4″ pipe stands installed on either post and then cut the 1/2″ pipe to length and install between the pipe stands. We used 3/4″ pipe stands so that the 1/2″ pipe would slide into the pipe stands…if you used 1/2″ pipe stands the 1/2″ pipe would need to be screwed into the pipe stand and that would be much harder to install.

8.) Determine desired height for rows of wire, and mark post.
Take a look at the size of your planting buckets, then at the overall size of your frame. How many planters will you be hanging? Use these details to plan out where to anchor your wires to the frame.

We decided to do four rows of wire, each with a total of four hanging planter buckets.

We started simply by eyeballing where we wanted the top row to hang. Then did some handy math to make sure the four wires would be evenly spaced along the height of our posts. We penciled in the location for the anchors along the post.

9.) Pre-drill holes for hooks and screw them into one post.

10.) Measure location for corresponding hooks on opposite post. Use line level to ensure correct location.

Tie a string around the hook you just installed and pull it over to the other post. Use a line level to get the string nice and straight and then mark the post where the hook should go. If you don’t have a line level, a standard level can be used instead (as in image below), it’s just a little harder, in my opinion.

11.) Screw in hooks on second post.
Once you know where the first hook goes on that second post, simply measure up the same distance and install the four hooks on this post.
12.) Make loop on one side of wire using a cable clamp and secure on hook.

Another view of the loop…

13.) On opposite pole, make another loop on the wire and use a turnbuckle to tighten wire.
Open the turnbuckle about 90% and attach it to the hook. Then hook your wire loop onto the turnbuckle hook and pull it as tight as you can secure it with the wire clamp. Now close the turnbuckle (by tightening the screws) til the wire is nice and tight.

14.) Repeat this process to attach all additional wires to your frame.
15.) Plant!!!

Many hands make for light work, so we enlisted our pint-size troops to help with this step. Make sure you have adequate drainage in your pots. And we even put some weed barrier at the bottom of ours to hopefully cut down on soil leaking onto the deck.

And that’s that! Enjoy those literal fruits of your labor! And if your mint harvest is abundant, send some our way. I do love some fresh mint.

The hubs can make a mean mojito with mint.

Hopefully, this year, I’ll even be able to grow some of our own. Thyme will tell (couldn’t help myself).
Either way though, we’ll sit out here on our deck, taking in some summer wind and sunshine. Would love to show you round our outdoor space! We finished it recently…another full-on DIY project, from the vintage tin can chandelier, to the pergola, outdoor curtains, and stenciled rugs.

Til we meet again, friends…big cheers, mojito in hand.

More high-impact outdoor planter ideas:

Paris-inspired tall wooden planter


Gothic arch style garden arbor (with raised garden boxes)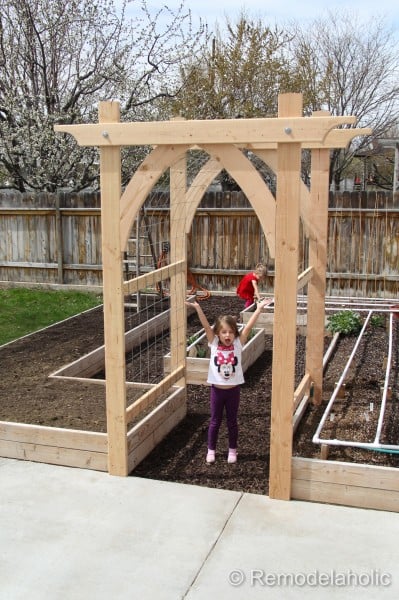
Former doctor of physical therapy, Heather, and her engineer hubby, Dave, blog at the colorful, slightly off-kilter DIY and home decor blog, The Heathered Nest. Definitely a contrast to the mostly neutral world of home decor that currently abounds, Heather and Dave's home is full of pattern, punchy colors, and tons of DIY, all done on the cheap, though it may not appear it. Their work has been featured in magazines to include This Old House, USA Today Home Magazine, Reloved, GreenCraft and Cottages & Bungalows. They've made appearances on several DIY network TV shows, including "I Hate my Bath" and "I Want That". And their work has been featured all over the www in spots such as Better Homes & Gardens, House Beautiful, Country Living, Good Housekeeping, The Today Show, Washington Post, Huffington Post, USA Today, Apartment Therapy and more.


Hi Heather, I am definitely going to try out your great vertical garden idea! I have a question, did you find that the metal pots would rust easily, or did they hold out ok? Thanks!