DIY Pipe Cleaner Himmeli Ornaments; Day 2


Last year we had some super fun pipe cleaner wreath ornaments in our 12 daysChristmas. This year Thalita from The Learner Observer is here to share a fun and kid-friendly Christmas ornament for you and it’s super on trend!
If you could name one big, huge trend in 2014 what would it be? I would have to say Himmeli! Are you furrowing your brow at me wondering what on earth a Himmeli is? Well, maybe if I show you this it’ll start to make sense…
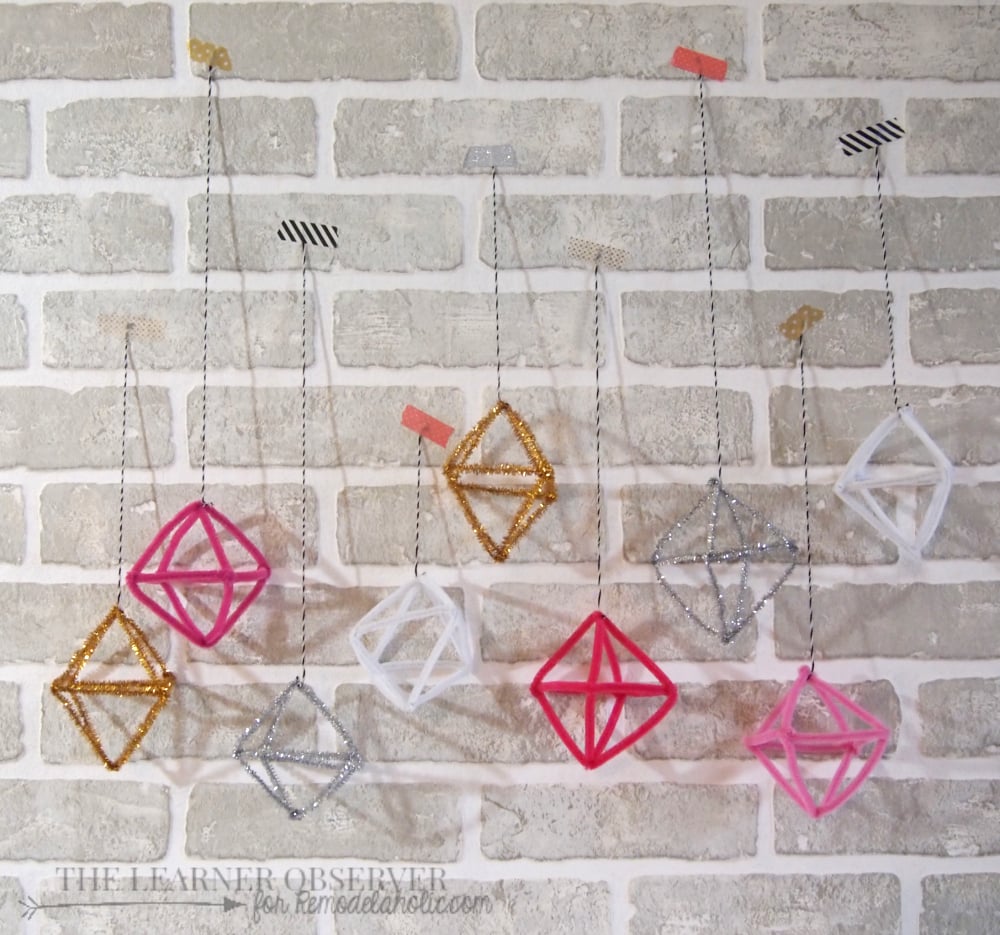
A little background: these Christmas ornaments originated in Finland and are typically made of natural straw. To make these extra kid-friendly (without needing to cut any straw or use a needle), I tried making these out of pipe cleaners, and wouldn’t you know it, it worked!
How to Make Kid-Friendly Himmeli Ornaments
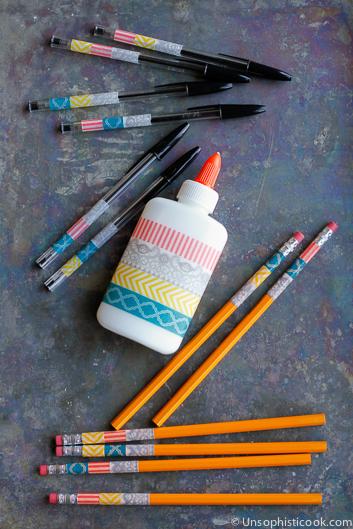
Here’s what you’ll need:
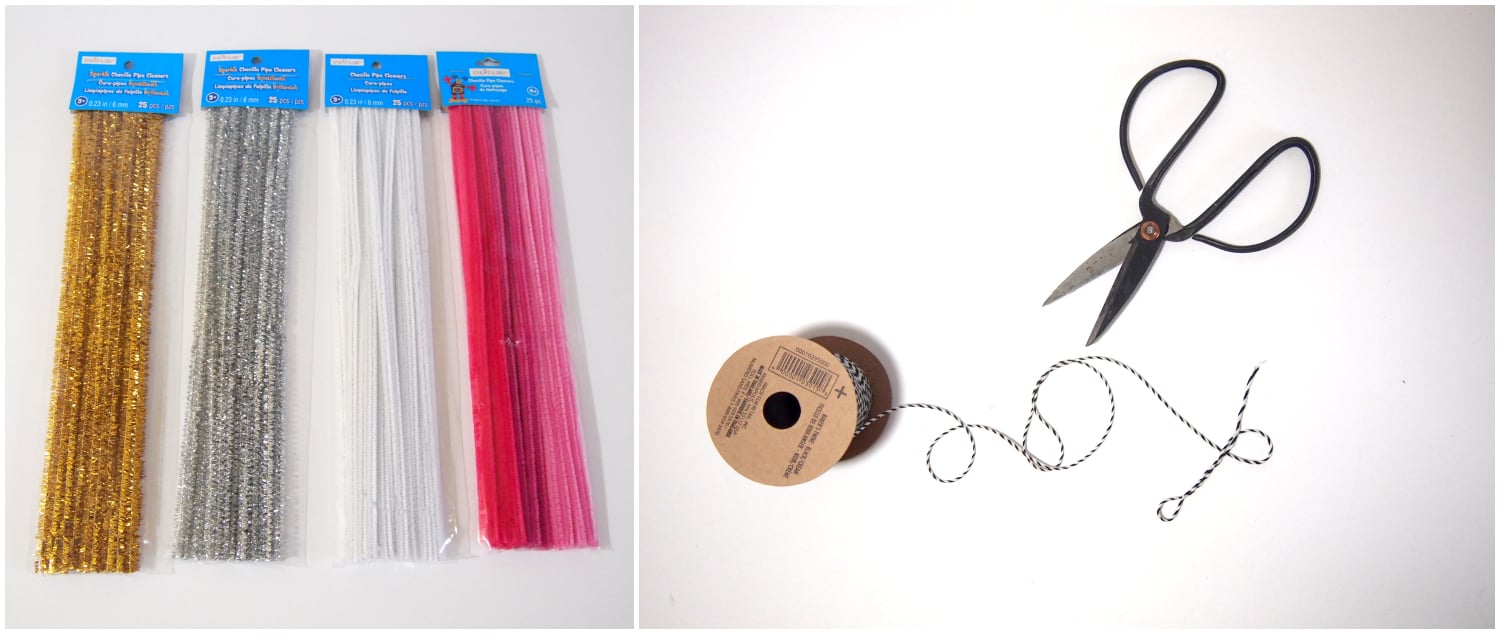
Pretty straight forward: pipe cleaners, baker’s twine and scissors! I didn’t choose typical Christmas colours, as you can see – I just loved those shades of pink so much, I had to have them! The great thing is that now I can potentially use these after the Holidays!
Here’s a breakdown of the steps:

Each Himmeli will need 3 pipe cleaners.
Step 1:
Fold two pieces of pipe cleaner in half.
Step 2:
Hook those two pieces together to form an ‘X’.
Step 3:
Fold up each of the 4 ends – you’ll want about 2″ from the center, though simply going halfway can also work!
Step 4:
Using your third piece, start folding it around one of the 4 bends.
Step 5:
Continue all the way around, making sure all sides are even.
Step 6:
When you finish step 5, you’ll have a kind of Himmeli house!
Step 7:
Flip your ‘house’ upside down and connect two of the ends together in the middle (two farthest apart from one another, so top and bottom of the diamond).
Step 8:
Connect the final two pieces. And you’re done!
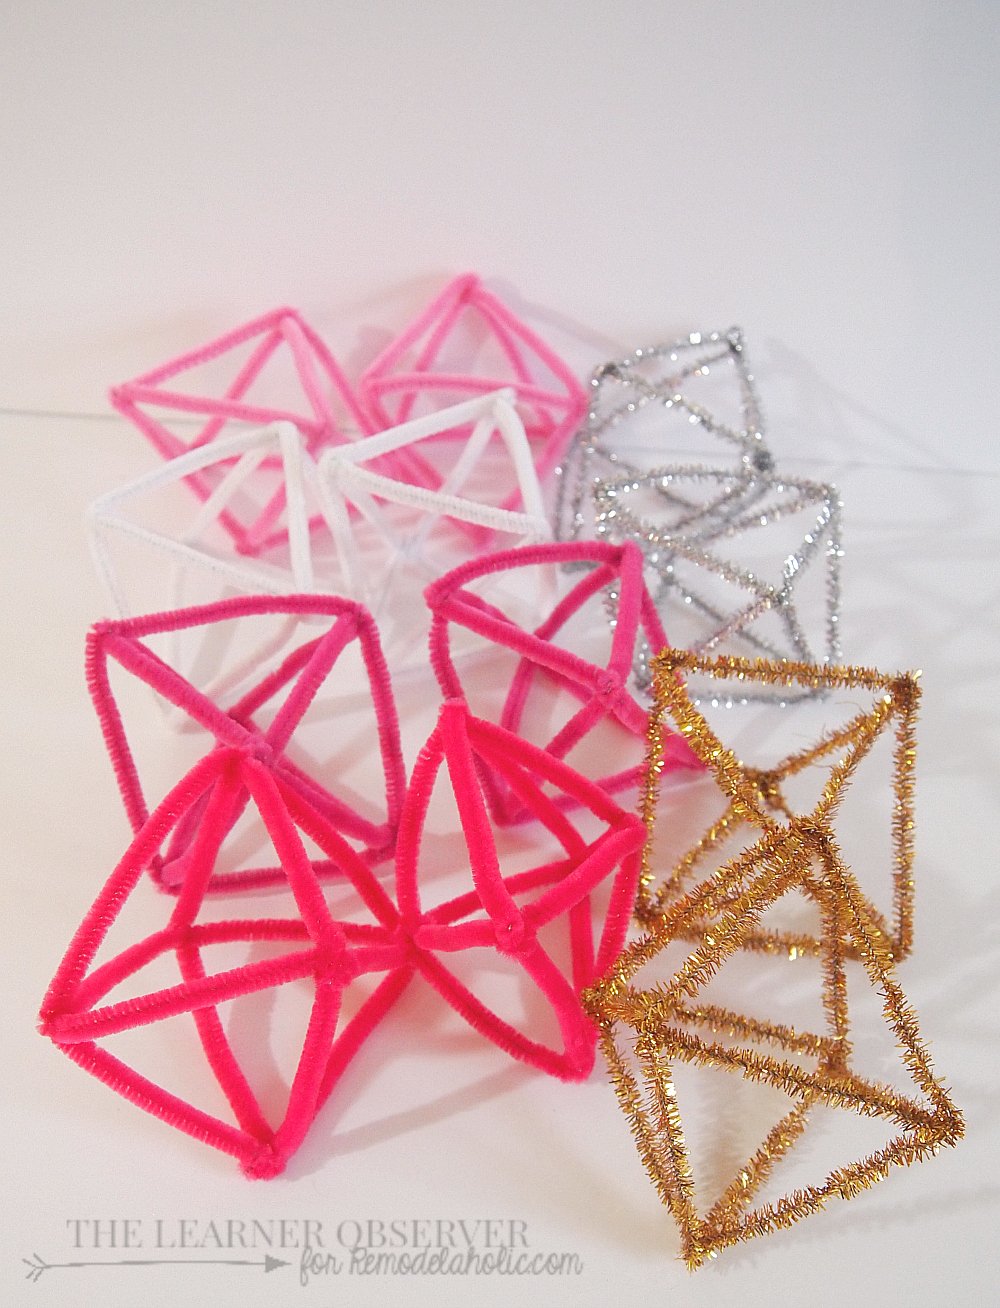
In all honesty, once you get the hang of the pattern this might take you about 2 minutes per ornament. Not too shabby, right? And you can totally get the kids to assist, especially with the first few steps. The trickiest part is attaching that third pipe cleaner, then they can help with the final two steps as well. All you need to do now is attach the baker’s twine and hang them up however you’d like!
I used some washi tape for these and put them up on a wall. Easy peasy!

They’re also kind of great clumped together on a table. They start to make a sort of geometric sculpture as you stack them up, which can be kind of fun!

I’d love to hear about your pipe cleaner Himmeli ornament experience if you end up trying this!
Be sure to check out Day 2’s other projects from some of my favorite bloggers:
Thistlewood, Inspired by Charm, Funky Junk, Shanty 2 Chic and Songbird Blog
 |
 |
 |
 |
 |
 |
AND THERE IS THE DAY 2 GIVEAWAY

$100 AMAZON Gift Card Giveaway
Thalita is a mom of twins, teacher, and blogger over at The Learner Observer. She is a frugal DIY-er and avid lover of thrift store scores with a passion for making over spaces with pieces that are both meaningful and beautiful. Favourite colour? White. Favourite food? Ice Cream. Favourite Pastime? Instagram, where she shares an abundance of pictures of her twin boys along with her latest home reno and decorating adventures!


These are so cute and so simple to make. I think my tree need a few of these!!
xo Michael
Thanks Michael!
These are so cute and colourful! And I learned a new term today! 🙂
My children will love making this fun craft to hang on our tree. Thank you for a great activity to keep them happy and busy while waiting for cookies to bake.
Picking up some white and silver pipe cleaners tomorrow. Last year we hung snowflakes from the ceiling. This year we’re doing Himmeli! Too cool. Thank you for sharing this. Tweeting and subscribing. – @Renmeleon