DIY Pallet Wood Christmas Tree Advent Calendar; Day 11
Ready for the next in our annual 12 Days of Christmas series? Today we have an easy and fun pallet wood Christmas tree advent or display for you

We used cards to count down and hang ornaments from the clips, but this advent tree could be used to hold small treat bags, scripture verses to study, family activities for each day — really anything! Or forget the count-down and use it to hold holiday cards, photos, mini art prints like these or garlands.

This post contains affiliate links. Please see our full disclosure policy here.
Pallet Wood Christmas Advent Calendar Tutorial
Click Here to Get a Free Printable Version of this Building Plan
Tools List
- Miter Saw
- Drill
- Pencil
- Paper Cutter or Scissors
- Printer for Numbers or (Just hand write them)
Materials (affiliate links)
- Pallet Wood
- 1 1/4″ Wood Screws
- Wood Glue
- Glue Stick
- Wood Clothespin
- White Paper
- Gold Paper
- Gold Sharpie
Parts List

- (6) Branches (lengths vary)
- 1st branch (top) – 8″
- 2nd branch – 16″
- 3rd branch – 24″
- 4th branch – 28″
- 5th branch – 32″
- 6th branch (bottom) – 36″
- (1) Trunk 42″
- (25) Close Pins
- (25) Paper Numbers Printed 1-25
- (1) Gold Star
- (25) Christmas Ornaments
Construction Steps
Step One
Cut the branches and trunk of the tree to length on the miter saw. The length of the branches will progressively get smaller from bottom to top. See the diagram above for the rough lengths of the branches.


Step Two
Lay the branches of the tree down on a table with the longest at the bottom. Space the branches about 2′ apart all the way to the top with the shortest piece on top. Center the tree trunk on the branches. Leave about 2″ of the trunk hanging over the top branch then glue between the boards.

Just for added strength, screw in a couple of wood screws to help it hold while it’s drying. You can pre-drill the holes to avoid splitting.

Step 4
After the tree is assembled, start decorating the close pins with the gold sharpie marker. Have sun with this and get creative.

Cut out all the number from the print.

Cut out all the backs of the numbers. Make them about a 1/4″ bigger on all sides to frame the numbers.

Now glue the numbers to the gold paper with a glue stick.

Next glue the star to the top branch and then glue the rest of the pins on the other branches. See the diagram below for the layout of pins to balance out all the numbers.

Step 5
Clip in all the numbers. Starting with one under the star and working your way down.

All finished. Now as each day goes by you can replace the number with an orniment. Merry Christmas!


————————————————
See the fun advent calendar we made last year here:

and even more advent ideas here: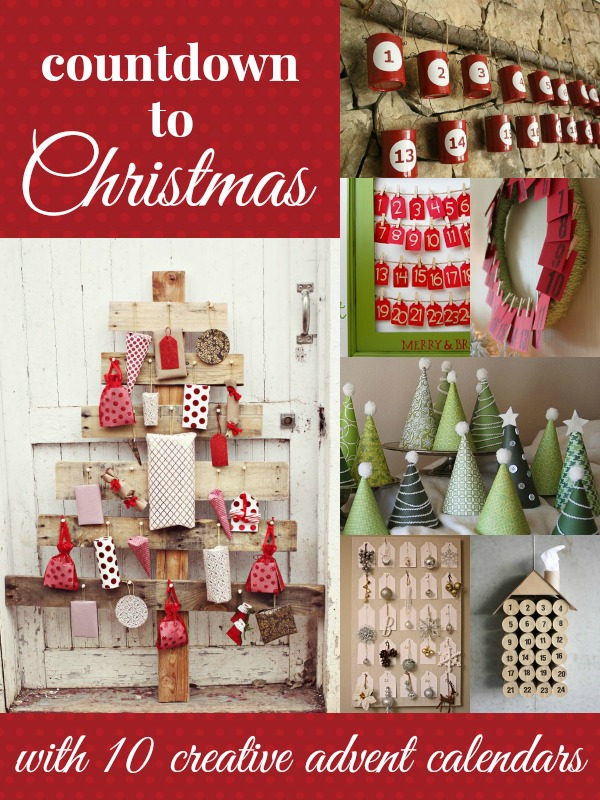
I am the husband of the amazing Cassity of Remodelaholic. I love to problem solve and to design and build things inside and outside the house to make life better. I am a professional Landscape Architect by trade and love the outdoors.


