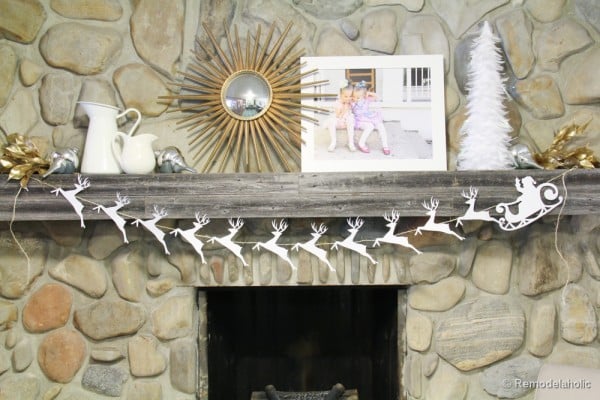
Santa and Reindeer Garland 12 days of Christmas; Day 1
Need a quick and easy Christmas garland? Look no further! This cute paper Santa and reindeer garland is easy to make and inexpensive! Perfect paper crafting without breaking the bank, and as a bonus, it is a pretty quick craft!

Supplies:
1. Template, (I purchased mine from Silhouette Santa Sleigh and Reindeer)
(My deer were cut at about 7 1/2 inches long , or two per 8.5″ x 11″ sheet of paper, Santa took up one whole 8.5″ x 11″ page)
2. Scissors or paper cutting machine of your choice
3. Cardstock Paper
(color of your choice, brown, white or silver reindeer, red or gold sleigh… whatever you like)
4. Hot glue and gun
5. Twine or Ribbon
Instructions:
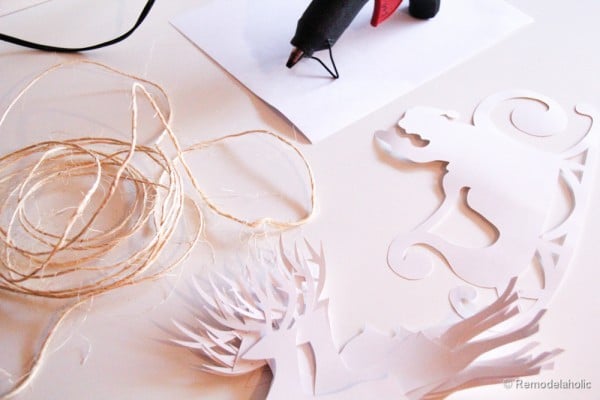
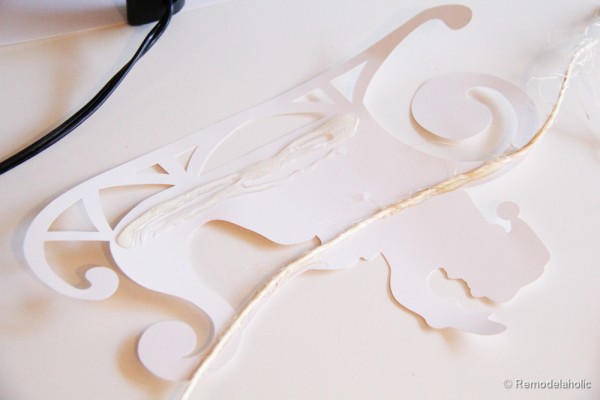
1. Start by tracing your template onto the card stock paper you have chosen for the reindeer and sleigh (or use a template in your cutting machine) For my 7 foot garland I had to cut about 11 deer plus Santa’s sleigh. Trace and cut out the shapes, if you are using scissors, I would suggest simplifying the antlers a bit.
*Remember you can choose any color you like that will match your Christmas Decor…. Don’t let my color choice feel like the only option. Go crazy!
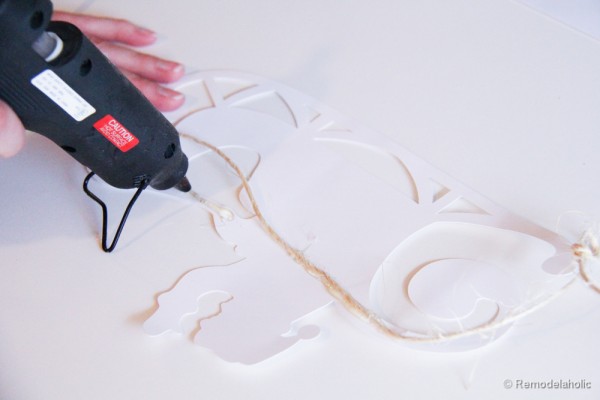
2. Plug in your glue gun and get it warmed up.
3. While your glue gun is warming the glue, cut your twine to length. I left about 2 extra feet on either side, because I like how it looks hanging down on either side. To check my length I tied a loop about 2 feet from one end, I hooked the loop to the nail it will be hanging from on my mantel. Then I strung it across checking that I liked how it hung. Once I felt good about it, I tied the second loop on the other side, added the 2 feet and cut it.
* This can be hung anywhere, you don’t have to have a mantel, try a stair railing, across a window, in a doorway endless options!

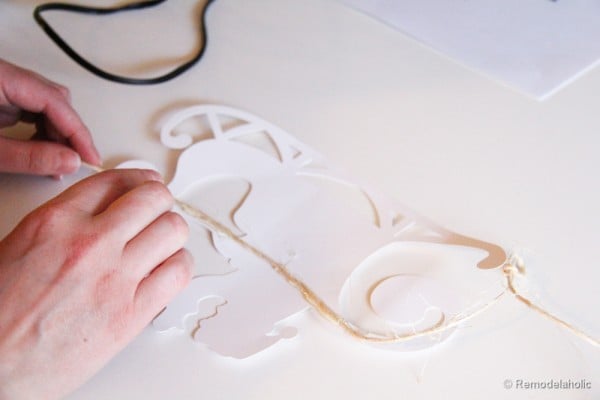
4. I started with Santa. Lay the cutout good side down, back side up. Glue a stripe of hot glue across half of the top, place the twine in the hot glue. Be careful where you place your fingers! Let it cool for about 30 seconds to a minute. Once it feels secure, finish gluing on the string. Keep adding the deer along the twine. Be sure to let the glue dry before moving along, unless you have a really LONG table!! I eyeballed the space between each deer, but you can measure it if you like.
5. Add a counterweight! In order to keep my Santa and accompanying deer hanging nicely, I added a bead of glue along the bottom of each to weigh the bottom down, and keep it upright, when it was hanging.
Once the glue is all cool and done, hang it where ever you like! Sit back and admire your handy work!
Merry Christmas to all and to all a good night!
And like I announced yesterday the fun has just begun! This post is the first day for our 12 days of Christmas posts that I am working on with 5 other great bloggers!

Please click on the buttons to go see other FABULOUS Christmas ideas!!
|
|
 |
 |
 |
 |
 |
Cassity Kmetzsch started Remodelaholic after graduating from Utah State University with a degree in Interior Design. Remodelaholic is the place to share her love for knocking out walls, and building everything back up again to not only add function but beauty to her home. Together with her husband Justin, they have remodeled 6 homes and are working on a seventh. She is a mother of four amazing girls. Making a house a home is her favorite hobby.


Oh what a cute garland! I love this, those reindeer look as if they are in a hurry to visit everybody.
Great start!
Well that was easy! This is really beautiful, Cassity! Love that the garland has a running theme that works with the long length! Genius…
I was wondering, wouldn’t your silhouette machine cut these out? Dianntha
Yes, I used my machine, but not everyone has one, so it can definitely be done my hand or with a cricut.
Love it!! The garland is super cute!! Thanks so much for sharing 🙂
Love! Great project to kick off the week!
So darling, Cassity!
Thanks Amy! Especially for all the shares! Made my day!
I love this! I would make it, but with our wood burning fireplace, I doubt it would stay in place. Boo!
I love this garland! and I already know exactly where I want to put it!! I bought a new Christmas Tree (fake) last year and kept the topper from my old tree. This would look great winding up the “small” tree
Thanks for the great idea!
Ricki
I’ve had my eye on this since you posted your letter. It’s beyond perfect! That’s for the tutorial.
xo Michael
What a cute idea. Love it, I can see using this in my triple window next year when all the renovations are finished. Wished I had a machine to cute mine.
So cute! A nice change from regular buntings & banners. Love the counterbalance glue strip tip! Thanks for sharing!
I love this! One question: Shouldn’t there only be nine reindeer, though? 🙂