How To Build a Desk With Wood Top and Metal Legs
Submitted by Dans le Townhouse
I teased you with the post about how we stained and varnished the surface and how Hubby welded the baseso, without further ado, here is the desk put together . . .


With the new lamps turned on (blogged about here and purchased here):
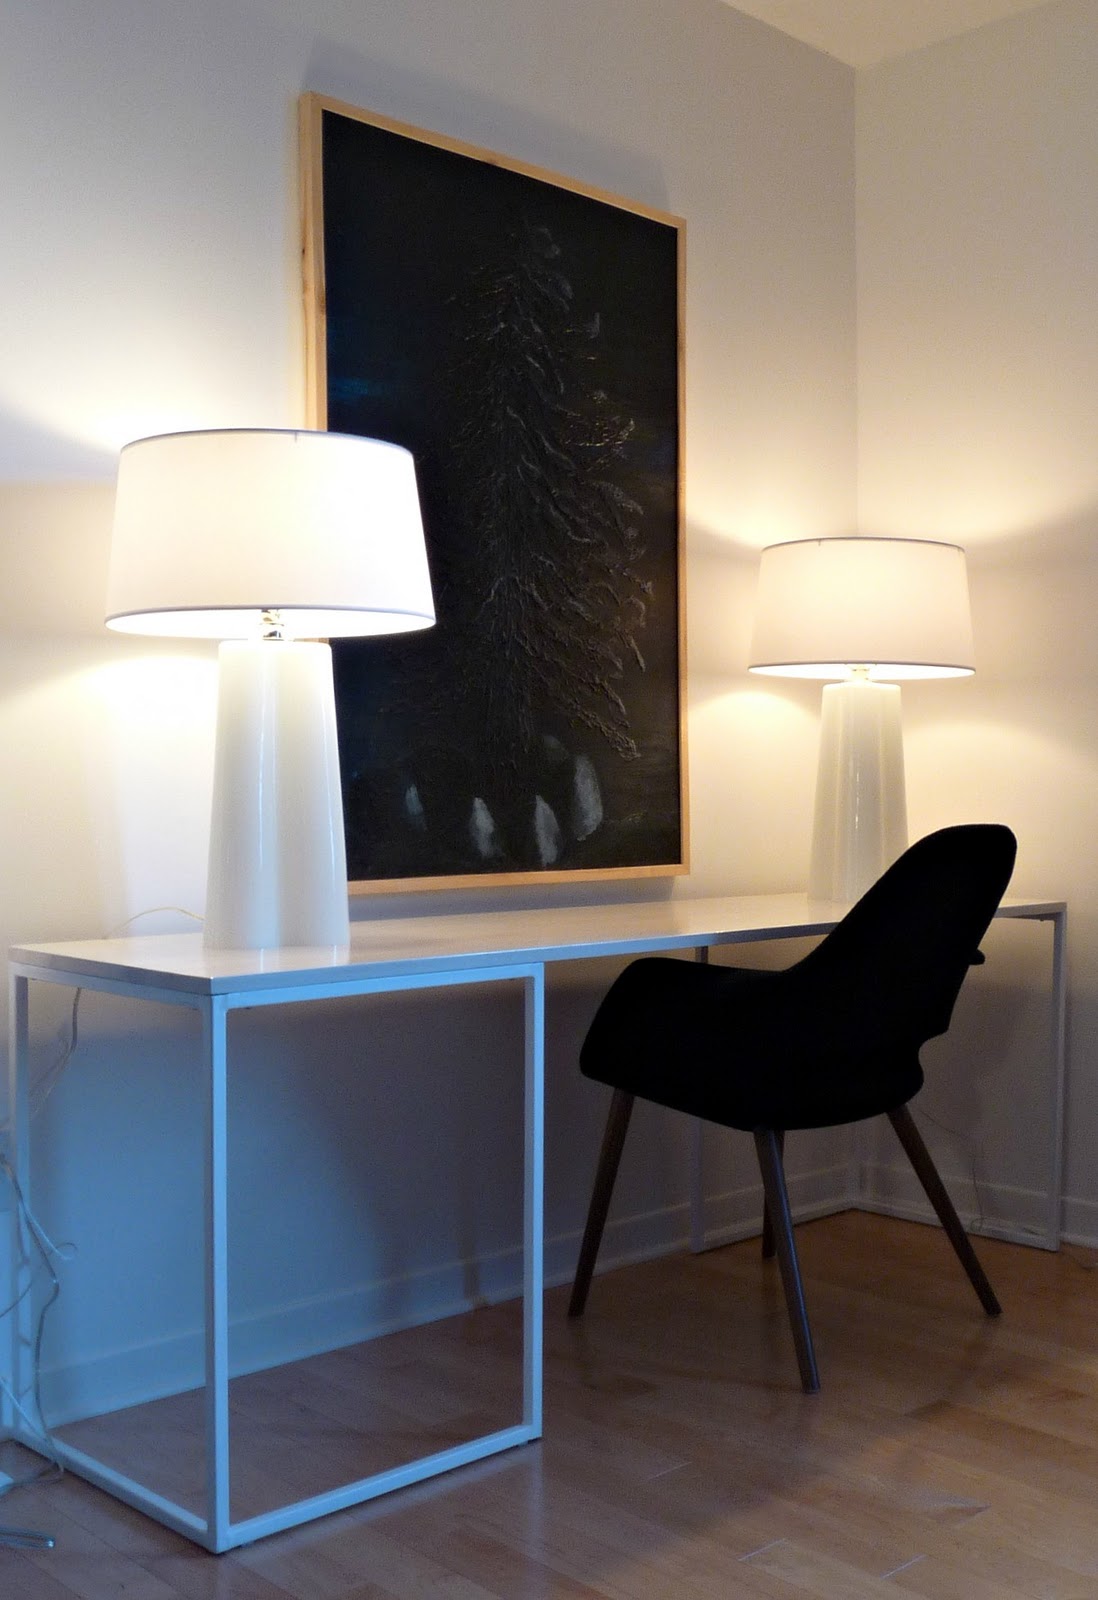
These lamps have a dimmer, which is a nice touch.
The chair, blogged about here, was purchased from this local shop that does online orders as well. The lamps and chair were pricey, but both were bought locally (although Living Lighting is actually a chain) and I always feel good about supporting Canadian stores. Plus, Hubby loves the chair (it really is comfy) and I am obsessed with the lamps (for good reason). The DIY desk really offset the price of the other items (less than $100 for all supplies).
I did the painting 10 years ago for an art class. Hubby (although he wasn’t my Hubby, yet) was handy back then too, and made my canvas stretchers and framed the finished pieces. I sold one painting from the series, gave away others and painted over one but I gave this to him as a gift to say, “hey, thanks. p.s. I love you”.

The painting is DIY, too!
In terms of designing the desk, we pretty much stole the design. I’m not gonna lie. I opted for white legs and a creamy white, glossy top so the desk wouldn’t compete with everything else in the office. We chose square metal tubing the same size as the thickness of the surface because I think that looks good. If you try this yourself, you can use larger/smaller tubing and a different surface thickness:

Now some shots of the glossiness that took me days to achieve:

Apologies for the wait, but I wanted to let the varnish thoroughly cure, especially because I doubled the “recommended” number of coats. I didn’t want any lamp-shaped indentations! But waiting was excruciating for me.

I’m still thinking about whether to put anything else on the desk. With the newly modified Ikea Expedit behind the desk and the silhouette wall behind my desk(more office pics soon), I think that simple might be the way to go.
Don’t have a welder or handy hubby? Read on:
I know this project won’t be especially affordable for people who don’t have the equipment already. I have the equipment because my grandpa was a welder and he bought me the tools so he could weld my headboardand so, eventually, I’d learn to weld (I’m working on that!) If you love the idea of this simple desk, but can’t reproduce it, chat with local high school students and college students in welding courses. A friend in high school welded her entire bedroom set (for credit!!) and I’m sure she would have welded something for someone else, for a little coin. Remember, $20 is a lot to a student . . .
Or, you could make a similar style desk made entirely of wood!
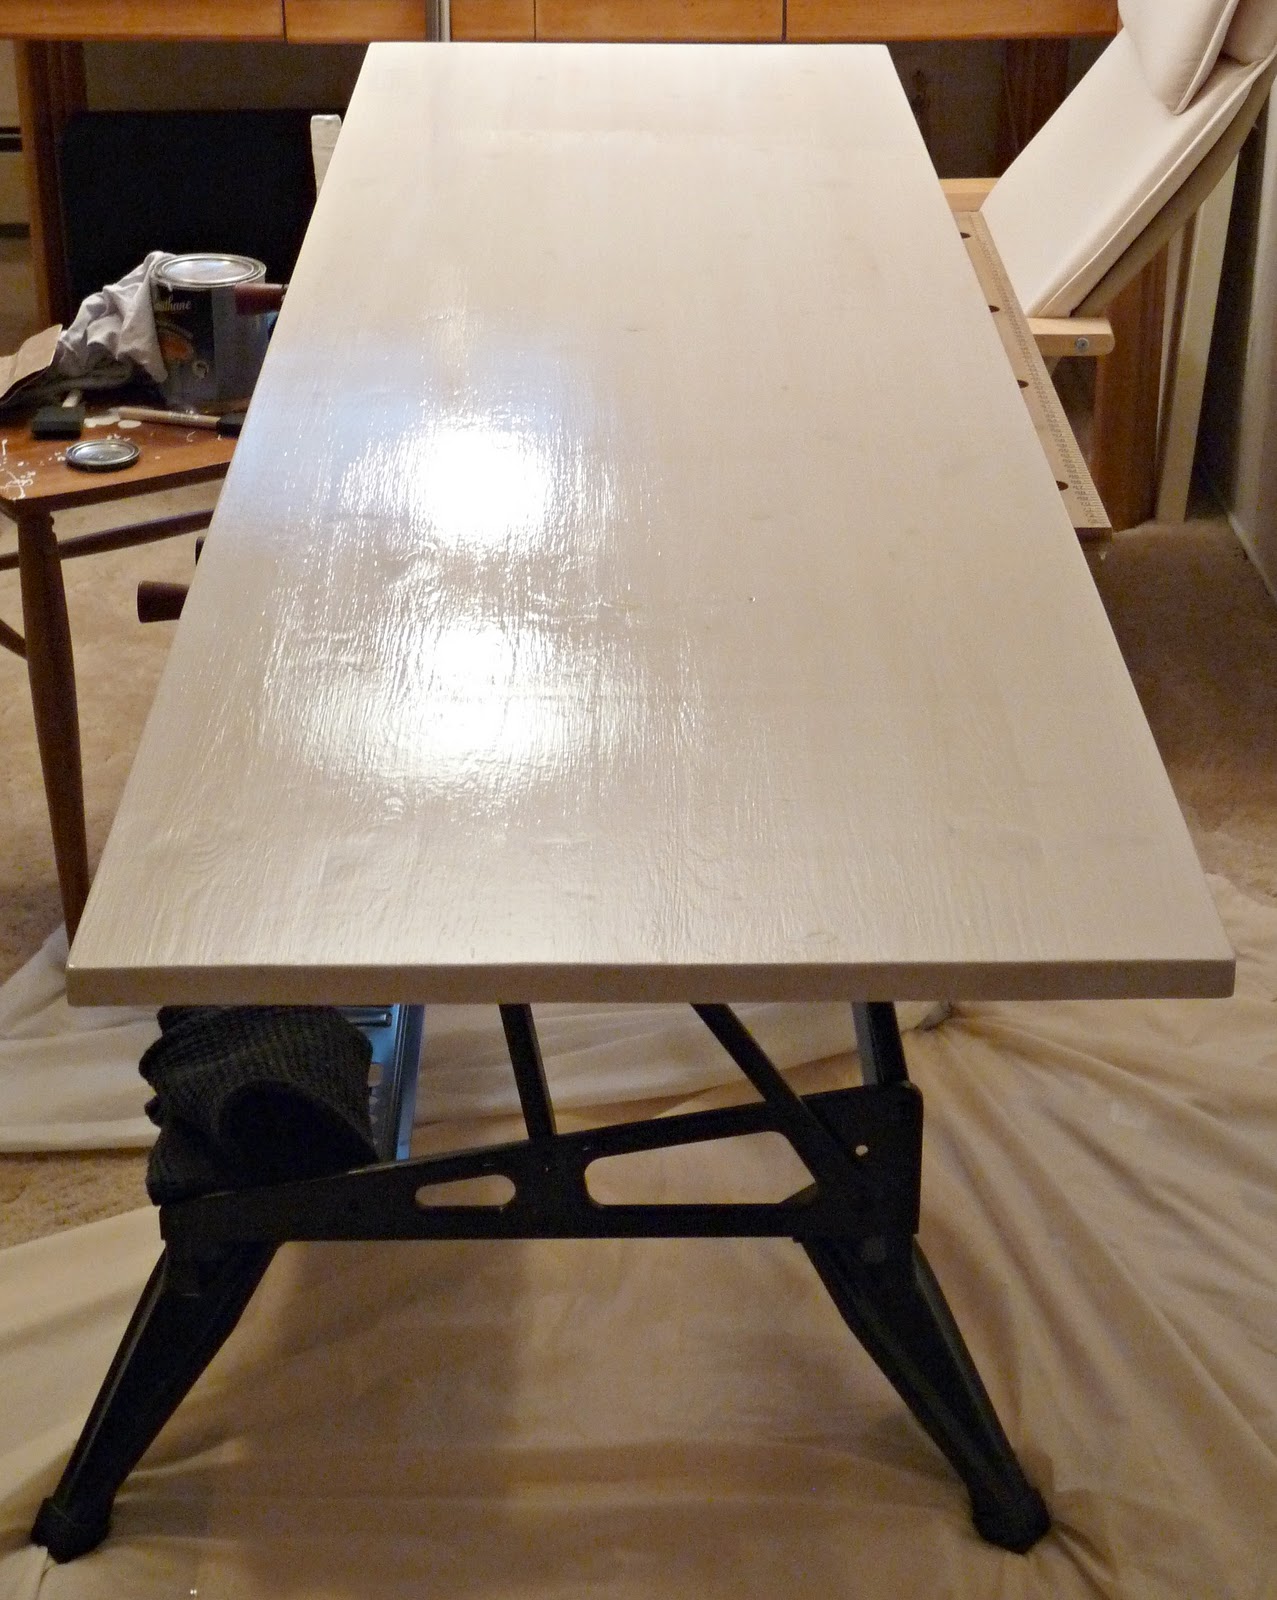
Finishing the desk top.
Without further ado . . . here is the desk surface, in our gloriously ugly basement, a.k.a the pit of despair
How to Cheat:
We had planned on building a surface, like Hubby did for my vintage treadle sewing machine desk, but while we were at Lowe’s shopping for lumber, we stumbled upon this display:

Seriously, look at the sweet price:

One of these pre-fab surfaces was the exact size we needed and it saved us hours and hours and hours of work in our freezing garage. Sold!
But it looked at little too knotty for my liking. Hubby is against painted wood (hence the wood-y kitchen we’ve maintained) so, because it ishis desk, I opted for a stain.
How to Stain:
1. We lightly sanded the top and edges because the board was pretty sharp as-is.
2. We wiped it clean with a dry cloth.
3. Pouring a bit onto foam brush at a time (as per the instructions), we applied Saman water based stainand it was fantastic!
After the fact, I learned that this brand of water based stain can be mixed for custom colours. I opted for “whitewash“.
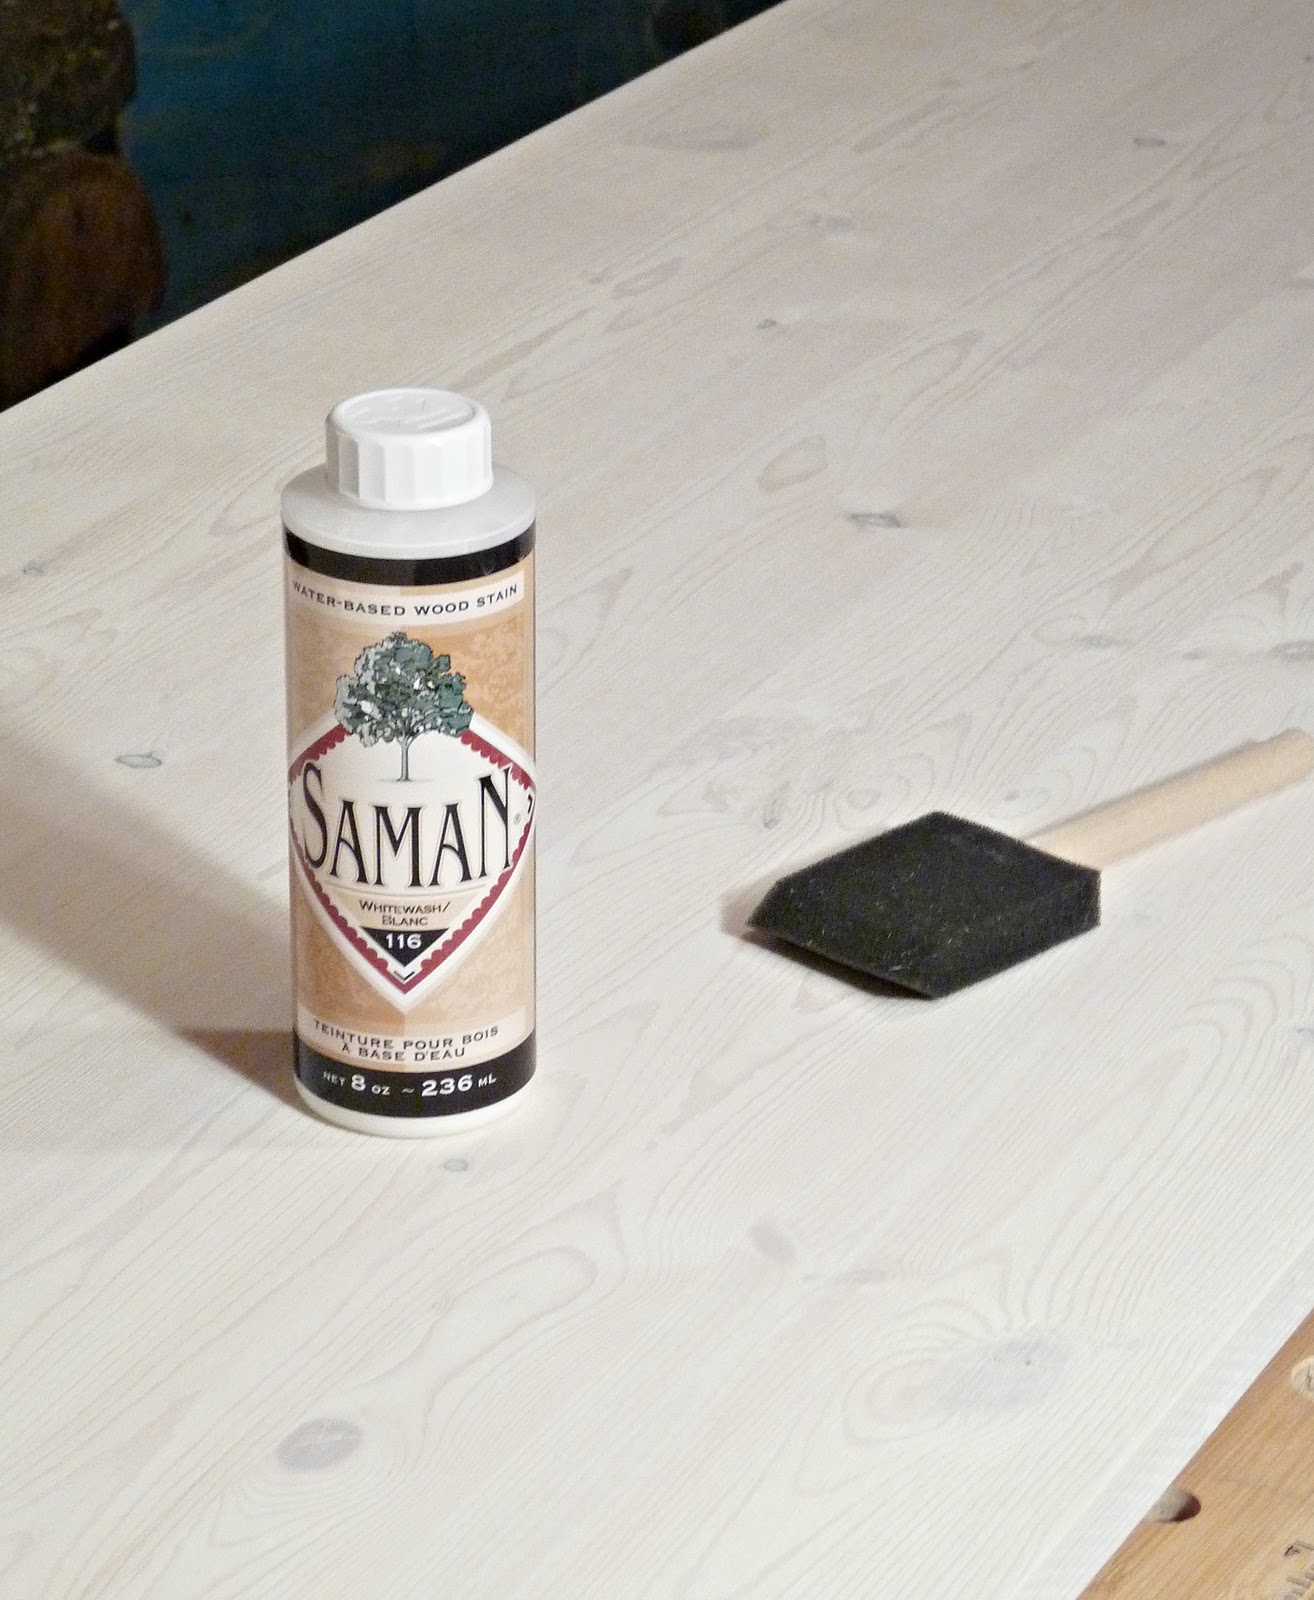

Why we loved this stain(and this is my own opinion, Saman execs don’t even know I exist, let alone that I’m giving the company mad love):
- Water based = easy clean up
- Low odour, making it perfect for indoor projects
- No overlapping marks
- Really awesome coverage
With just one 8 oz. bottle we applied four coats, making the wood almost opaque but still grain-y and wood-y for the Hubs.
Some Varnish Love:
We used Varathane brand (click here to see the can’s English side – oops) Premium Diamond Wood Finish in clear gloss. It, too, is water-based and although meant for outdoor items, worked just fine for a desk. The helpful salesman at Canadian Tire who sold me my tiny first can of varnish is not as obsessed with glossiness as me. When I bought my second can, this time at Home Hardware, the helpful salesman there suggested I buy a bigger can. I’ll use the rest, he reasoned. He’s smart.
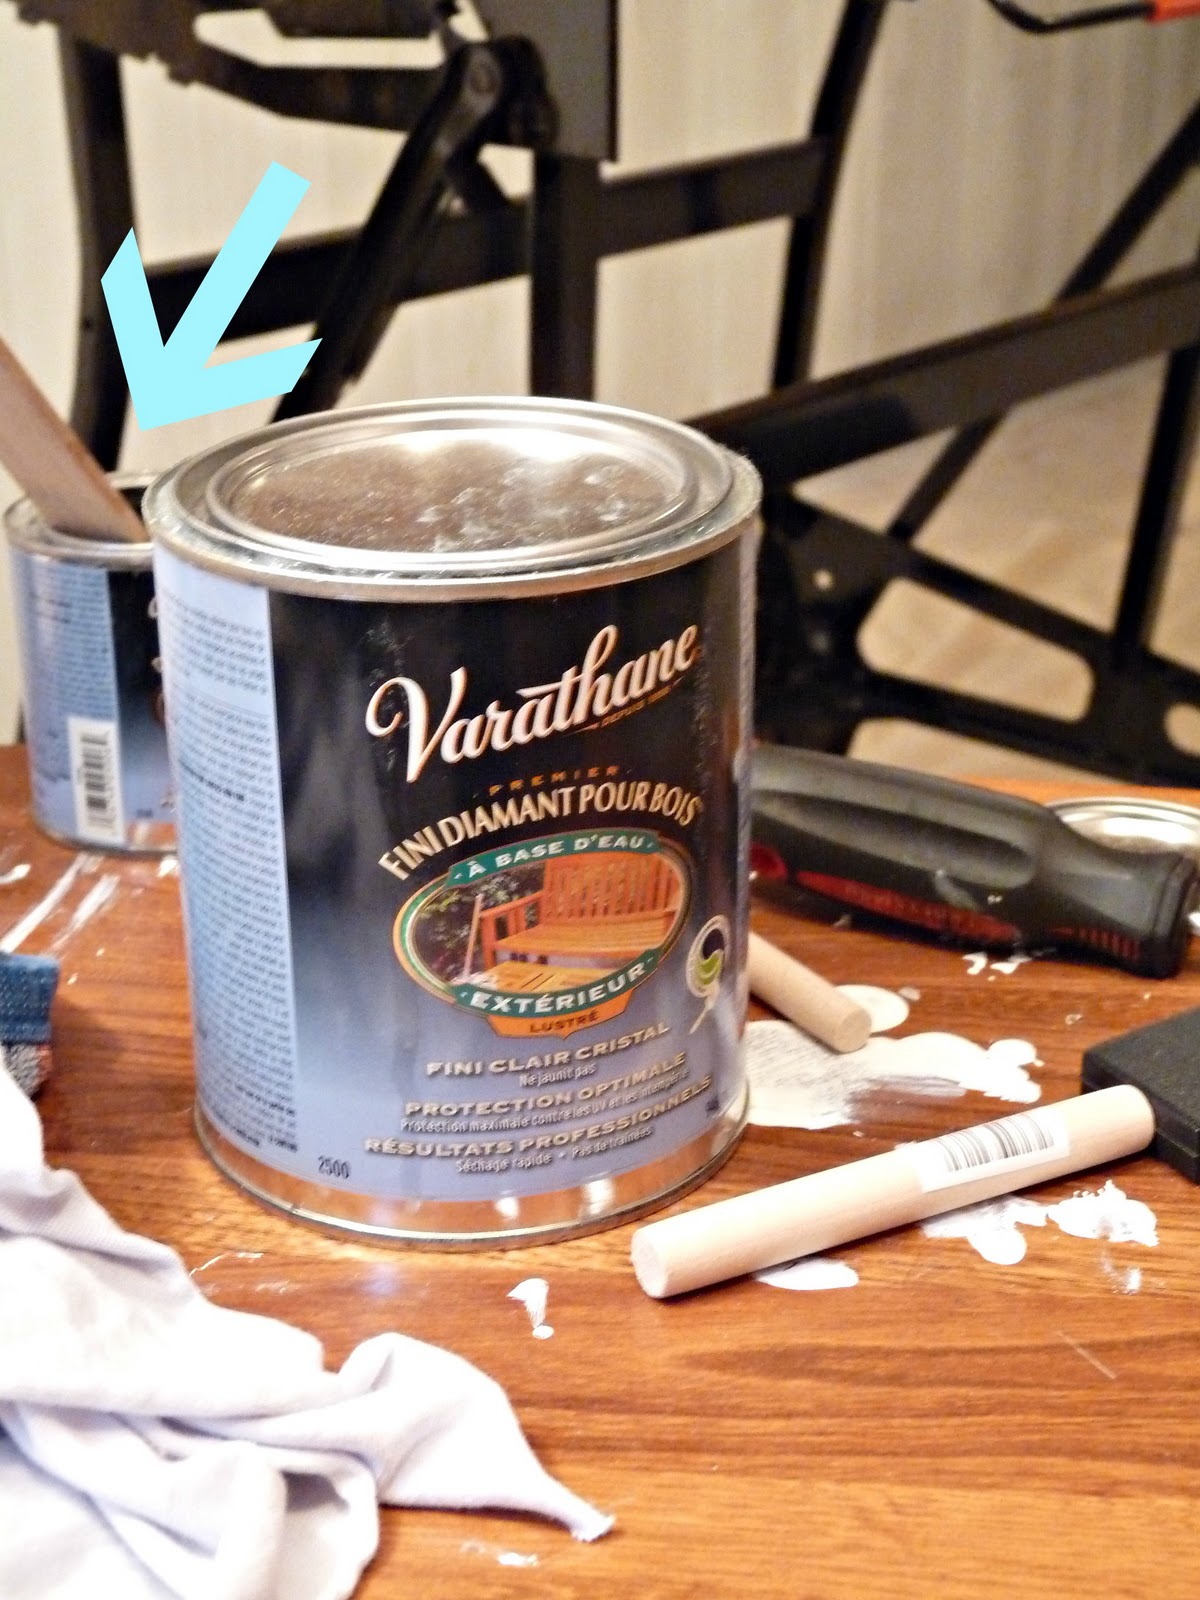
Oh, tiny first can. How quickly we parted ways.
I applied EIGHT coats to get the desk surface glassy-glossy and I love the result. In the office, it just glows.
How to Varnish:
1. Lightly sand any grain that has been raised during the staining process.
2. Wipe thoroughly with a dry cloth
3. Ensure surface is free of debris (I missed this step – crap).
4. Apply varnish using a foam or bristle brush (don’t go cheap – my brush left fuzzies I noticed too late –double crap)
5. Allow to dry (2-4 hours for this brand).
6. Lightly sand any raised grain, wipe clean (the manufacturer’s suggest sanding the whole thing if more than 24 hours have passed).
7. Re-apply varnish and continue until you can see your reflection (I used 8 coats).
8. Patiently wait for the surface to cure for one week.
Despite some mystery debris trapped beneath eight layers of varnish like some weird grime time capsule, I am happy with the results. I’ll show you the whole kit & caboodle soon!
Supplies:
- Flux core wire feed welder (ours was a gift from Tanya’s grandpa)
- Grinder (ours was $20 – on sale at Canadian Tire)
- 0.75″ square metal tubing (2 eight foot lengths)
- Welding mask (the welder came with a cheap-y one, but Hubby had his own)
- Work gloves/protective clothing (something safer than what Hubby donned, please)
- A workbench helps, but something else can be jury-rigged
- Tape measure
- Square
- Chalk
- Workshop/garage (this is messy!)
- Metal primer
- Paint & brushes
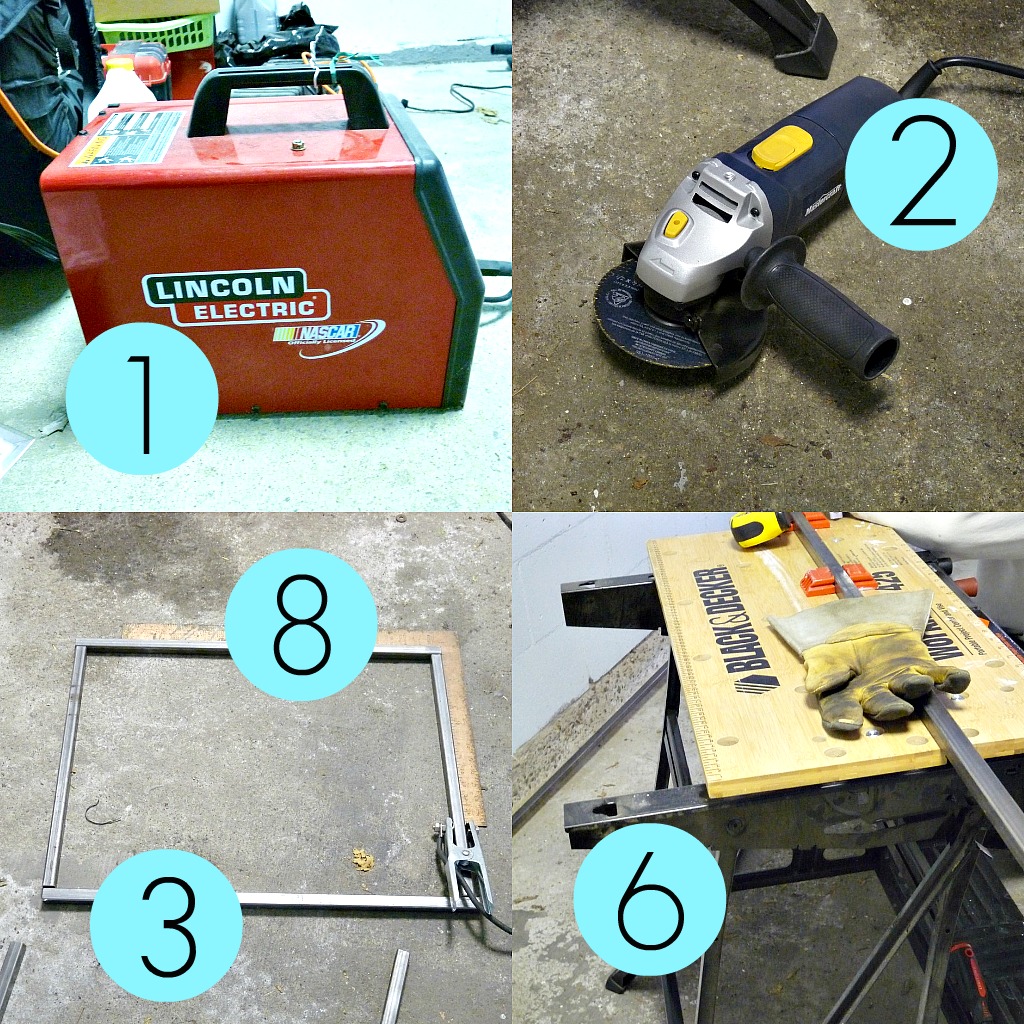
A note about the welder:
For this job the machine we used was a Lincoln Weld-Pak 100. It is a basic flux core wire feed welder that is great for home and hobby use and can plug into your standard 15A 110V outlet. This exact machine is no longer produced, but there are many similar ones at the Lincoln Electric websiteand available at many retailers.
Preparation:
First we measured the height Hubby wanted for his desk. Already knowing the design we wantedto copy, we quickly determined how many lengths of tubing we would need (two, 8 foot lengths were enough and could fit into our Versa hatchback).
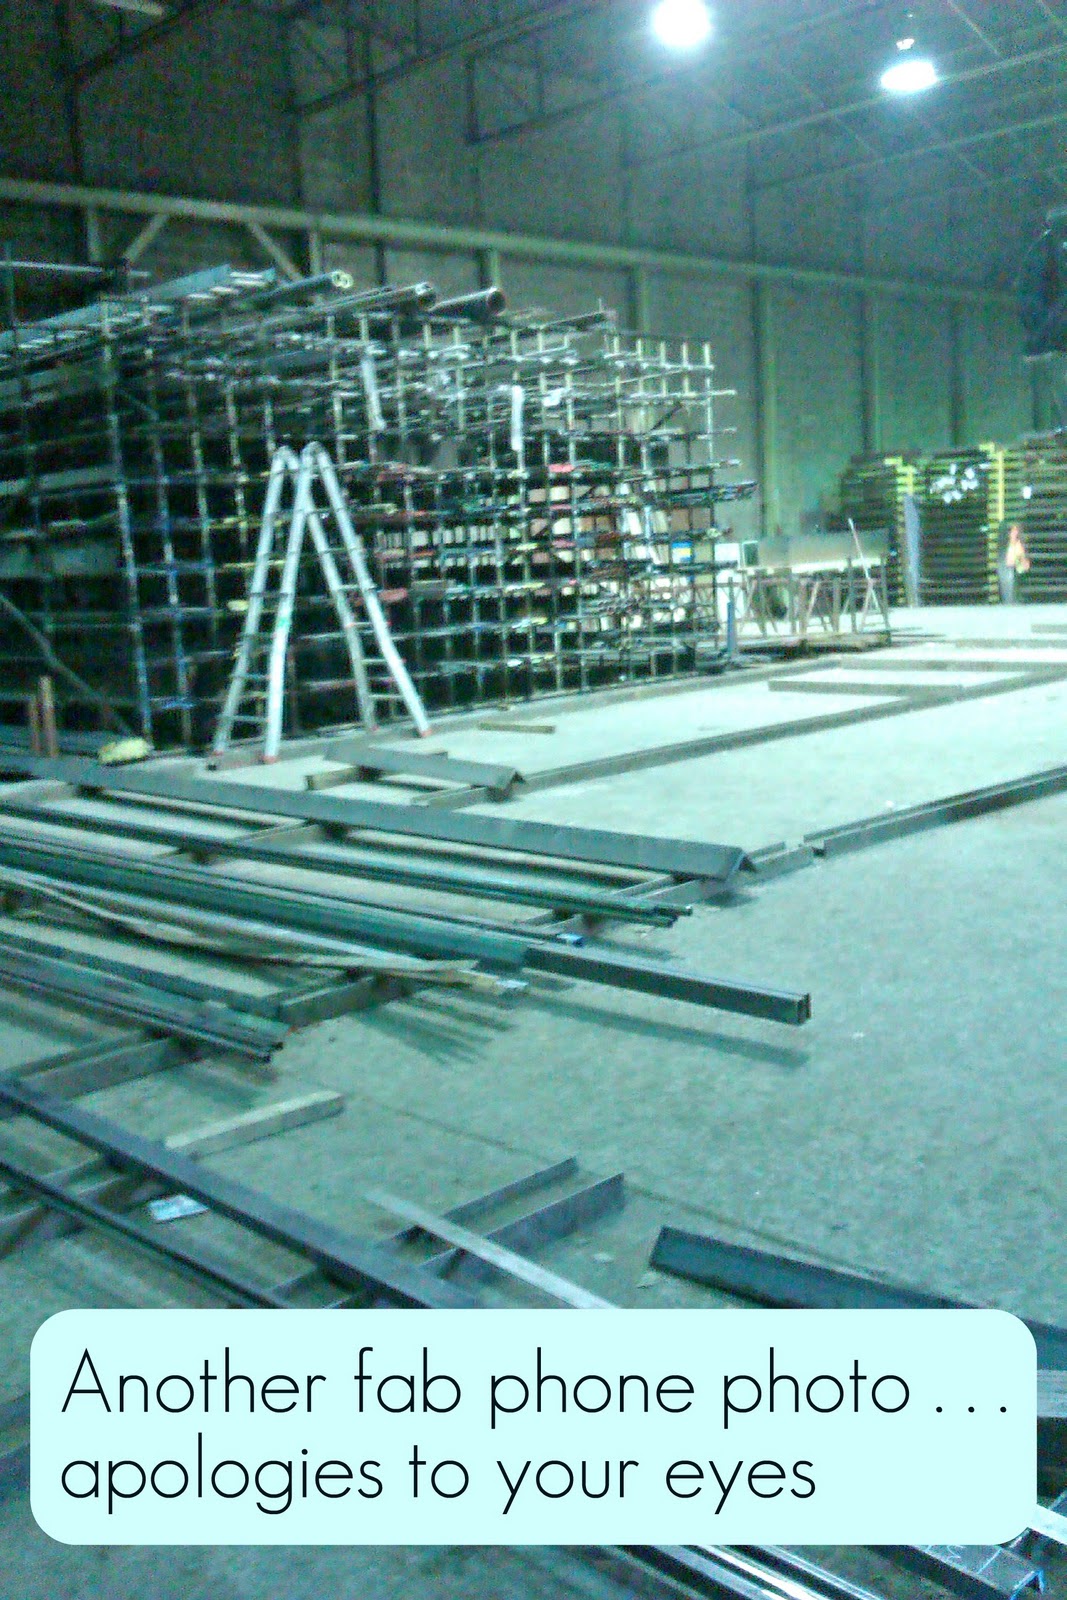
We purchased the metal from a metal supply shop. Turns out, we could have had them do all the cuts there.
How-to:
This part was written by Handy Hubby . . .
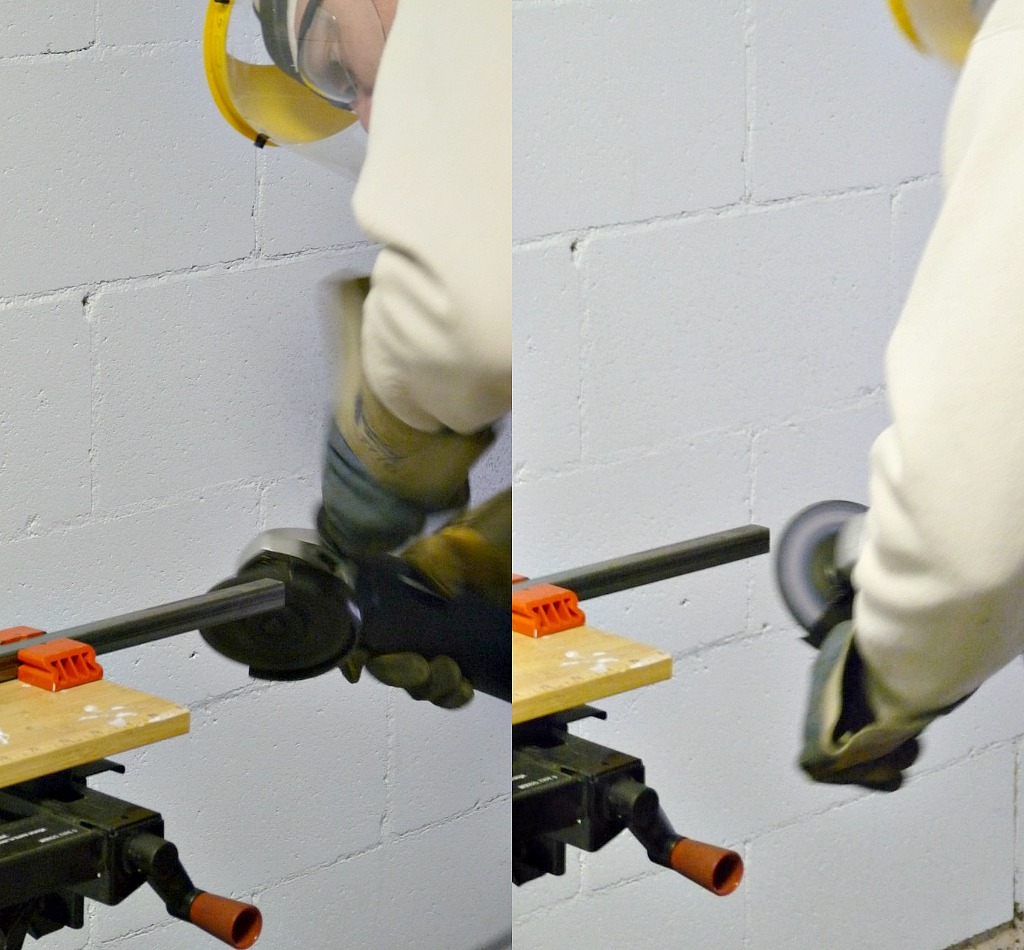
I measured and marked my cuts with chalk. I used a 4.5” angle grinder with cut off disks to cut the lengths I needed and ground the ends smooth (freshly cut metal can be razor sharp) with a grinding disk. Remember not to use cutting disks for grinding because cutting disks are not designed for it and it can be very dangerous.
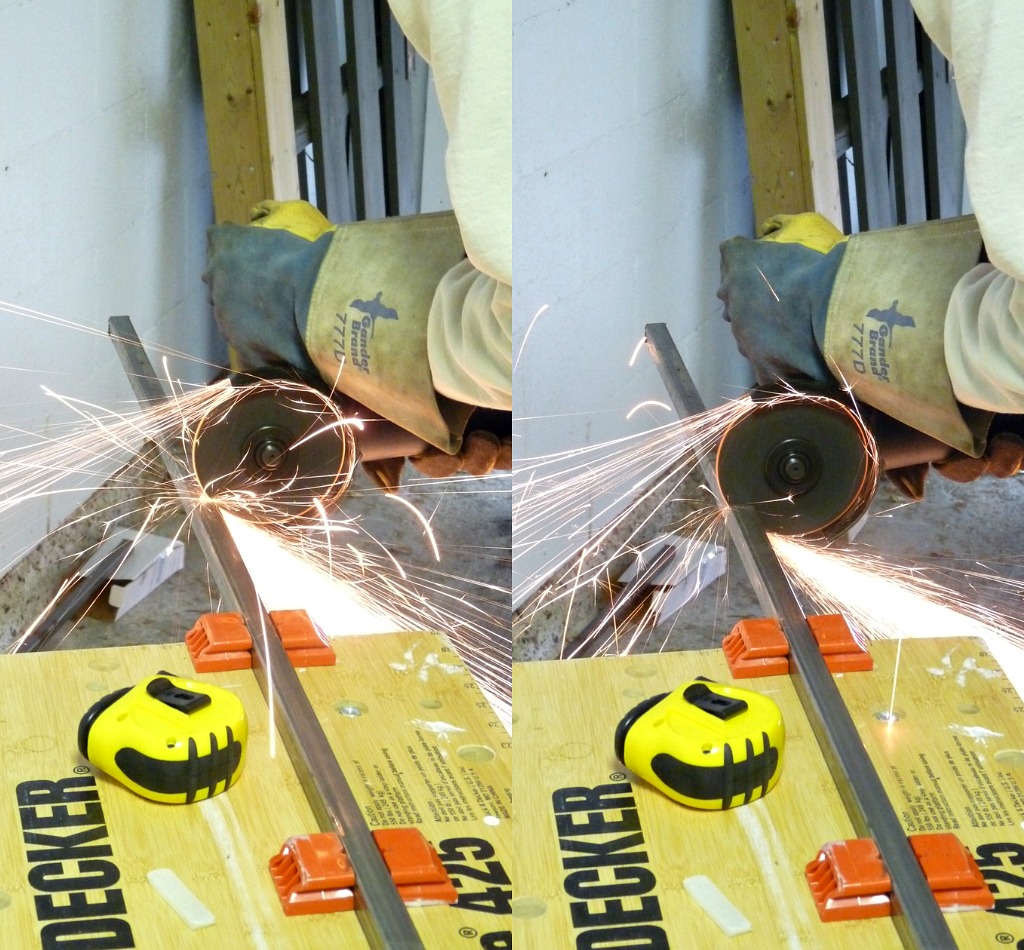
Using a framing square, I laid out the pieces on the garagefloor and used the welder to tack them in place. Start with small tack welds, as it allows you to check for square as you work. Also, as a welder heats up the metal, it can distort the shape. The tack welds hold everything in place as you complete all the welding.

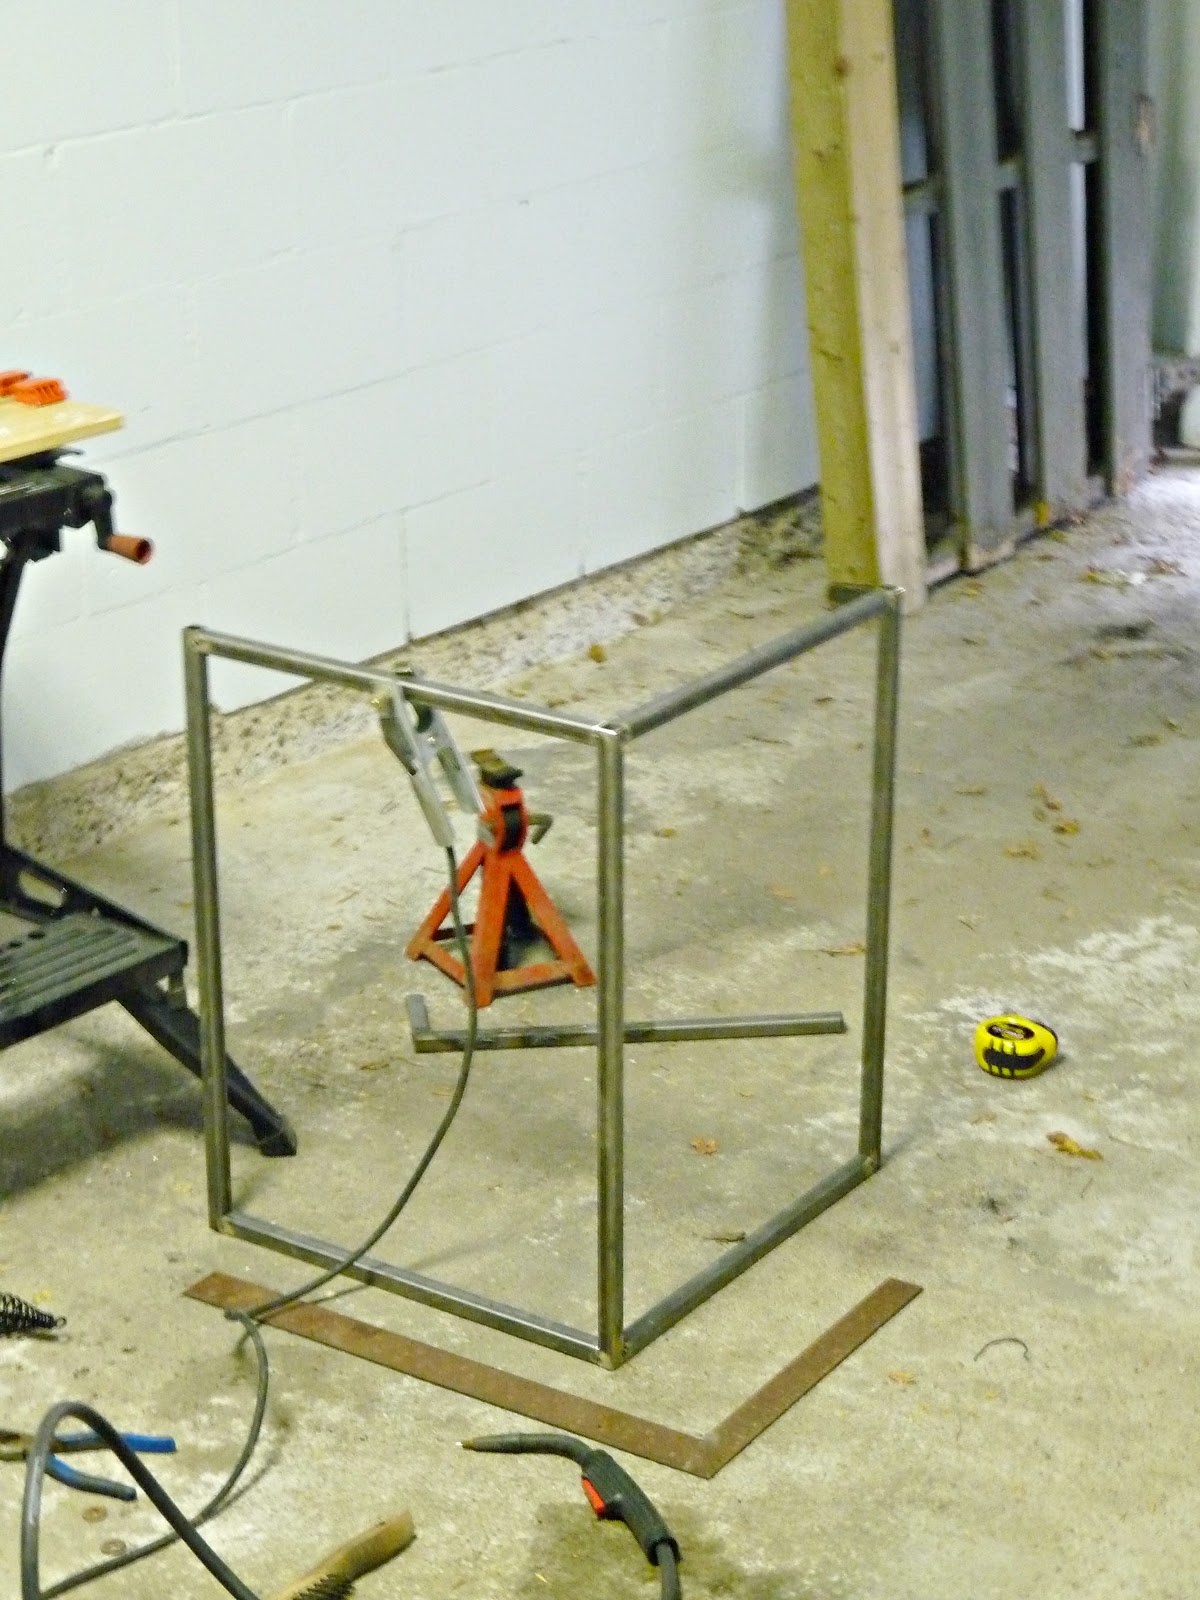
Once the welding was complete, I used the grinding disk to smooth out the welded areas, remove any welding spatter, and level out any welds that were less than perfect. I can weld, but I am not a pro. J
Then I slapped on a coat of metal primer and a few coats of white paint (leftover from painting the walls).

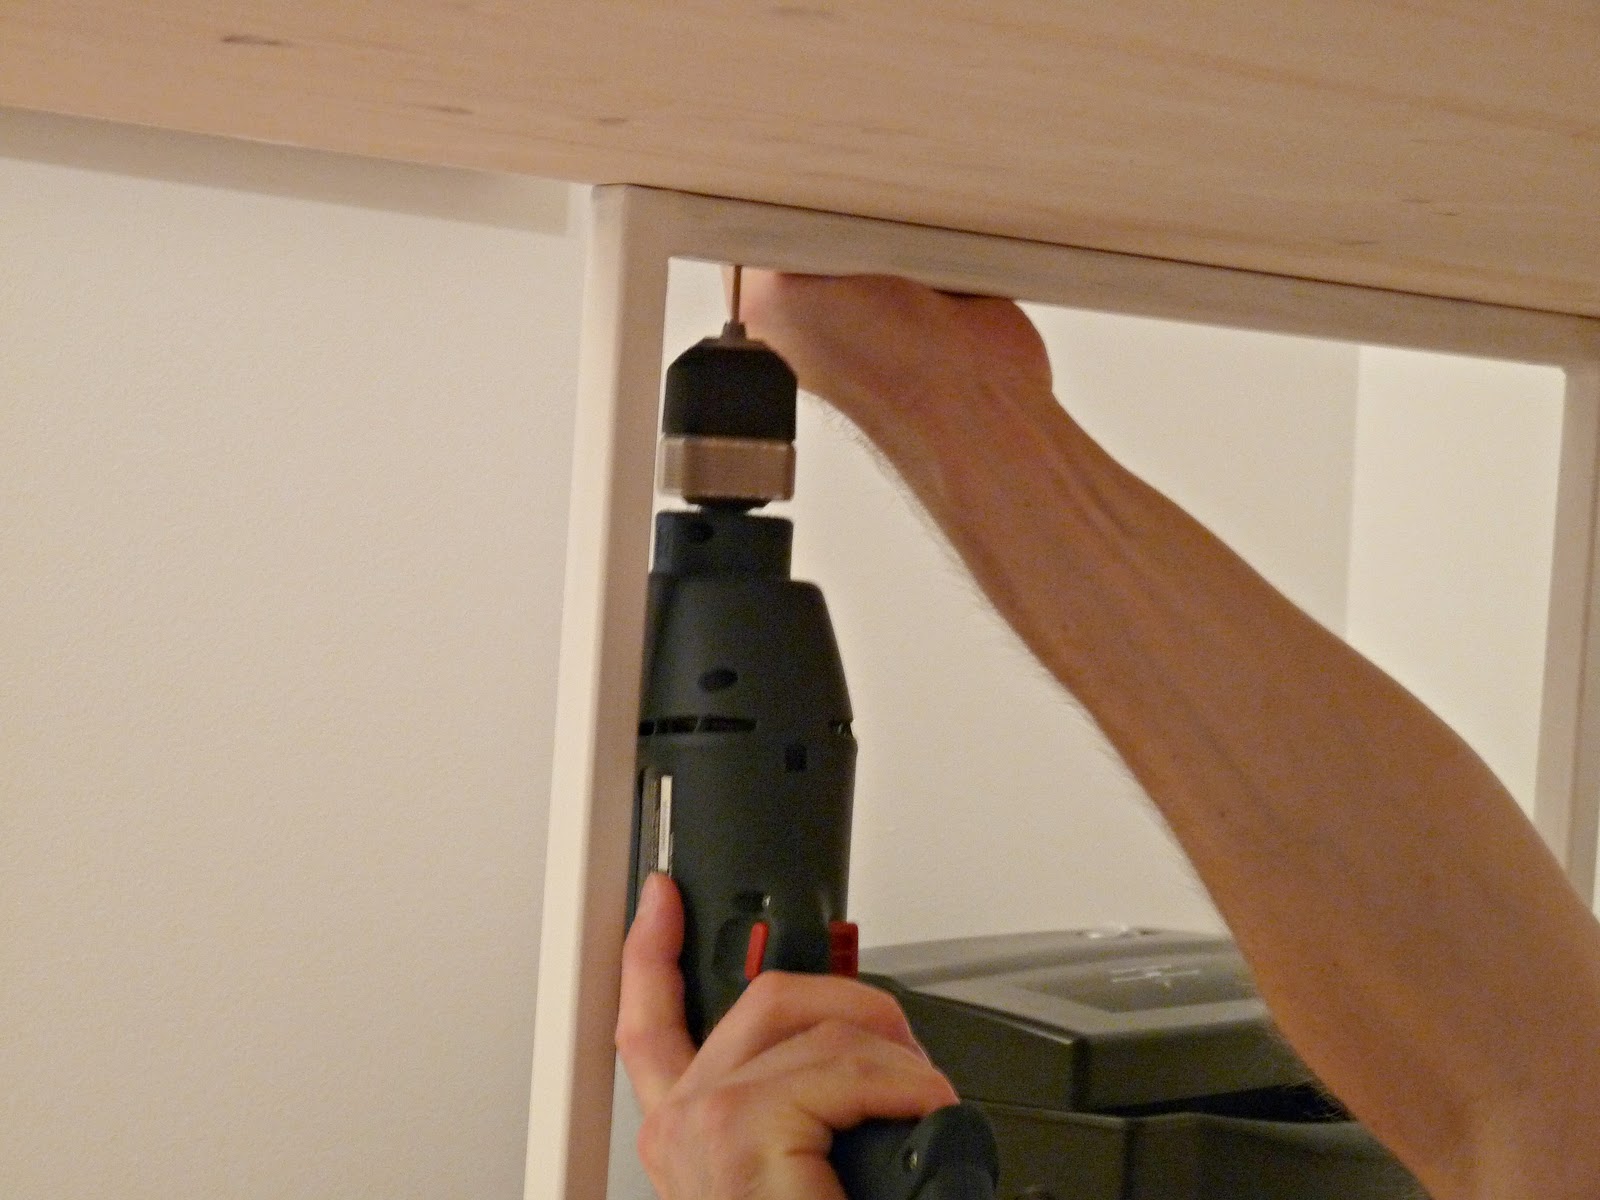
In order to fix the top to the legs, I used 1.25” wood screws. The top is 0.75” and the tubing is 0.75”, so a 1.25” screw can go through the legs and into the top with 0.25” to spare. Drill holes in the tubing that are just large enough for the screw threads to pass through. Pre-drill a smaller hole in the table top from the bottom (ensuring you don’t go all the way through!) to provide a path for the screw and eliminate the chance of cracking the wood. I used four screws per base piece and it seems to be sufficient, but I can add more later if needed.
To protect the floor we simply attached stick-on felt feet to the bottom bar.
As a side safety note, read all tool instructions and when using a grinder always wear safety glasses with your face shield. You do not want to see a cutting disk come apart at 11000rpm.
I am the husband of the amazing Cassity of Remodelaholic. I love to problem solve and to design and build things inside and outside the house to make life better. I am a professional Landscape Architect by trade and love the outdoors.


This desk is absolutely gorgeous!
Hooray for welding! I’m jealous you found a grinder for so cheap, I haven’t bought one because they are so pricey. Love the new desk!
My daughter would love this in her room. She’s very MOD. She’d love the TREE art esp.
JoAnn
1) I voted for your blog and it was hard cause I have many favorite blogs nominated. Thanks for the information about the prefab wood tops. I’m going to check them out for my office redo. I think I’ll get the legs from IKEA but I do like the look of your desk. I love the stain you did too. Thanks for sharing the info! Katharine
THANK you KAT! That means a lot, a TON actually … and while I want to at least make it to actually voting, I will let you in a little secret… I think you can vote blog for more than one blog but the limit is just one vote for each one… that doesn’t make sense… the point is go vote for your other favorites too!
I’m glad you like the colour stain I chose! That brand was great – there are so many wonderful (and vivid!) colours to choose from, plus you can even mix your own stain for a custom colour.