How New Lighting and Paint Brightened Up A Dark Kitchen
Submitted By Cleverlyinspired
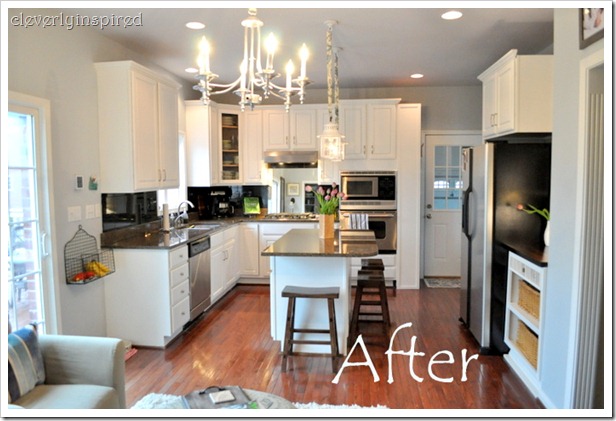
I am soooooo very excited to show you the kitchen!!! I cannot tell you how much difference some paint and new lighting makes in a space! It feel like we added a window too…light just pours in! Ok…I’ll shut up and get on with the eye candy we all want to see…..
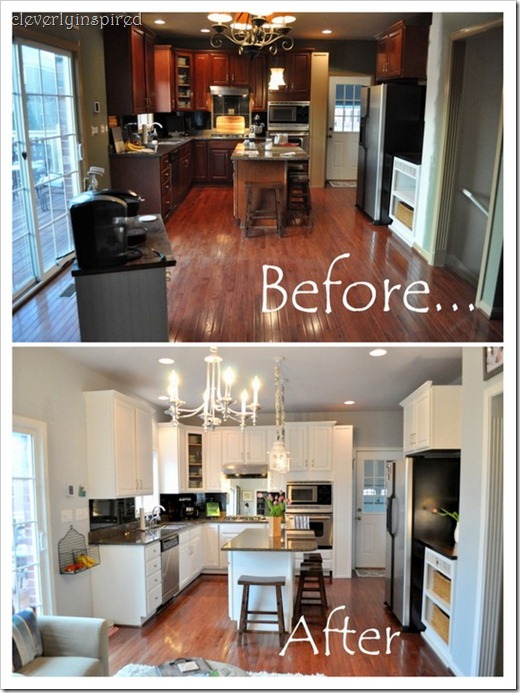
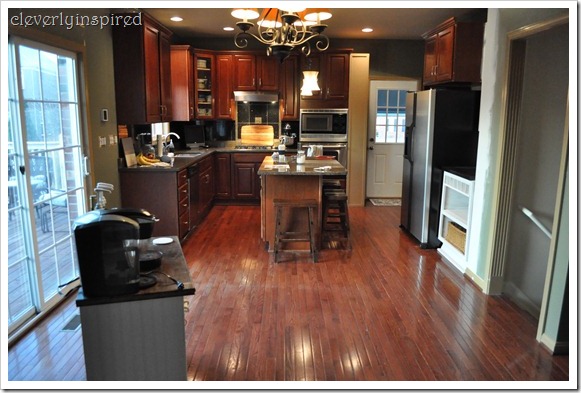
Let me jog your memory…..
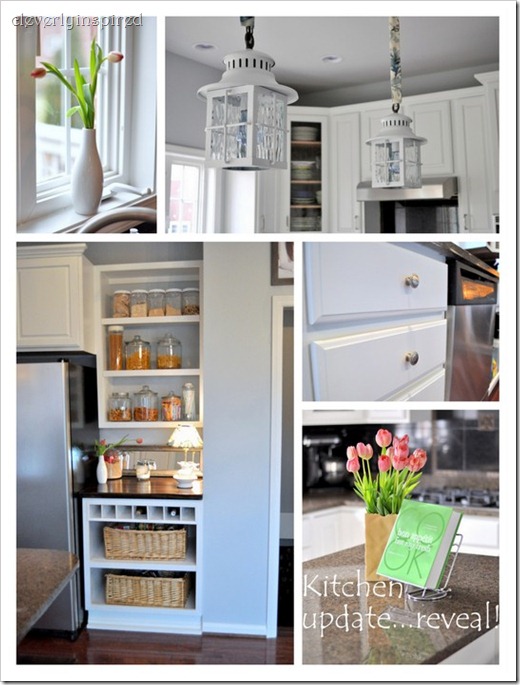
Amazing right?!?! I know!! We painted the walls a half strength of the foyerpaint (Behr Light French Grey). The ceiling is a shade lighter…Reflecting Pool. The white cabinets are Porter Paint White Umber…along with the trim.
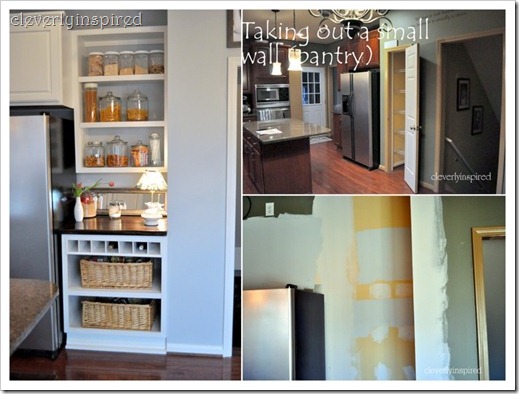
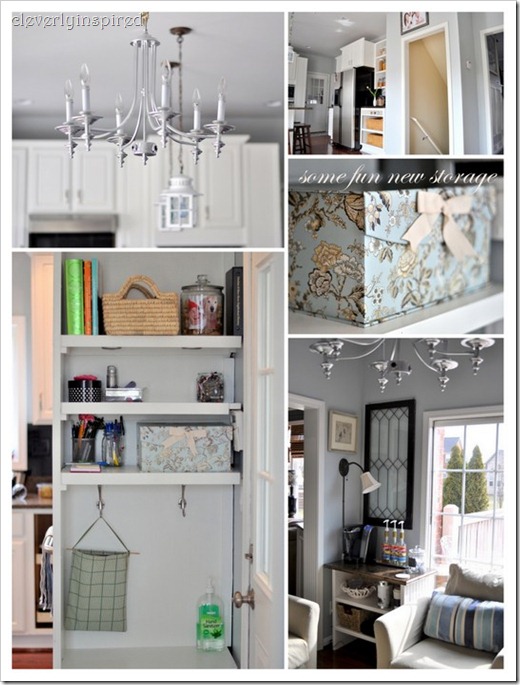
We took out the pantry and added in some open shelves and a base cabinet…along with our custom wood countertop. So open and easy to use…we are really loving the extra countertop space!
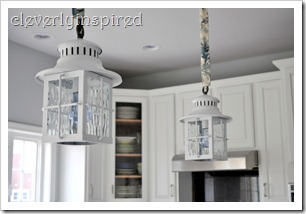
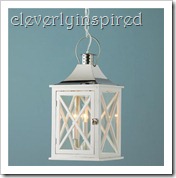
The lighting we had before was great for the “Tuscan” look….but we wanted something fresh and a bit airy. The lanterns I found are actually outdoor lanterns…scored them for $29 each at Home Depot! The original lanterns I fell in love with were $130….so these saved us a bundle. I did have to spray them white. We LOVE how they came out. The water glass shimmers at night…so lovely.
The chandelier was also a STEAL…from the Restore. (Habitat for Humanity store) You should seek this store out in your own town….seriously the best deals. This light was $18! It was bright brass….but I made it sing again! I will be doing a separate post just about the lights 🙂 I made a video about how to install your own pendant lights. It is really a simple project…and you can do it girls!!! I will show you step by step how to take out and old light and re wire a new light…easy 🙂
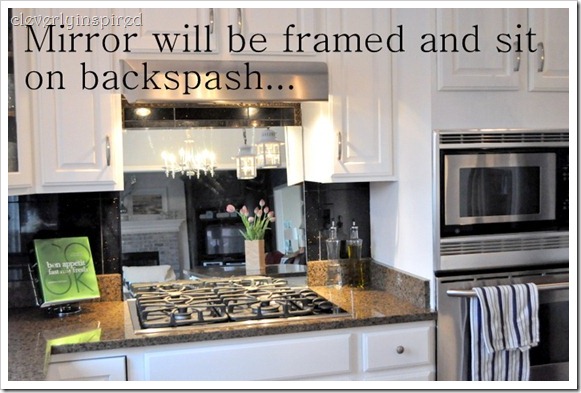
Last thing we are working on now is this custom mirror for the cooktop area. The black granite tile hasn’t really annoyed us like we thought it would. We are going to live with it for awhile since it would be costly to replace. However, the area above the cooktop will be outfitted for a custom mirror. This is a great, budget friendly solution to visually opening up the space without taking out an tile. We called our local mirror and glass cutter…gave them the exact size…and they cut us a mirror. We are going to trim it out and place it in that spot. Easy! And look how it bounces the light! It’s like we have a 8 burner cooktop!! :)Love it!
I know the question yall are dying to know…what did it cost you?!? Here is a basic breakdown of the kitchen update.
Demo pantry and re-drywall : $425
Built new base cabinet and shelves above: $70
New wood countertop: $10
Paint walls, trim and cabinets (includes paint) : $800 (we were going to do this ourselves…but when we got this quote…we surrendered! Plus our contractor sprayed the cabinets which made the finish really lovely and professional)
New Pendant Lights: $15 (we sold the other chandelier for $55, and the pendants are for sale still on craigslist 🙂
New Chandelier: $18
Paint for new lighting: $7
Storage, décor, etc.: $30 ( I had some of the jars prior to this update)
Custom mirror for backsplash: $39
Total: $1469
We think it was worth it….to go from this…
to this….
I am the husband of the amazing Cassity of Remodelaholic. I love to problem solve and to design and build things inside and outside the house to make life better. I am a professional Landscape Architect by trade and love the outdoors.



As always…you are so kind 😉 Thanks for the feature girly;)
Gorgeous!! I think you have helped me decided what I am doing in my kitchen. 🙂 I love the wall color too!!
Wow! What a terrific transformation! It’s so much more airy now! Love the glass in the pendants! She did an amazing job on an incredible budget! Thanks for sharing.
Oh my goodness – what a HUGE improvement! I love the mirror behind the cook top. We’ll be building a house soon and your photos helped me convince hubby that we need to do white cabinets in the kitchen! Fabulous transformation.
ButterYum
I love how much bigger and fresher it feels. Nice job!
Amazing make-over! The kitchen looks so much better, so airy..
Your kitchen looks beautiful! I’m in the middle of painting my cabinets right now. Such a long and awful process but I now it will look 10 times better. Great work!
Wow! Isn’t paint a miracle product? The kitchen is beautiful and has a totally different feel with paint and great design ideas. Wonderful job!
How did you prep the cabinets to make sure the paint doesn’t start to peel or flake off in a year or so? And were the drawer sides, bottoms and backs already white or did you have to paint them as well? And were the insides of the cabinets white as well or were they the same color of the original stain? And how long did it take you to paint the cabinets, including prep time?
What a great transformation! I especially love the lanterns you found at Home Depot. So cute!
how do you sew fabric to cover lighting chains ect? do you have a tutorial for it? thanks
Hi Linda! This was a guest post, so head over to the original blog (linked at the top of the post) and she can help you with your questions. Thanks!