From Table to Seat
I hope by now that you all know how much I love when a project that involves re-imagining and reusing something that we already have. So, when I saw this project from table to seat, I had to ask if I could share it. Jenni from Peppertowne did a fabulous job with an old coffee table, check it out:
Confession: I lost the ‘before’ picture for this project.
Confession: I lost the ‘before’ picture for this project.
I swear I took the pic. But where is it?
I’ve search through the endless piles of photo chaos on my computer. Oh, don’t judge me. You know the photo chaos…you’ve been lost in it too.
The abyss of unmarked photos scattered all over your computer.
Promise: I promise to save my pictures in a marked and uber-organized way. At lease until I’m in a hurry or the cheese quesadillas are burning…
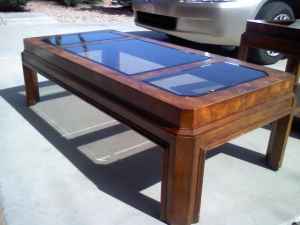
Craigslist rules! I found a photo similar to the coffee table I originally bought.
My coffee table cost me $10 bucks. But, I needed a window seat!
I was looking something with modern lines and a neutral feel.
TAA-DAA!!

This was an easy project with some basic upholstery.
Step #1: Prep and paint the wood frame.
After removing the lovely smoke mirrored glass, I painted the table and then sanded up the edges a bit to let the dark wood show through.
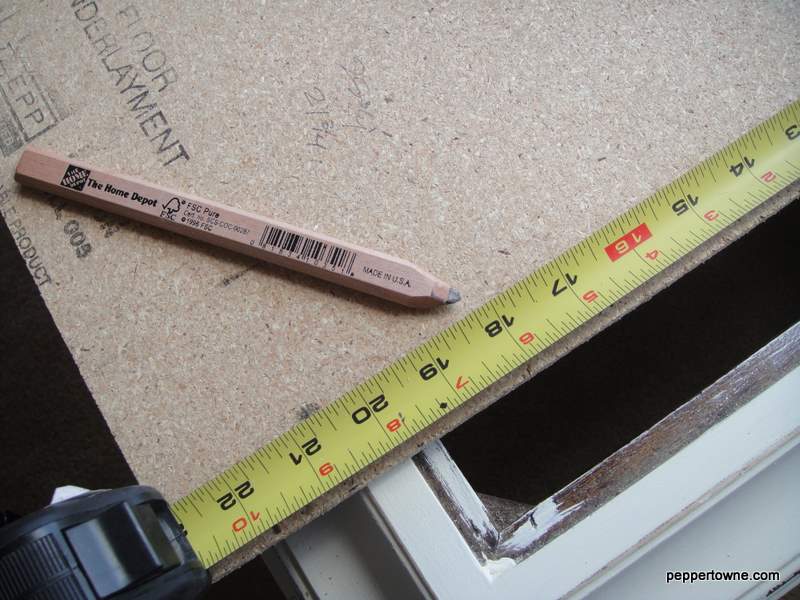
Step #2: Cut some wood board to replace the glass mirrors.
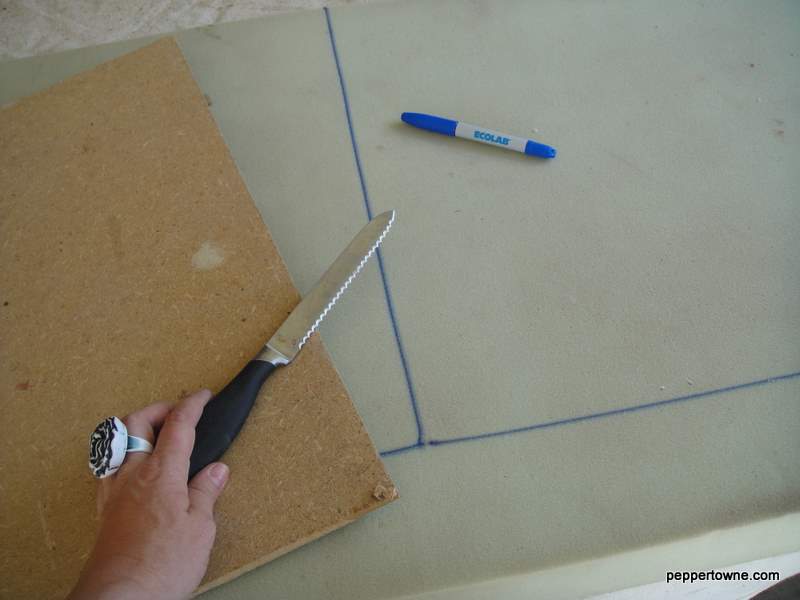
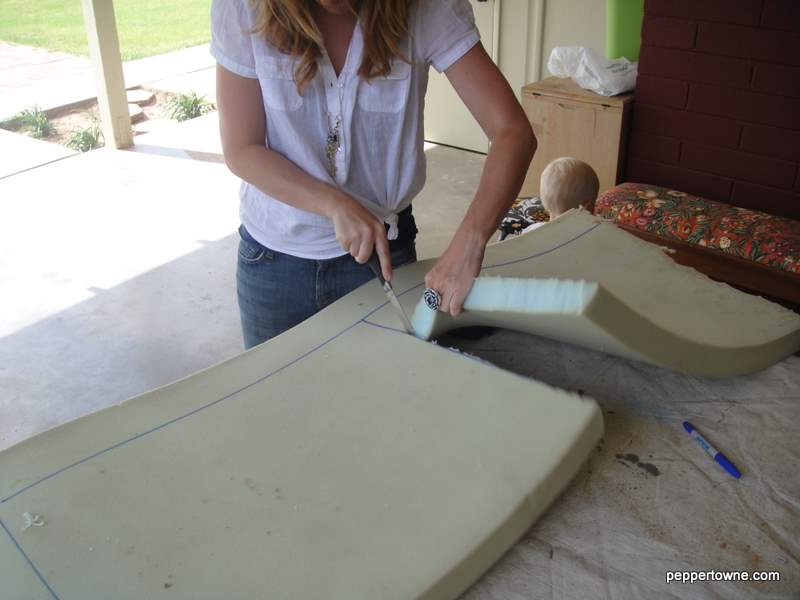
Step #3: Cut a piece of foam for the bench seat. The best way to cut foam is a band saw. But if you don’t have one, the second best way is with a sereded kitchen knife.
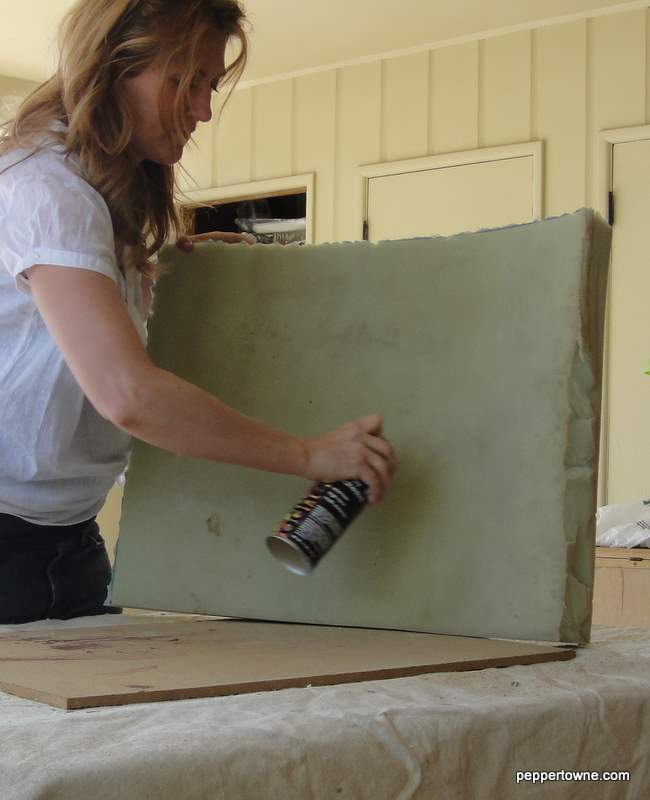
Glue the foam to the board using spray adhesive.
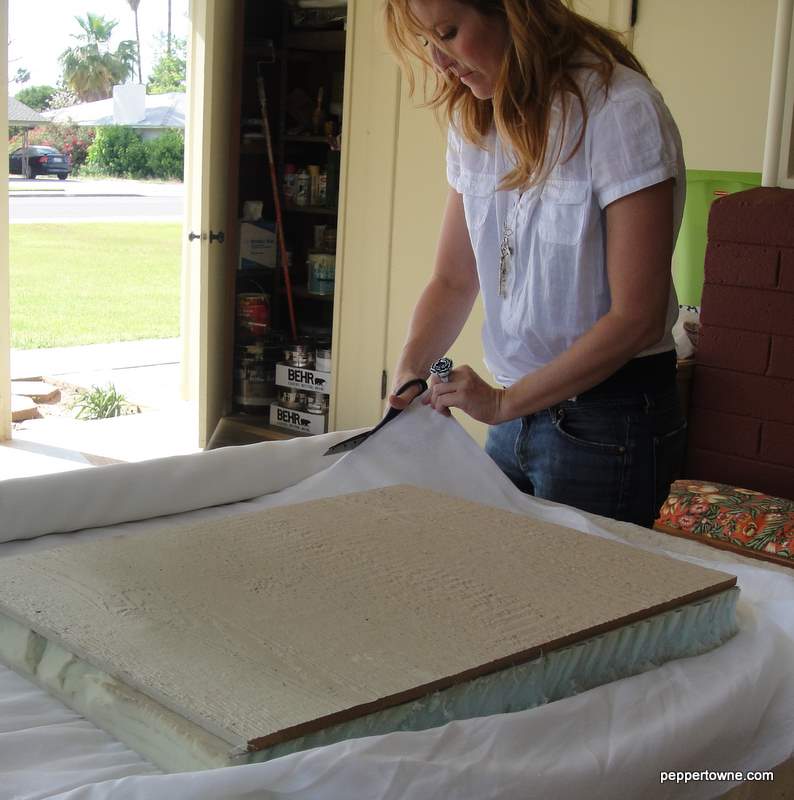
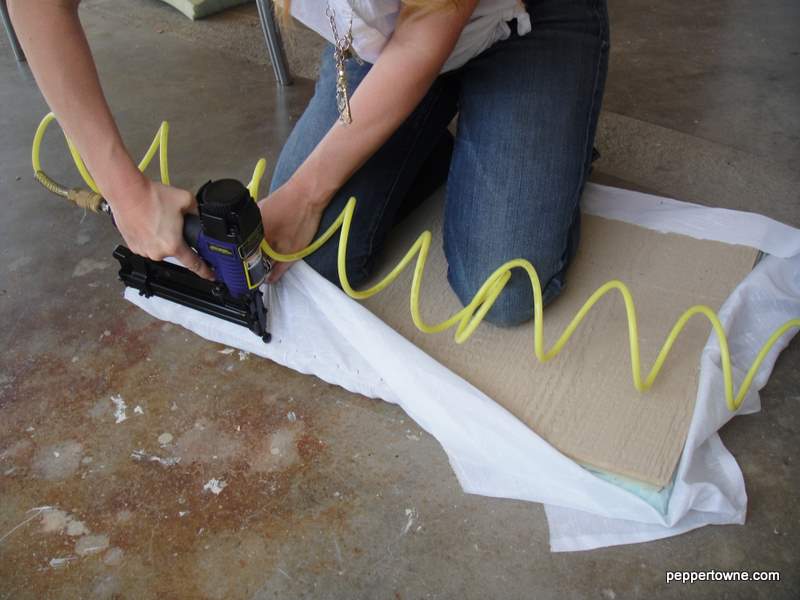
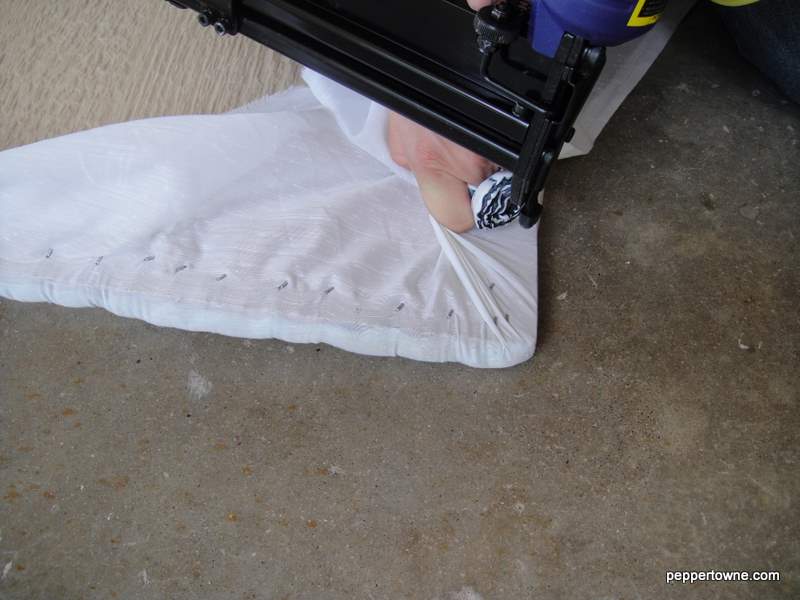
Step #4: Using a staple gun, cover the foam with a liner cloth.
Securely staple on the backside of the board. Use a firm even pressure around the edges. As you can see in the picture, I use my body weight to push foam in and then staple the fabric. This makes a nice rounded edge on your seat.
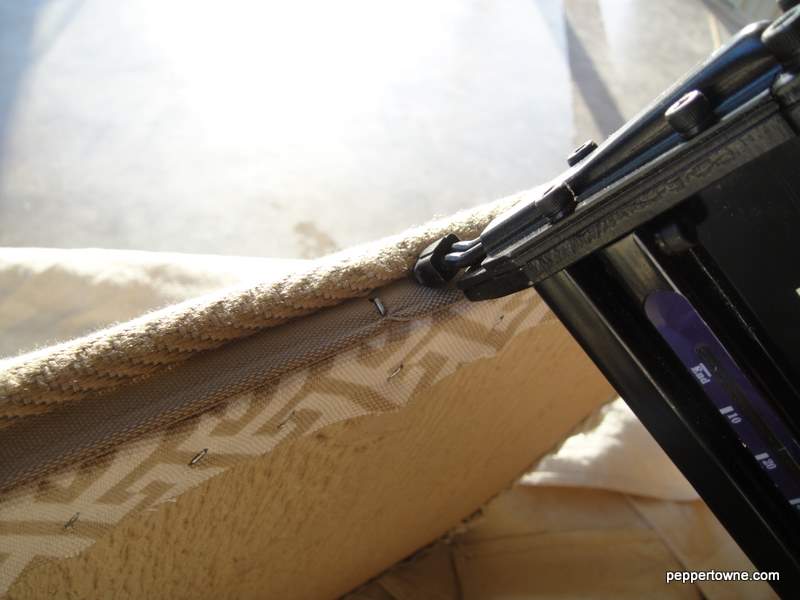
Step #5: Cover your seat with the upholstery fabric.
Using the same technique as the liner cloth, use a firm even pressure and staple the fabric in place. Always cut away and excess fabric. Pull your corners in and staple them like crazy. Remember, the underside of your project doesn’t have to look perfect. This is not an art of perfection…and that’s why I love it! Also, I’m using an air powered staple gun, which is the bomb. If you don’t have access to one of these, a hand powered gun is great. I’ve done many many project with a hand gun.
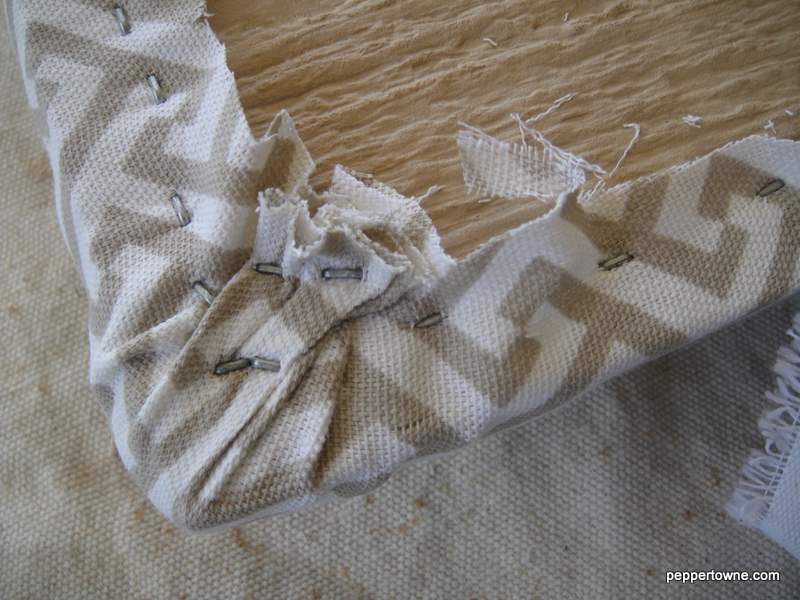
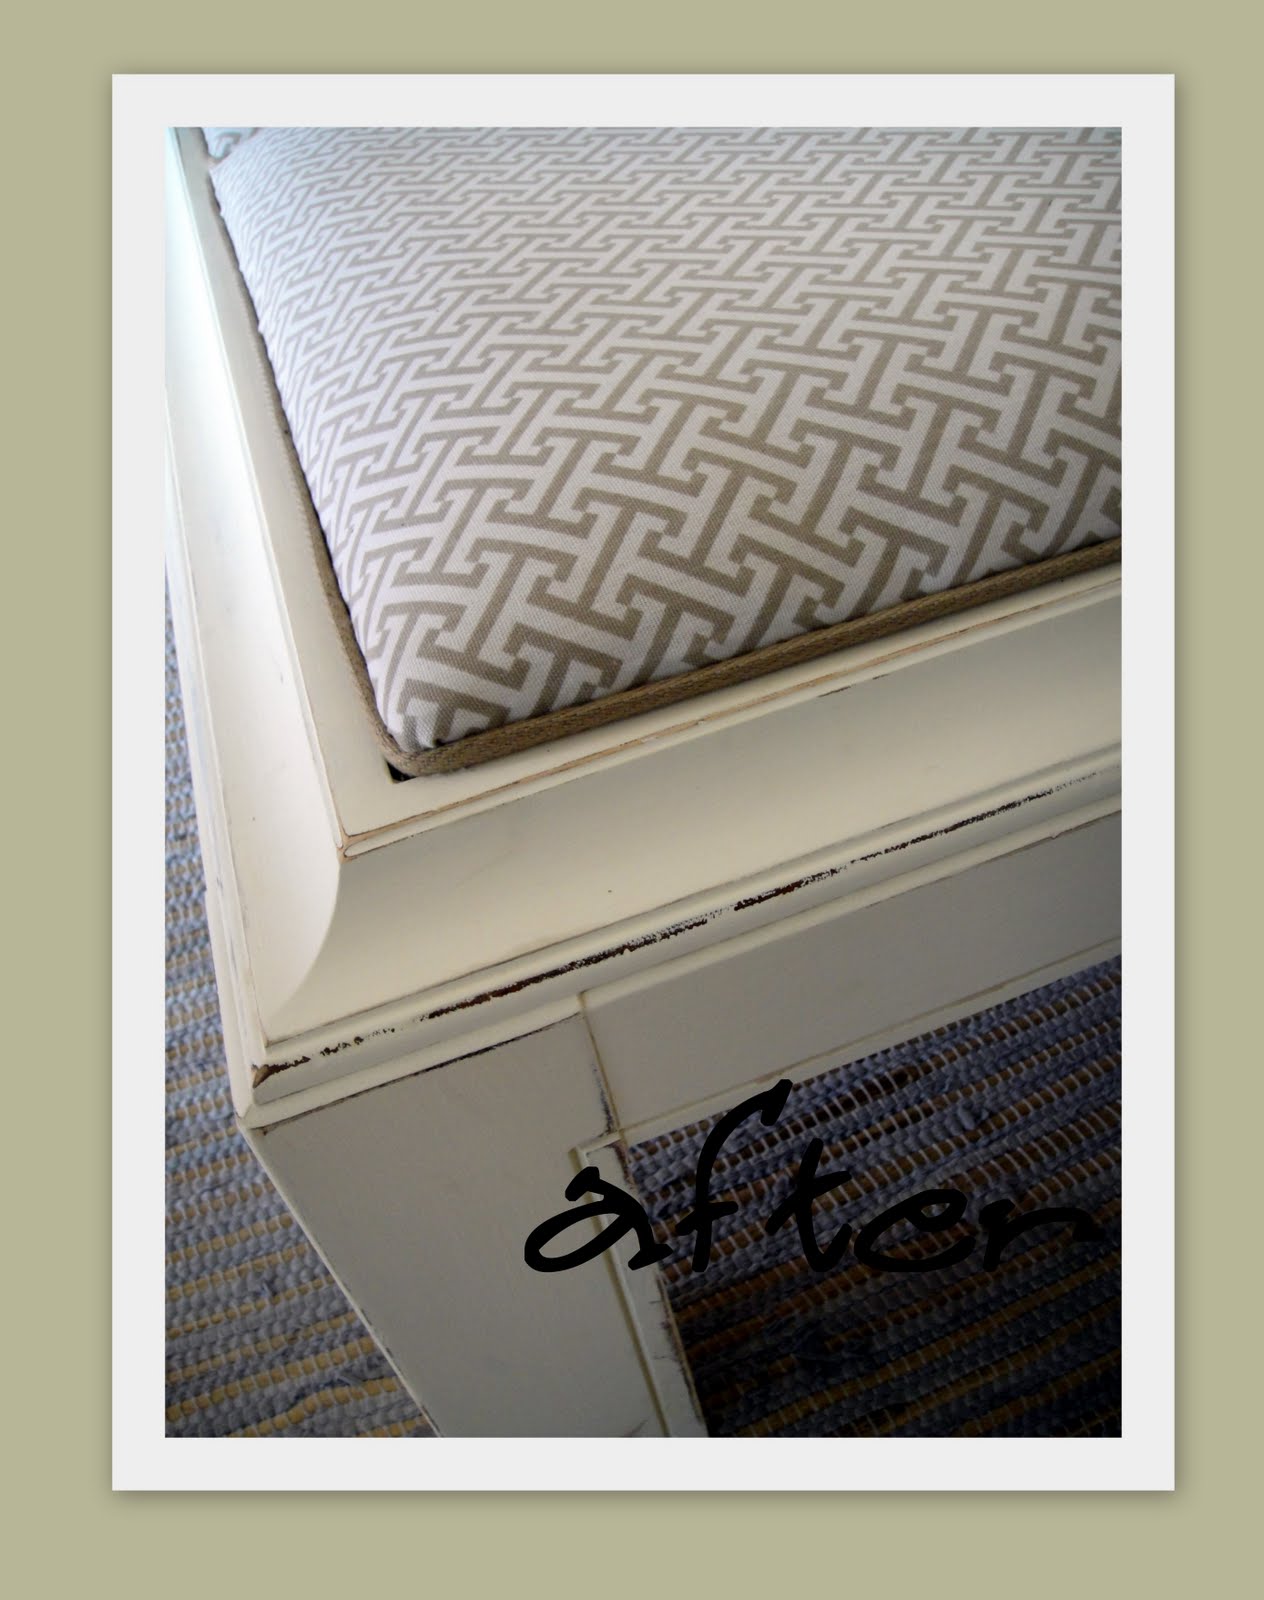
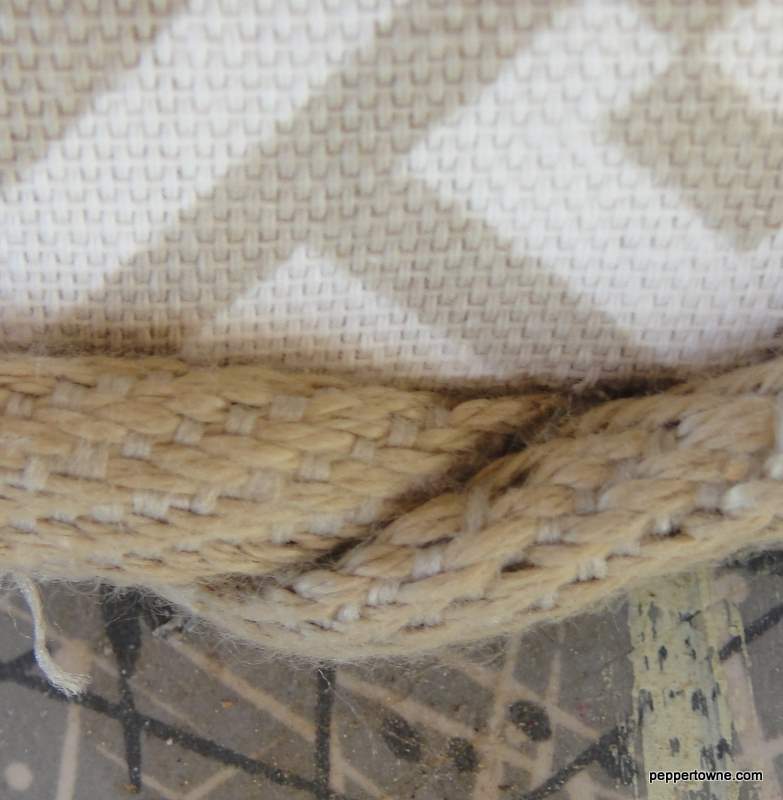
Step #6: Staple your trim.
Adding a trim gives finished look to your project. Here I choose a burlap natural fiber that fit in with my neutral scheme. Simply, staple the trim along the edge of your board.
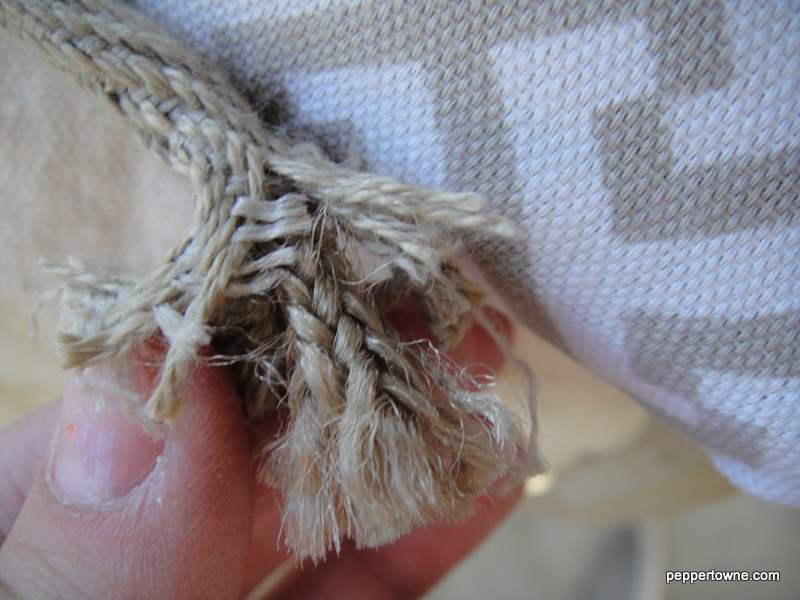
Here’s a trick I learned from a great upholsterer, when the two ends of your trim meet, simply unravel the ends, cross them over each other and staple in place on the underside of the board. This way your cushion will fit perfectly without the added bulk of the extra trim.

Step #7: Put your bench together.
Add a few L brackets to secure your seat.
That’s it!
Enjoy your new table to seat bench!
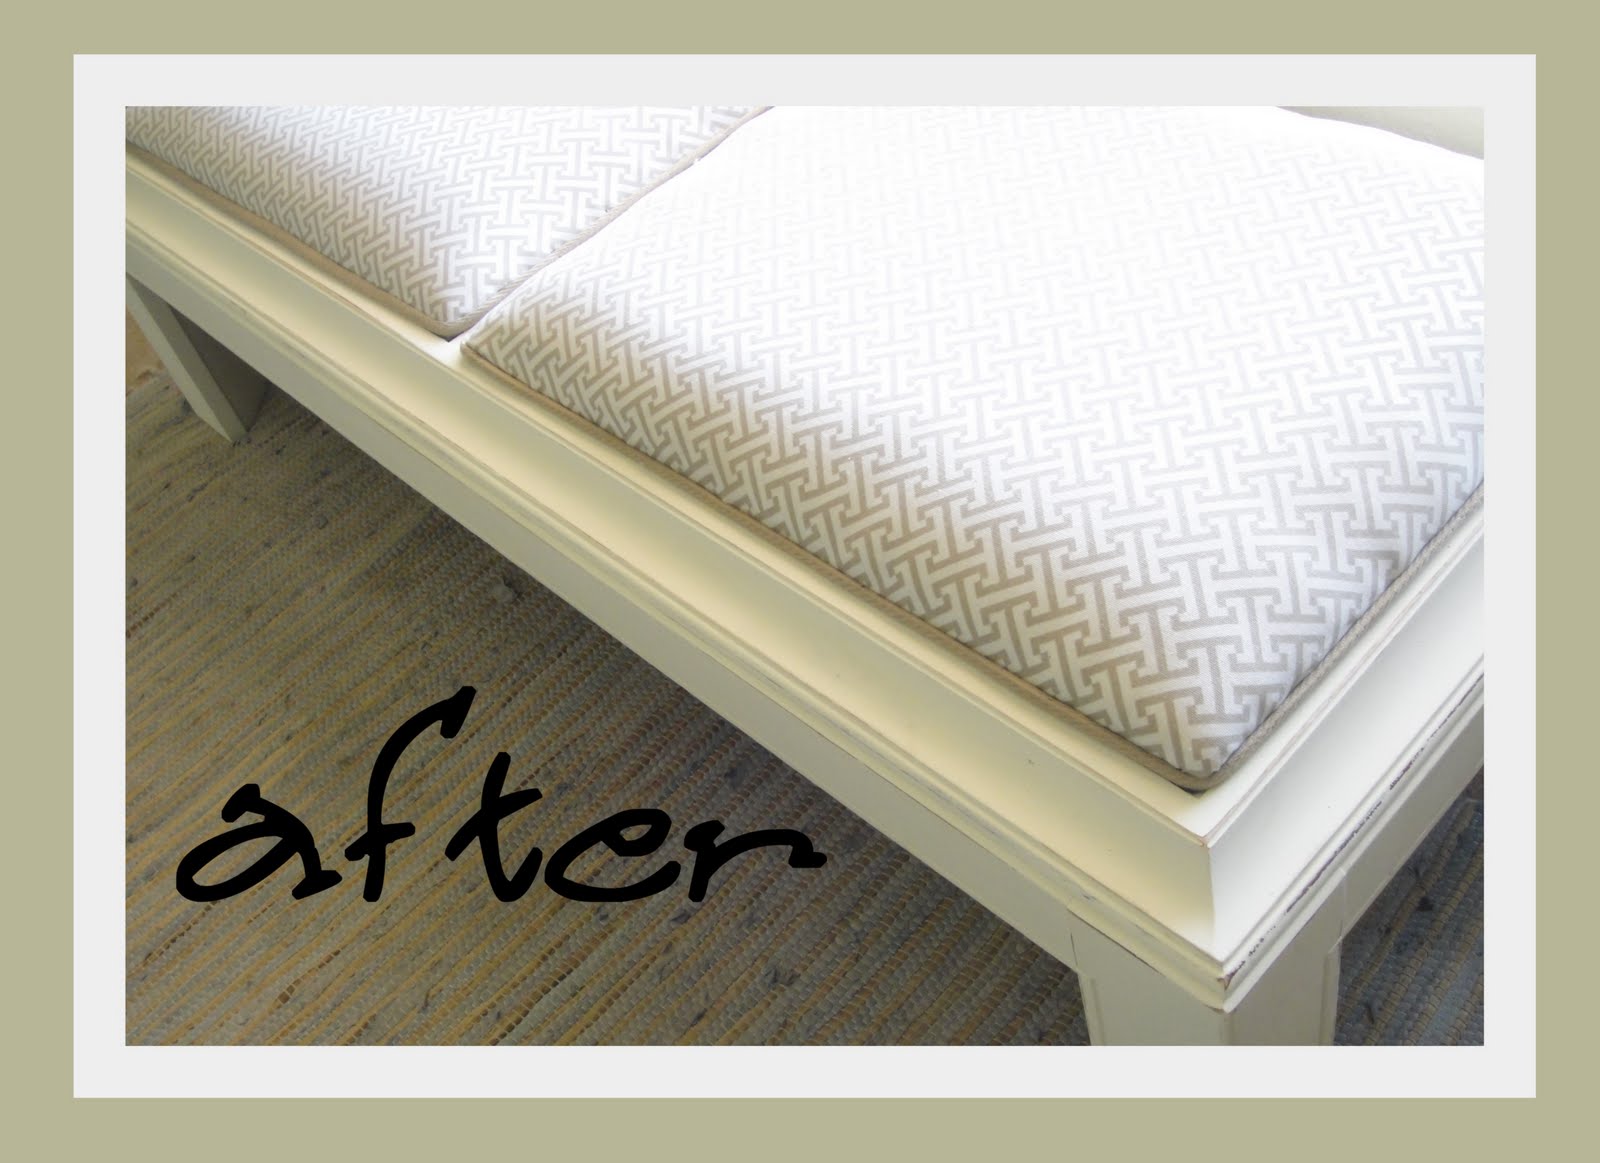
Isn’t it lovely!
I love the fabric, I love the color and the slight distressing,
I really love it all!
I love the fabric, I love the color and the slight distressing,
I really love it all!
Cassity Kmetzsch started Remodelaholic after graduating from Utah State University with a degree in Interior Design. Remodelaholic is the place to share her love for knocking out walls, and building everything back up again to not only add function but beauty to her home. Together with her husband Justin, they have remodeled 6 homes and are working on a seventh. She is a mother of four amazing girls. Making a house a home is her favorite hobby.


>I LOVE it!!! I have a similar table that I can do this with – brilliant! Thanks for posting.
>Love this!! The transformation is AMAZING! Way to go. 🙂
>I love this! What a great idea!
>Qué maravillosa transformación!
Xoxo
Charo
>AMAZING transformation! I see tables like this ALL the time in the free section of craigslist…I'm gonna snatch one up one of these days and make one of these!!!!
>Oh I love it! I actually used to have one of these so that's too bad. I didn't think to do this with it!
>Thanks for visiting me today. I always love to read your blog and see what you have been up to. You are so creative. And that table turned bench is awesome!!! You did the best job on it and I love the fabric. I need to email you and ask about a project I am thinking about tackling. Just need some help with paint, etc. I will send you an email soon. Have a wonderful week. Love & blessings from NC!
>This is a super project – how many of those 80s coffee tables are lying around (my dear MIL has one I know)…
I love the transformation!
🙂 Laura
>That turned out great! Thanks for the tip about the trim.
>That is beautiful. I love it!
>Wonderful project. Love it, Love it, Love it,.
Hugs
cindy@stitches
>Wow, great job, but mostly great tutorial, thanks!!!
>That is fabulous. Great tutorial.
>What an amazing transformation!
>Coffee tables in that style are a dime a dozen around here, what a great way to reuse them, I am loving the creativity. I will approach them with a new eye now!
~Kelli @ Smidgens
>No. Way. That is fabulous! And I must say, you look like you should be on one of the make-over shows — simply lovely. (I usually look like I crawled out of the sewer.) And thanks for linking up! (ps. the search function now includes party link-ups.) I hope you share more of these re-fab projects.