Decorative Faux Tin Can Tutorial
Hey there Remodelaholic fans! Ursula here, from Home Made by Carmona…listen, you guys are awesome! Thanks for all the love on my last Remodelaholic tutorial on How To Turn a Door Into A Stylish Headboard. Today I’m going to show you how to make a faux version of those gorgeous SyuRo tin cans you’ve been drooling over on Pinterest. I mean, you have been drooling right? Then you went to buy them and nearly had a heart attack when you saw the price, right? Or was that only me dramatically clutching my heart and crying “but I want you sooooo muuuuuch”. Hee hee. The originals cost $56 for the smallest tin can which is a mere 2-1/2″ x 3″. A knock off version costs you about $2-$5 per faux tin. 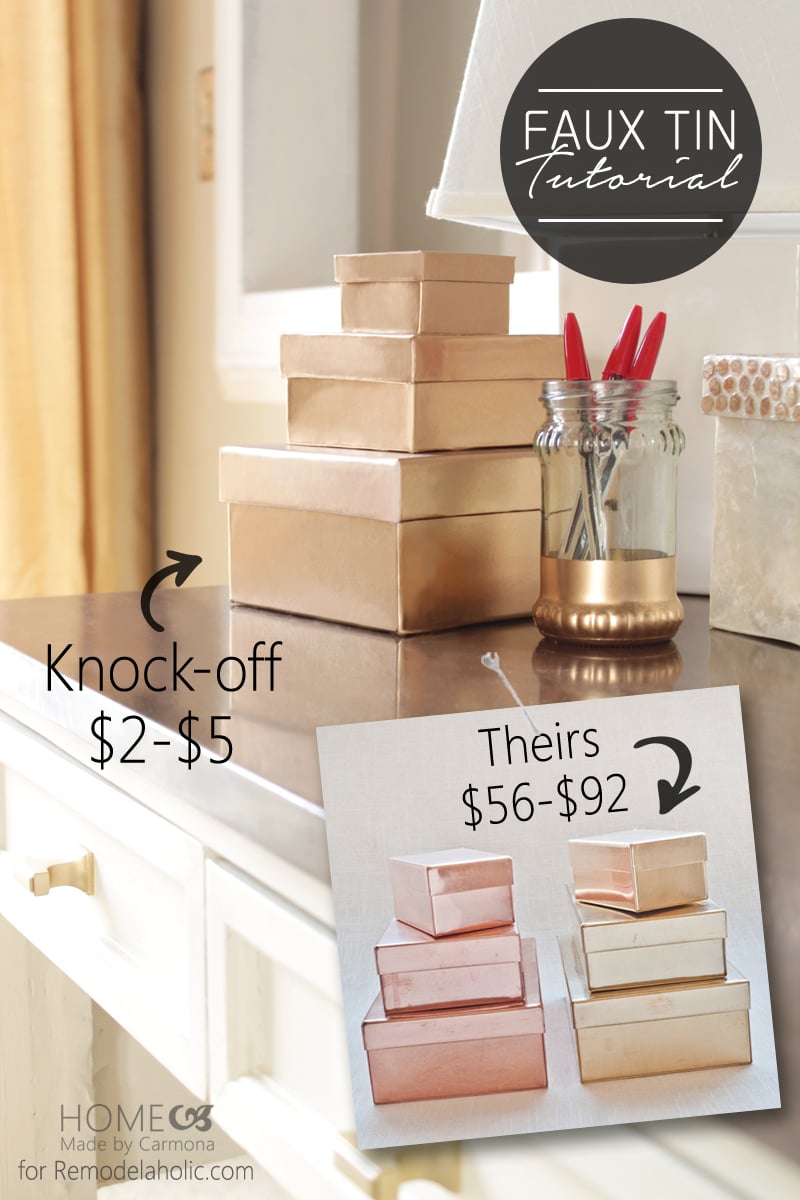
How to Make a Decorative Faux Tin Box
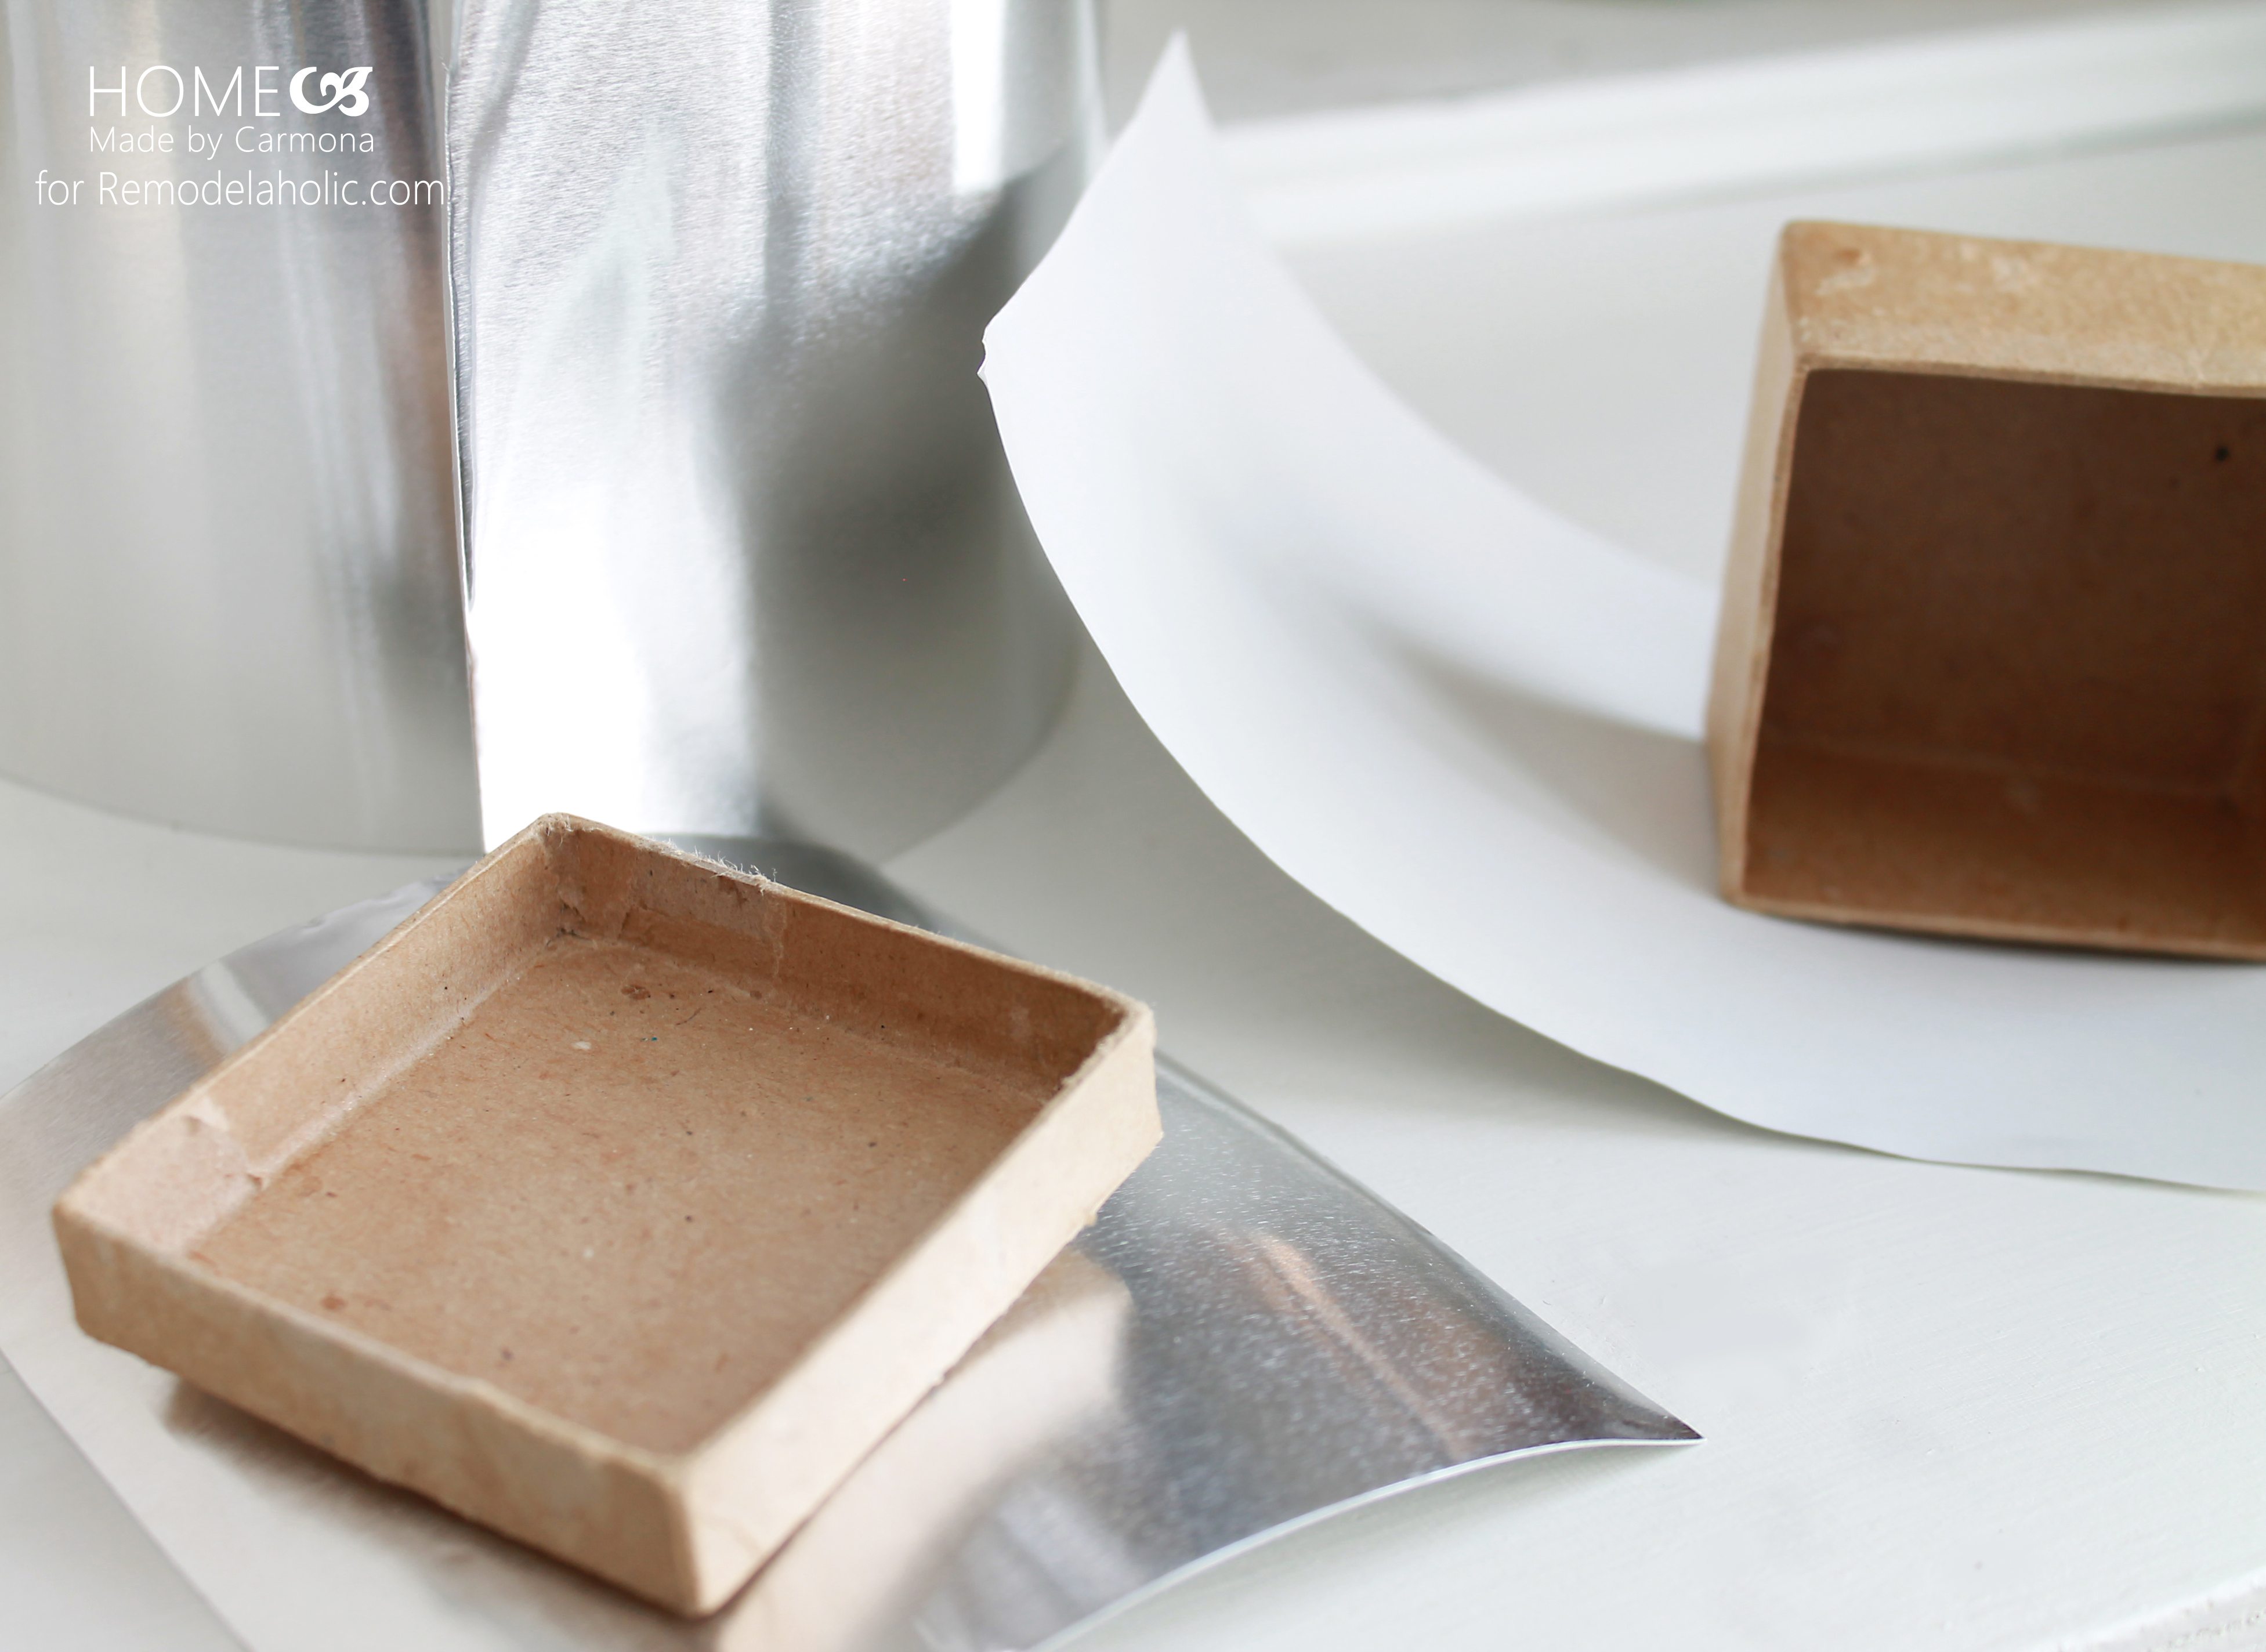
These faux tins may not be made of metal, or anything even close, but you’d need to be a hardcore DIY’er/metal worker to make the real deal. This project mimics the reflective glam that makes them so beautiful without having to become a metal worker. If you can wrap a gift, you can make your own faux tins! Plus it only requires 3 materials, and a sharp pair of scissors. Here’s what you’ll need:
- Square (or rectangular) cardboard boxes ( found for $1 each at many craft & dollar stores): must be a very smooth cardboard with no lumps or bumps.
- OR Square wooden boxes (also at craft & dollar stores): this ensures there are no imperfections that will show through.
- Aluminum foil adhesive repair tape (found in hardware stores in the roofing department): important to create the reflective quality.
- Reflective metallic spray paint: to change it to your favorite metallic color.
 Ok, before you get started, you’ll need to make sure that you buy aluminum foil adhesive repair tape that is wide enough to cover the width of your box cover. It comes in rolls, so length won’t be a problem, you’ll need to measure width however. You can buy a 6 inch x 25 ft roll at Home Depot for $16 (that is way more foil than you’ll need, enough for other creative projects). I have also found a 7 inch x 3 ft version of an aluminum foil adhesive roll in a craft shop for $4. The goal is to “gift wrap” the box in the aluminum foil tape, it creates a smooth reflective finish on the outside of your box to mimic the metallic look of the original. Start by cutting a long rectangular piece capable of wrapping around all 4 sides of the box. Peel the adhesive backing off the piece, and follow the pictured steps below to wrap.
 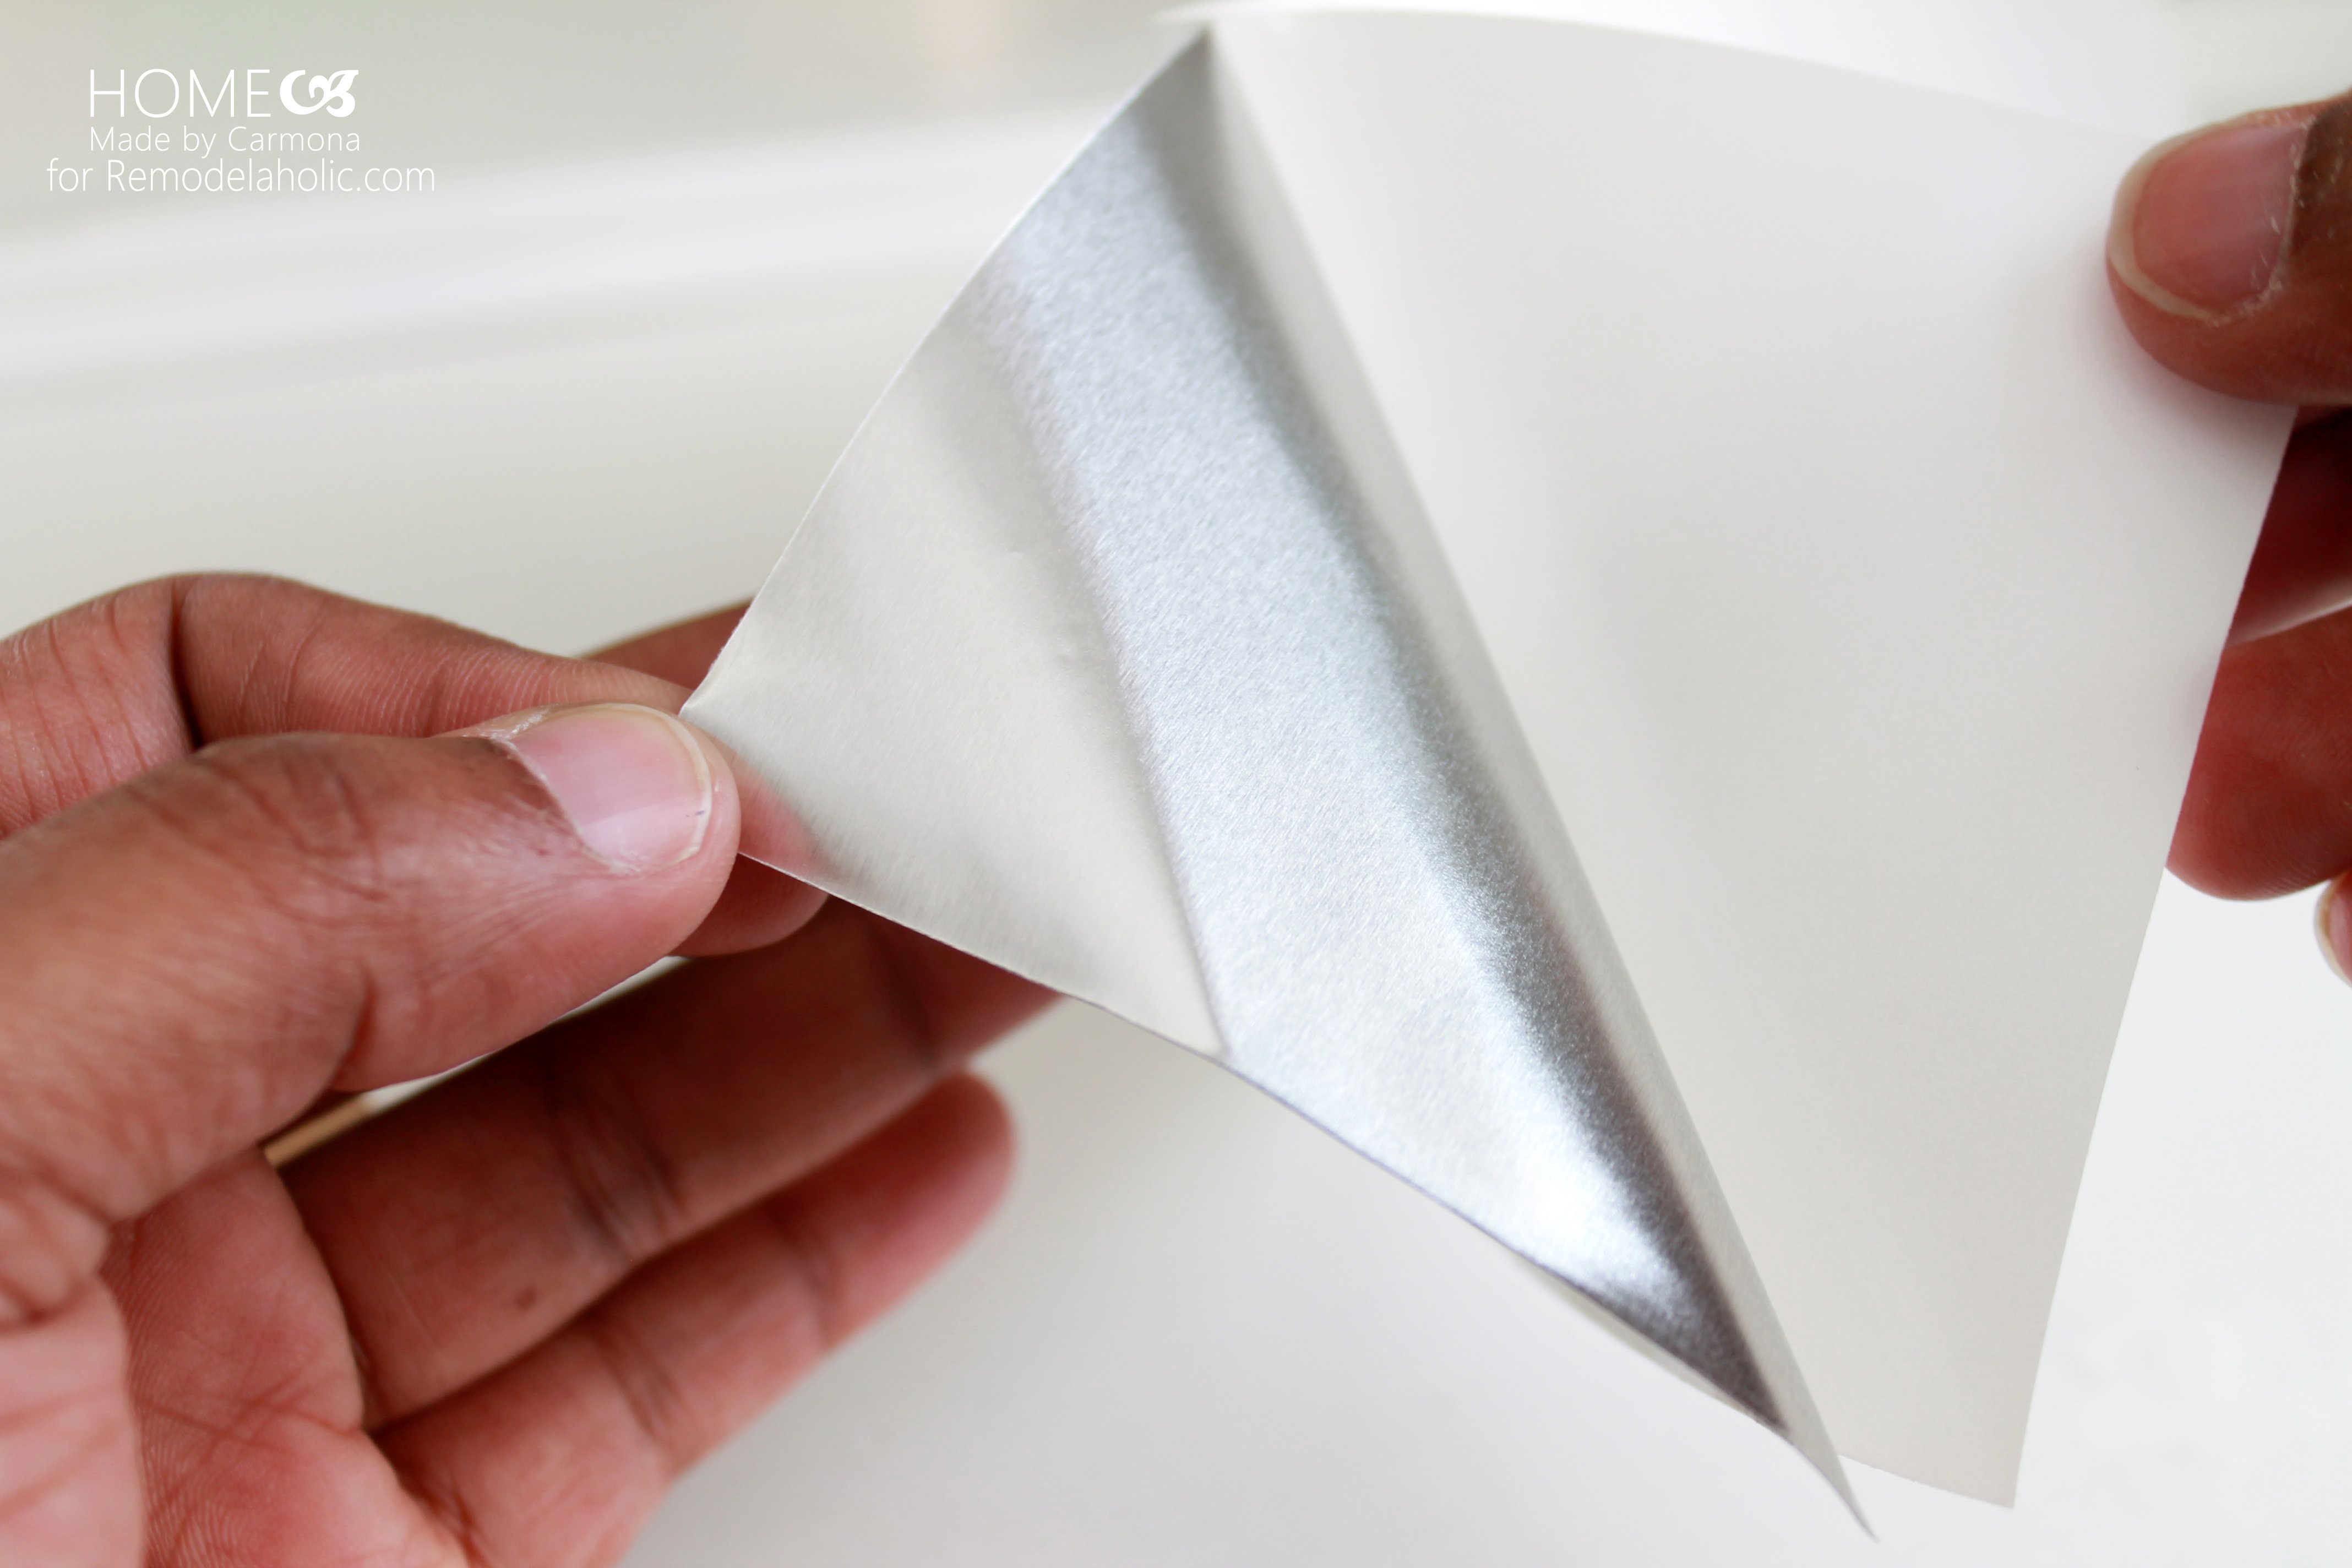 Just a quick tip when peeling the adhesive backing and wrapping; do so slowly and carefully keeping the aluminum foil tape as straight and stiff as possible. You don’t want to create crinkles or creases in the very pliable aluminum foil tape.
 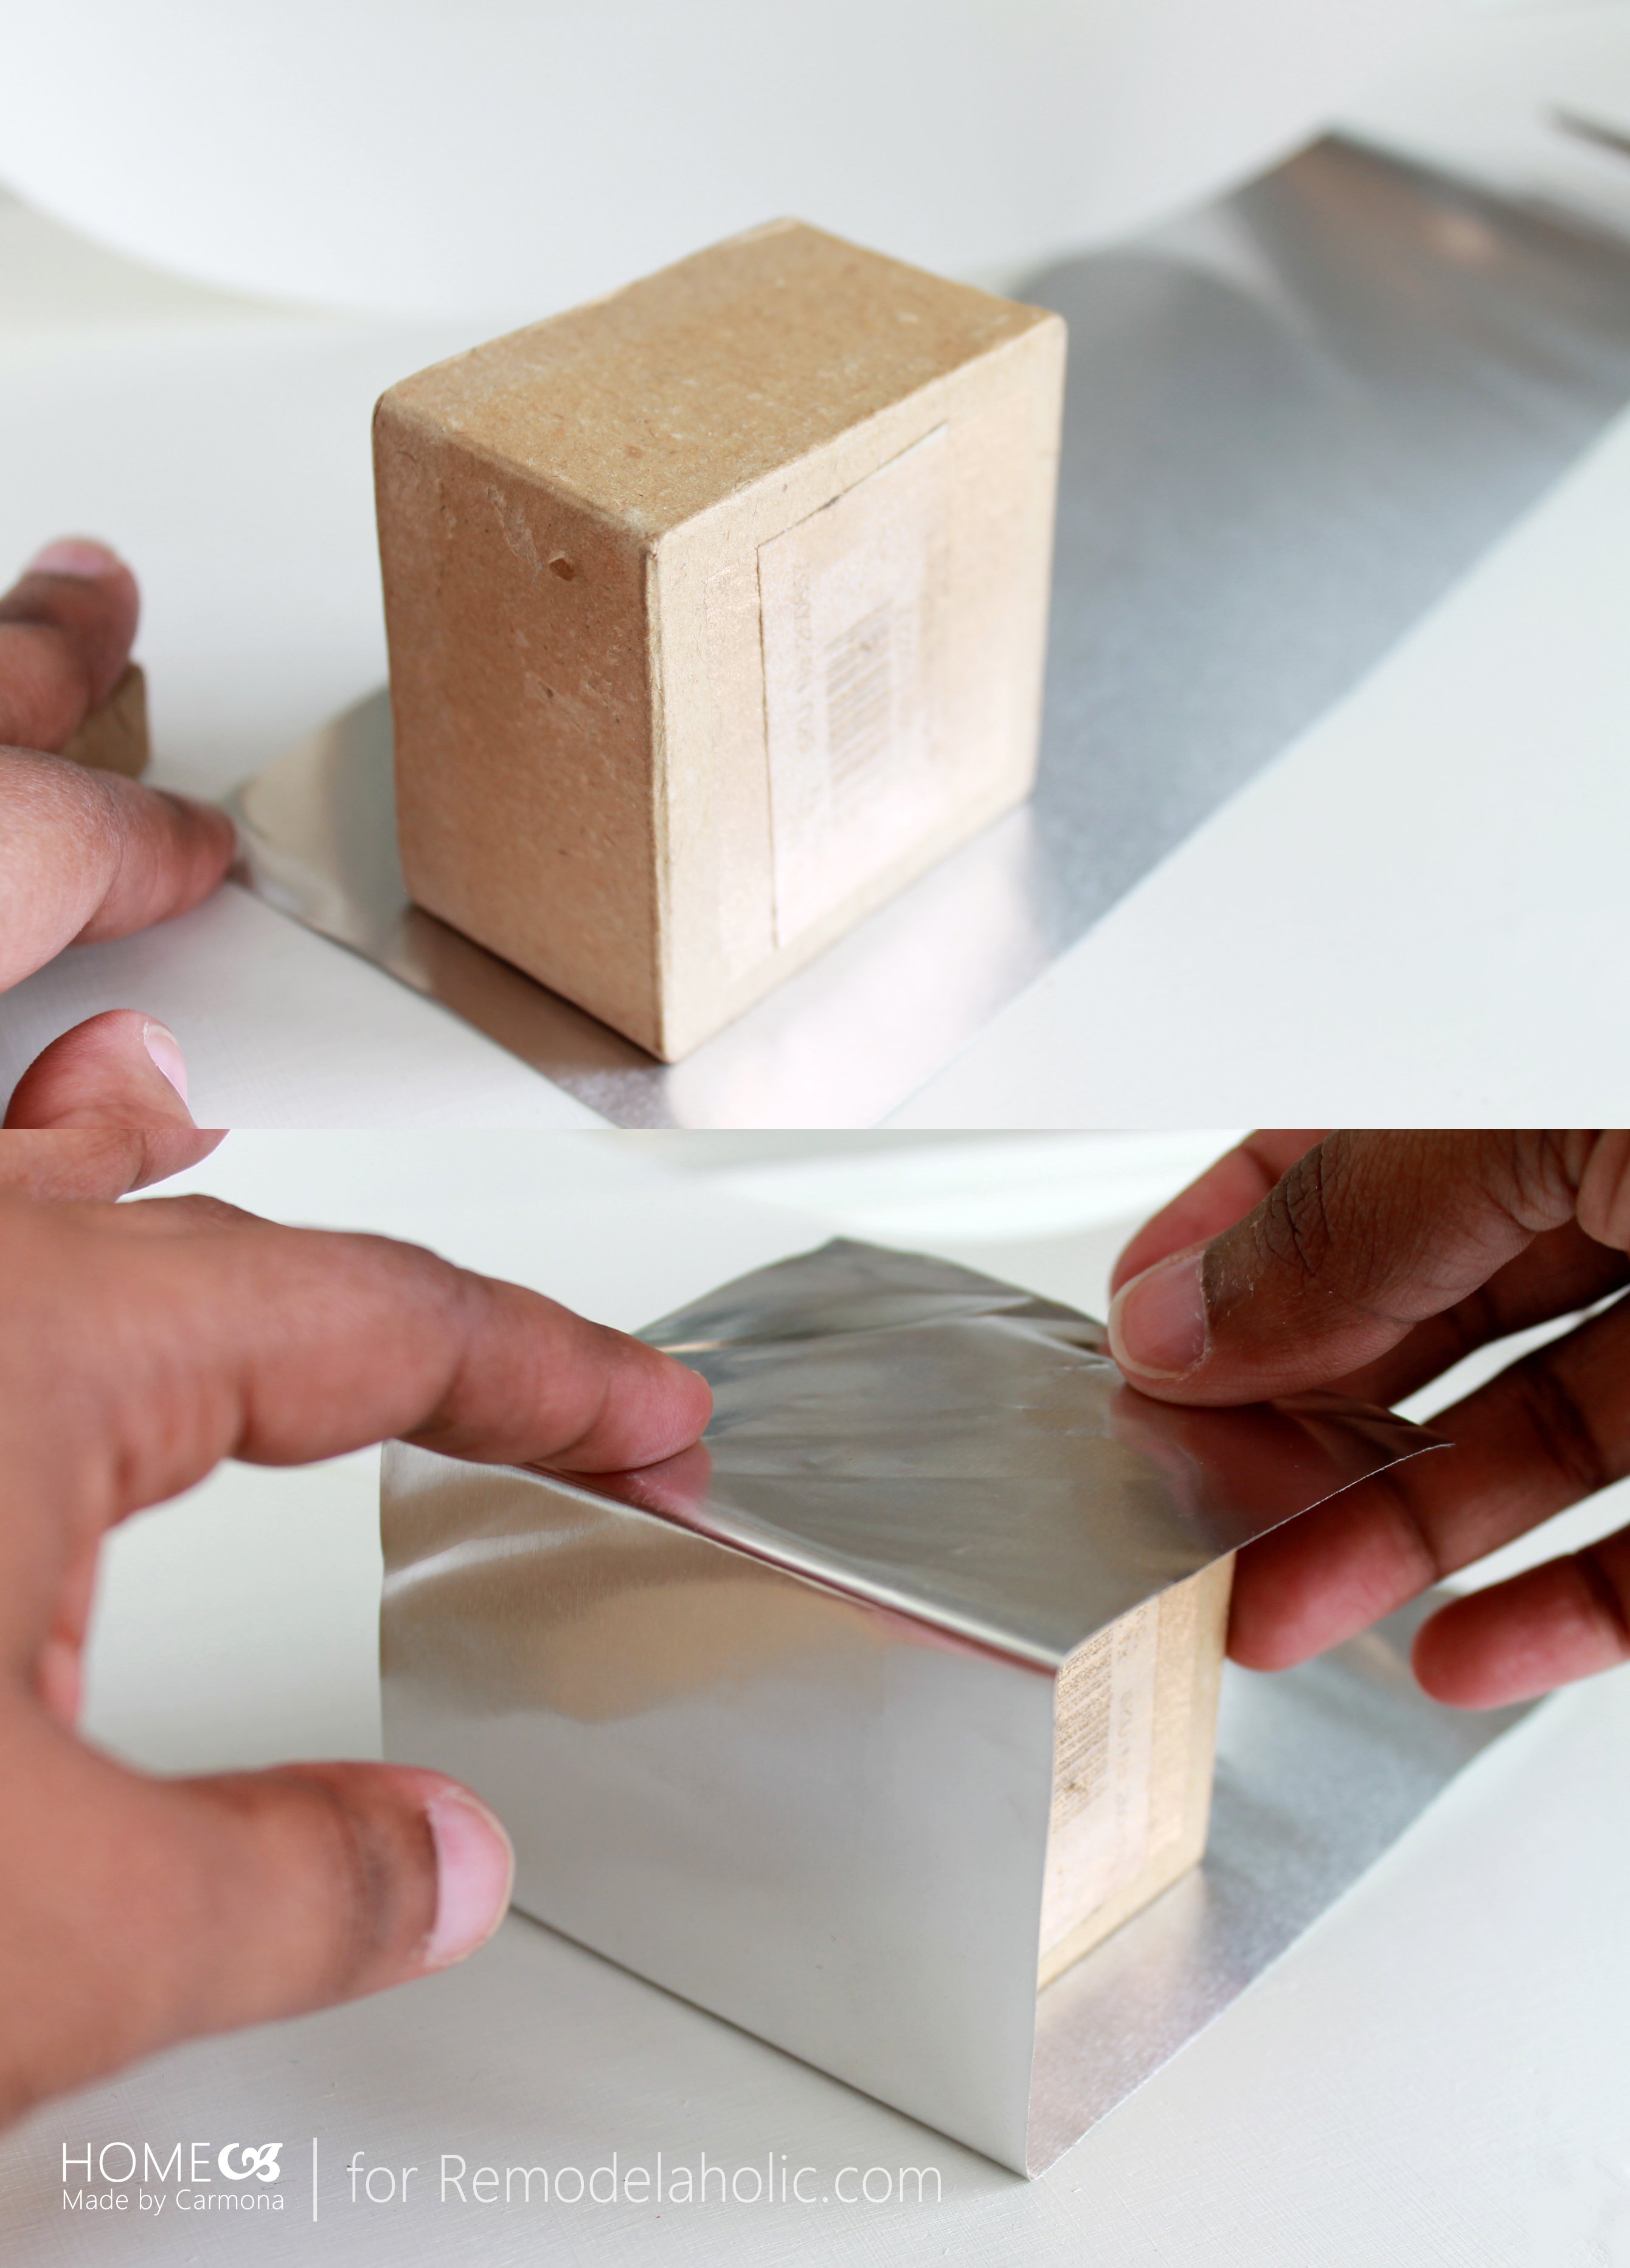 Once you reach the end, trim any excess with a scissors. Try to trim flush to the edge.
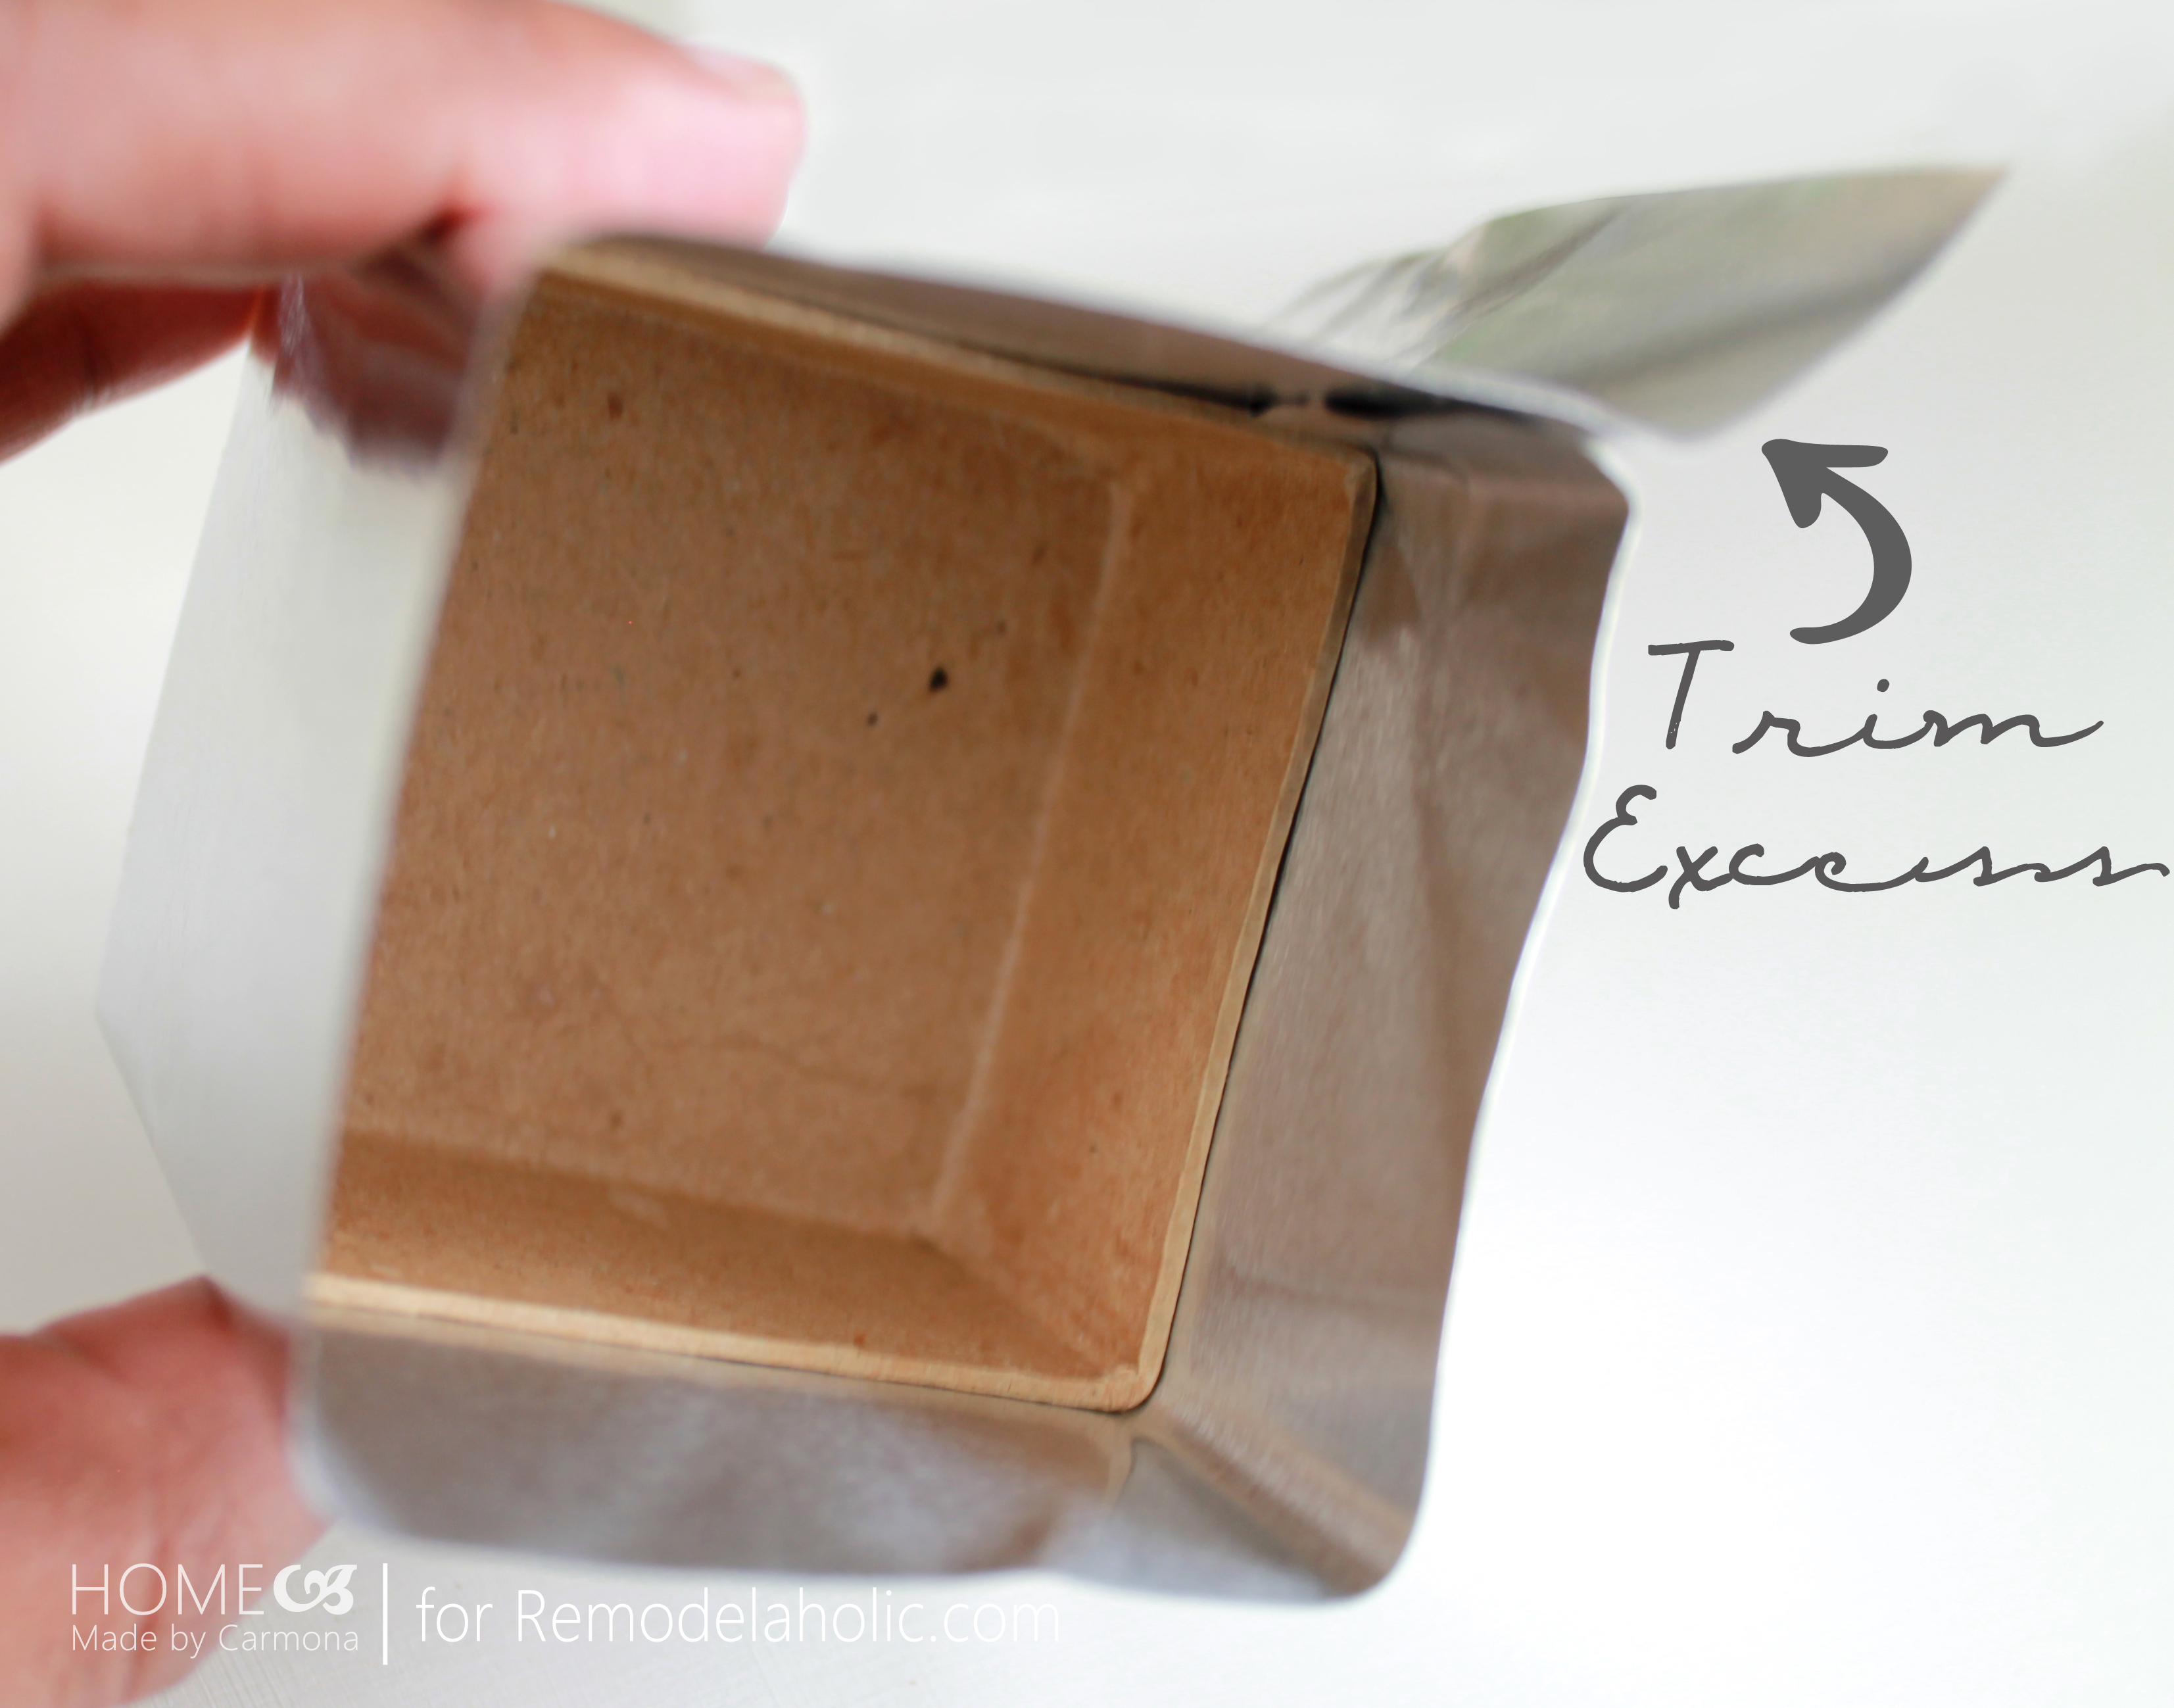 Cut the overlapping edges on each corner of the box and fold the sides down.
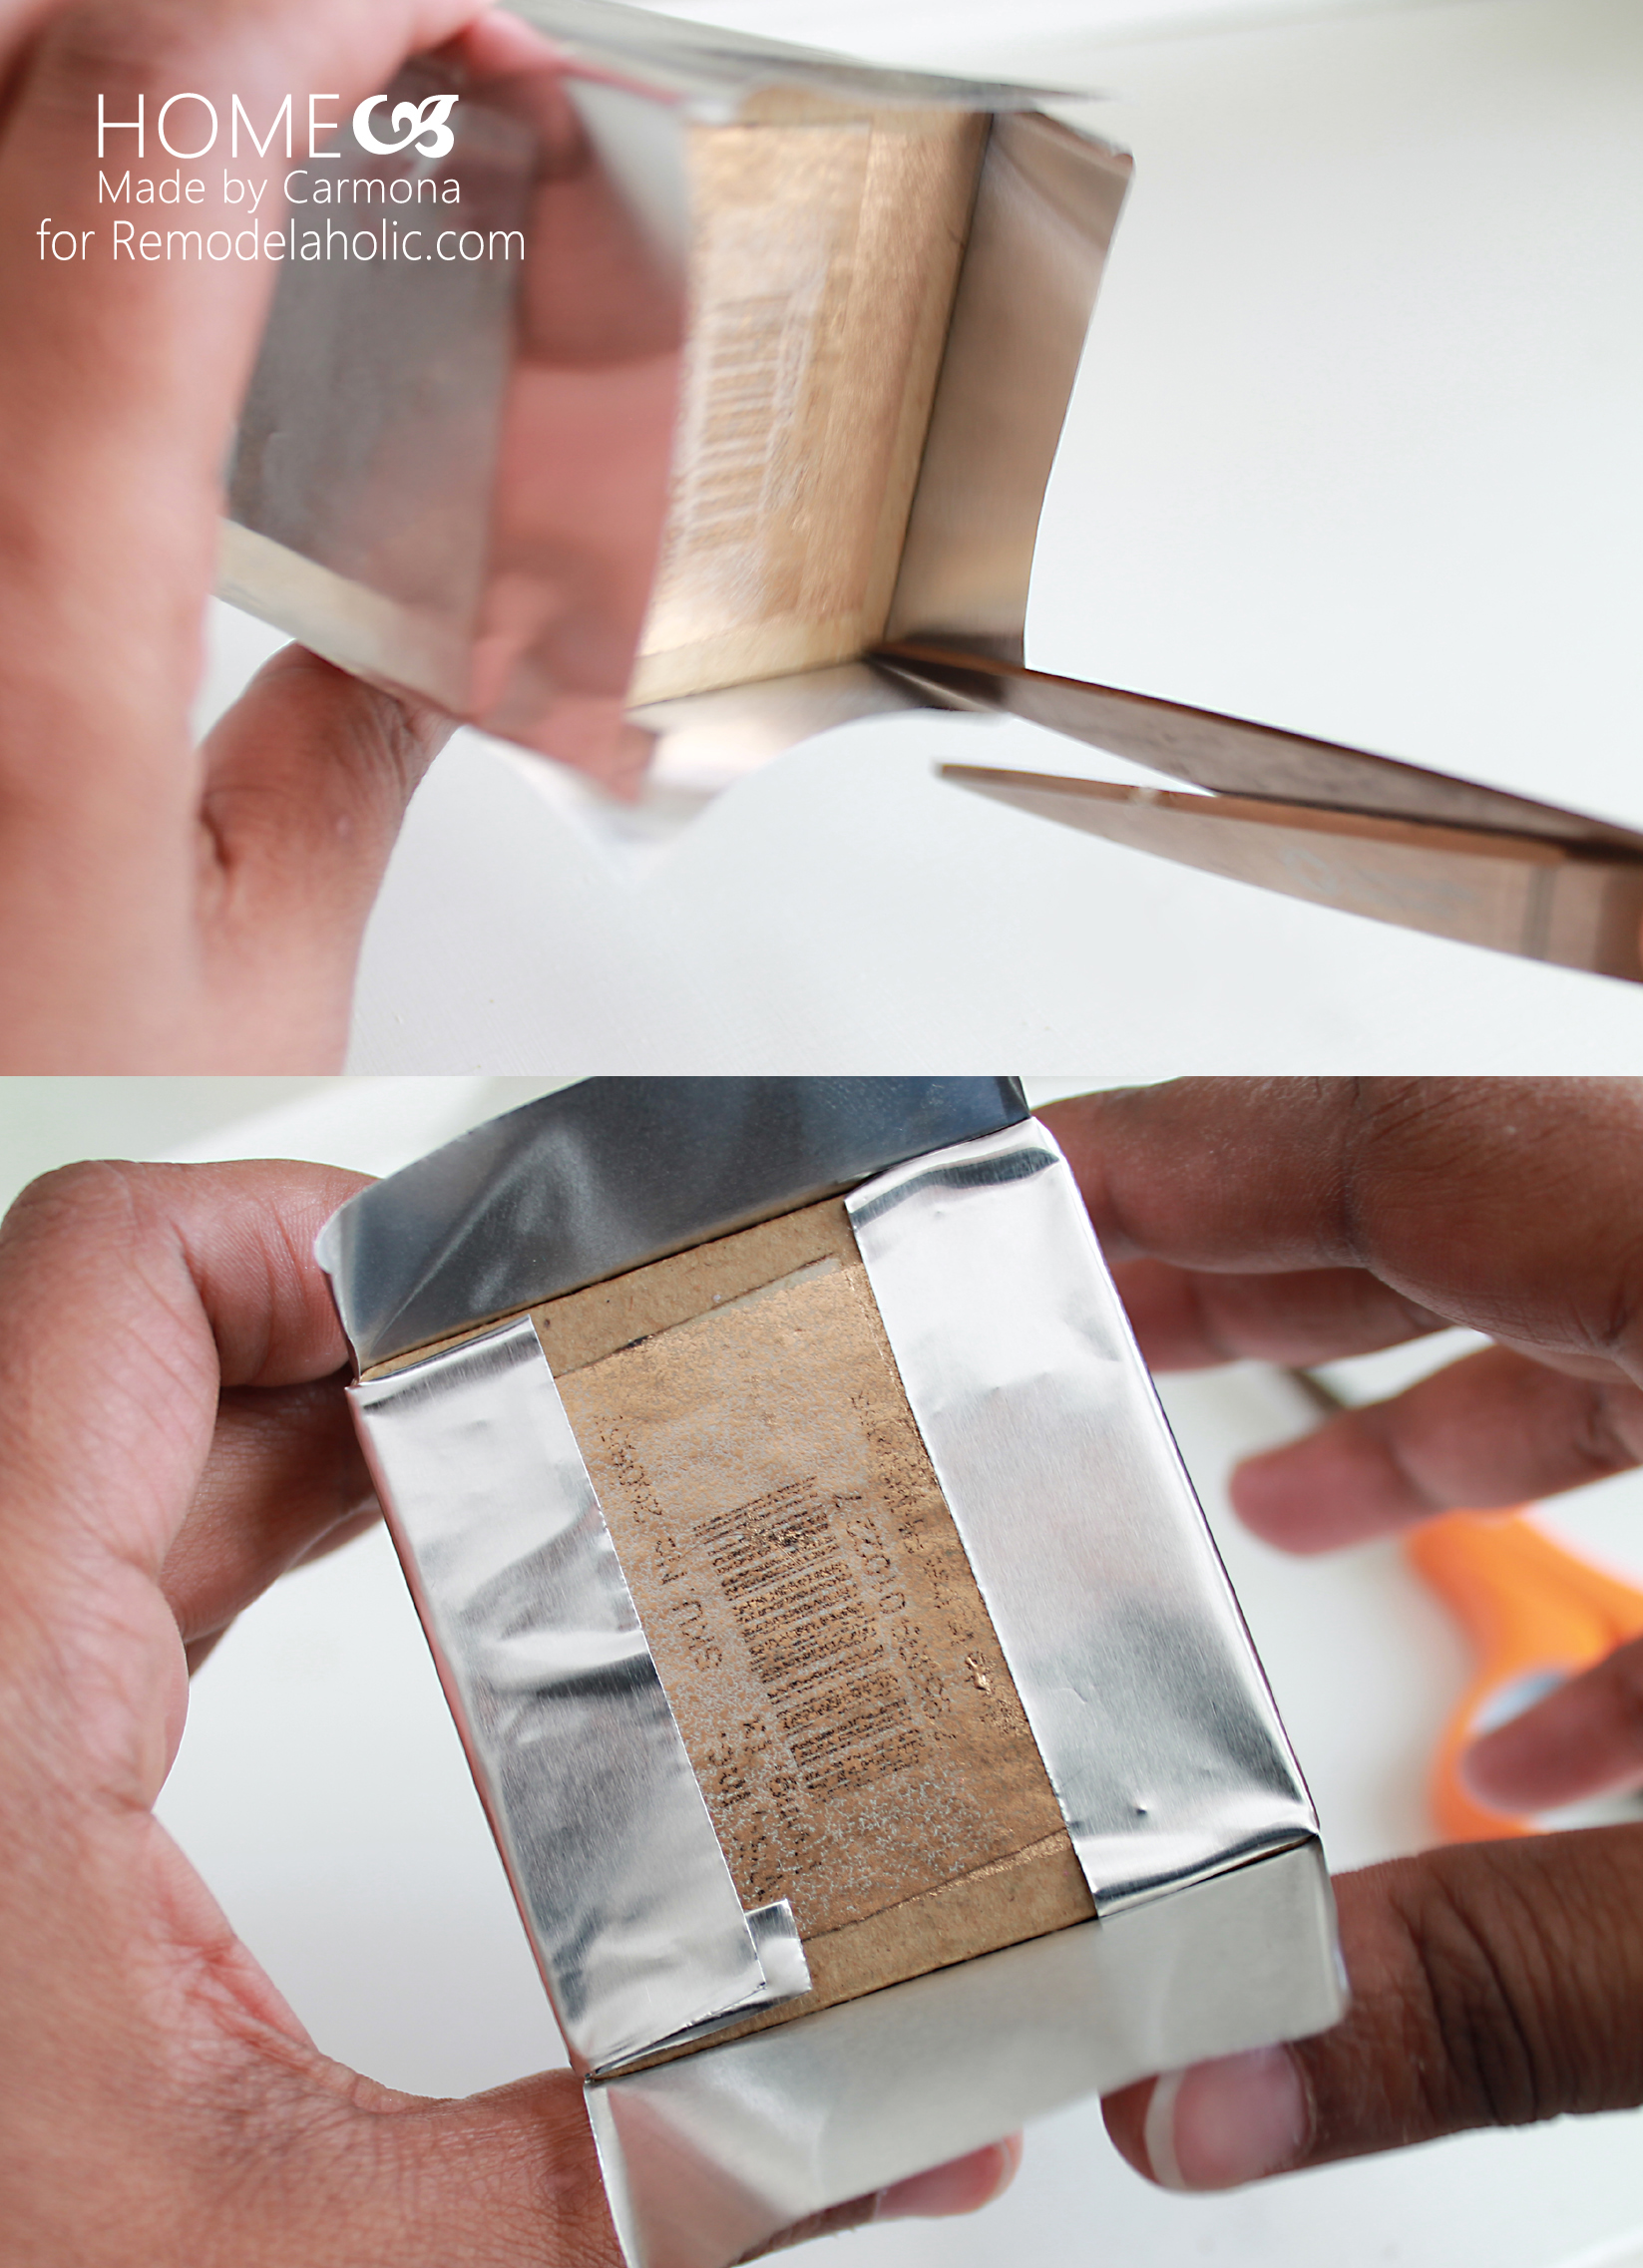
 The cover is pretty simple and wrapping it is very much the same principle as wrapping the box: wrap the two opposing ends first, cut slits to fold the edges down, and trim any excess. Just be sure to make everything as smooth and bump free as possible!
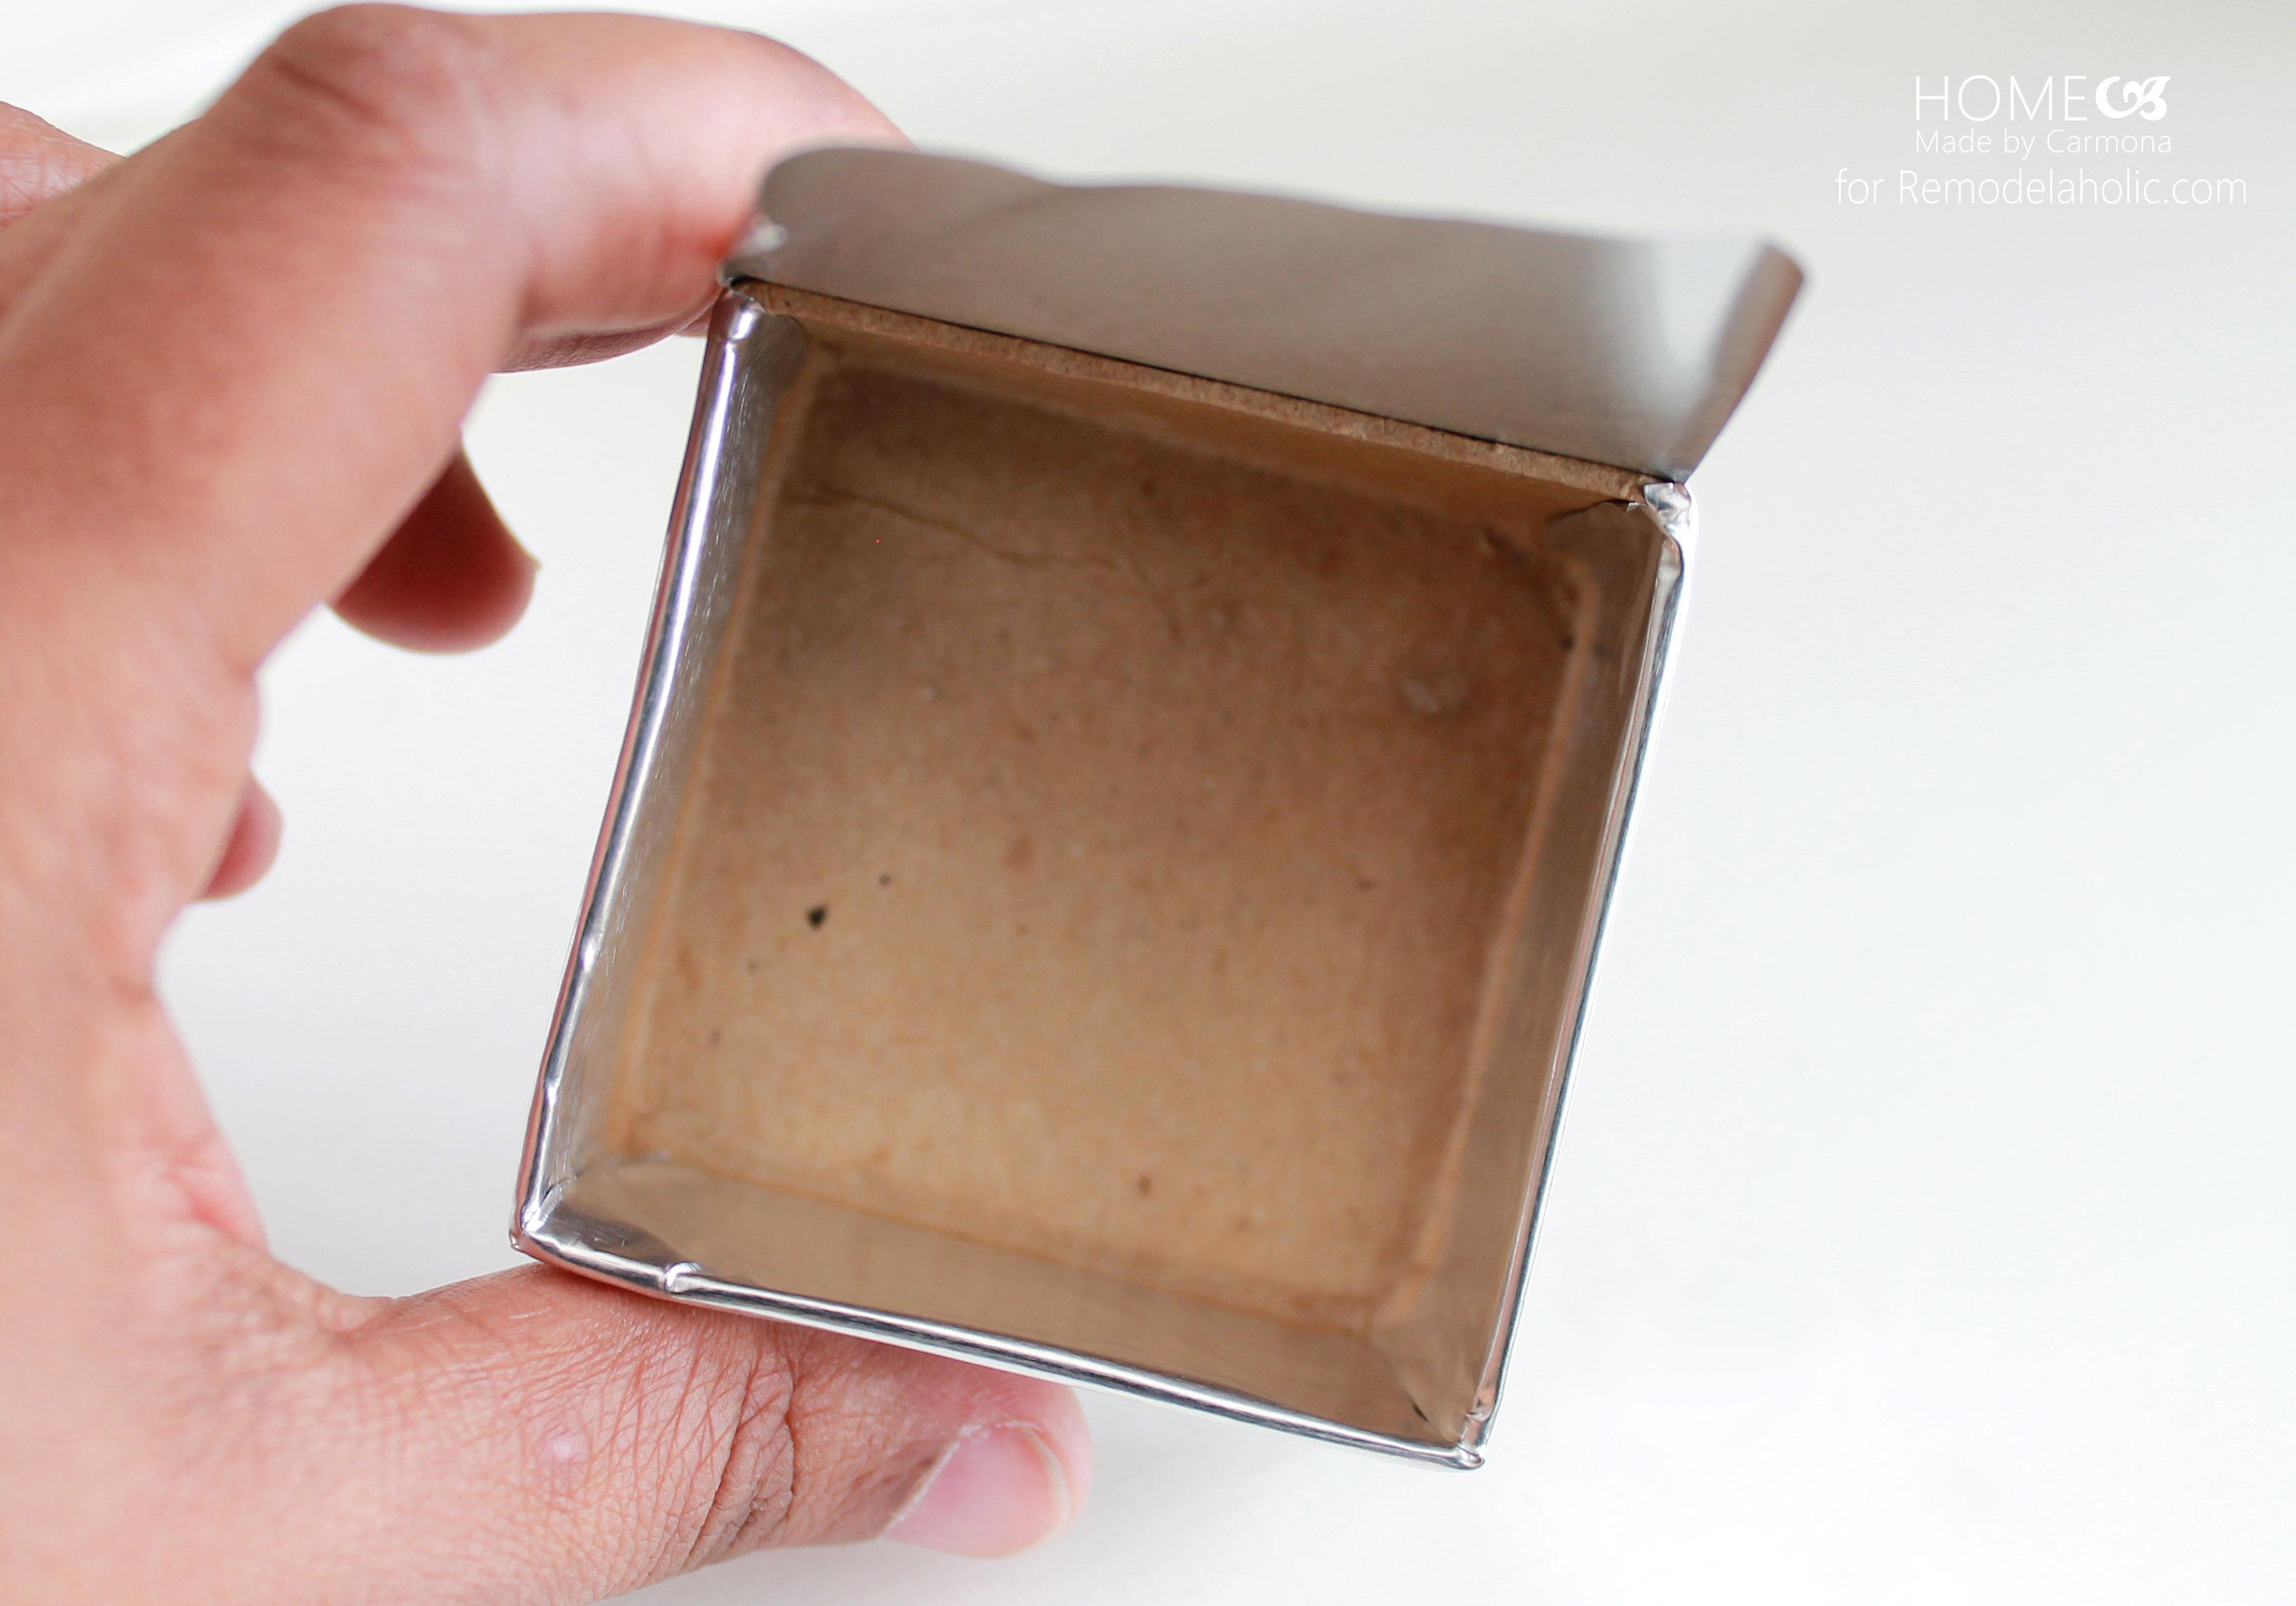
 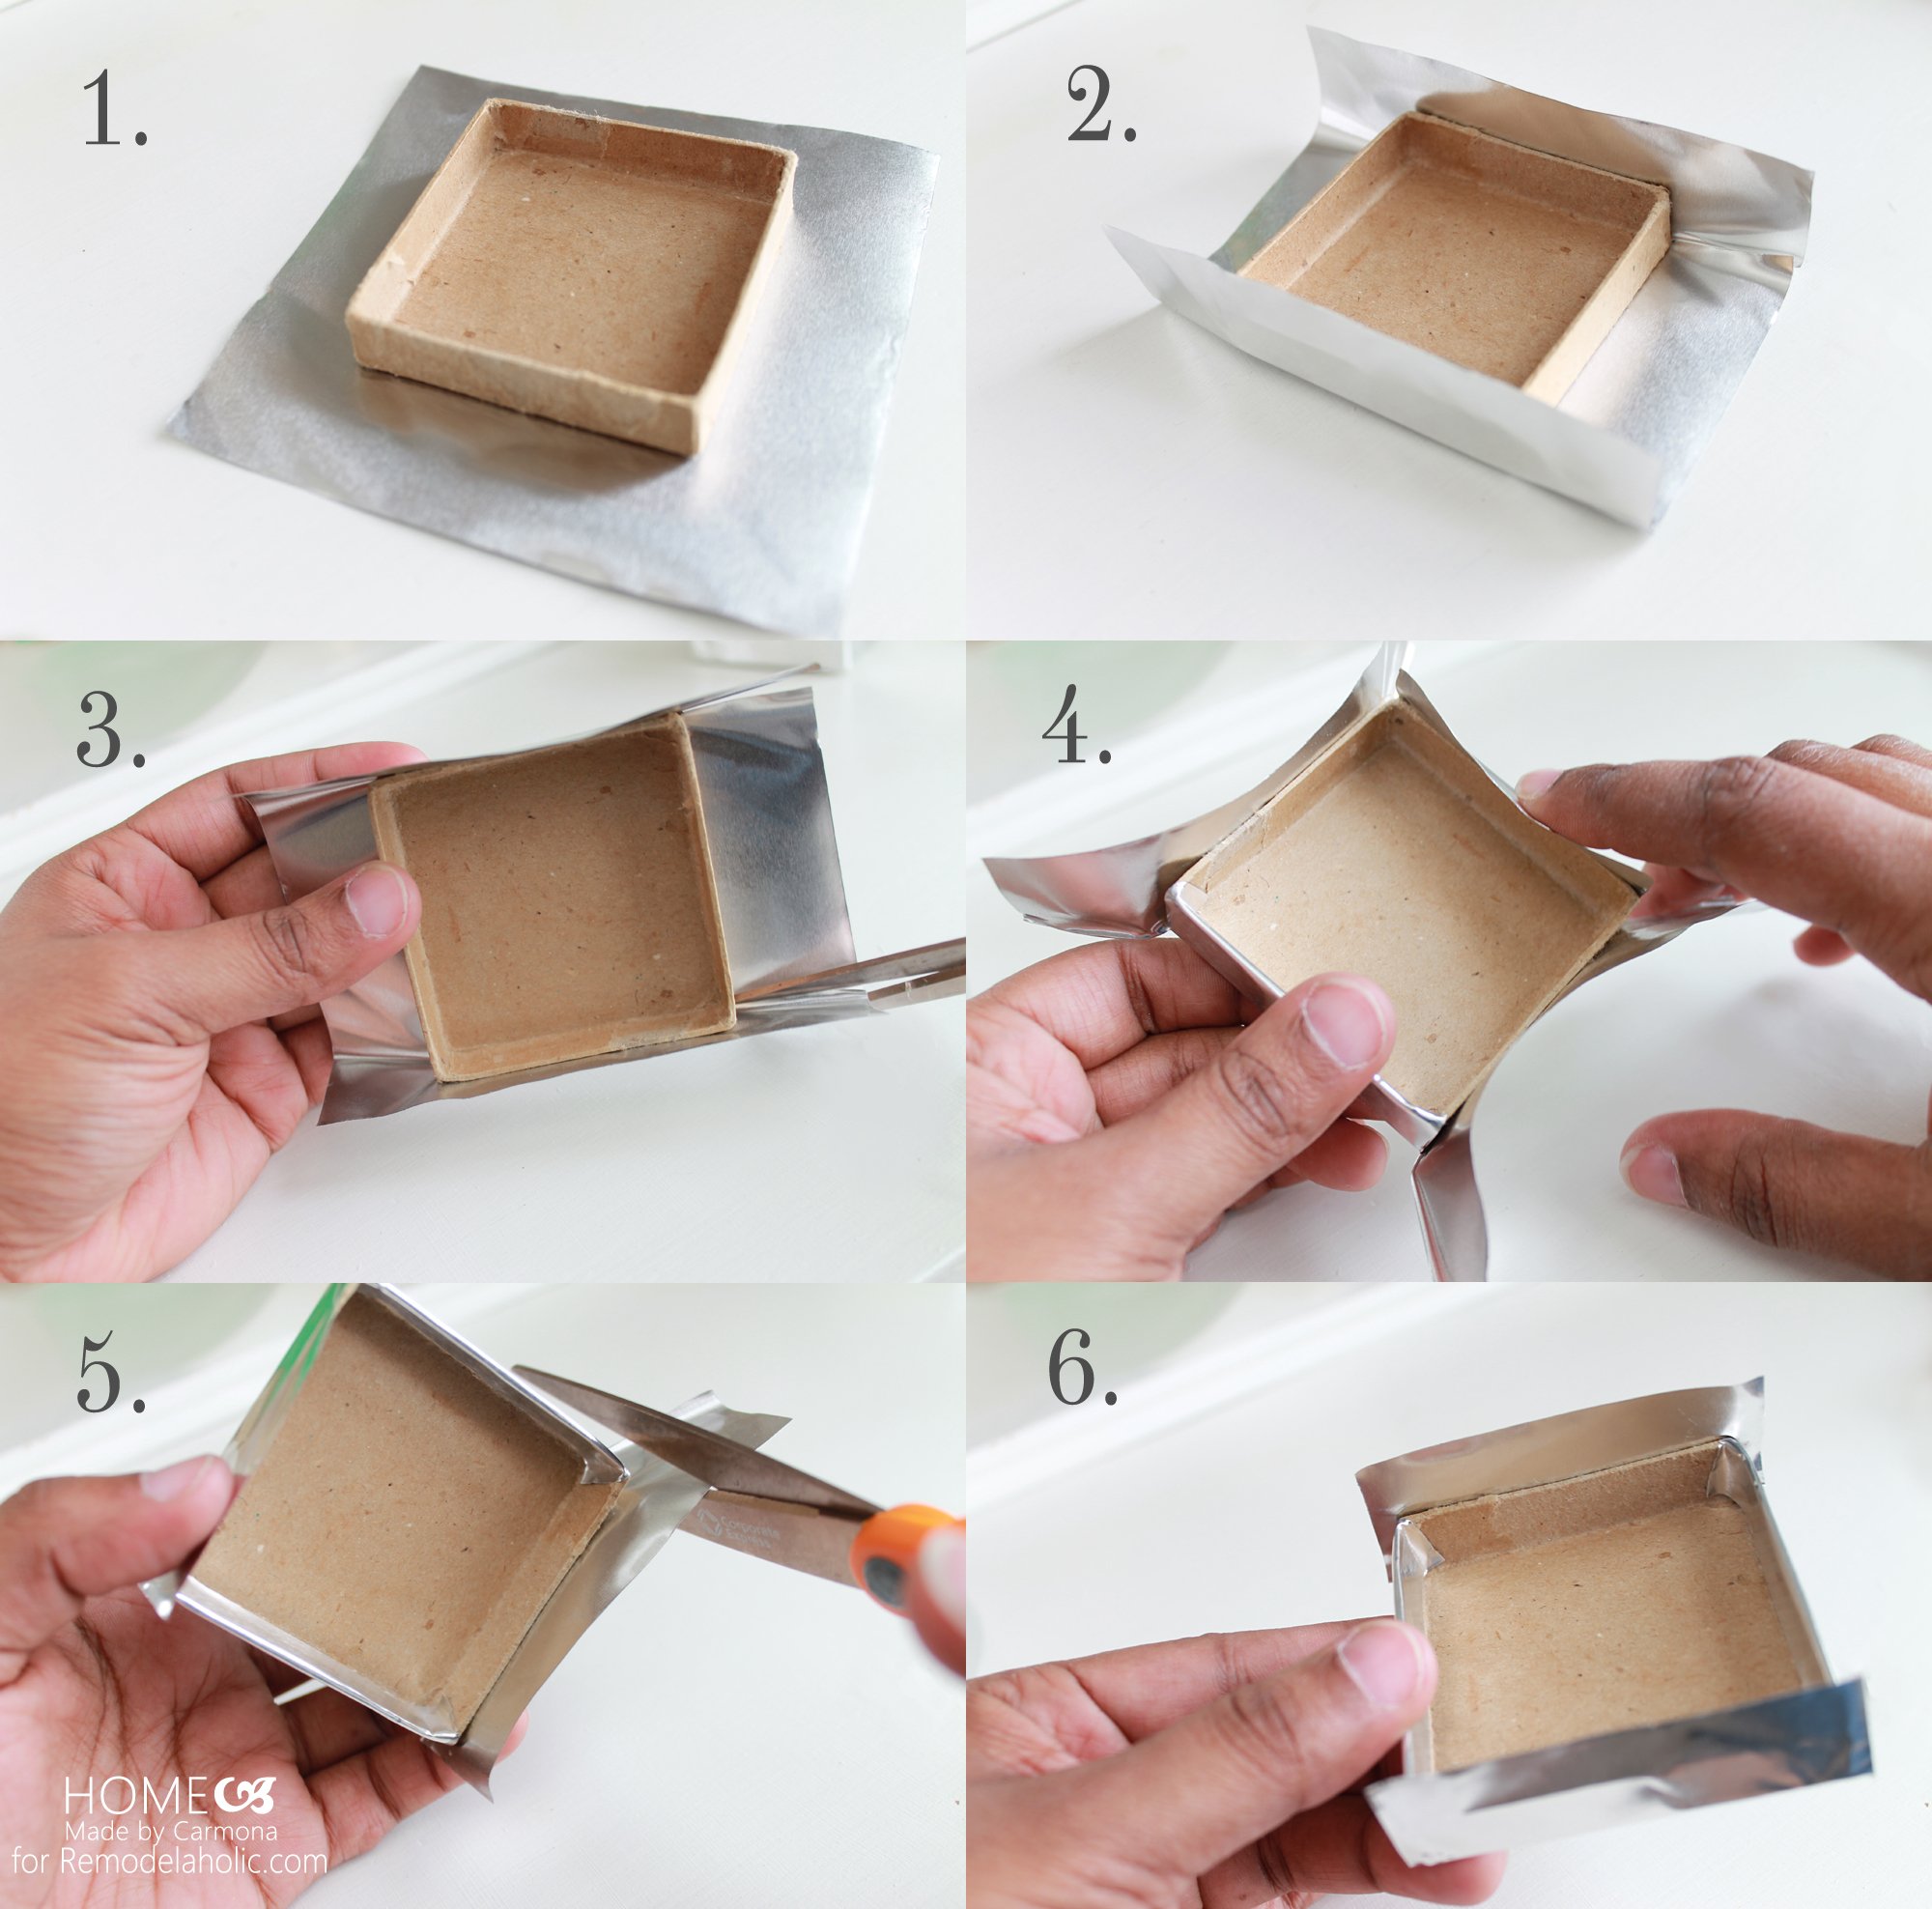 Once you fold the last two flaps down, smooth all your seams out, and this is what your box will look like:
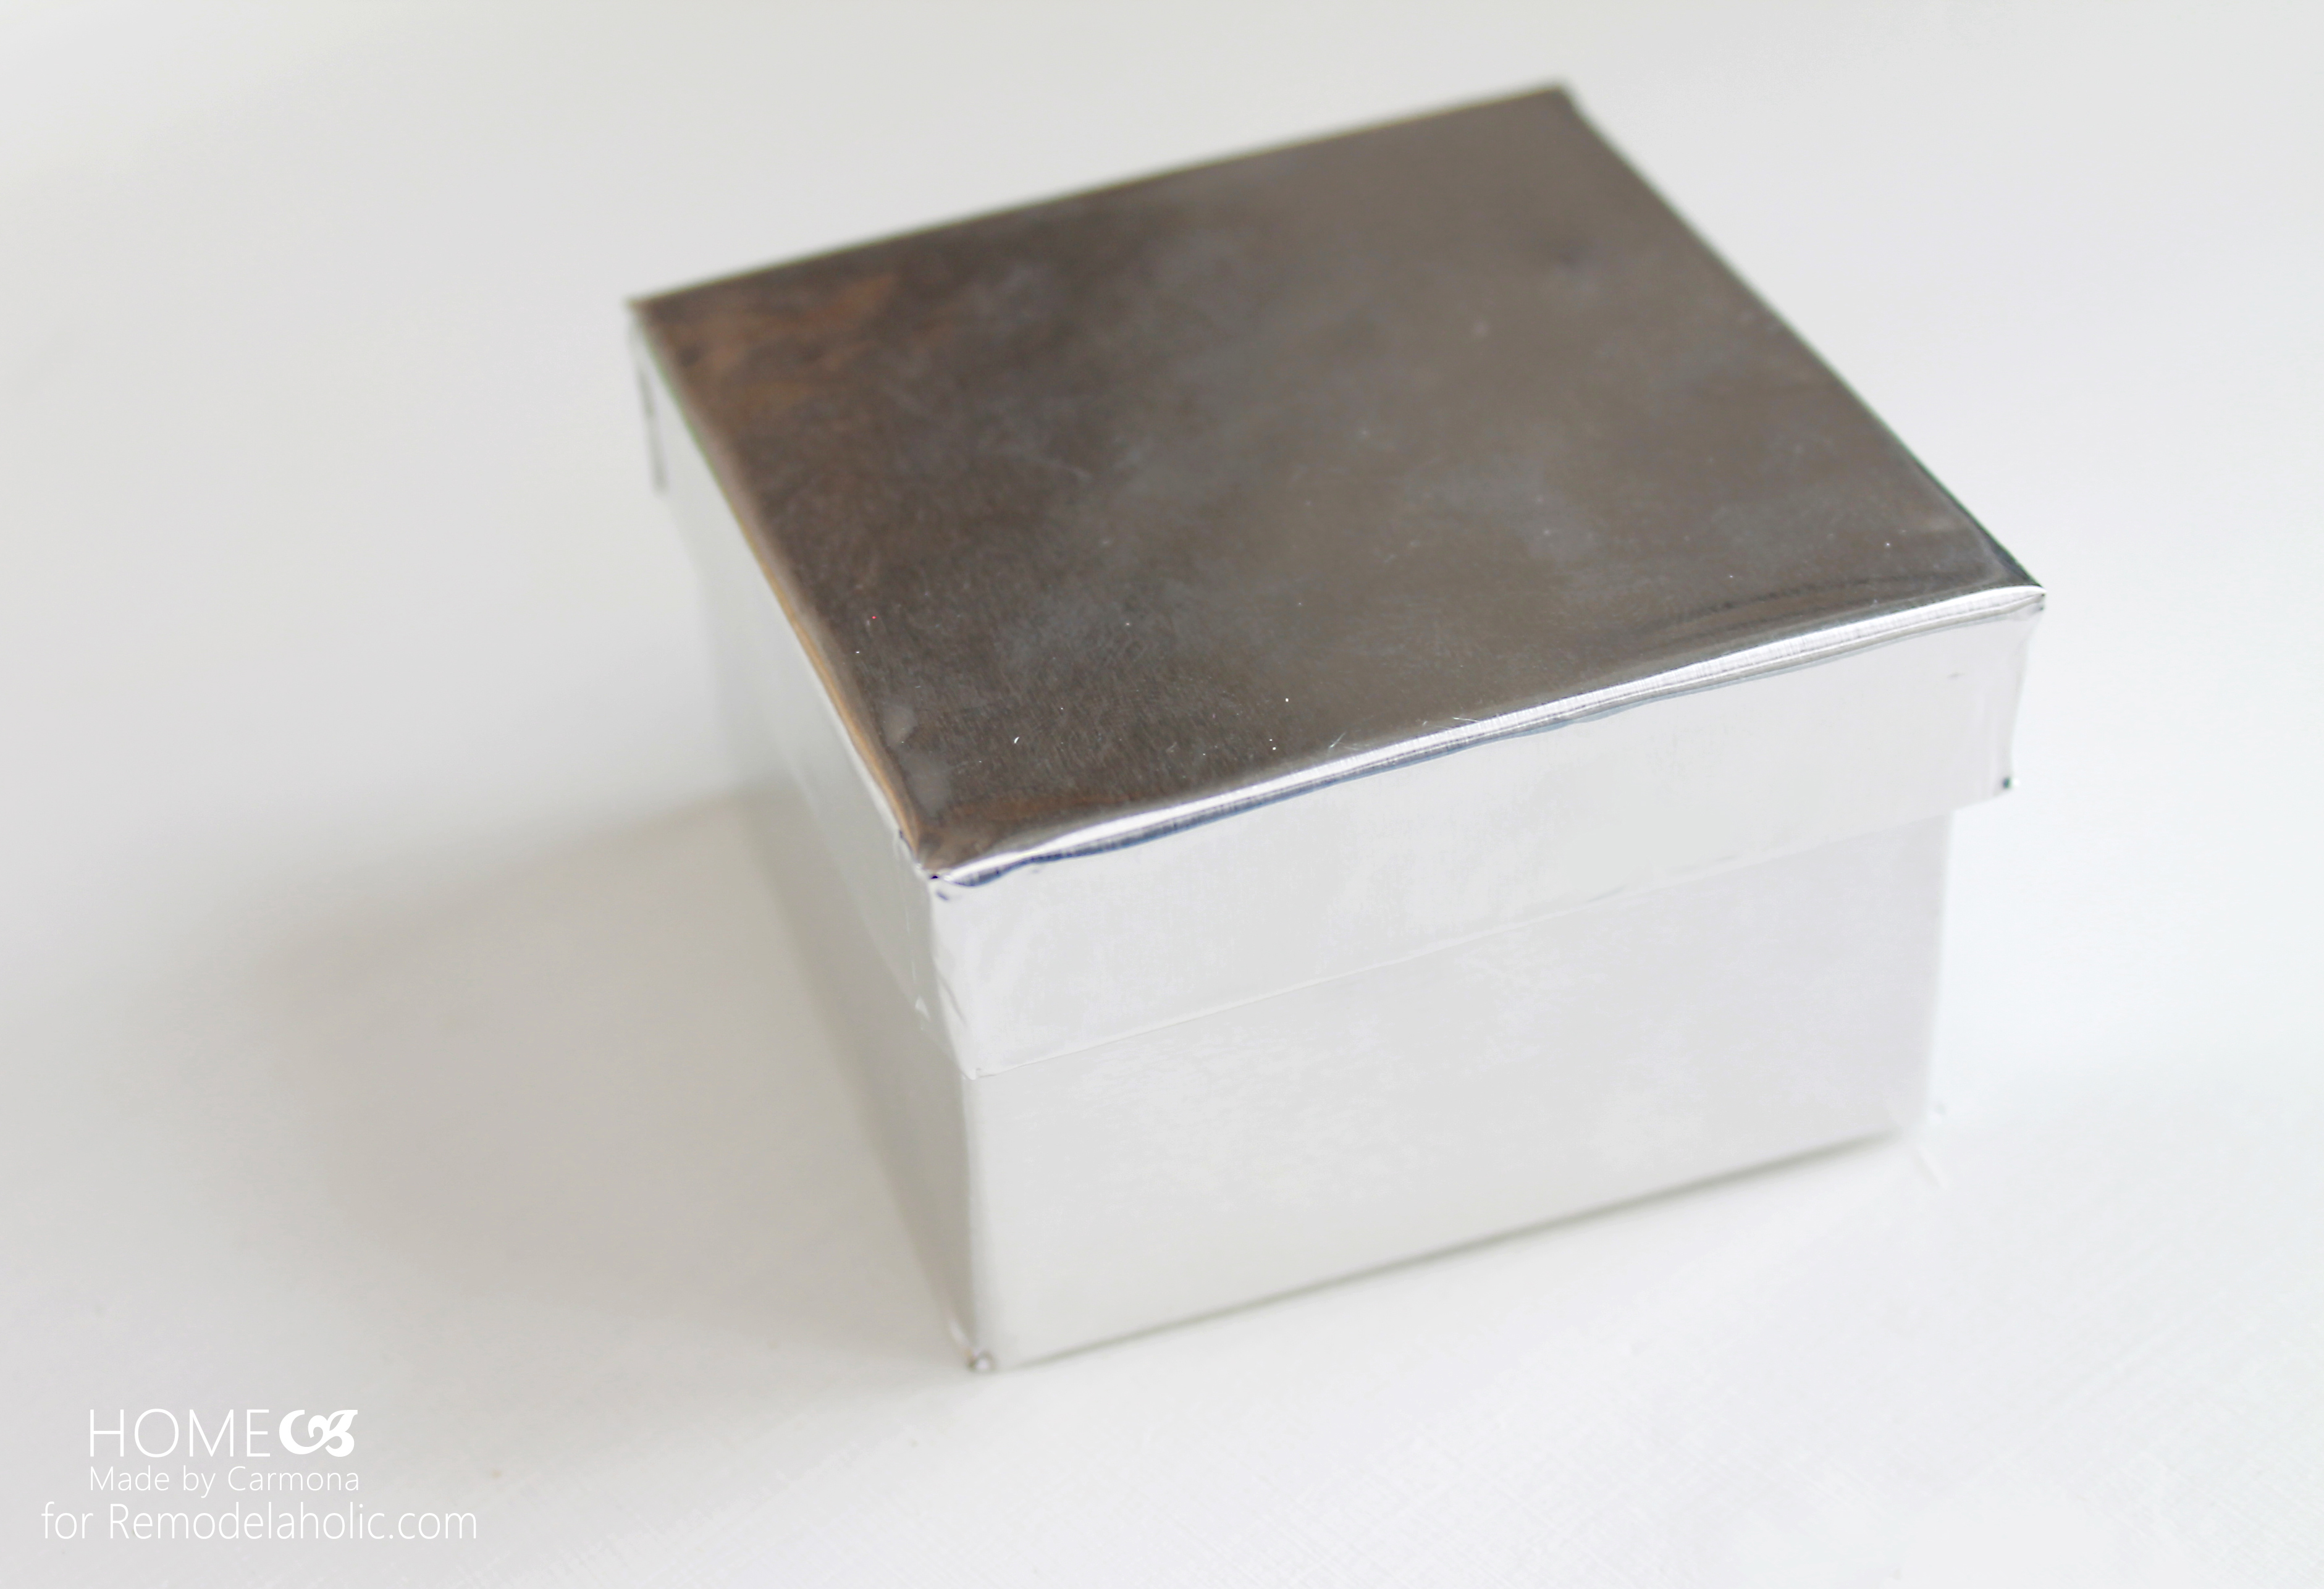 Finally pull out your favorite metallic spray paint and give it a new hue! Personally I love a high shine gold or copper spray paint. Spray paint the inside and out for consistency, the inside won’t shine quite like the outside, but it’s nice to have them both match. Metallic paint will not appear reflective when sprayed on plain cardboard or wood, but with this new aluminum wrapping your new “tins” will glint glitter and shine!
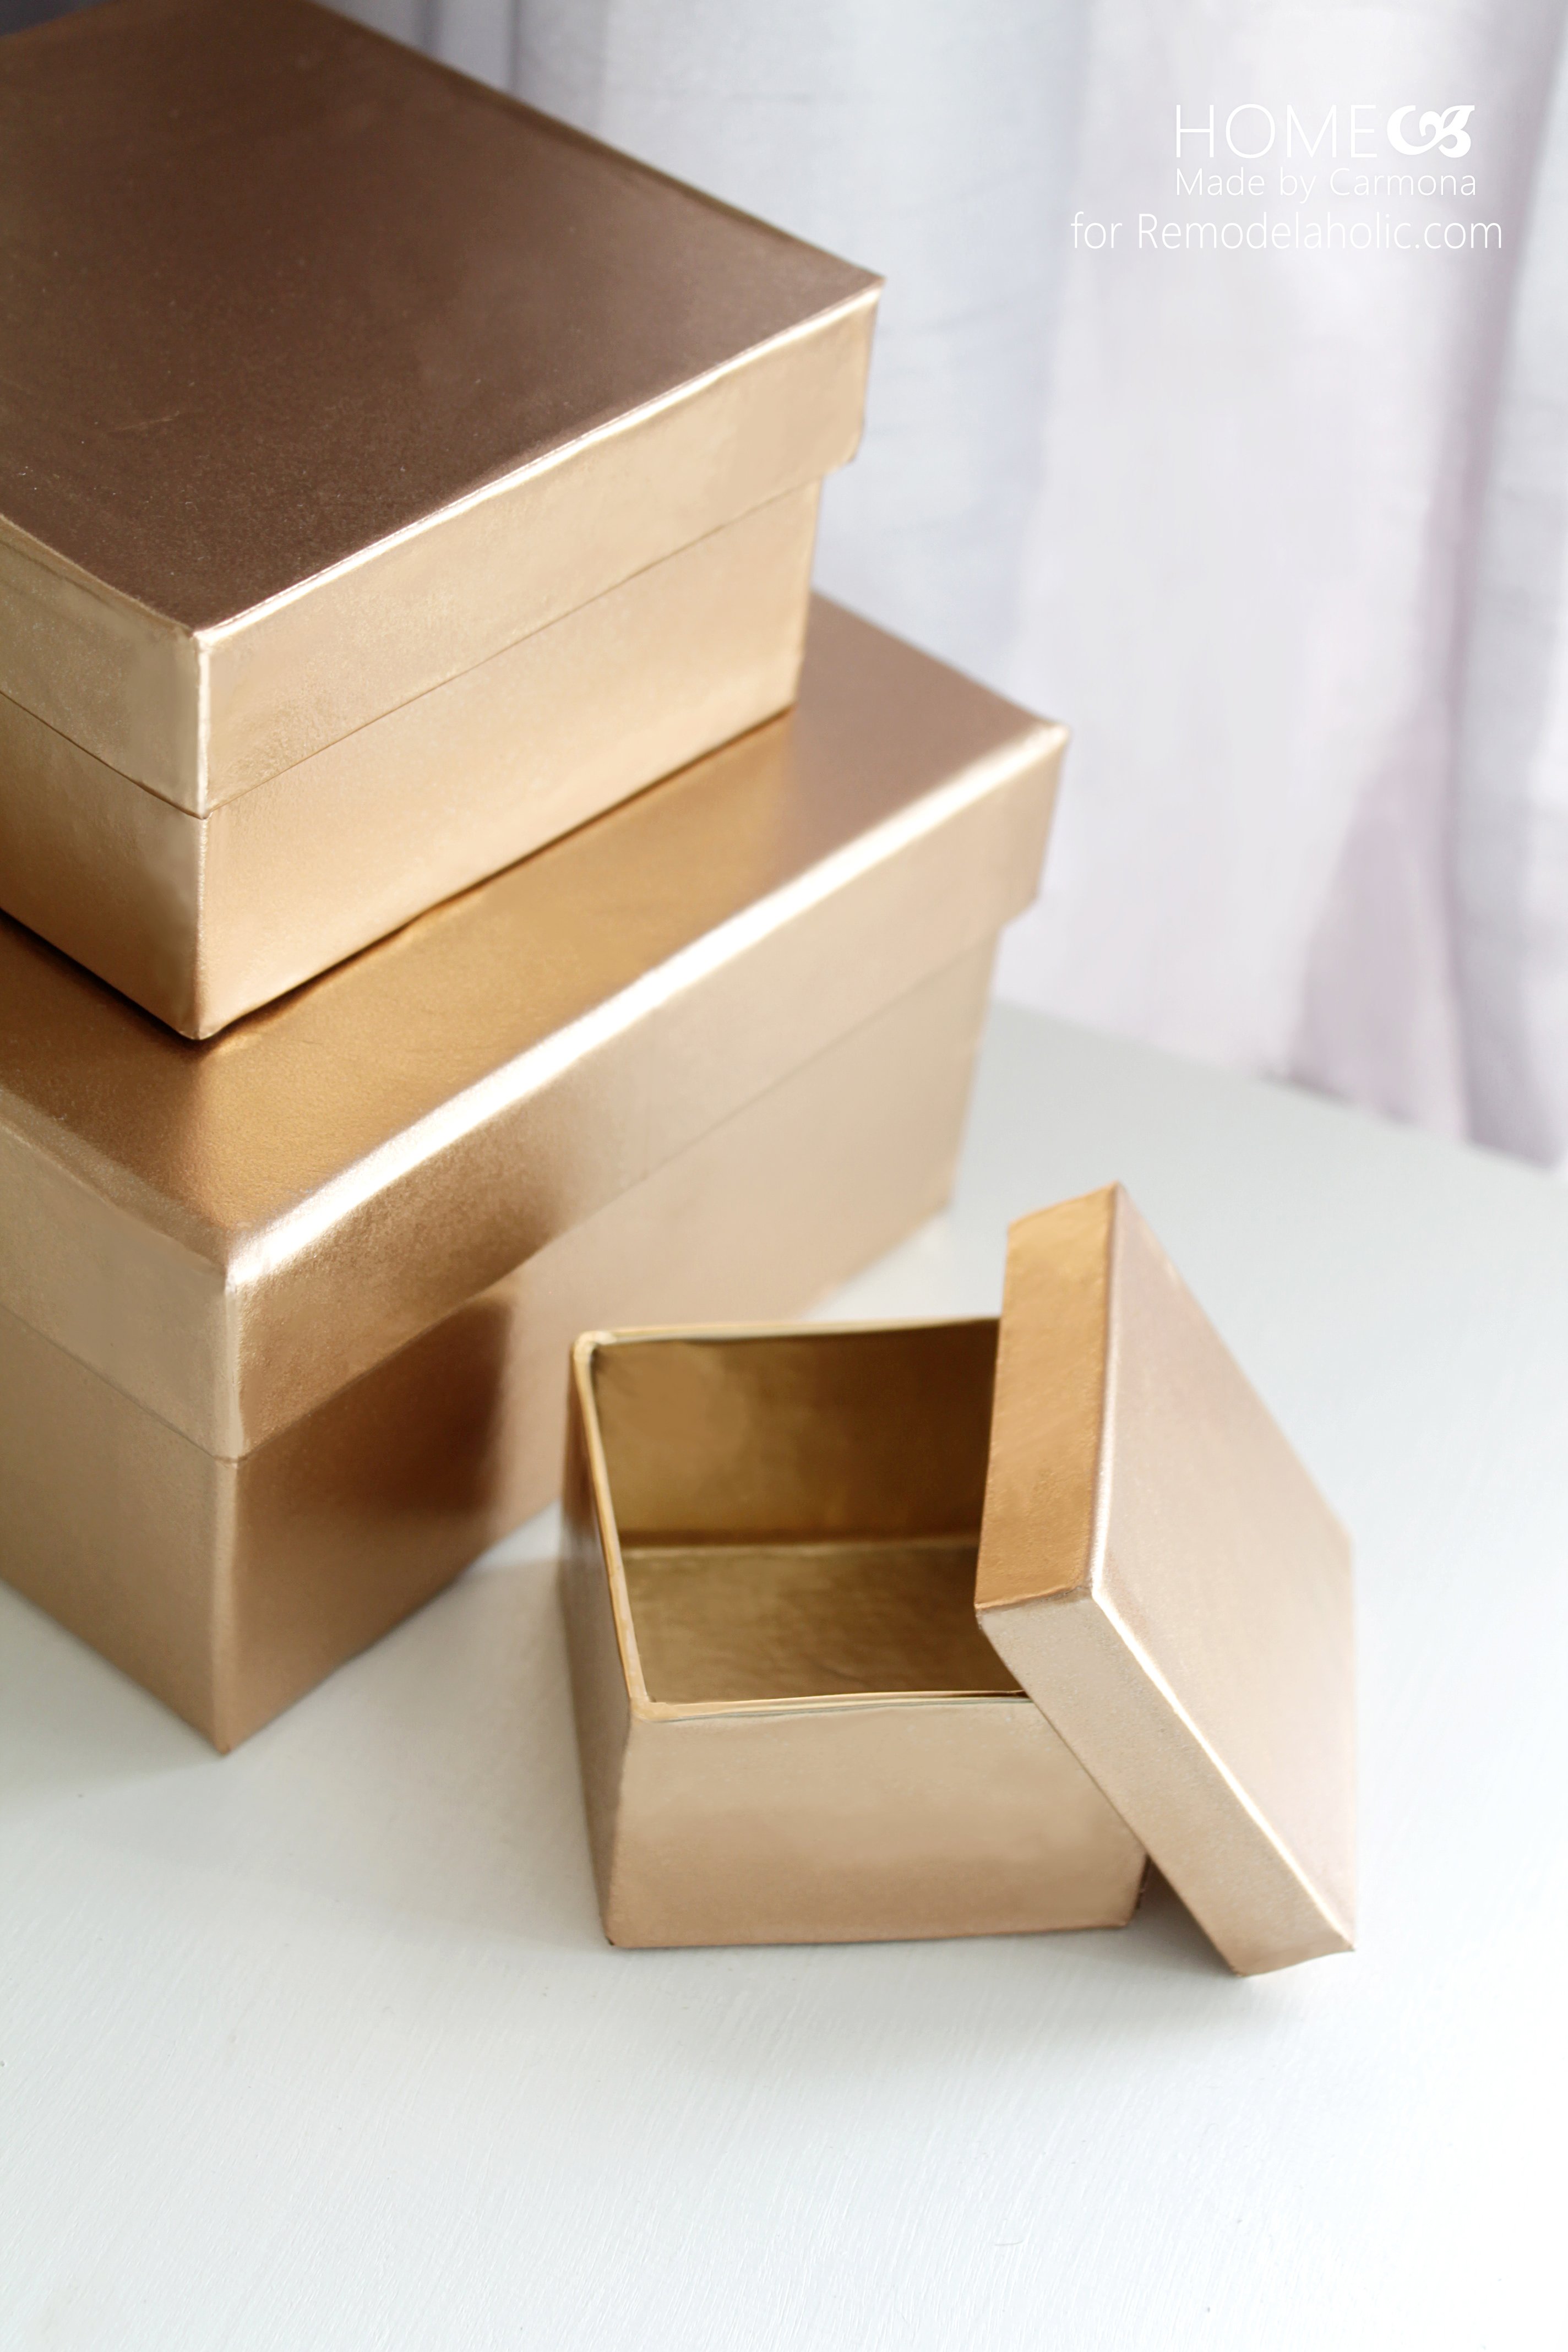
I’m such a sucker for all things gold & copper, and if it stores things it’s just that much better! I also spray painted some lovely jars while working on my faux tins. You can find my Gold & Copper Painted Jars tutorial here. 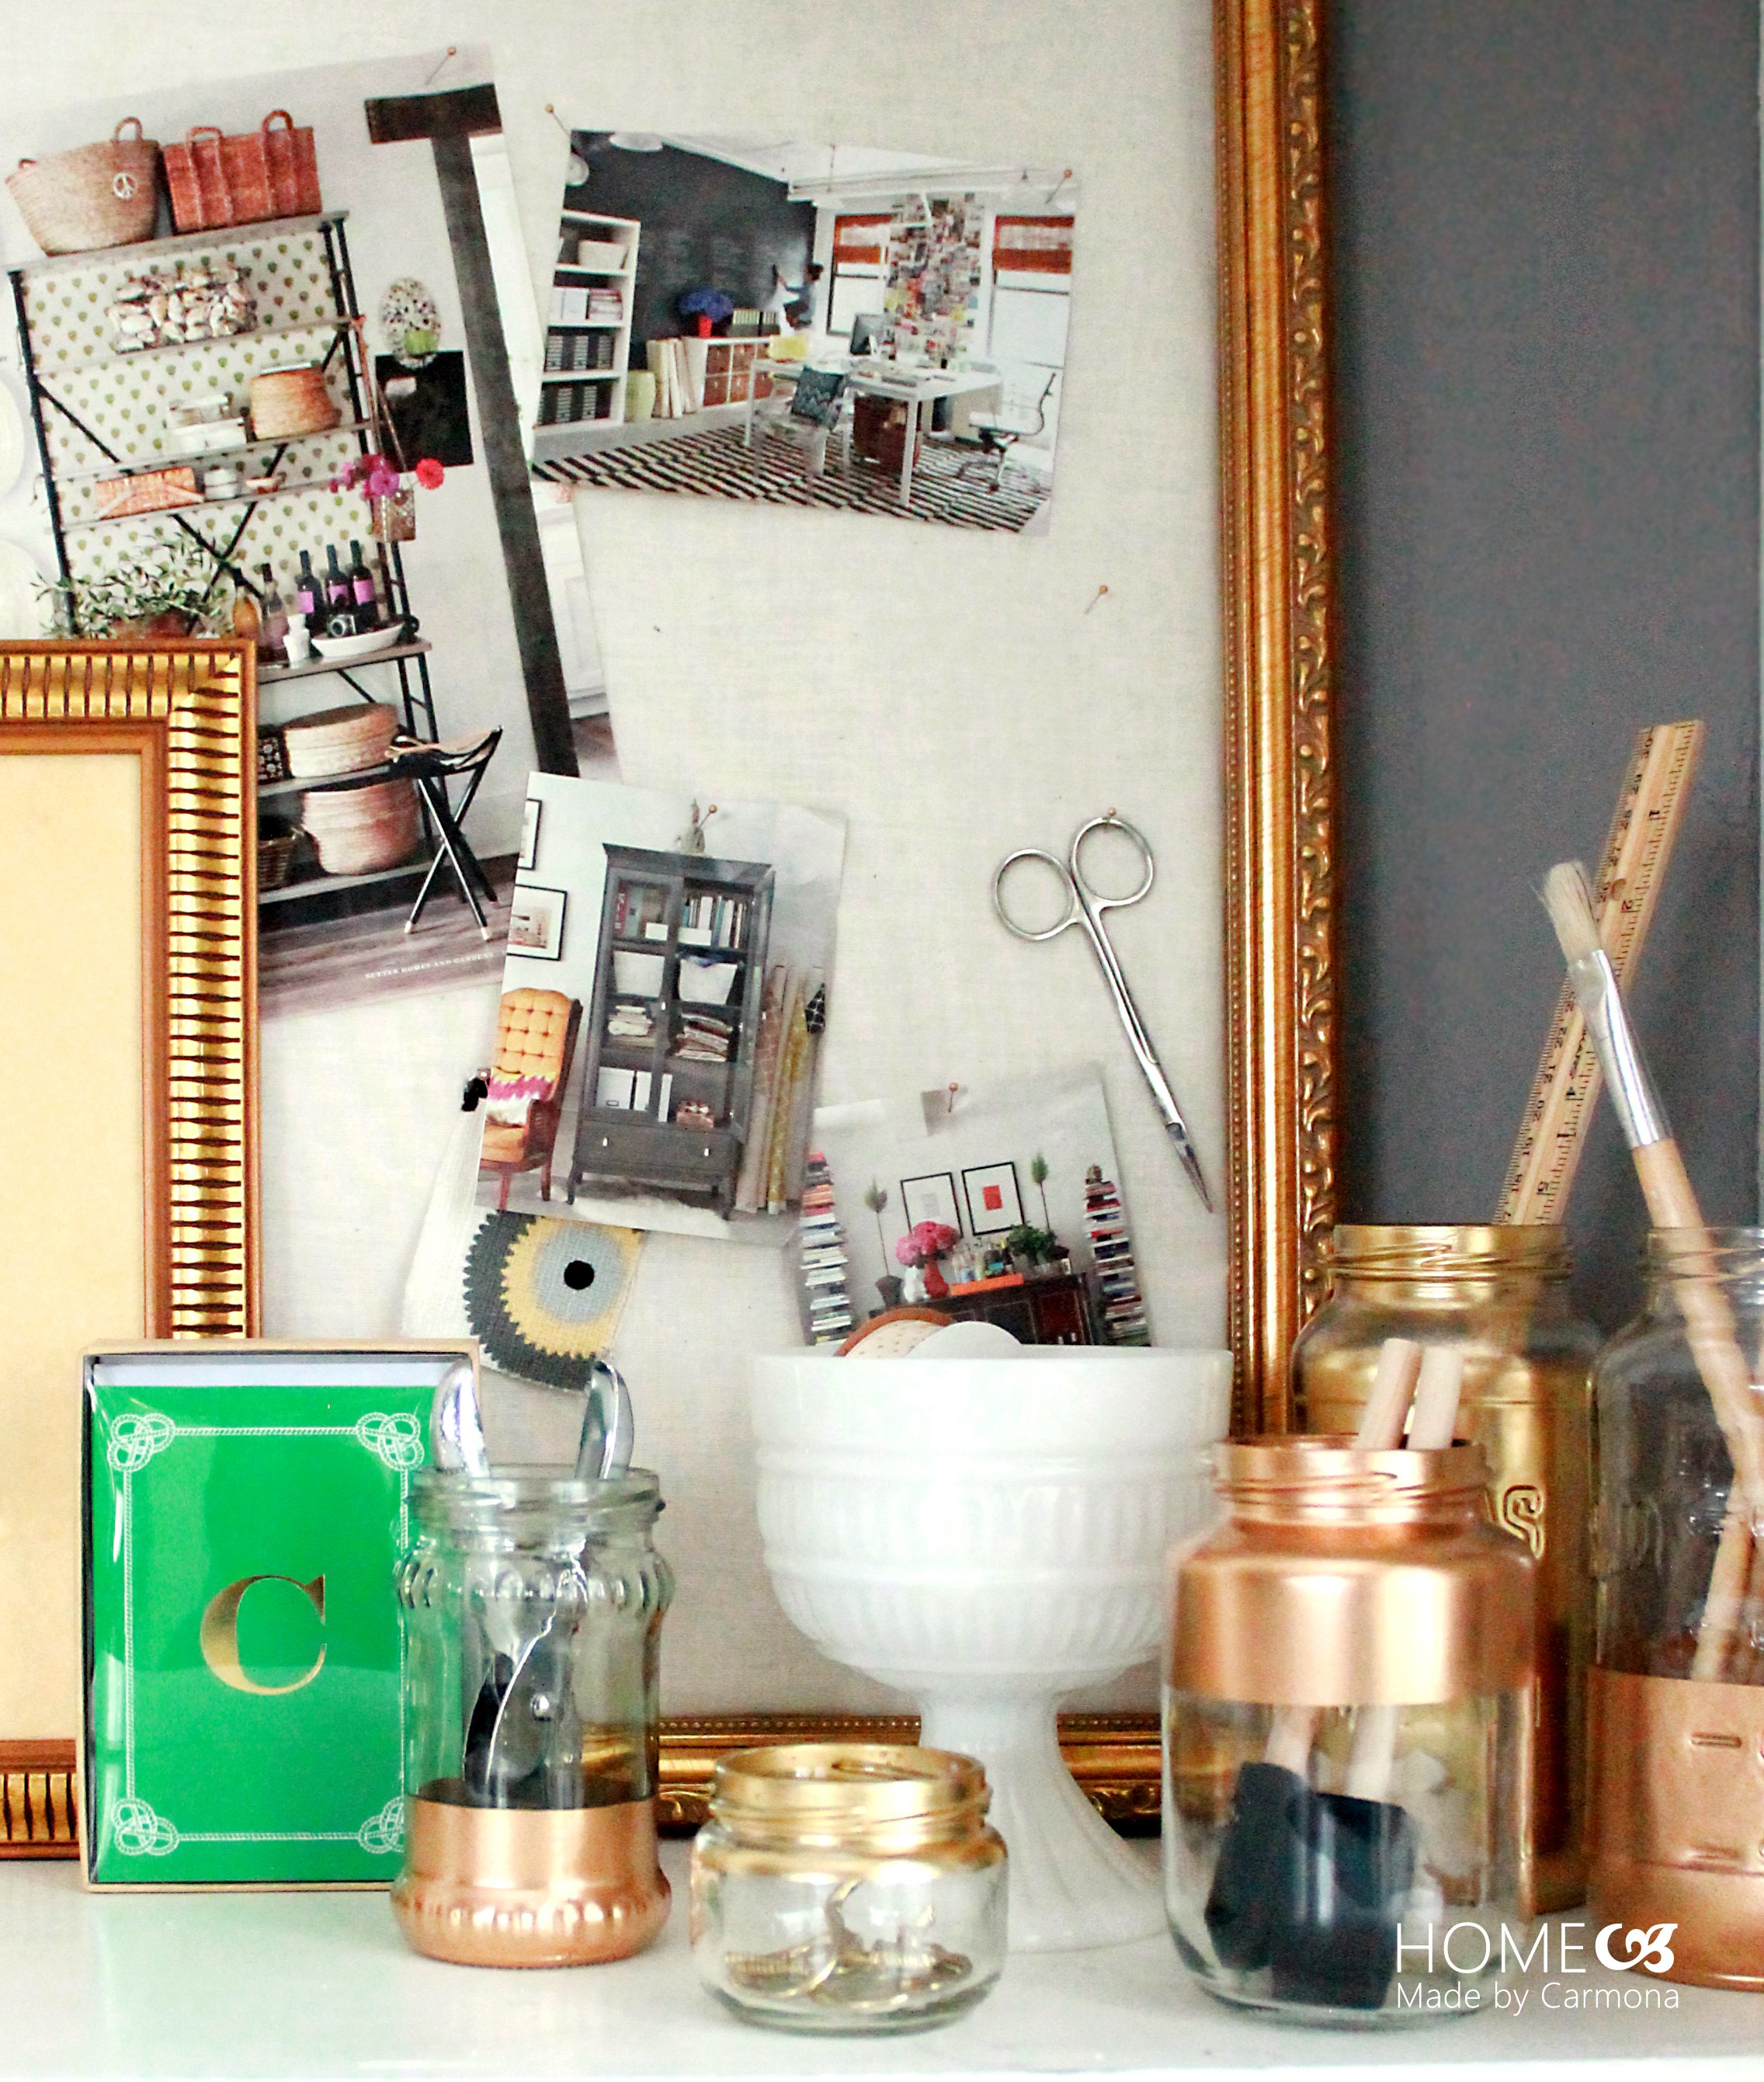 I am loving all the gold and copper storage throughout my work spaces. Honestly I can’t get enough!
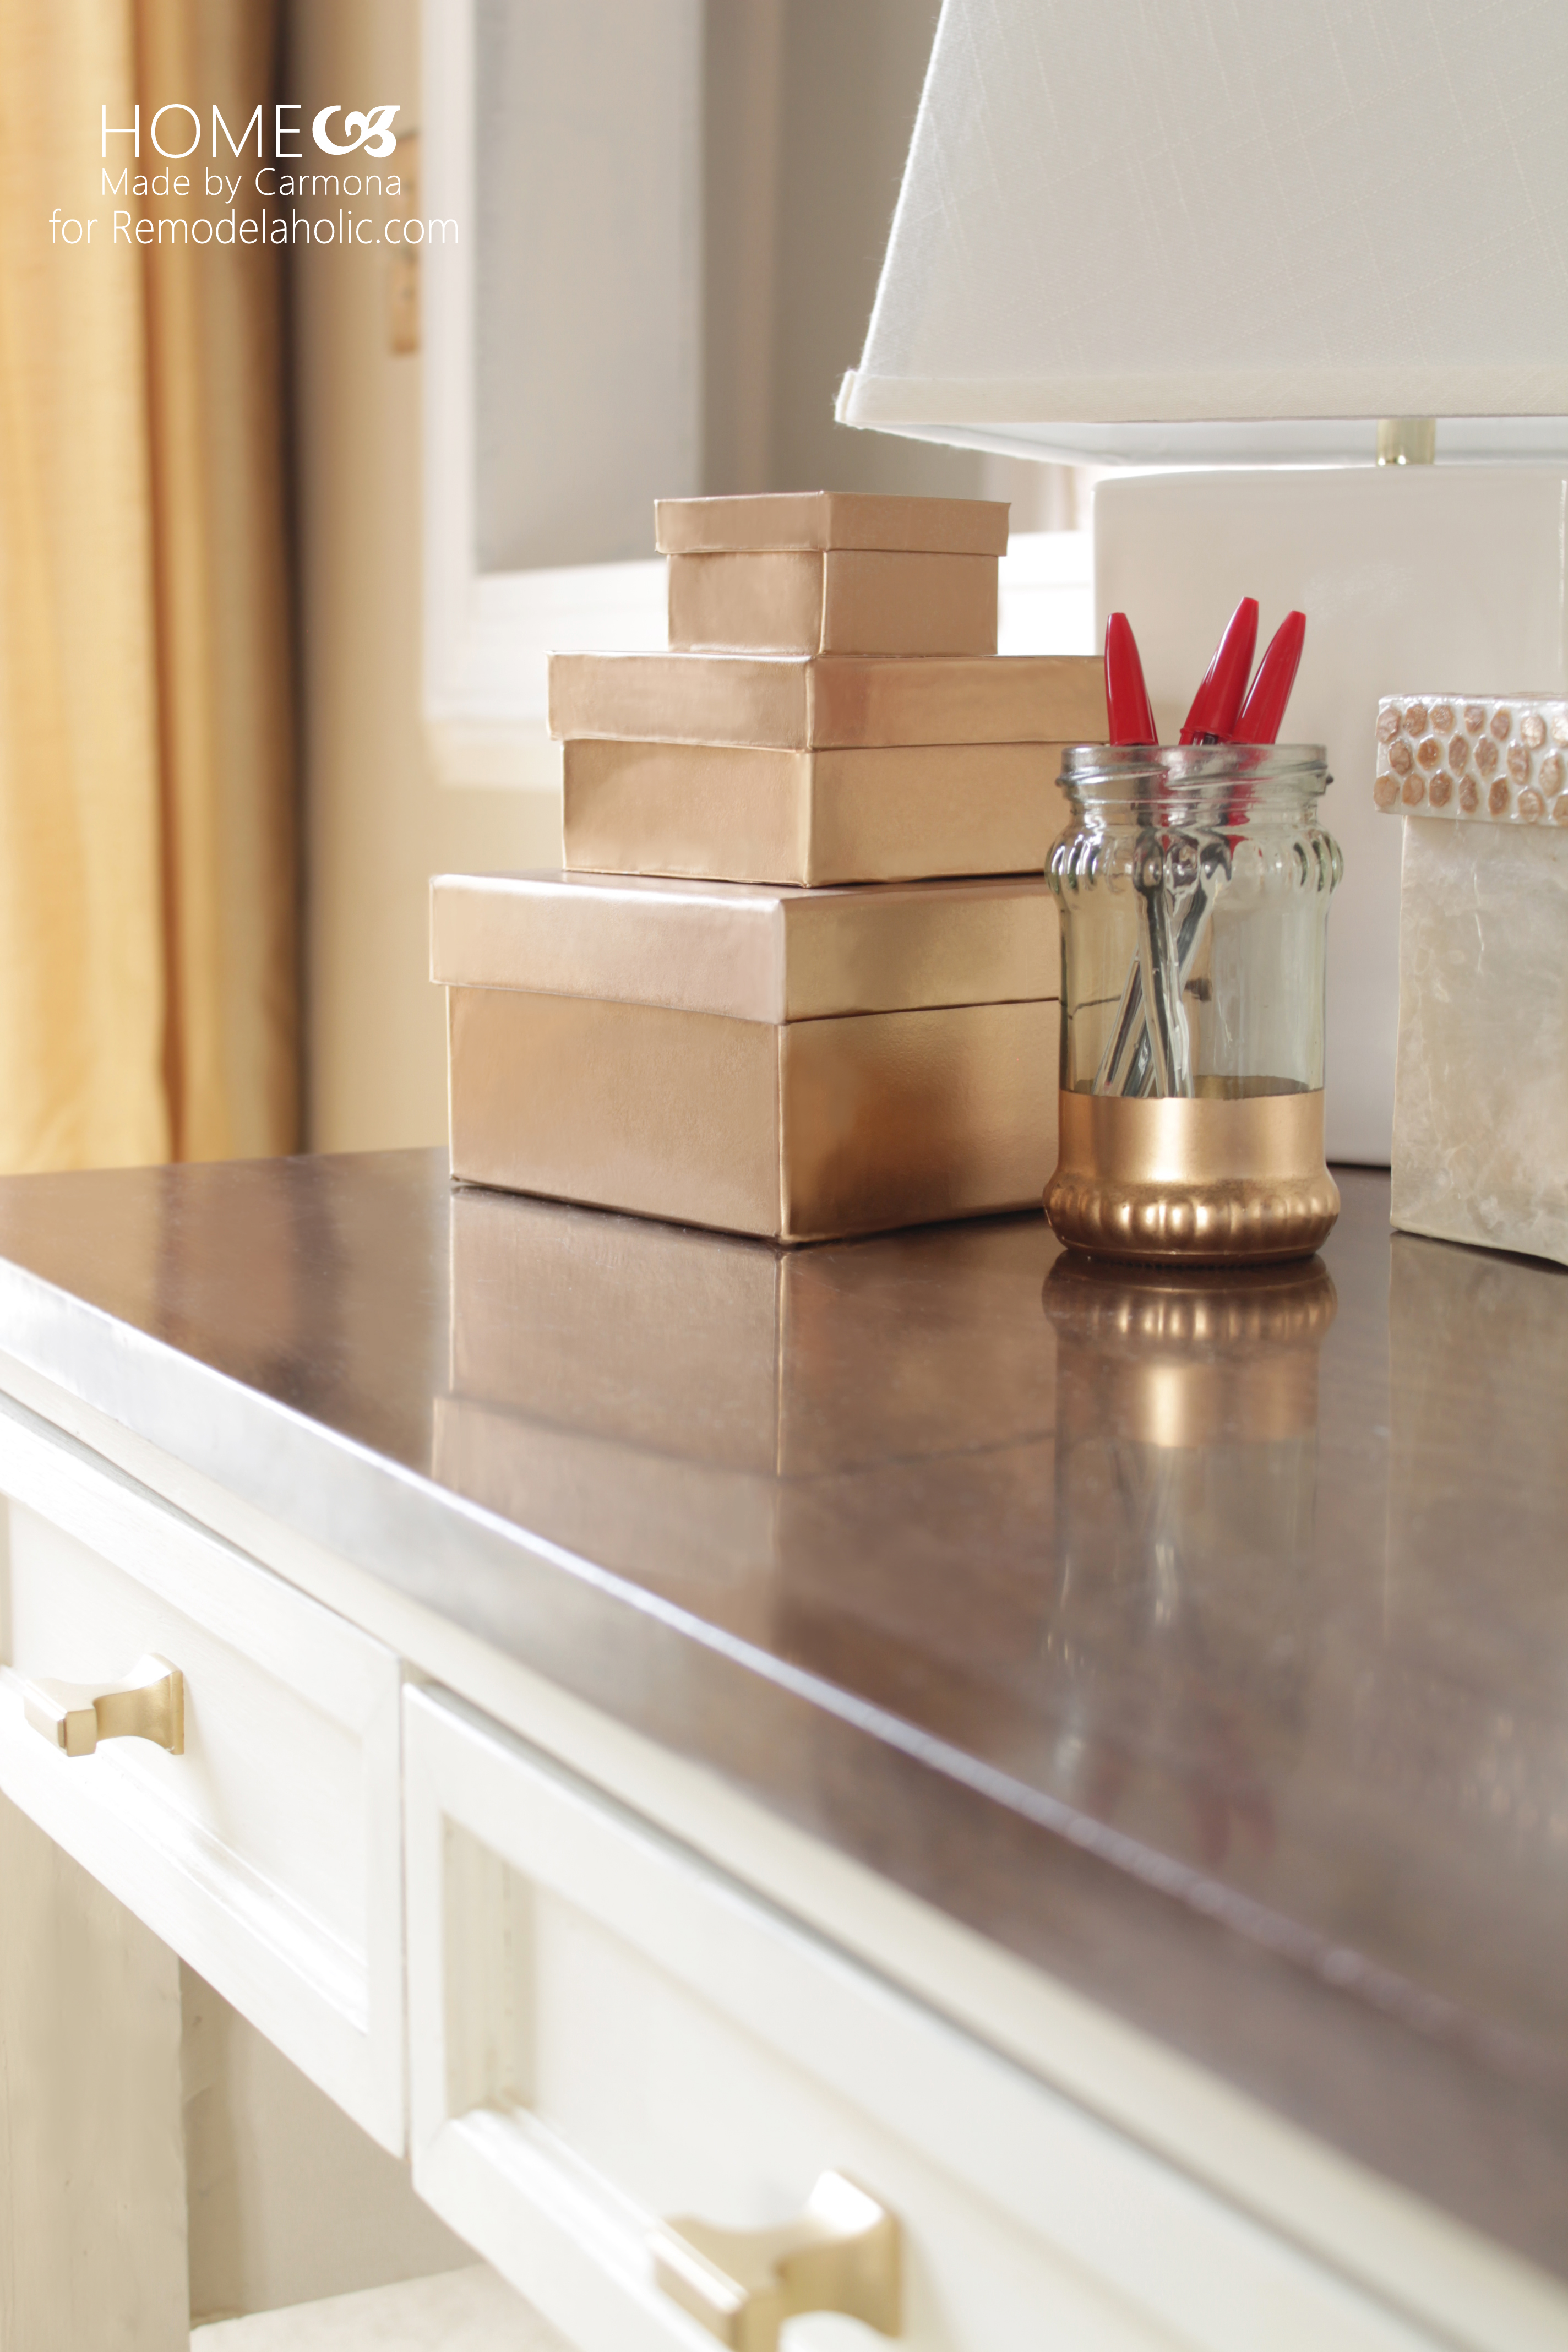
————————————————–
Looking for some more ways to add a glam metallic touch to your decor? Try these!

3 Simple Gold Home Decor Projects
Modern Industrial Concrete Planters with a Gold Edge