Easy Butcher Block Countertop Tutorial
–
Okay, I know we just saw a butcher block countertop not too long ago here and here, but I have never seen this before, wood flooring used for a butcher block countertop. Very smart and very cost effective! We did something similar with a countertop and window bench in our family room, but I didn’t think to try it on a butcher block countertop in our kitchen. Scroll down to see how she pulled it off.

Submitted By PJH Designs
Peggy Hale lives in beautiful east Texas. She is a wife, mother, and grandmother who loves to refurbish or repurpose furniture and home decor items, and is not afraid to take on any home remodeling project. After a few years of painting furniture for herself and family she decided to take a chance and try selling her work thus PJH Designs was born. You can find many of her one of a kind pieces at King’s Antique Mall in Shreveport, Louisiana.
You can also see three of my most viewed posts on my site that you might find interesting.
(click on the image below)


Today I am finally sharing the way I achieved butcher block countertops at a fraction of the cost. If you remember I priced the countertops at anywhere from $4500 to $7000! Wow, I was really shocked that they cost as much or more than granite.
Anyhoo, here’s what they look like now.
Pictures just don’t do them justice at least my pictures don’t lol.


And here is what my bar looked like before with green laminate.
They look like they have a glass finish! I could not find a way with my little camera to take a picture that did not show a glare. It’s that shiny!
Now if you want plain butcher block countertops you may still follow my directions. You just need to leave off making a lip around the edges and pouring on the poly finish.
I would rate this project as medium in difficulty. If you have some carpentry skills and have laid hard wood flooring you will have no problems.
Here is what you need to complete this project:
3/4 plywood (enough to cover all of your countertops)
unfinished red oak flooring (In my area the only place to find this is at Home Depot and it is cheap!) You need enough to cover your countertops.
1”x 4” red oak trim (enough to trim out your countertops)
flooring adhesive
long finishing nails
circular saw
router
hand sander
sand paper 60, 100, 150, & 220 grit
wood stain in color of your choice
Envirotex Lite polymer coating
(or polymer coating of your choice)
butane torch
trowels
sponge brush
plastic drop cloths
cheese cloth
mineral oil
paint mixing bucket
old pitcher with spout
Step 1
After you have removed your old countertops re-enforce the corners of your cabinets as you see in the picture below to hold the weight of the plywood and wood flooring.

Notice the block of wood nailed to the corner stud. You need to do this anywhere along your cabinets that you feel need the extra support.
Step 2
Measure and cut your plywood to fit exactly the way you want your countertops to fit. Including the over hang on sides and at the ends. Apply plywood to top of cabinets.

Make sure your plywood is level and as you add flooring be sure to keep everything level
Step 3
Next cut your red oak flooring to fit on top of the plywood laying it out in an irregular pattern just as if you were laying it on a floor. Once you have an area all cut and ready to lay out apply the flooring adhesive to the plywood in small sections.

Step 4
Now, after applying the adhesive lay each cut piece of oak to the plywood use an extra block of wood and a hammer to tap the planks together tightly. Taking the block of wood put it against the plank and hammer it instead of the plank to tighten the planks against each other. Then using an nail gun and the long 1 1/4″ brad nails nail the planks together to get as tight a fit as possible. Nailing into the sides of the plank not the top so that there are no nail heads on the top.
Continue doing the above until you have completely covered your countertops.
Step 5
Now this is where you have a choice. If you want true butcher block countertops cut your 1”x 4” red oak trim to fit evenly along edges of top. If you don’t want the upkeep like me cut your 1” x 4” to leave a small lip around the top so that you have something to encase the polyurethane when you pour it on. You can make this around1/4″ deep.

Notice lip at top and right side of picture.
Step 6
Apply red oak trim to edges of countertop leaving lip around top or not according to your choice. Counter sink nails and fill with stainable wood glue. Also fill any spaces in the counter top with the stainable wood glue.
Tip: wipe off all excess wood filler thoroughly with a wet towel as it really does not stain well. You just want to get it in the cracks.
I would also, if you have not already, remove your faucet so as not to get poly and stain on it. We cut out very tight fitting styrofoam circles to put in the holes. Also applying Vaseline around the top of your sink should keep any wood stain or polyurethane from sticking to it.
Step 7
First, using the router go along edges of trim rounding edges and corners. Next using a hand sander and 60 grit sand paper start sanding. Sand the entire countertop thoroughly. Then sand with 100 grit, 150 grit, and lastly 220 grit. Top should feel smooth to the touch with no splinters or fuzzy areas.
Dust off the counter and then wipe clean with a damp cloth being sure to remove all dirt and dust.

My butcher block counter piece next to my stove before mineral oil
Step 8
If you want plain butcher block countertops all you have to do now is treat the top with mineral oil or a butcher block treatment oil you can find at most hardware stores. Apply according to instructions or, if using mineral oil for a first time treatment, apply four coats waiting a couple of hours in between coats. I chose to leave one small counter beside my stove butcher block for food prep as you can see in the picture above. If you have chosen to apply the polyurethane proceed to step nine.
Step 9
Next you need to apply your stain of choice. Apply according to instructions on package. I prefer to apply my stain by wiping it on with cheese cloth. I just feel like I have more control. Early American is the stain color I chose as it wasn’t too dark and looked good with my new flooring.

Allow your stain to dry for one to two days keeping everything off the counters as it will scratch easily. Now you are ready for the top coat.
Step 10
Before pouring on polyurethane tape plastic drop cloths around and underneath all the countertops.
You will need at least two people to pour the polyurethane on more would be even better. We ended up with five people. Luckily my step son and his wife stopped by about the time we started and they jumped in and helped out. Thanks guys.
Mix your polyurethane according to instructions. The product we chose was very simple as you mixed equal parts.

Tip: Do not stir your mixture like you are whipping it use smooth back and forth strokes. Whipping adds bubbles to the mix that are hard to get out.
We used a paint mixing bucket to mix the poly and an old plastic pitcher to pour the mix onto the countertops.
Once someone pours the polyurethane onto the top have someone else start spreading the mix with a trowel. The longer the trowel the better. Keep adding and spreading until you reach the top of the lip all around the countertops and there are no dips anywhere and the top looks even and smooth. When it runs over the sides (which it will big time) spread it along the edges with the trowel or a sponge brush.
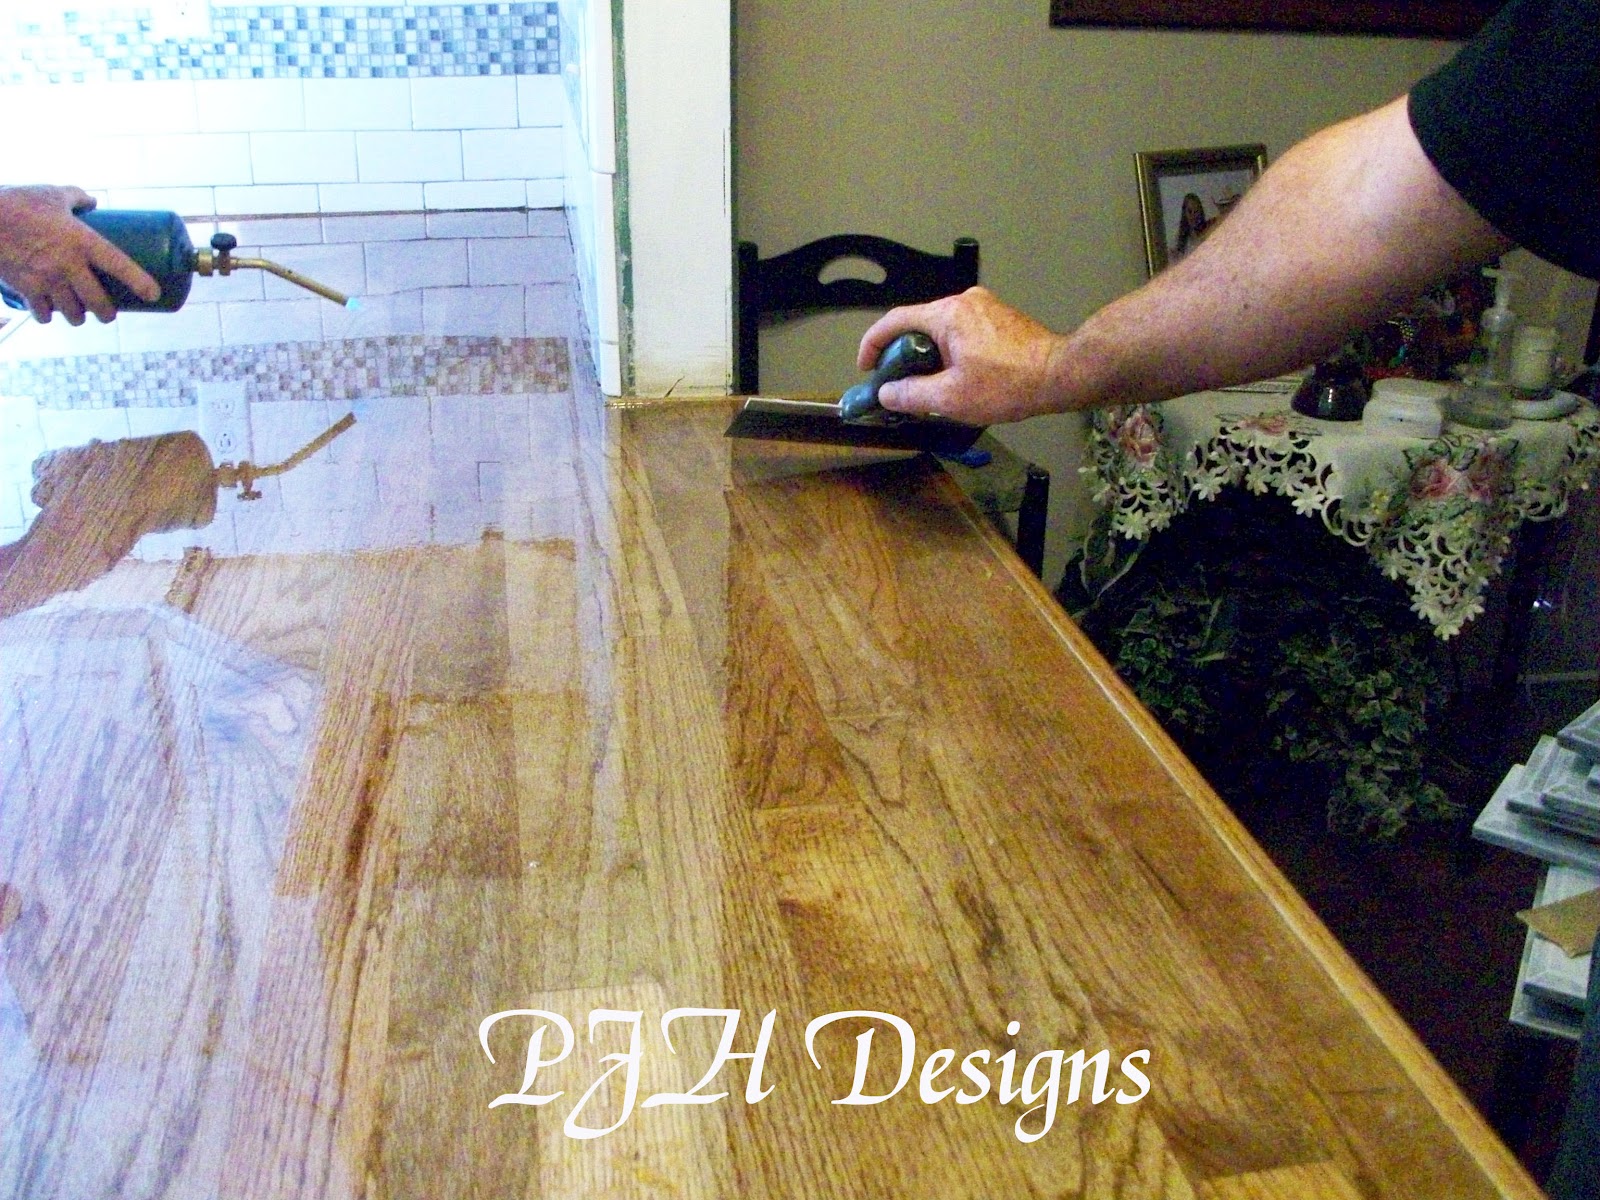
Here you see one person spreading as another uses the butane torch
Step 11
Let the poly set up for about five minutes then light the butane torch and slowly sweep the flame back and forth over any bubbles and watch them pop! Too cool! lol
We were not able to get all the bubbles out but the ones that were left were not too noticeable.

Note: Using the butane torch in your home is very dangerous and should be done carefully. I did not come up with this as it was part of the instructions on the polyurethane and I will not be held liable if you use this technique and are injured or damage is caused to your home in the use of the butane torch.
Your countertops will be dry to the touch in about five hours but you may not sit anything on them for three days until they are completelyhardened.
That’s it! Your done! Finally! lol. I love how they turned out and so does everyone who stops by to visit. By the way the poly top coat we poured on is equal to 30 or 40 coats of regular polyurethane.
Let’s talk about cost before I close out. The plain butcher block countertops cost will be about $150 if you purchase your supplies in the Ark-La-Tex area where I live. If you add the thick polyurethane top it cost about $400. Compared to $4500 it was well worth all the work.
I am the husband of the amazing Cassity of Remodelaholic. I love to problem solve and to design and build things inside and outside the house to make life better. I am a professional Landscape Architect by trade and love the outdoors.


Love the idea of using flooring–I too would have never thought to do that!
I’m in the process of deciding what to replace my old formica countertops with. I love the wood idea, particularly the butcher block. Ikea has them and they’re very reasonable.
Thanks for your ideas.
Angie Bull
You’re welcome, Angie! Good luck deciding — there are so many great options!
Do you find that the coating “gouges” at all? How does it hold up?
Hi there, just found your site – luverly! I’m another who wouldn’t have thought of using flooring – brilliant – I’m going to upset my DH by asking for this – our kitchen was renovated in mid-80’s, but as we are in western France that should read mid-60’s in style – almost retro if I liked retro! I plan on painting the doors (BTW: did you know Hammerite metal paint sticks to melamine/formica like s–t to a blanket?) and would dearly love a new work surface (at present it’s finished in the tiles left over from a friends poolside walk). I’ve been saying this for the 10 years we have been here, and I’ve even got the replacement brass pulls ready to go – I just need a push to start!
Also BTW – how is your work surface standing up to daily life – is it still looking mighty purty? Liza
Liza… you had my at western France! WHAT! I would totally live with a retro kitchen for the chance to live in France! Which I guess is beside the point… technically this was a guest feature, so i can’t tell ya exactly, but the finish they used, should hold up REALLY well! (although I would still avoid cutting on the surface to keep it looking pristine!
our kitchen countertops as well as a counter height table were all made out of wood flooring. it was done b/c had the material on hand & wanted to use up rather than buying counter material. i love it and it’s very durable. we needed to have custom bottom cabinets to work around my vintage sink that i found on craigslist 🙂
We bought bamboo flooring for our countertop. It’s environmentally friendly, cost effective and impervious to water. Can’t wait to get our lower cabinets in and put it up!
That is such a great idea. I would have never considered that.
We just did butcher block counter tops but with another sealer. We understood that polyurethane did not make it food safe. We used an acrylic sealer. WE love the look and I would recommend this to anyone! Yes, much cheaper choice.
I am going to make my own counter top too..where can i find Acrylic Sealer? i thank you, Marina
Hi Marina,
You might try Waterlox like Alyson used here: https://www.remodelaholic.com/2014/04/faux-reclaimed-wood-countertops/
Can I stain it and then oil it? Or do I have to put polyp urethane on top of the stain?
Hello,
I may be missing this from your post, but what did you use to finish off the front edges of the countertop? Thanks for the great idea!
Nicole
Hi Nicole,
Check out step 6 — it says to use the red oak trim around the edges. If you have more questions, you can also click over to the original blog (this is a guest post they did for us). It’s linked up toward the top of the post. Thanks!
Three questions…does/will it warp over time as the seams are not “glued” together as in traditional butcher block? Could you further explain how to nail them together? Are you nailing diagonally through the flooring into the plywood? How has it withstood time with everyday kitchen use?
Thank you
Hi Monique,
This is a post from a fabulous guest of ours, so to see more and ask your questions about durability, please click over to their blog (linked toward the top) and ask there. Thanks!