Decorative Stencils Wall Art: Guest Post
Mandi at Vintage Revival decided to try out making decorative stencils for some fresh wall art on a main wall in her living room. She how she did it.
So as I was checking out some of my favorite bloggitys today one of my favs Brooke @ all things thrifty was talking about making your own wall stencils. I have been meaning to post this so today is as good as any right? Basically I followed Brookies tutorial {found here} and this is how I did it. I found the image that I wanted on my favorite photo editing website Picnik (look under create- stickers- Floralia) Then I took a pic of the wall and uploaded it to picnik so that I could easily edit the picture to change the size, color, etc. and get a general idea of what I wanted. {Seriously please don’t judge my messy house mmmmkay?}
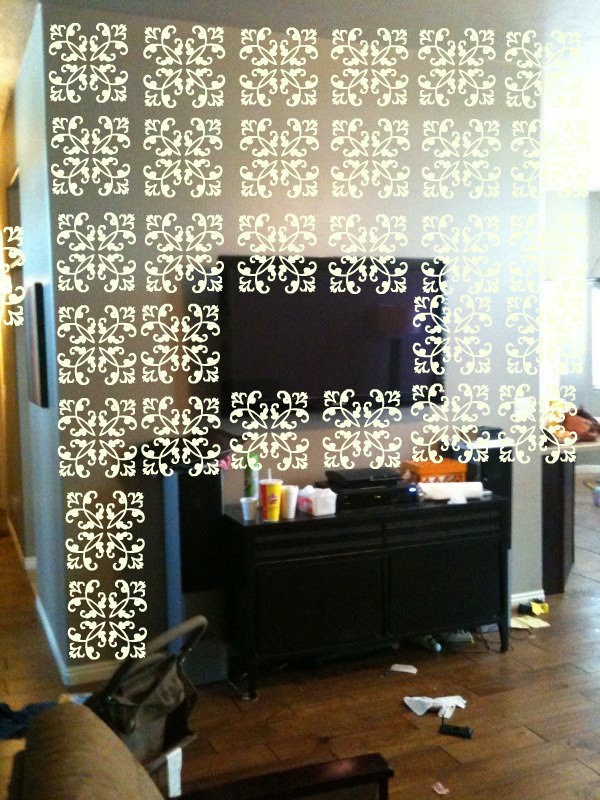
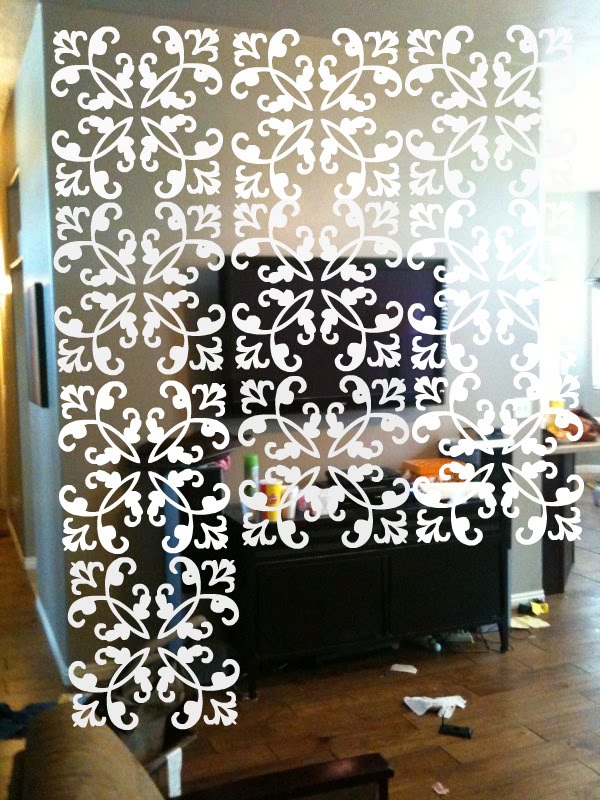
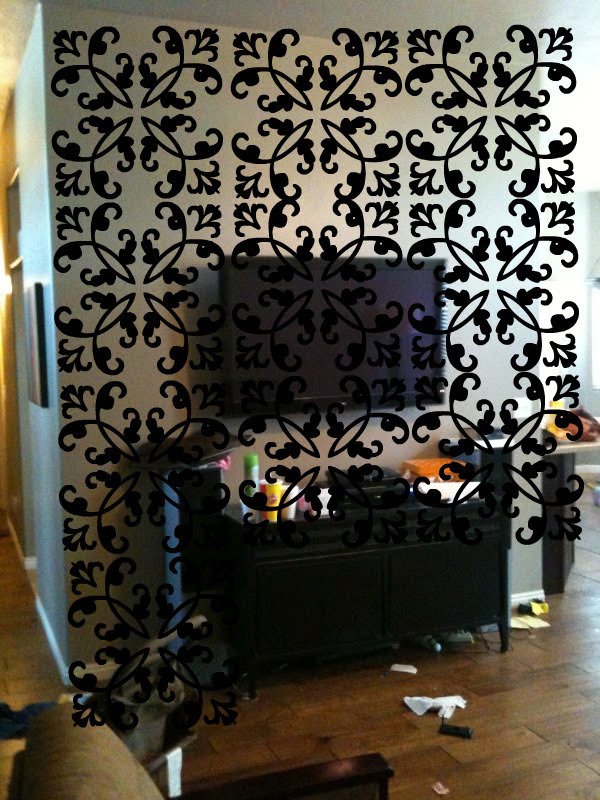
I originally was going to do white (the color of our baseboards, doors etc.) but after seeing the black I knew that had to be it. I measured my wall (which was about 8 feet across) and decide that 4 stencils across would be a great size. I printed off a single square of the pattern, and drove my happy butt to steamroller copies (local in St. George but I’m sure anywhere would do it.)
I had the cute girl working there print 2 sizes off. 1 1/2 feet squared and 2 feet squared. It cost me all of $2.00. When I got home I taped both sizes up on my wall to see which one I loved the most.
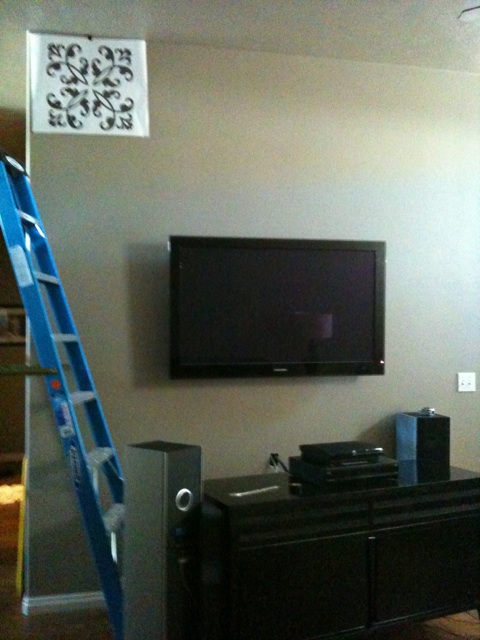
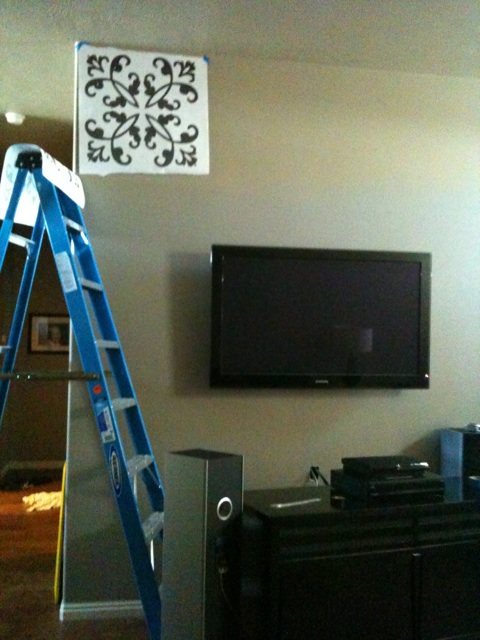
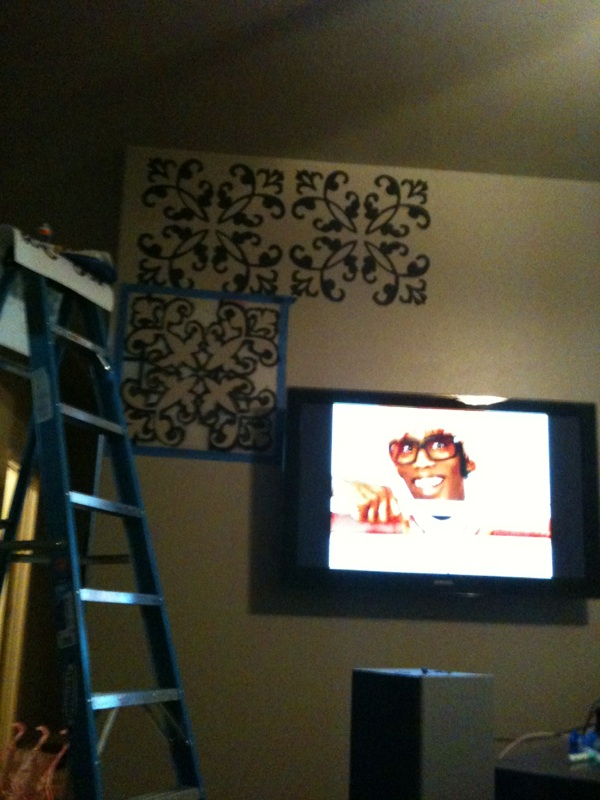
I loved the big one (I was totally grateful for that decision when I realized how much time was involved!) I took 4 sturdy plastic folders that I got at Target and taped them together and then laid it over my design and traced it with a sharpie. (make sure you tape them both down- you don’t want it to slide! On Brooke’s blog she used an Exacto knife to cut out her design. But she recommended getting a stencil cutting tool, I am all about doing things the easy way so that’s what I did. I completely recommend getting one too. (I think it was about $15.00 at Roberts) It was a tedious process even with that tool I cant imagine what it would be like without it. Basically its like a soldering tool but smaller and it has a small point on the end that gets flamin’ hot and just slides thorough the plastic. Then comes the fun part. Spray it with spray adhesive to make it stick to the wall so that the paint doesn’t bleed. I used 2 kinds because I ran out in the middle. I used Krylon brand and Elmers brand. I would take the Elmers over Krylon any day. The Krylon left stickiness on the wall and its just another step to clean it off. Because my walls were dusty stencil was “flippin’ huge” (according to Ivie) I had to spray it after every other stencil so that it stuck really well on the edges. I used just regular old black tole paint and it worked great, just make sure you don’t get to much on the brush (because my stencil was so big I didn’t really have a detail issue but I can see that happening)

Cassity Kmetzsch started Remodelaholic after graduating from Utah State University with a degree in Interior Design. Remodelaholic is the place to share her love for knocking out walls, and building everything back up again to not only add function but beauty to her home. Together with her husband Justin, they have remodeled 6 homes and are working on a seventh. She is a mother of four amazing girls. Making a house a home is her favorite hobby.


>I think if I were to do a stencil, I wouldn't go for a high contrast. I've seen a couple examples of using different glosses of the same color, which I'm considering for one of my bathrooms. Great ideas here though!
>Thanks so much guys for featuring my wall!! I love all of the wonderful blogs that you feature and I am so honored to be among them!
Love your guts
mandi
>Oh ya! I love it! I love the seizure comment from the man of the house. That is totally what would happen at my house.
>I love the wall done like this, but I agree with your husband, there is too much going on behind the TV. It would have been better on another wall. I would not want to look at all that pattern while trying to watch television. That pattern is gorgeous and you did a wonderful job. Love & blessings from NC!
>WOW! That's very cool. What a great impact it has.
I'll be stopping back on Sunday to see Izzy's post.
Have a great weekend.
jj
>looks fab…I would love to do this on my floors, cheers Katherine
>i love the design and the wall. and so does my husband! 🙂 great ideas as always
>Love this! A more affordable option than wallpaper, and easy to change too!
Laura
http://www.HappyHomemakerUK.blogspot.com