Build an Open Media Shelf
Hi Remodelaholic readers, Jaime here from That’s My Letter with my first furniture contributor post. I write a DIY project focused blog called That’s My Letter (named after a phrase my kids used) where I build, paint and sew everything and share the tutorials with my readers. Today I’m here to show you how to build this open media shelf:

We recently moved to a new (old) home and as with any move furniture gets shuffled about, some pieces fit like a glove while other areas require new pieces. This open media shelf is exactly what we needed in our downstairs kids playroom to house the xbox game system.

The open shelves provide easy access to the xbox console (which we also use to watch DVD’s), houses the Kinect sensor and the DVR/cable box. But most importantly you can access the portal which is required for playing the Skylanders game!
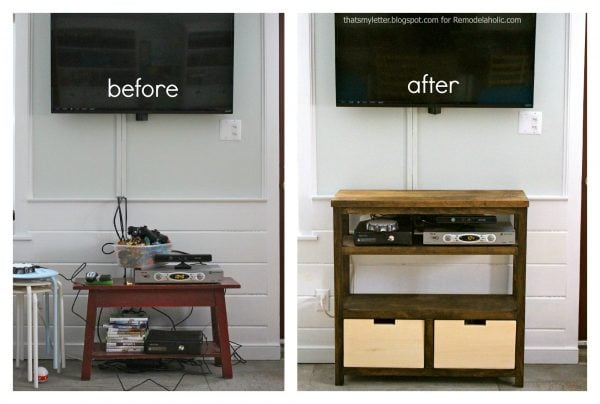
And speaking of Skylanders now all the figures have their own storage bin down below that’s easily removable for access.

This build was inspired by Restoration Hardware’s 1950s Dutch Shipyard Media shelving:

I modified the dimensions to fit our space and needs. This piece measures 36″w x 36″h x 13″ deep:

I choose to leave the back open for contrast against the white horizontal planked walls but my plans below allow for a 1/4″ plywood backing if you really want to hide all those wires behind the shelves.

Open Media Shelf Building Plans
Materials:
- 3/4″ plywood – 1/2 sheet (4′ x 4′)
- 3 – 1 x 2 x 8′ pine boards
- 2 – 2 x 2 x 8′ pine boards
- 1 – 1 x 10 x 10′ pine board
- 1/4″ plywood panel (2′ x 4′)
- 1 – butcher block piece @ 13″ x 36″ for top or similar 2x board or 3/4″ plywood works fine too
- 2 1/2″ screws
- 2″ screws
- 1 1/4″ screws
- finish nails
Cut List:
- 1 – 13″ x 36″ butcher block (top)
- 4 – 2 x 2 @ 34.5″ (legs)
- 3 – 3/4″ ply @ 11″ x 32.5″ (shelves)
- 4 – 1 x 2 @ 32.5″ (front shelf trim)
- 8 – 1 x 2 @ 9″ (sides shelf trim)
- 1 – 3/4″ ply @ 10 1/2″ x 11″ (drawer divider)
- 1 – 1 x 2 @ 9 3/4″ (drawer divider trim)
- optional 1/4″ plywood backing (not included in materials list)
Drawers:
- 4 – 1 x 10 @ 15 1/4″ (fronts and backs)
- 4 – 1 x 10 @ 10 1/4″ (sides)
- 2 – 1/4″ ply @ 15 1/4″ x 11 3/4″ (base)

Step 1: Build 3 identical shelves. Predrill pocket holes using your Kreg jig in 4 corners to attach to legs later. Predrill pocket holes in lower half of 1×2 trim to also attach to legs later. Attach the trim inset as shown to accommodate legs using glue and finish nails.
Pocket holes made using a Kreg jig:

A detail shot of the pocket holes at the corners:


Step 2: Determine leg placement on underside of top using shelf as your guide. The back leg should be flush to back of top and the front leg inset 1″. Make a pencil mark of the interior corners using the shelf as a guide for the placement of the legs. See below back leg is in place using the shelf as a guide:


Step 3: Predrill pocket holes in top of legs.

Step 4: Secure legs to underside of top using 2 1/2″ pocket hole screws and glue.

Step 5: Secure bottom shelf to legs leaving 2″ clearance at floor. Shelf front should be flush to legs at front which leaves 1/4″ at back edge of shelf for optional 1/4″ plywood backing.
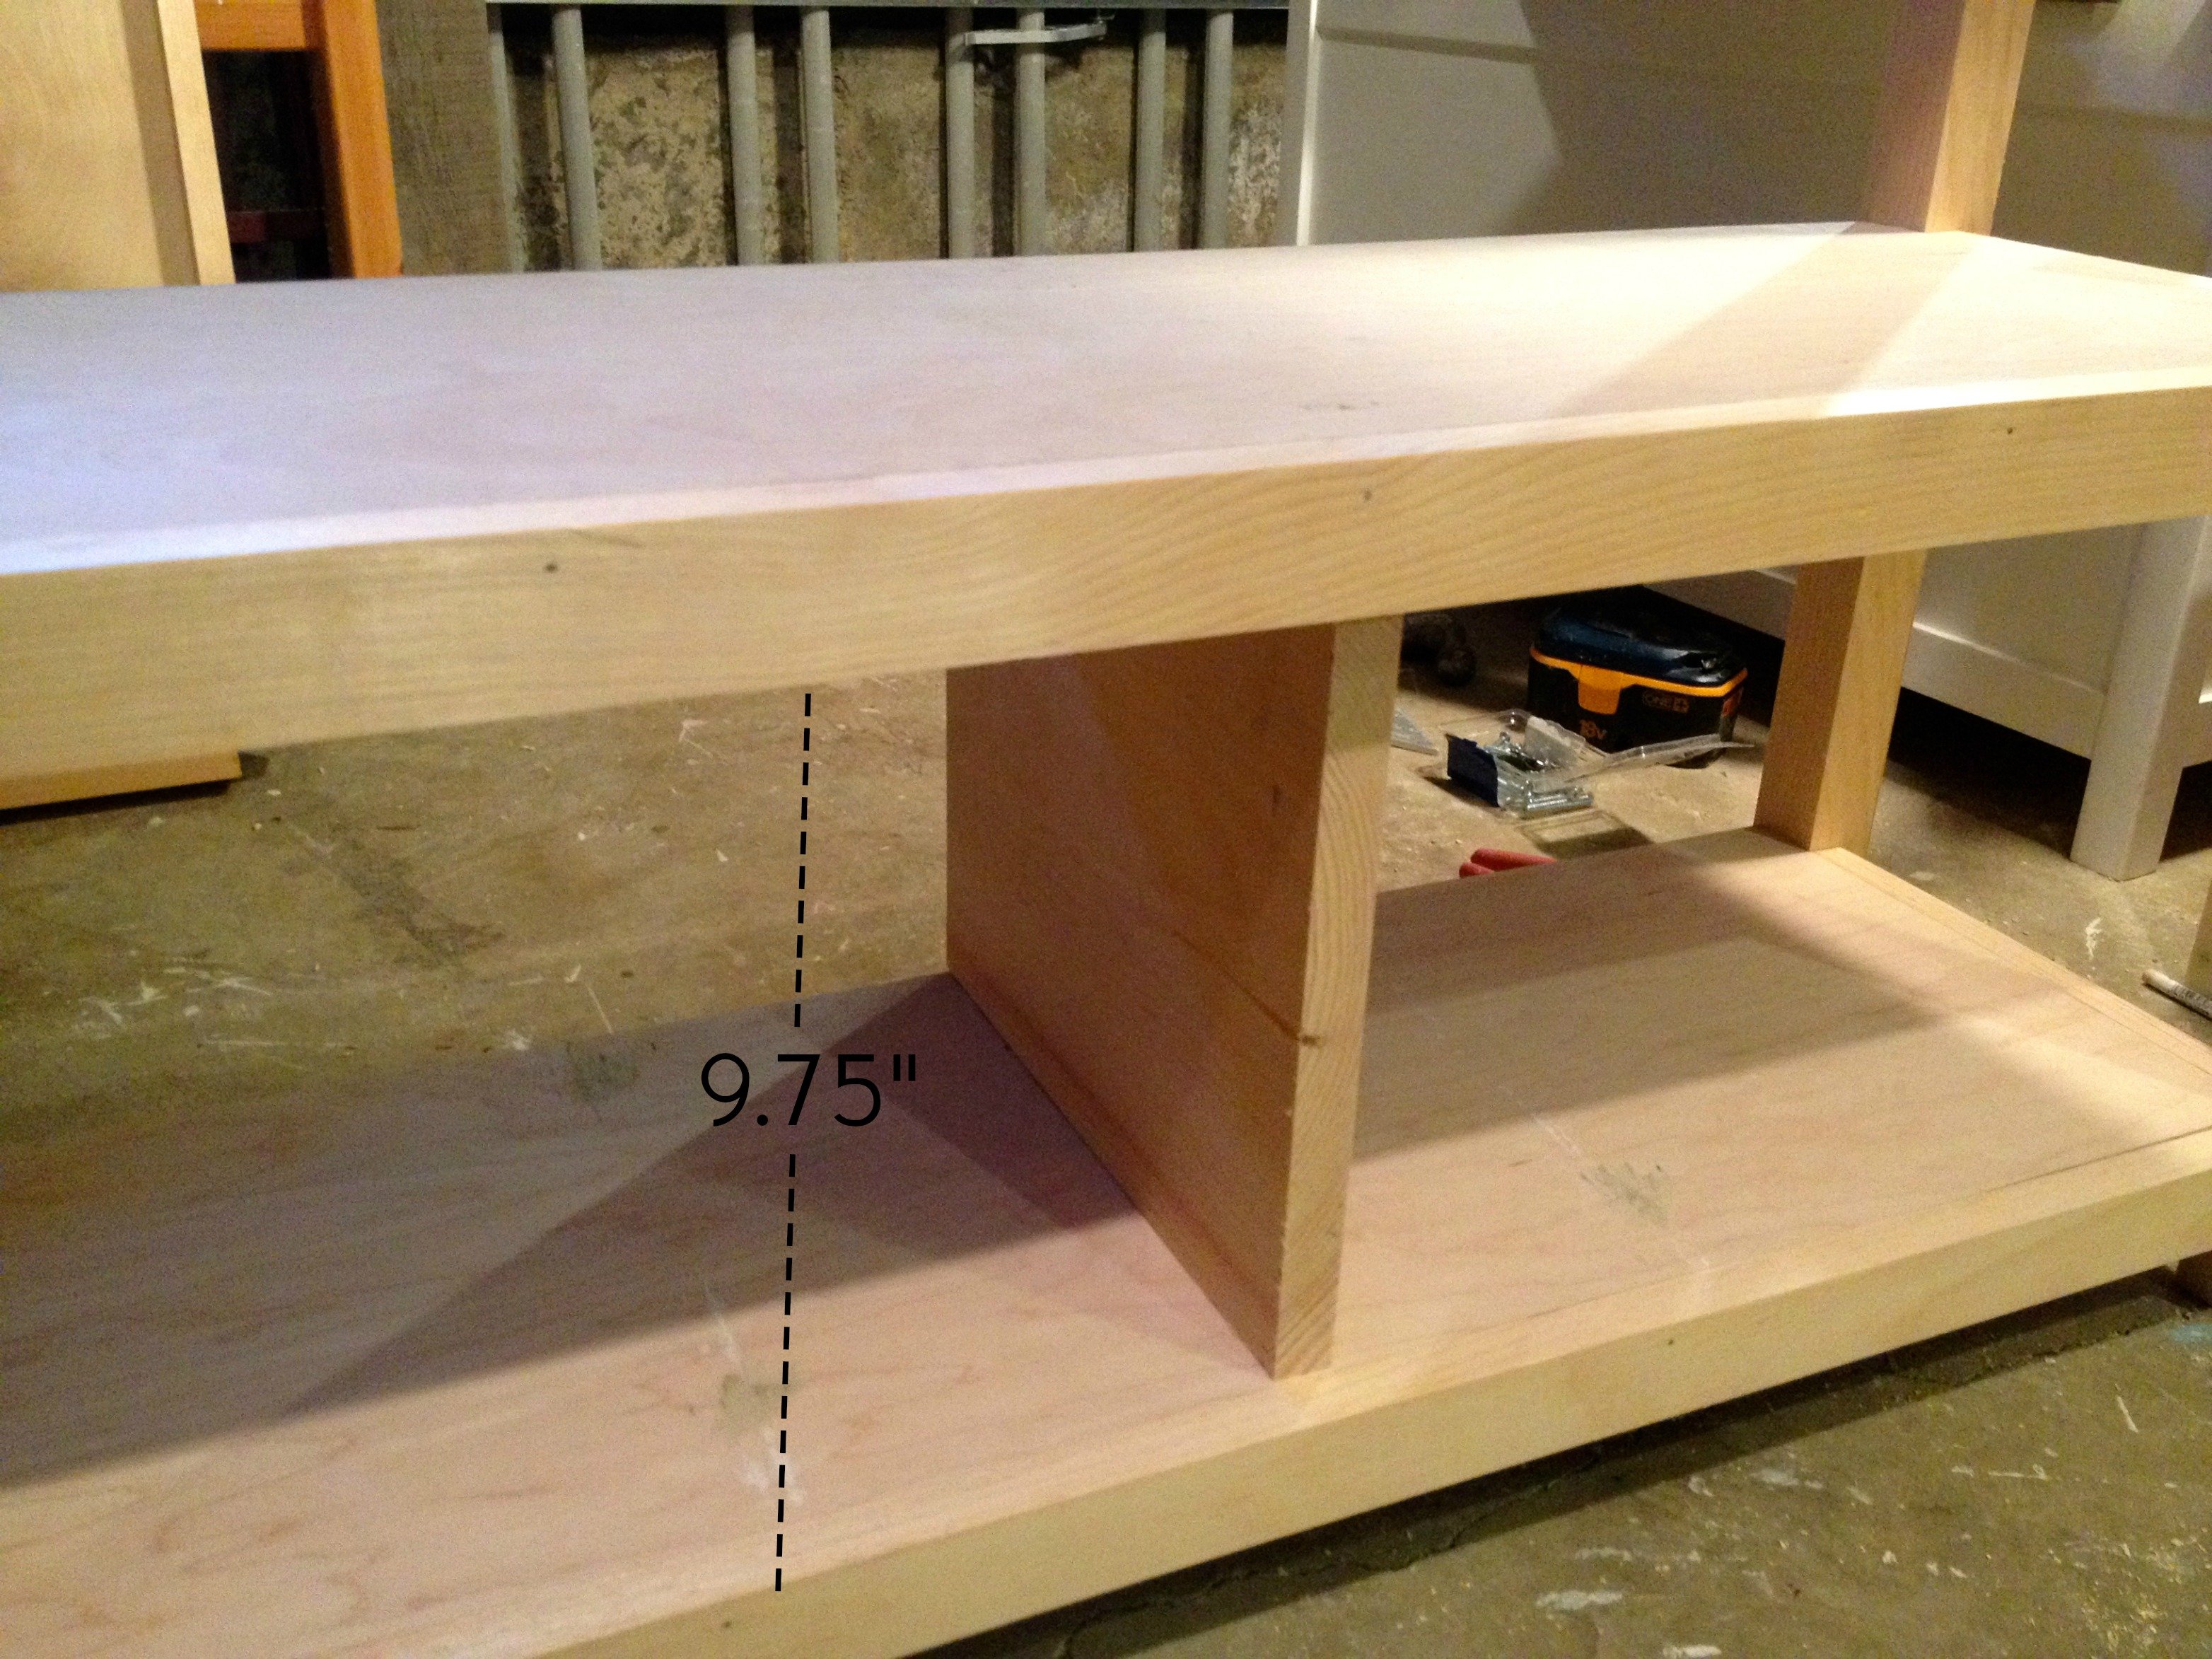
Step 6: Secure second shelf 9 3/4″ up from bottom shelf. Then add drawer divider at center with finish nails.
Step 7: Nail top trim in place just under top using 2″ finish nails down through the 1×2.

Step 8: Secure third shelf 6″ from base of top trim.

Sand and stain entire piece using Minwax dark walnut then seal with dark wax.
Moving on to the drawer construction.

Step 1: Using a jig saw cut out the pull out spots in 2 of the front pieces.

Step 2: Make pocket holes in ONLY ONE END of side pieces.

Step 3: Secure sides to front with pocket holes. You could use pocket holes to secure the back on but for less visibility I choose to countersink screws from the back in the next step.

Step 4: Secure the back using 2″ wood screws, countersunk and glue.

Step 5: Finally add the drawer base, again I used countersunk screws. You could nail it on but this is a large drawer and could get heavy so I choose to really secure the base on with screws.
Sand well and smooth.

Step 6: Seal with clear wax for a hard finish and to keep fingerprints at bay.

Slide your drawers in place and your open media shelf is ready.
If you’re looking for another alternative for Skylander storage I previously but this cubby shelf:

All the build details are here. Or if building is not your thing I also post painting and sewing projects like these:


 —————————————–
Looking for more media center solutions?
Hide the cords in a reclaimed wood faux mantel


That looks awesome! I’m so jealous of how organized all of your wires look! Behind our tv is a MESS.