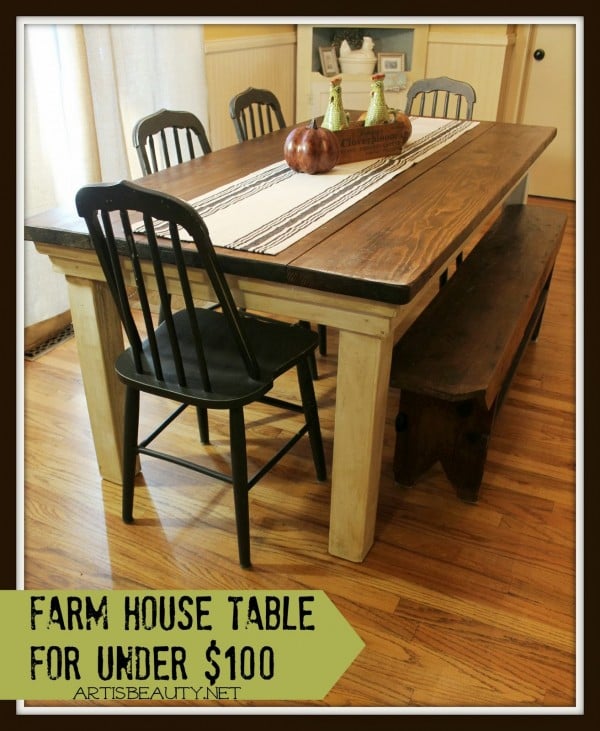
How to Build a Farmhouse Style Table
Today we’re building a simple but beautiful farmhouse style table with Jamie and Morgan from Construction2Style. Farmhouse style is really popular right now, and great for DIYers because it’s relatively simple and inexpensive to build yourself. This table only requires a few materials and a few cuts, thanks to premade legs. Here’s Morgan with the details!
We are on the move into a new home and are so, so excited to start the renovations all over again. When you first walk into the new house to the right there is a formal living area with a a half wall. On the other side of that half wall is the kitchen and smaller dining room area. But what I envisioned the second we walked through the door to tour this home for the first time was a very large dining room area (instead of the living room) and an office where the dining room area once was. The living area is fairly large but all I have ever wanted in our forever home is a very large dining room table. We love to entertain and love to serve people. So what better than a large table for friends and family to gather.
And of course being we are DIY’ers buying a table is out of the question- haha! And I am sure for the farmhouse look I want costs thousands of dollars we don’t have. So we did a little test run for some friends and wanted to share the tutorial with you guys to DIY. We can’t wait to show you our table in our newly finished home- which might be a year or so…haha. So for now here’s a smaller version.

How to Build a Farmhouse Style Table
by Jamie and Morgan from construction2style
This finished table is about 44 inches wide by 78 inches long by 30 inches tall, but you can use this same method to make a table of any dimensions you want by using a different width of lumber and cutting it to a different length.
Step One: Choose Design
The first step to building anything is choosing your design which will be the factor on what materials you use. After scouring Pinterest for days, we ended up wanting a super simple design with some nice strong farmhouse style legs. Our friends also wanted us to match the finishing of their chairs, so we knew exactly the stain and finish we wanted to have on the table.
Step Two: Buy Materials
This post contains affiliate links for your convenience. See our full disclosure policy here.
Tools & Materials Needed:
- 4 wooden legs — standard dining table legs are 29 inches. Ours are from this site.
- 8- 2×6 ( 8 ft long) for the tabletop
- 3- 1×4 (8 ft long) for the table skirt
- Wood glue
- Saw
- Biscuit joiner and biscuits
- Pocket hole jig and screws
- Stain (We used Minwax Red Oak)
- Paint brush to stain
- Old rags
- Sander
Step Three: Build
There are so many fun decorative legs out there for fairly inexpensive so we decided to buy the legs instead of DIY. We got these online for about $80 each. There are a lot of more inexpensive legs out there, but we wanted them fairly large and bulky to hold our table and to add that strong farmhouse style. Being we bought the decorative legs the only thing you really have to spend much time building is the table top. The most important tip to any build is to ensure you get straight boards. We used 2×6’s for the table top. Once you’ve gotten your boards from your local hardware store it’s time to get to the fun part, building.

To keep the table boards together we secured each 2×6 with wood glue and biscuits. If you don’t have a biscuit joiner you could also screw the boards together as well with pocket holes. Using a biscuit joiner we cut hole into the side of the board every foot.

Once all the holes were cut we filled them with wood glue, placed a biscuit inside the hole and pushed the two 2×6 boards together to secure.

We wanted our table 6 1/2′ long as well so we then cut down all of the 2×6 boards from 8 ft down to 6 1/2 ft once all of the boards were secured together. We used our circular saw to cut the boards down in one piece.

You will also need to build the base of the table for the table top to sit on. To do this, we took 1×4’s and secured them to each of the table legs, setting the table legs out a little bit further than the boards. Our skirt is inset 2 inches from the tabletop, so, taking the 5″ legs into account, our skirt pieces are 14″ shorter than the tabletop edges.
Step Four: Sand
Once the boards were glued together and cut to size, sand down the boards. The purpose of sanding is to remove any marks and even everything out and blend together. We used our electric sander to sand down the table. Make sure to sand the table down until you can run your hand across the table and it’s silky smooth and blended together.
Step Five: Stain & Poly
After testing about ten different stains, we finally landed on Minwax Red Oak. We were trying to match the table with certain chairs, and I have to say I think we finally got it right. Brush your stain on with the wood of the grain, once brushed on tag an old rag and wipe any access of. Let dry for at least 24 hours before applying any poly.
Once the stain is dry, apply your poly. We used Minwax Polyurethane. Just like stain, apply a thin coat of poly onto the table with the wood of the grain with a brush. Let dry for 24 hours minimum. And if you’re like us and are building in a cold garage it might take a little longer than that for it to dry.
And if you want to get more of a farmhouse look, it’s all about the type of paint/ stain you use and the sanding. Once painted or stained, sand that baby down to give it more of a distressed look. We also have taken a metal brush and really rubbed the table down to give it that distressed look.
Step Six: Assemble

Once the stain and poly are dry it is time to assemble the table top to the legs of the table. Flip your table top over and lay it out the floor. Take your base with legs and flip it onto the top (bottom of actual table) onto your table top. Using pocket screws, screw the base into the table top. Flip your table over and ta-da!! There you have your farmhouse table!

Can’t wait to see your guys’ DIY farmhouse tables. They’re super simple and fun to make. All it takes is a little tutorial, time and energy!


More farmhouse style tables to build:


Hey friends! Or soon to be friends! hehe. From the bottom of our hearts it is SO nice to meet you. We are Jamie and Morgan, a husband and wife home remodeling, styling, and blogging team out of MN. We blog over at construction2style all about residential remodeling, interior styling, carpentry, custom-built furniture designs...and our family (and probably a lot more TMI). hehe. We just want to help create a place for you to build your legacy within; your home. So we share as much as we can within very detail of our projects and within our own home.


That table looks great, I guess it took a lot of sanding 🙂
Thank you!! It sure did! 🙂