I’m so excited to be here today on Remodelaholic! I’m Jaime from I’m a Mom not a Professional, I have five awesome kids who take up most of my time but when I have a minute I like to blog about all the fun things I do to keep them clothed, feed and entertained. You can find everything from recipes like Caramel Apple Cinnamon Rolls to super easy Contact Paper Art and when possible I try and show you how I did it. But today I’m super excited to share with you one of my favorite projects ever!
My friend introduced me to the awesome art of shirring about 9 months ago and ever since I have been shirring everything in sight. And when I needed a new curtain for my half bath I thought it would be a perfect opportunity to shirr a curtain.
Supplies you’ll need:
curtains/ pre-made or you can make some
elastic thread
thread
sewing machine
The How to:
I used a pre-made curtain that I got from Target for $5.00, the window my curtain was going in is small so I only got one panel. And if you can’t get to the curtain right away because you’re busy being a mommy you too can have an awesome wrinkled curtain just like this
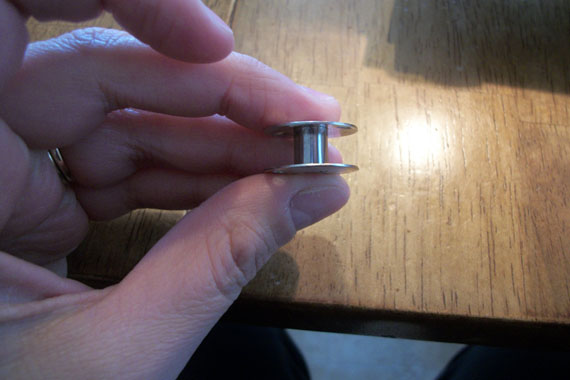
To make a shirred curtain you’ll need an empty bobbin,
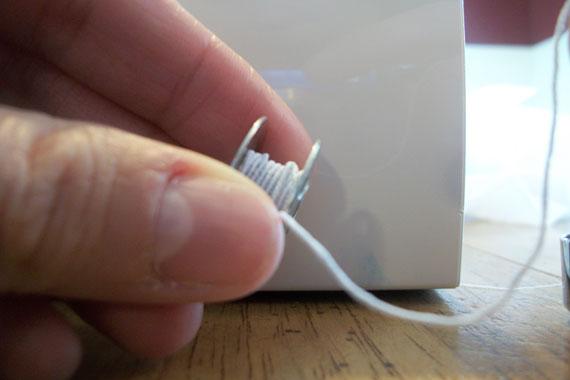
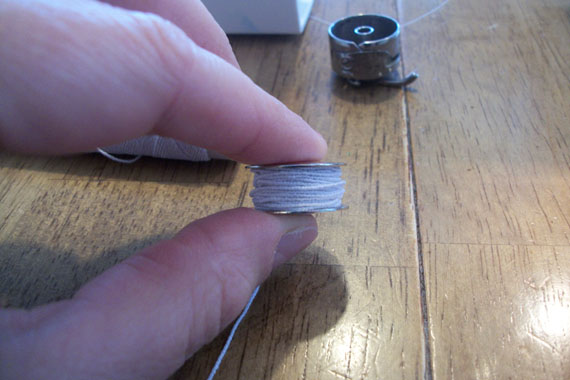
and elastic thread. You can find elastic thread in the sewing section of most places, it’s labeled elastic thread and it comes on a little spool like this. Make sure the package says elastic thread.
Then by hand loosely wrap the elastic thread around your bobbin. Try not to stretch it out while you wrap it.
Once your bobbin is full place it back into the bobbin casing and place it into your sewing machine.
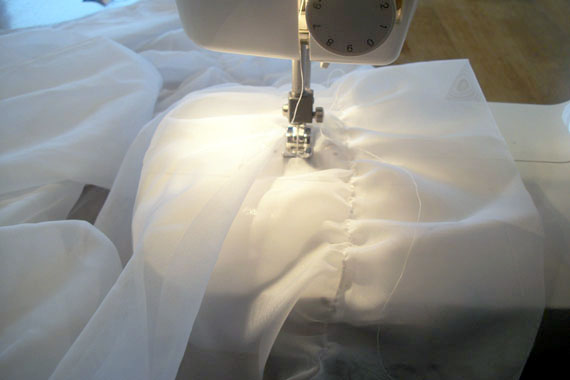
Then you use regular thread in the top of the machine. Set you stitch length for the longest straight stitch. Then start sewing, if you’re sewing a curtain make sure you have the right side up at all times and make sure you sew forward and backward at the beginning and the end of your row; or else when you cut your threads to start the next row your elastic thread will go zooming back through your curtain and yes I might have learned that from experience.
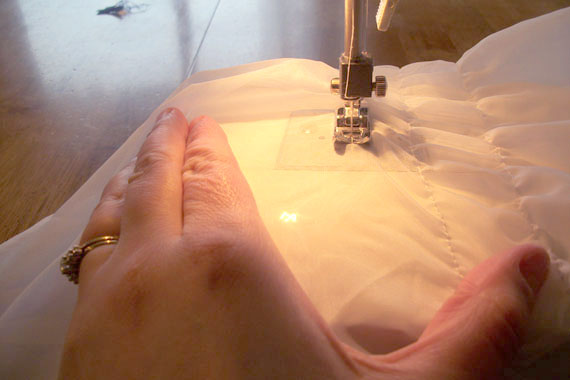
The more rows you sew the more gathered your curtain will become, so I used one hand on each side of the curtain to help smooth out the gathers so I would have a smooth sewing surface. Kind of like this but with both hands.
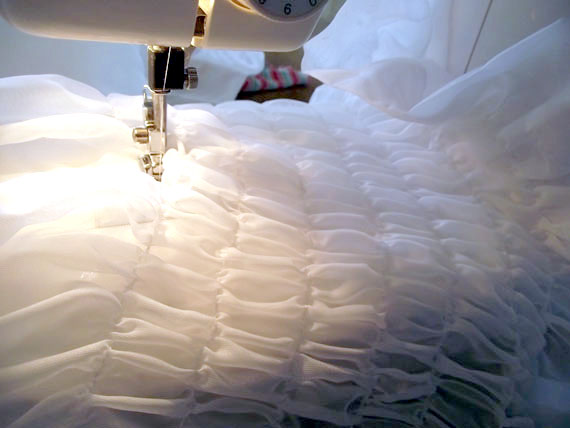
Just keep adding rows until you get your desired width.
How many rows you sew and how far apart you sew your rows will determine the end size of your curtain. I would sew some rows and then go measure the curtain in my window to check my progress.
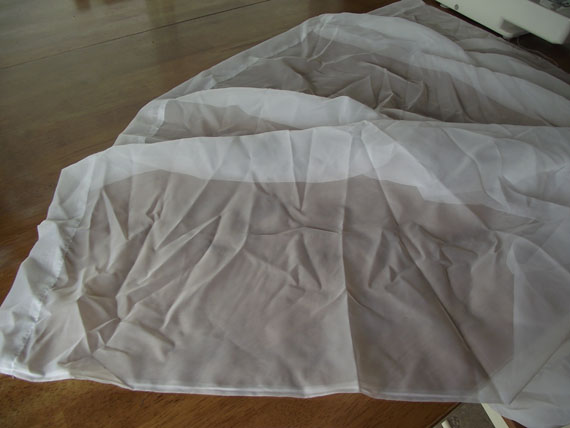
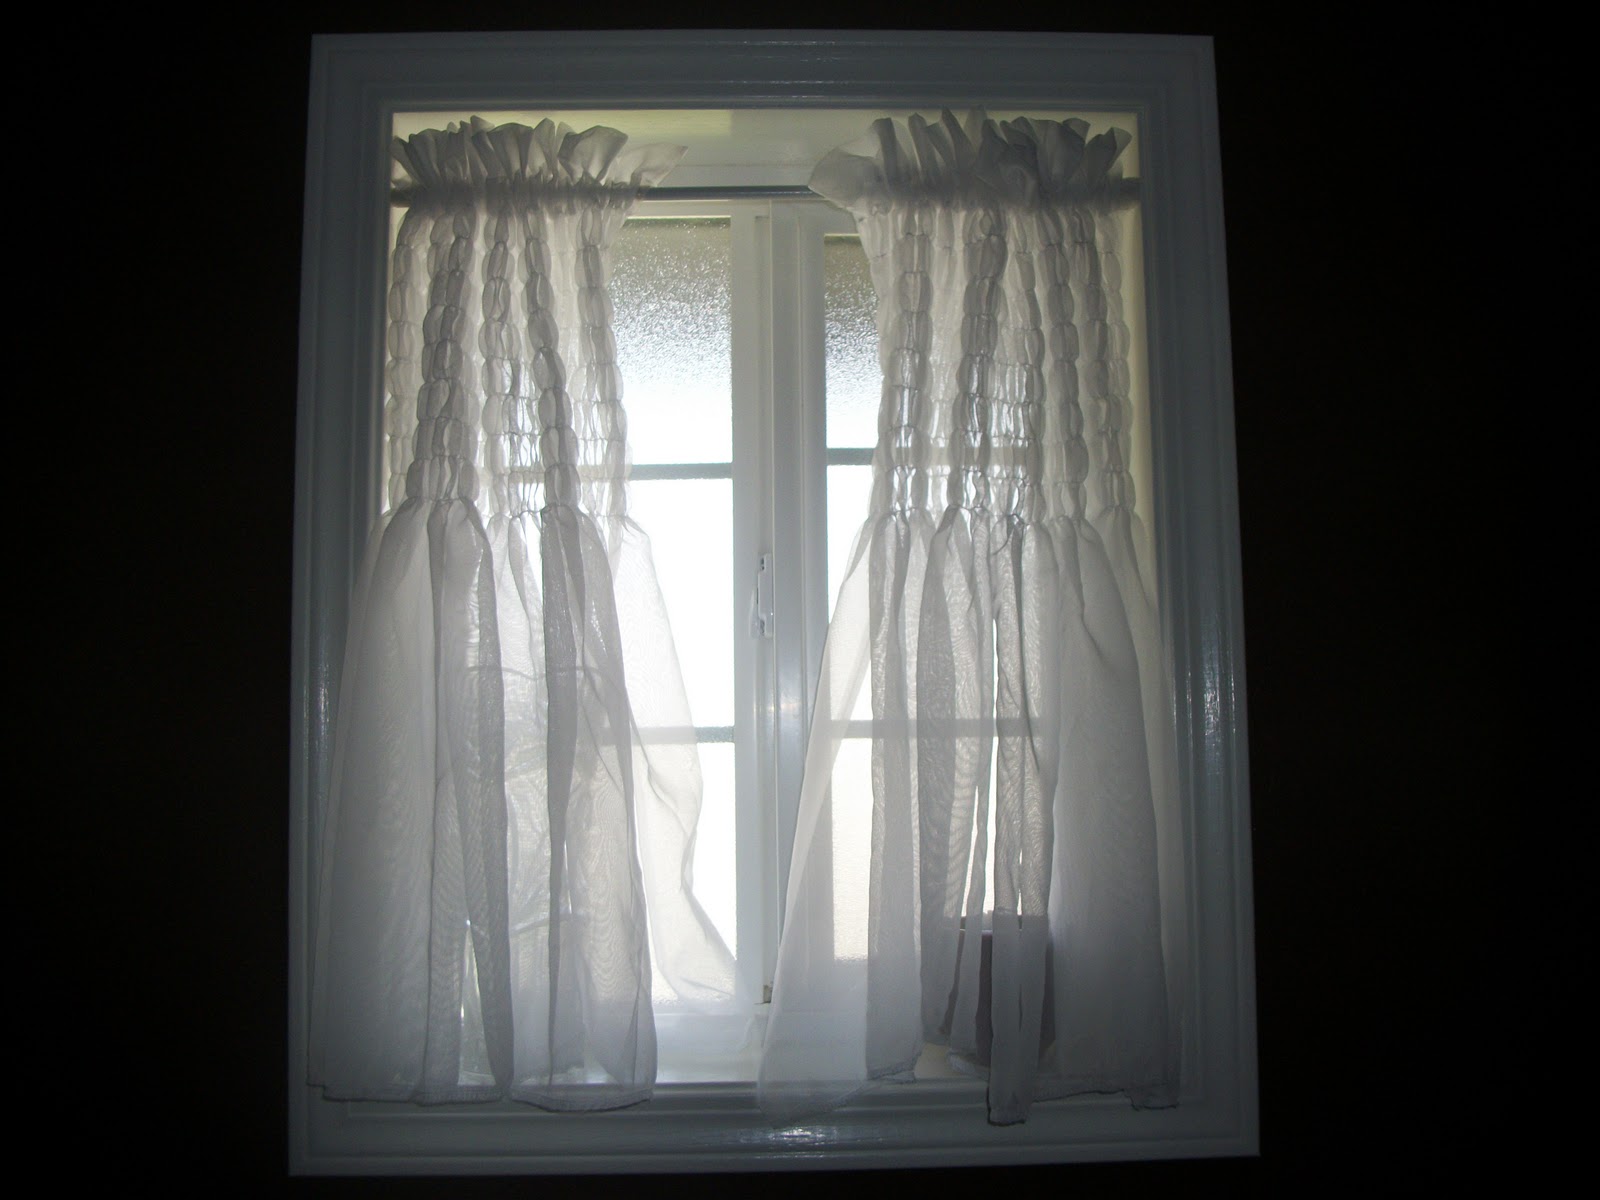
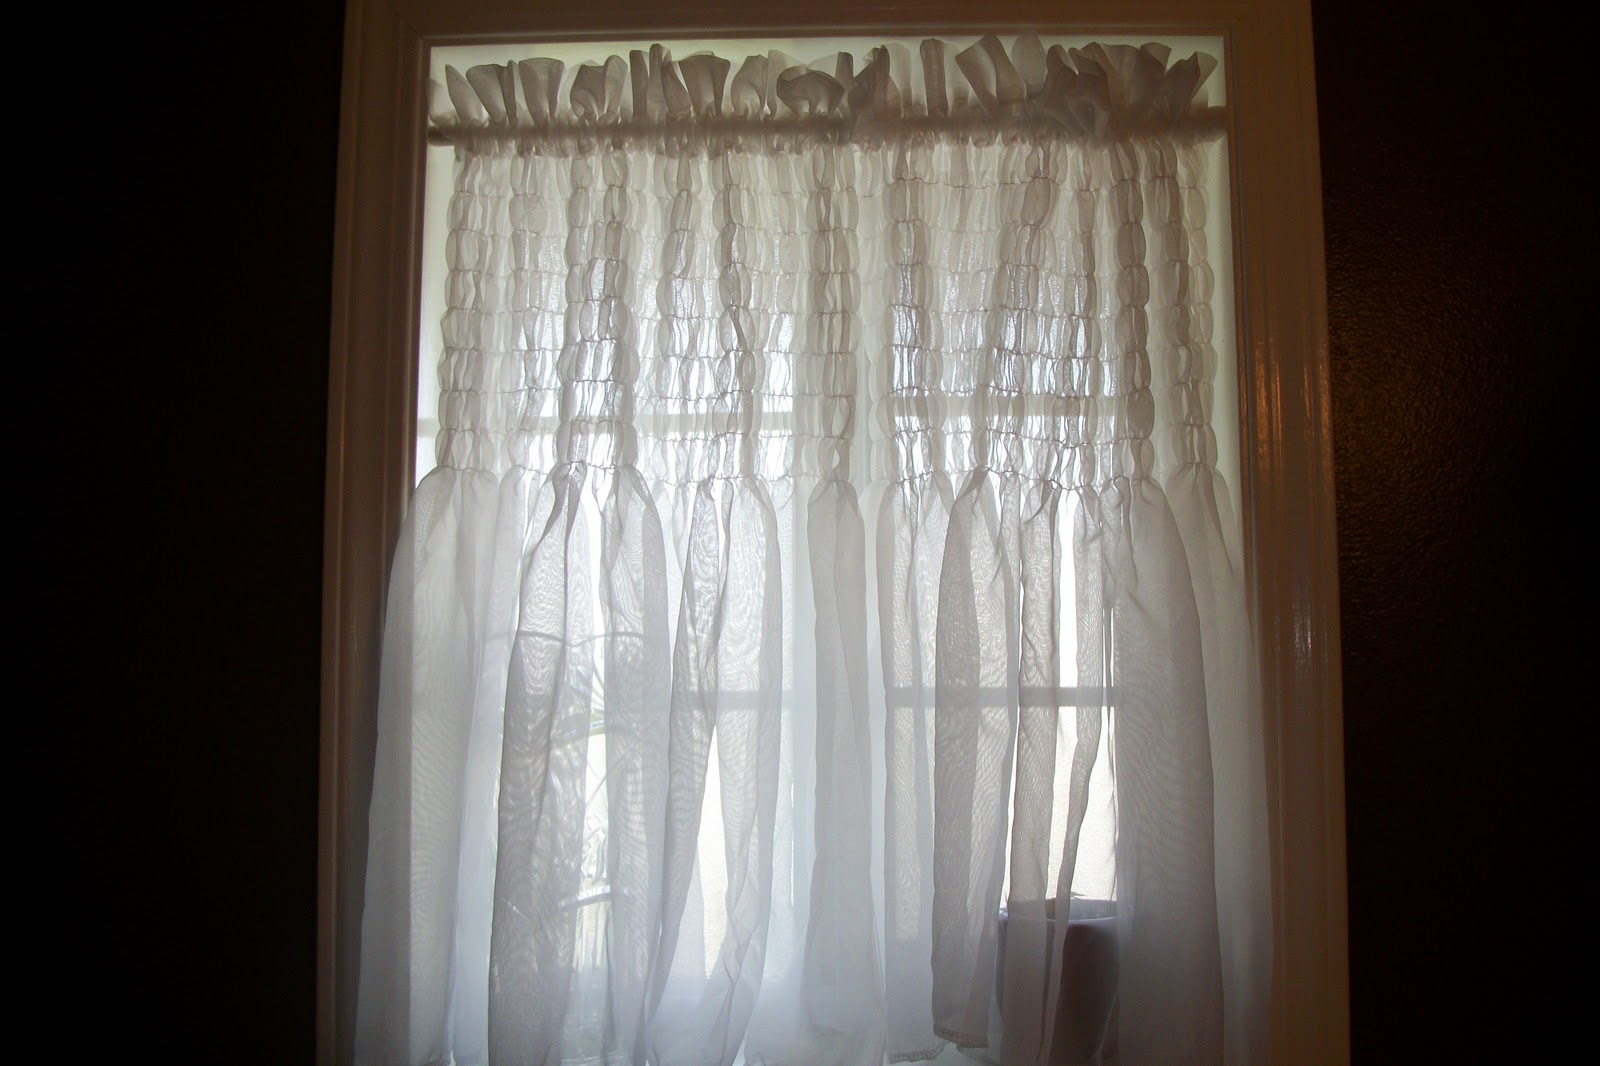
Here I could have stopped and left it like this but I wanted a more full look so I shirred some more rows at the top of the curtain, for a total of nine shirred rows. Then I cut the curtain in half and shirred the bottom end another 9 rows and used both ends of the panel to fill up the window.
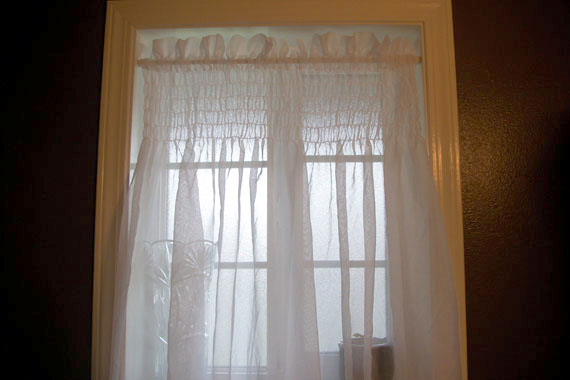
So I ended up with this
I loved them from the moment they came streaming from my sewing machine, they’re so pretty I could cry.
Cassity Kmetzsch started Remodelaholic after graduating from Utah State University with a degree in Interior Design. Remodelaholic is the place to share her love for knocking out walls, and building everything back up again to not only add function but beauty to her home. Together with her husband Justin, they have remodeled 6 homes and are working on a seventh. She is a mother of four amazing girls. Making a house a home is her favorite hobby.


I love it
So pretty!!