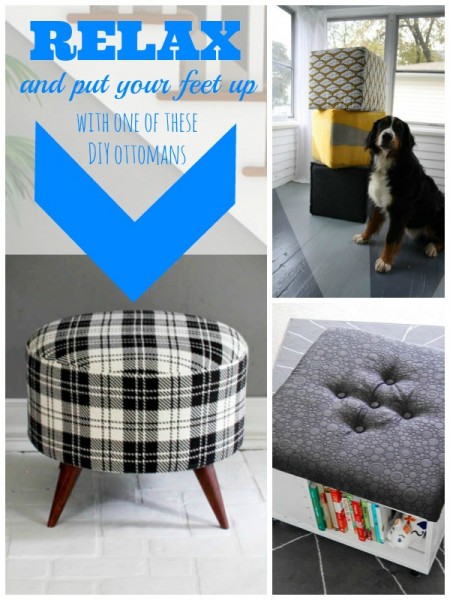
Ballard Designs Inspired Upholstered Cube Ottoman or Stool

Hello, Remodelaholics! I’m Tamara popping over again from Provident Home Design to share another DIY with you today!
I was inspired by Ballard Designs upholstered cube for this DIY.

via Ballard Designs
Upholstered cubes are extremely versatile and are especially useful for extra seating!

via How to Decorate
I’ve noticed them popping up all over the place in the interior design world lately!

Ballard Designs price ranges from $119-$$344 for one upholstered cube depending on what fabric you choose. It can become pricey though especially when you are are buying two!
I decided to come up with my own version for a lot less and I am so happy with how it turned out!


Ready to learn how to make one?? It does require some sewing but believe me if you can sew a straight line, that’s as much as it will require. You can do this!

DIY Upholstered Cube Ottoman/Stool
by Tamara from Provident Home Design
This post contains affiliate links. See our full disclosure policy here.
Supplies (to make 1 upholstered cube)
- 1/2 inch thick sheet of plywood, 2 cut to 15″x 16″ and 3 cut to 16″x16″ (I had this done for me at Home Depot)
- Drill
- (4) L-Brackets
- Quilt Batting, Crib Size
- About a Yard of Fabric, I used this one
- Sewing Machine
- Staple Gun
- (1) 2×2 pine board
Price comes to about $30 a cube.
Building the Cube Ottoman
1. Have a 1/2″ thick piece of plywood cut into 5 pieces (2 cut to 15″x16″ and 3 cut to 16″x16″) or cut it yourself with a jig saw, circular saw, or table saw.

2. Place one of the 15″x16″ pieces on the ground. Place a 16″x16″next to it going vertically as shown below. Attach them with an L-bracket. Make sure the L-bracket is placed at least 3 inches from the bottom of the wood pieces.
Tip 1: Make sure the screws are short enough that they do not go completely through the other side of the wood.

3. Add another 16″x16″piece of wood going vertically on the other side of the 15″x16″ and add an L-bracket (shown below).

3. Add L-brackets to the top corners so that each corner has 2 L-brackets.
Slide the other 15″x16″ wood piece in between the top of the two vertical 16″x16″. Flip it over and add L-brackets.

Continue until you have added 8 L-brackets (2 to each corner) and set upright as shown below.

4. Apply a layer of Gorilla glue to the top lip of the base structure. Set the last 16″x16″ on top of the square base making sure it sits flush with the base. Let the glue dry completely before handling.

Sewing an Upholstered Cube Liner
5. Next we will be making the liner for the ottoman cube. The purpose of the liner is to make the ottoman more comfortable to sit on. I used quilters batting for the liner. My batting was about 1/4″ thick but you may want to get batting around 1/2″-1″ for more comfort.

6. Cut 4 pieces of batting to 17″ x 19″ and 1 piece to 17″ x 17″.

Lay the pieces of batting over the sides of the ottoman long ways. and the 1 !7″x17″ piece on the top as shown below.

7. Choose a side to start with and connect the top of it with the top piece of batting. Connect them together with a pin or an alligator clip. I use an alligator hair clip instead of pins because it’s faster and does the job!:-)

With the sides on top of each other sew them together making sure the needle of the sewing machine is 1/2″ from the sides of the batting.

8. After sewing the sides together lay it on the ottoman base. Can you spot the furry photobomber in the photo below?

Place the batting piece for the next side on top of the first side piece and place a clip or pins as shown below. Sew the side together. You sew everything inside out so that the stitches aren’t as noticeable on the outside of the fabric.

After you sew the sides together It will look like the photo below. You will next bring the upper portion of the side piece and the top piece side together. Now flip it inside out and sew along the side.

9. Continue to do this piece by piece until all of the sides and top are sewn together.

Sewing an Upholstered Cube Ottoman Cover
10. Now you will do the exact same steps with your fabric as you just did with the batting.


After sewing all of the sides and top together it will similar to the below photo.

11. Next you will lay the cube on it’s side.

Pull the fabric down tightly and around the inside of the cube and staple with a staple gun. Staple along the inside every 2-4 inches.

When you get to a corner pull the fabric up close to the corner and staple.

Do this on each inner side. If the staples don’t go all of the way in then use a hammer to get them in further.
Adding Legs to the Upholstered Cube
12. Cut a 2×2 pine board into (4) 6 inch long pieces. These are the cubes legs.


13. Paint or stain the legs to your desire.

I sprayed mine a dark espresso color.

14. Lay 1 leg inside one of the corners so that 3 inches is sticking out below the cube. You must be concise with measuring each leg’s placement or the upholstered cube won’t sit flat on the ground (it will rock).
Drill a hole in the leg and then screw a 2 inch flathead wood screw into the hole. Press down firmly while screwing to ensure the screw goes into the leg and then the cube.

Do this in each leg at three different points as shown below. Two straight in and one in the middle of them coming from the side.

And then my friend you are DONE!!

You can keep your upholstered cube out in the open.


OR store it under a side table for future use!

There are so many ways to style and utilize an upholstered ottoman! Do you see one (or a couple) in your future?
Please let me know if you have any questions!! And feel free to come by and check out my other free DIY tutorials at Provident Home Design!:-) Thanks for having me!

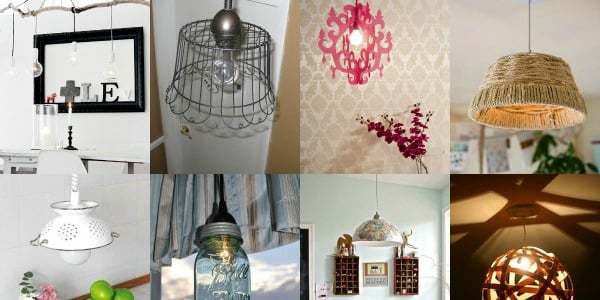
More double-duty ottoman/stools that you can build yourself:


Hello! My name is Tamara and I am the author of Provident Home Design, a blog devoted to deals, DIY, and design. I'm a big advocate for getting "the Look" for less and love to share lots of tips on the subject! Currently i am turning my builder blah home into my own one (or 5 or 6) DIY projects at a time.


This tutorial will be helpful for me as I have two ottoman’s that need to have the upholstery replaced however I think some of your photos are missing from this tutorial as they stop right after the photo under ‘6. Cut 4 pieces of batting to 17″ x 19″ and 1 piece to 17″ x 17″.” Can you please update as it is so much easier to follow with photographs. Thanks.
Hi Holly — Thanks for your kind comment! All the photos are showing properly for me. Will you check again (and maybe give it an extra minute to load since there are a LOT of photos) and if it’s still not working, send me some details about your device/computer and browser so we can make sure things are working on our end? Thanks!
You can buy premade legs in several different styles for a reasonable cost at HD, Lowe’s, etc. I love this DIY project!
Thanks for using our T50 staple gun on this project! Often decreasing the staple size can help staples go in flush to the surface easier, but we’re glad you were able to find a solution while working on your project. Happy DIYing! #MadeWithArrow